
Win7 vs2015編譯protobuf-3.0.0
需要工具:
1. visual studio 2015
2. cmake
3.git[可選]
安裝完畢,繼續
從官網下載protobuf :https://github.com/google/protobuf/releases/tag/v3.0.0
window編譯protobuf有兩種方式:一個使用vs自帶的msvc(環境測試vs開發者命令列工具),一種是用Cygwin 或者 MinGW。
此處使用msvc 進行編譯。
使用vs開發者命令列工具,先測試cmake是否可用。
開啟上圖第一項,測試:
ok,接下來,解壓protobuf壓縮包,在和protobuf同級目錄下新建一個install資料夾,用作編譯完成後方include ,lib等檔案。
如:
C:\Path\to\install
進入protobuf目錄,建立build目錄
     C:\Path\to\protobuf\cmake>mkdir build & cd build
     C:\Path\to\protobuf\cmake\build>
以下注意^和命令之間的空格
建立release版本的編譯目錄:
     C:\Path\to\protobuf\cmake\build>mkdir release & cd release
     C:\Path\to\protobuf\cmake\build\release>cmake -G "NMake Makefiles" ^
     -DCMAKE_BUILD_TYPE=Release ^
     -DCMAKE_INSTALL_PREFIX=../../../../install ^
     ../..
建立debug版本的編譯目錄:
     C:\Path\to\protobuf\cmake\build>mkdir debug & cd debug
     C:\Path\to\protobuf\cmake\build\debug>cmake -G "NMake Makefiles" ^
     -DCMAKE_BUILD_TYPE=Debug ^
     -DCMAKE_INSTALL_PREFIX=../../../../install ^
../..這一步需要注意的是,
"Visual Studio 14 2015 Win64"
是因為安裝了visual studio 2015而決定的,這是所謂的generator,不同編譯器是不同的,具體型別可見:<span style="white-space:pre"> http://www.cmake.org/cmake/help/latest/manual/cmake-generators.7.html#visual-studio-generators</span> C:\Path\to\protobuf\cmake\build>mkdir solution & cd solution
C:\Path\to\protobuf\cmake\build\solution>cmake -G "Visual Studio 14 2015 Win64" ^
-DCMAKE_INSTALL_PREFIX=../../../../install ^
../..注意:這裡用了Win64 那麼生成的就是64位庫,想要32位庫就去掉Win64
以上3種不是必須都做。通過以上3個步驟,可以見到在不同目錄都生成了相應的makefile檔案,接下來是執行nmake進行編譯:
To compile protobuf:

     C:\Path\to\protobuf\cmake\build\release>nmake

or

C:\Path\to\protobuf\cmake\build\debug>nmakeTo install protobuf to the specified *install* folder:
C:\Path\to\protobuf\cmake\build\release>nmake install
or
C:\Path\to\protobuf\cmake\build\debug>nmake install到此,release 和 debug版本都編譯成功,vs可以使用了。
-----------------------------------------------------------------------------------------------------------------------------------------------------------------
vs平臺開發用sln生成庫要注意兩點:
第一:
solution目錄下有生成sln檔案,可以用vs開啟生成庫,但要注意位數,比如如果
vs + qt (32位庫)
那麼,protobuf也應該改成win32平臺,講所有專案都改成win32平臺的,
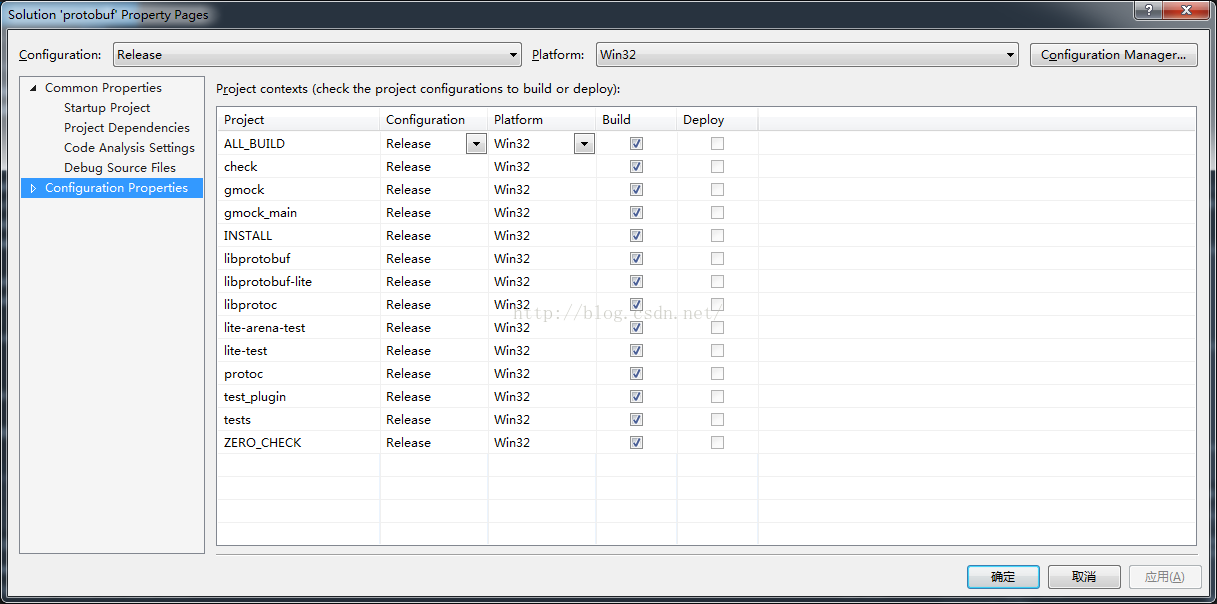
不然會出現: fatal error LNK1112: module machine type 'X86' conflicts with target machine type 'x64'
另外,32位編譯器可以編譯32和64位程式,這裡選用win32
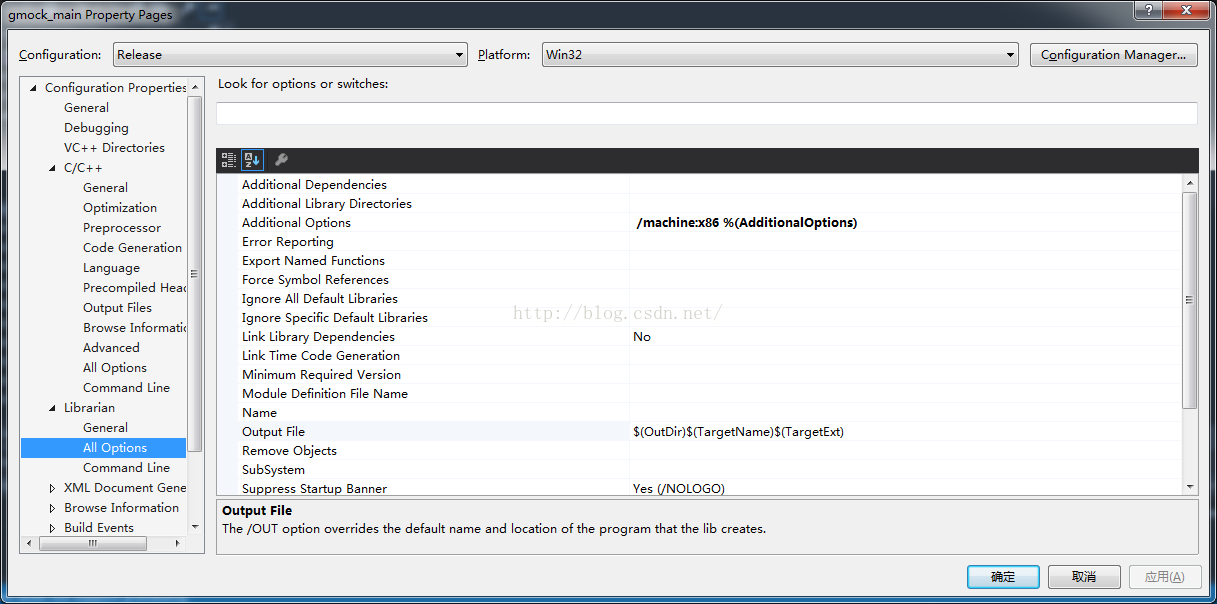
第二:
編譯的庫要和你使用的版本一致,如release debug,在下圖的位置確定;
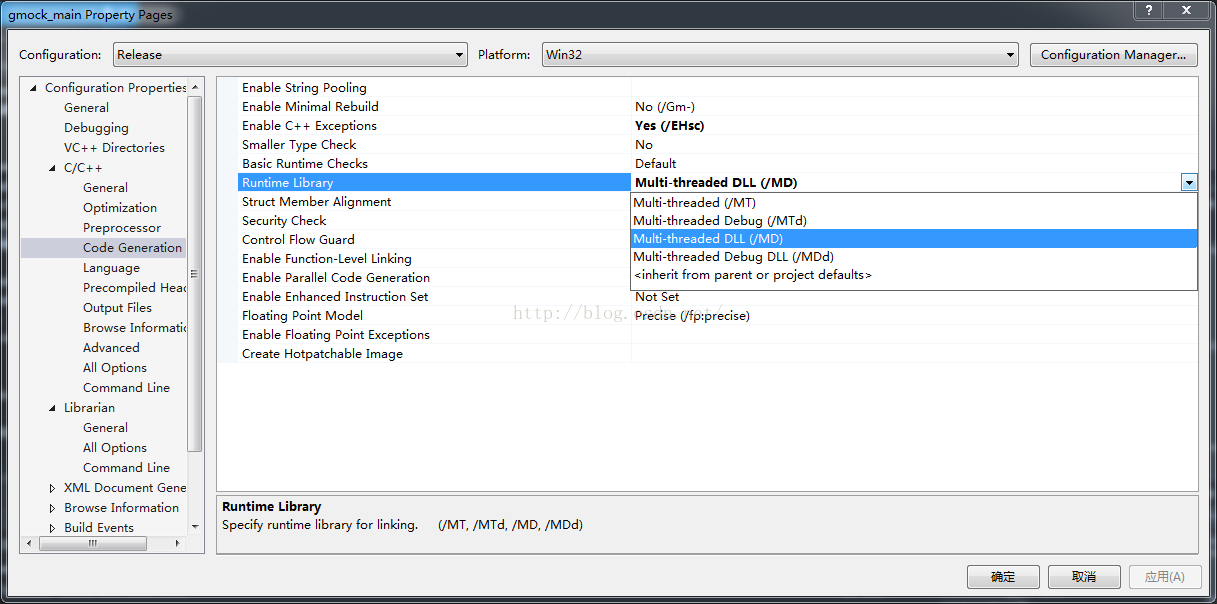
MD代表動態連結,MT代表靜態連結,後面沒有有d代表是release模式-》

release模式則用前兩種。
同時,如果你在專案用到其他庫,比如vs + qt (32位動態連結庫),那麼protobuf也應該用動態連結方式生成lib,不然提示:
等這類錯誤。
動態連結方式:MD
靜態連結方式:MT
總之,qt 庫連結方式要和protobuf的一致,如果還用到其他的,全部都要一致。