Ubuntu18.04 安裝MySQL。
阿新 • • 發佈:2019-01-06
轉自: https://blog.csdn.net/weixx3/article/details/80782479
Ubuntu18.04 安裝MySQL
環境資訊:
OS:Ubuntu18.04
MySQL: 5.7.22
1.安裝MySQL
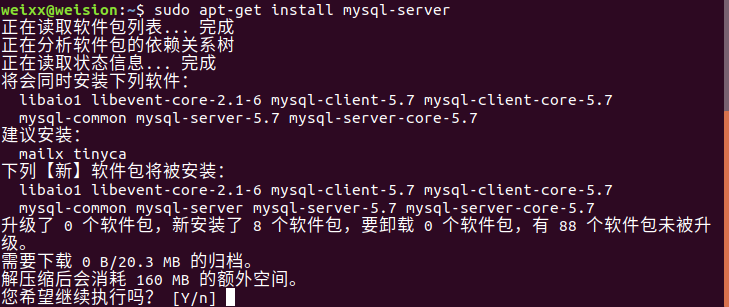
在 Ubuntu 18.04 中,預設情況下,只有最新版本的 MySQL 包含在 APT 軟體包儲存庫中,要安裝它,只需更新伺服器上的包索引並安裝預設包 apt-get。
#命令1
sudo apt-get update
#命令2
sudo apt-get install mysql-server
- 1
- 2
- 3
- 4
2.配置MySQL
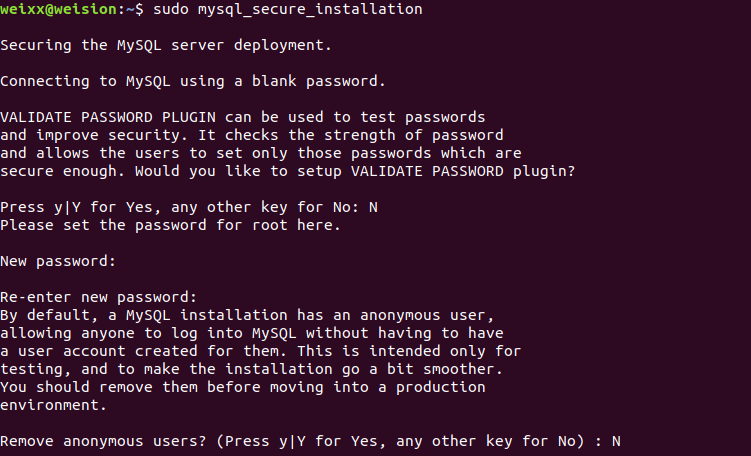
2.1 安裝配置
sudo mysql_secure_installation
- 1
配置項較多,如下所示:
#1
VALIDATE PASSWORD PLUGIN can be used to test passwords...
Press y|Y for Yes, any other key for No: N (我的選項)
#2
Please set the password for root here...
New password: (輸入密碼)
Re-enter new password: (重複輸入)
#3
- 1
- 2
- 3
- 4
- 5
- 6
- 7
- 8
- 9
- 10
- 11
- 12
- 13
- 14
- 15
- 16
- 17
- 18
- 19
- 20
- 21
- 22
- 23
- 24
- 25
- 26
- 27
- 28
- 29
- 30
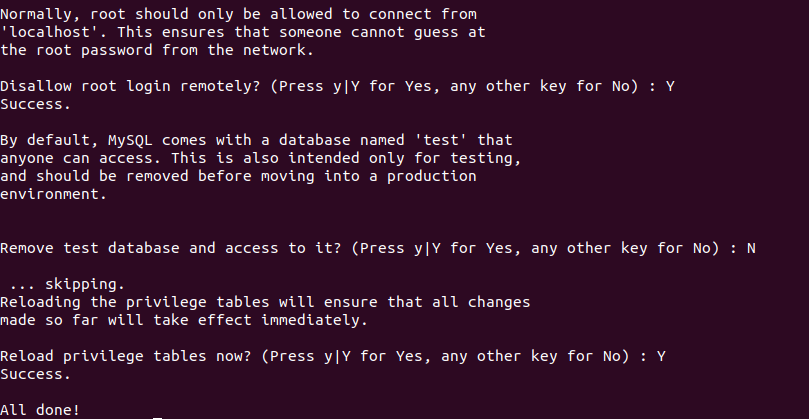
部分圖示:
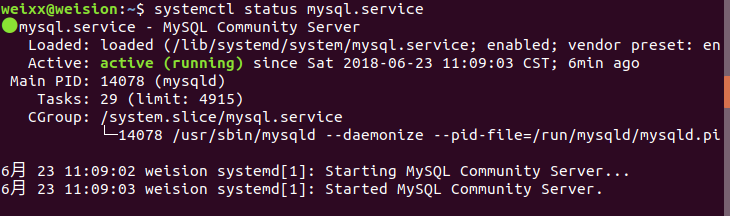
2.2 檢查mysql服務狀態:
systemctl status mysql.service
- 1
顯示如下結果說明mysql服務是正常的:
● mysql.service - MySQL Community Server
   Loaded: loaded (/lib/systemd/system/mysql.service; enabled; vendor preset: en
   Active: active (running) since Sat 2018-06-23 11:09:03 CST; 6min ago
 Main PID: 14078 (mysqld)
    Tasks: 29 (limit: 4915)
   CGroup: /system.slice/mysql.service
           └─14078 /usr/sbin/mysqld --daemonize --pid-file=/run/mysqld/mysqld.pi
6月 23 11:09:02 weision systemd[1]: Starting MySQL Community Server...
6月 23 11:09:03 weision systemd[1]: Started MySQL Community Server.
- 1
- 2
- 3
- 4
- 5
- 6
- 7
- 8
- 9
- 10
3.配置遠端訪問
在Ubuntu下MySQL預設是隻允許本地訪問的,使用workbench連線工具是連不上的;
如果你要其他機器也能夠訪問的話,那麼需要改變/etc/mysql/my.cnf配置檔案;
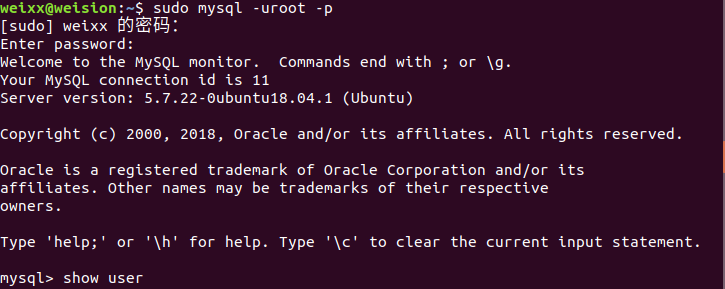
3.1 首先用根使用者進入:
sudo mysql -uroot -p
- 1
預設的MySQL安裝之後根使用者是沒有密碼的,命令執行後會讓你設定root的密碼,進入root後才能進行其他設定:
以root進入mysql後也可用命令給root設定密碼:
GRANT ALL PRIVILEGES ON *.* TO [email protected] IDENTIFIED BY "123456";
- 1

3.2 新建資料庫和使用者
用root使用者新建資料和用作遠端訪問的使用者
##1 建立資料庫weixx
CREATE DATABASE weixx;
##2 建立使用者wxx(密碼654321) 並賦予其weixx資料庫的所有許可權
GRANT ALL PRIVILEGES ON weixx.* TO [email protected] IDENTIFIED BY "654321";
- 1
- 2
- 3
- 4

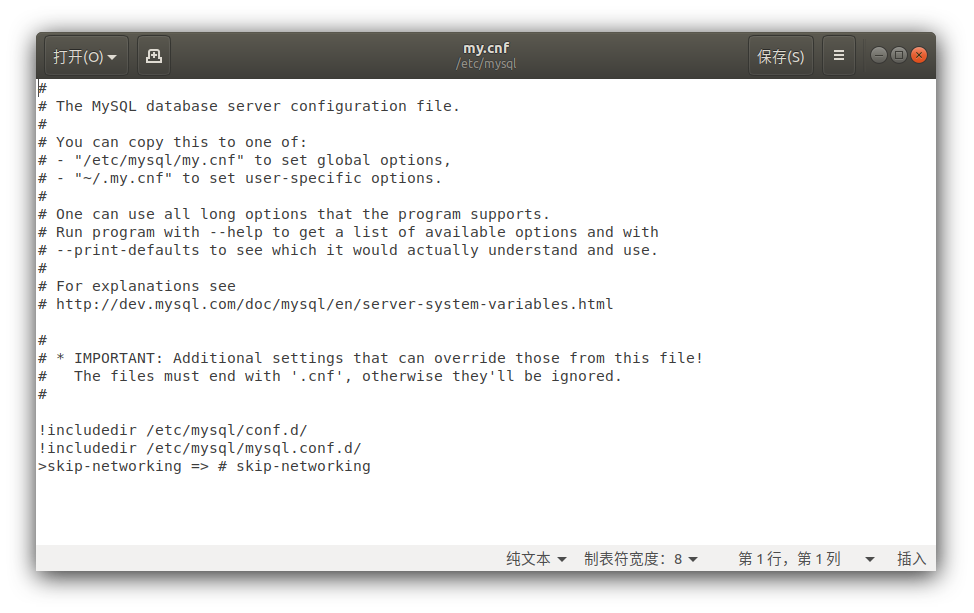
3.3 進行遠端訪問或控制配置
##1 允許wxx使用者可以從任意機器上登入mysql
GRANT ALL PRIVILEGES ON weixx.* TO [email protected]"%" IDENTIFIED BY "654321";
- 1
- 2

$sudo gedit /etc/mysql/my.cnf
##在最後新增如下配置,允許其他機器訪問MySQL
>skip-networking => # skip-networking
- 1
- 2
- 3
到此位置,就配置好了。
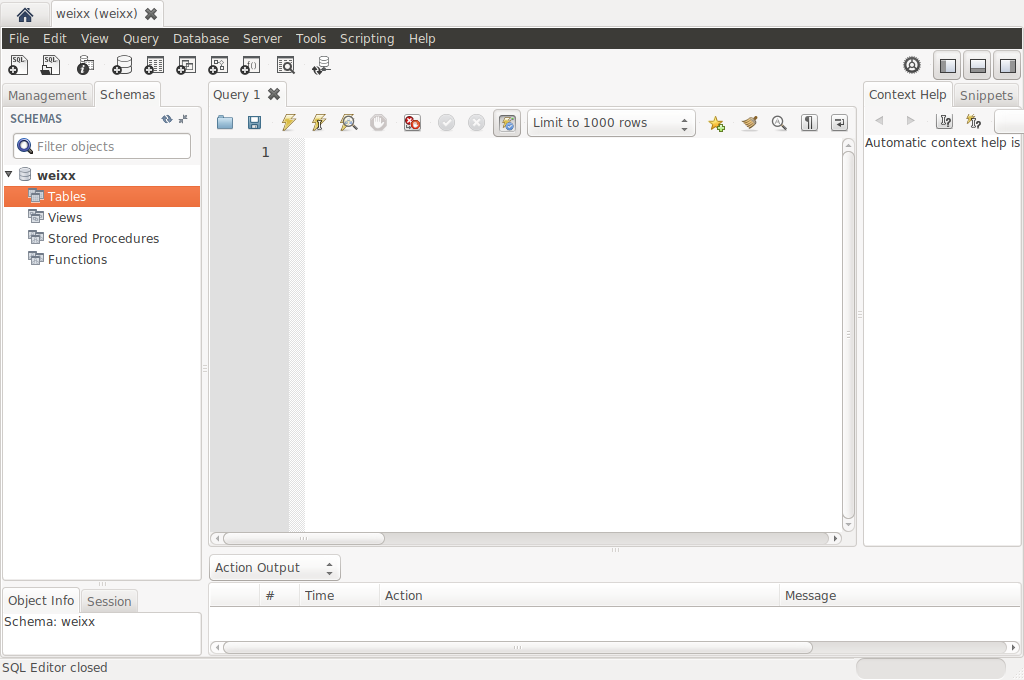
4.使用workbench連線資料庫
開啟workbench進行連線配置:
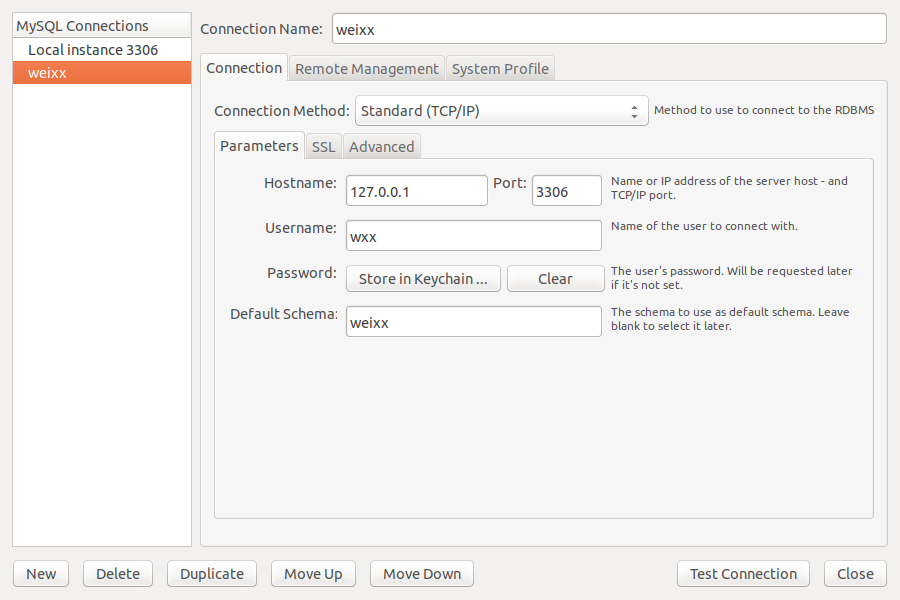
配置完成後,在主介面選擇weixx資料庫進行連線: