專案案例之GitLab企業級程式碼管理倉庫
一.安項GitLab
| 主機名 | IP | 備註 | 特殊要求 |
| git01 | 192.168.200.136 | GIT客戶端 | 無 |
| girlab | 192.168.200.140 | GITLAB服務端 | 記憶體2G |
GitLab國內源下載地址:https://mirrors.tuna.tsinghua.edu.cn/gitlab-ce/yum/el7
1 ##初始環境
2 [[email protected] ~]# cat /etc/redhat-release
3 CentOS Linux release 7.5.1804 (Core) 4 [[email protected] ~]# uname -r 5 3.10.0-862.el7.x86_64 6 [[email protected] ~]# echo "git lab 127.0.0.1" >>/etc/hosts 7 [[email protected] ~]# tail -1 /etc/hosts 8 git lab 127.0.0.1 9 [
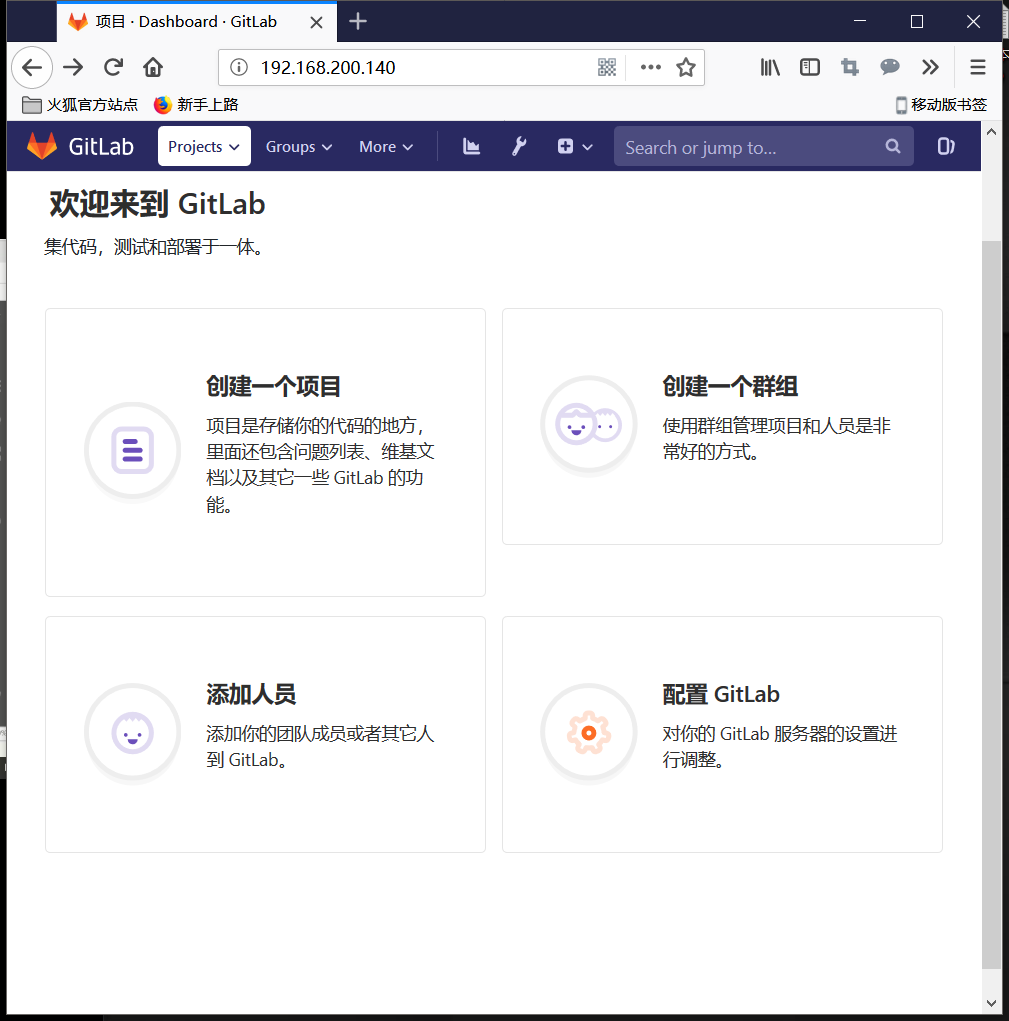
在宿主機輸入http://IP地址就可以訪問了
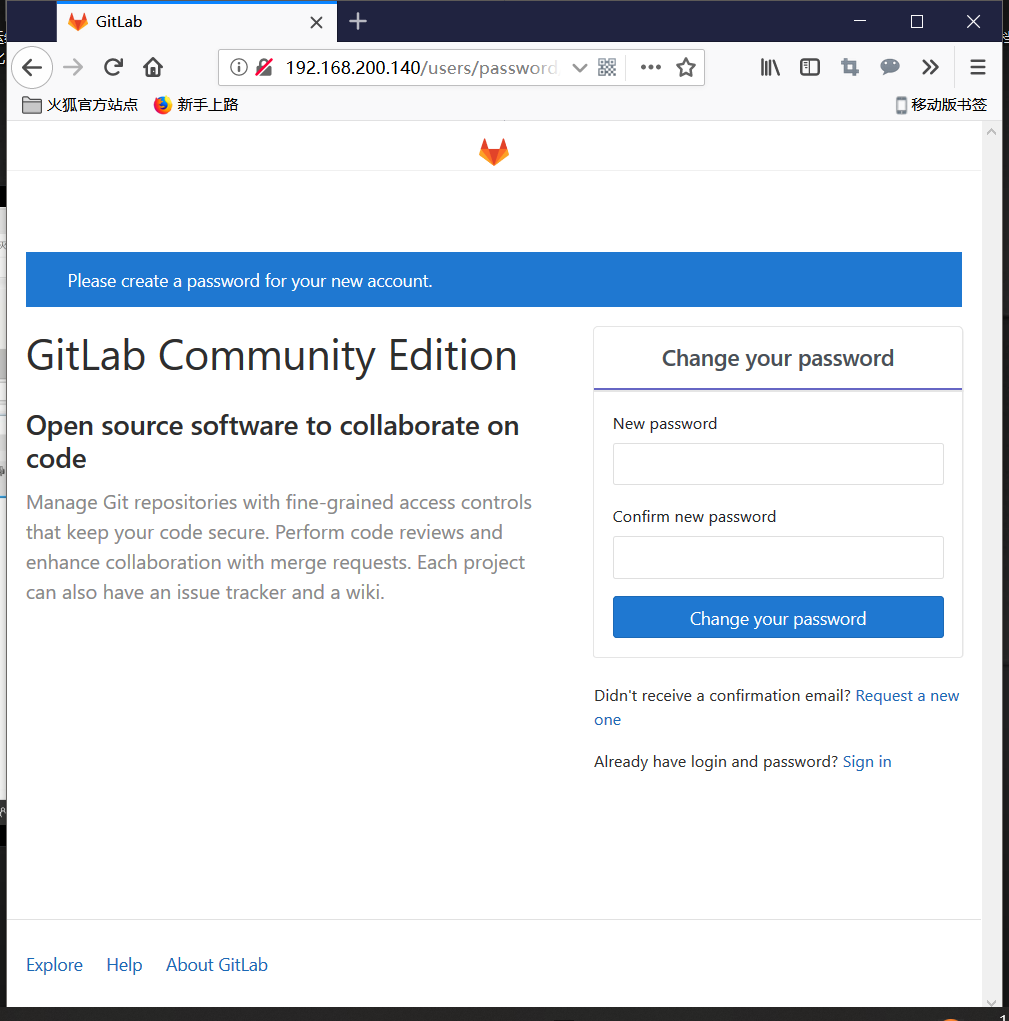
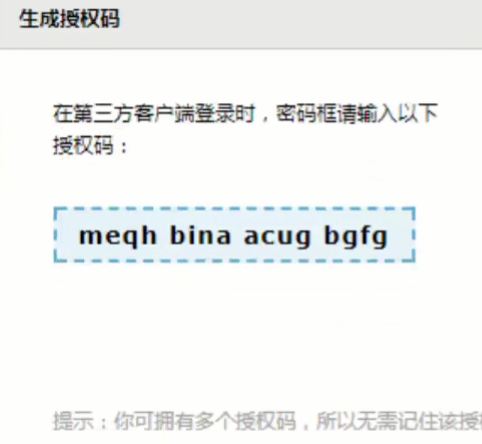
密碼最少為8位
登陸管理員賬號 : root 密碼:66666666
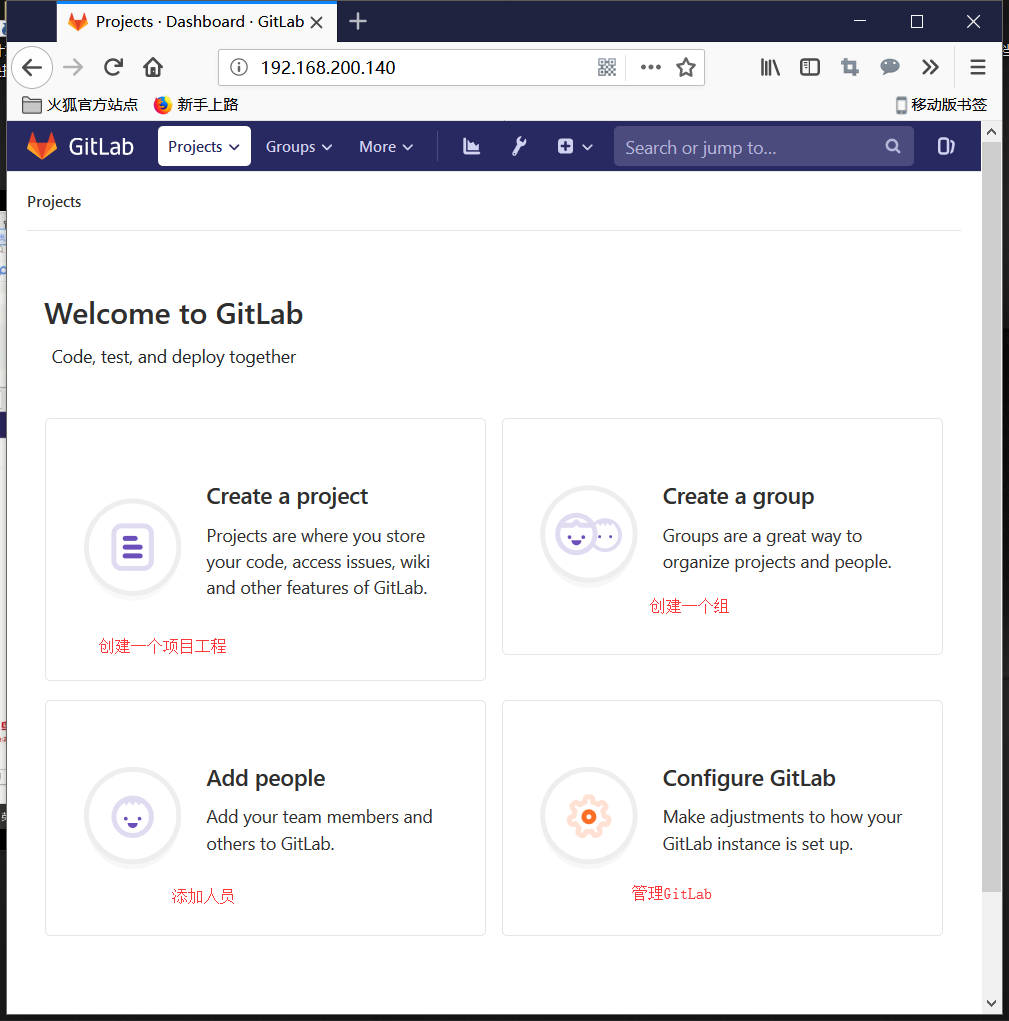
登陸後,我們就可以選擇如下功能使用了
安裝GitLab中文補丁
GitLab中文社群:https://gitlab.com/xhang/gitlab/tree/11-2-stable-zh
#解壓GitLab中文補丁包
[[email protected] ~]# tar xf gitlab-11-2-stable-zh.tar.gz
#檢視系統已經安裝的GitLab版本號 [[email protected] ~]# cat /opt/gitlab/embedded/service/gitlab-r ails/VERSION 11.2.3 #檢視解壓後的補丁包版本號 [[email protected] ~]# cat gitlab-11-2-stable-zh/VERSION 11.2.3 說明: 補丁版本號和安裝的GitLab版本號需要一致 #備份英文版GitLab [[email protected] ~]# cp -r /opt/gitlab/embedded/service/gitlab -rails{,.bak} #將中文補丁包的內容覆蓋英文版 [[email protected] ~]# /bin/cp -rf gitlab-11-2-stable-zh/* /opt/ gitlab/embedded/service/gitlab-rails/bin/cp: cannot overwrite non-directory ‘/opt/gitlab/embedded/ser vice/gitlab-rails/log’ with directory ‘gitlab-11-2-stable-zh/log’/bin/cp: cannot overwrite non-directory ‘/opt/gitlab/embedded/ser vice/gitlab-rails/tmp’ with directory ‘gitlab-11-2-stable-zh/tmp’ 說明: 此報錯不用管,因為已經設定過root密碼,登陸過,所以會報錯。 #重新配置GitLab [[email protected] ~]# gitlab-ctl reconfigure #重啟 [[email protected] ~]# gitlab-ctl restart
重新重新整理瀏覽器訪問GitLab
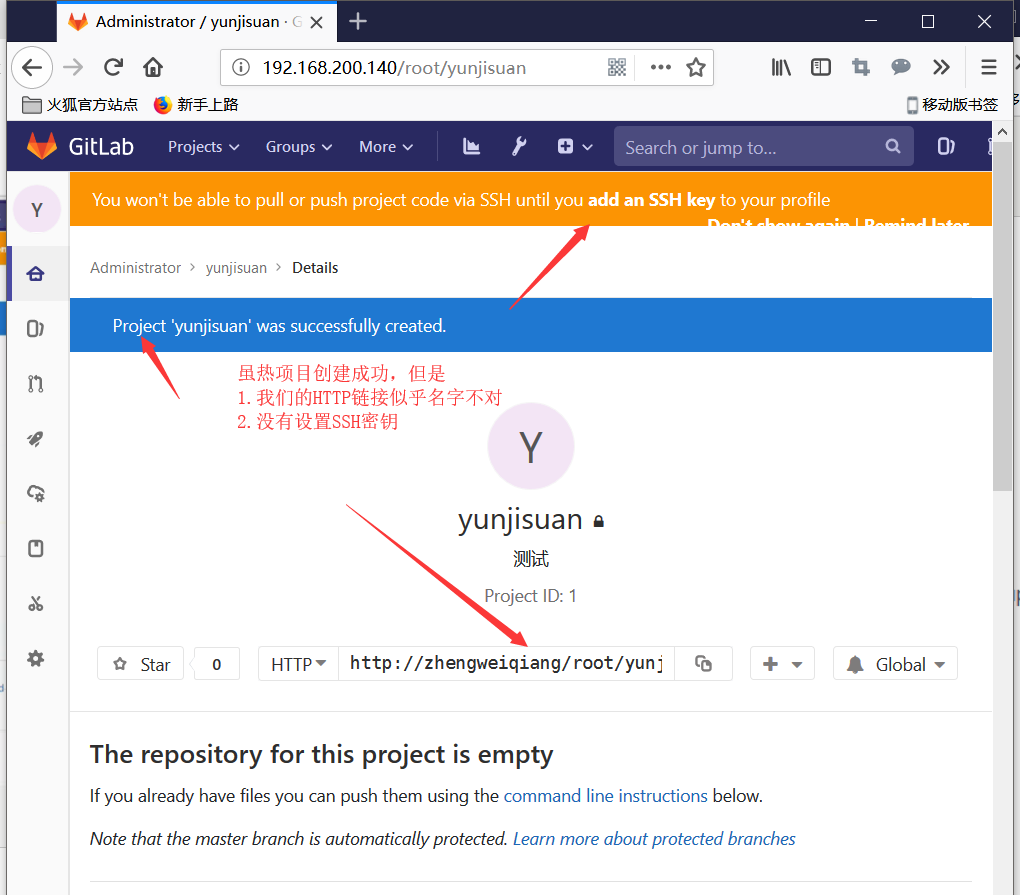
建立一個專案

修改GitLab配置檔案/etc/gitlab/gitlab.rb
我們需要修改GitLab的預設訪問域名
GitLab預設監聽埠為80,但是企業中,這個埠經常被別的服務佔用,所以我們需要更換埠
 1 [[email protected] ~]# cat /etc/gitlab/gitlab.rb | sed -n '13p;9
 2 43p' external_url 'http://gitlab.example.com'
 3 # nginx['listen_port'] = nil
 4 [[email protected] ~]# vim /etc/gitlab/gitlab.rb
 5 [[email protected] ~]# cat /etc/gitlab/gitlab.rb | sed -n '13p;9
 6 43p' external_url 'http://192.168.200.140:8888'
 7 nginx['listen_port'] = 8888
 8 #重新配置
 9 [[email protected] ~]# gitlab-ctl reconfigure
10
11 #重新啟動GitLab
12 [[email protected] ~]# gitlab-ctl restart
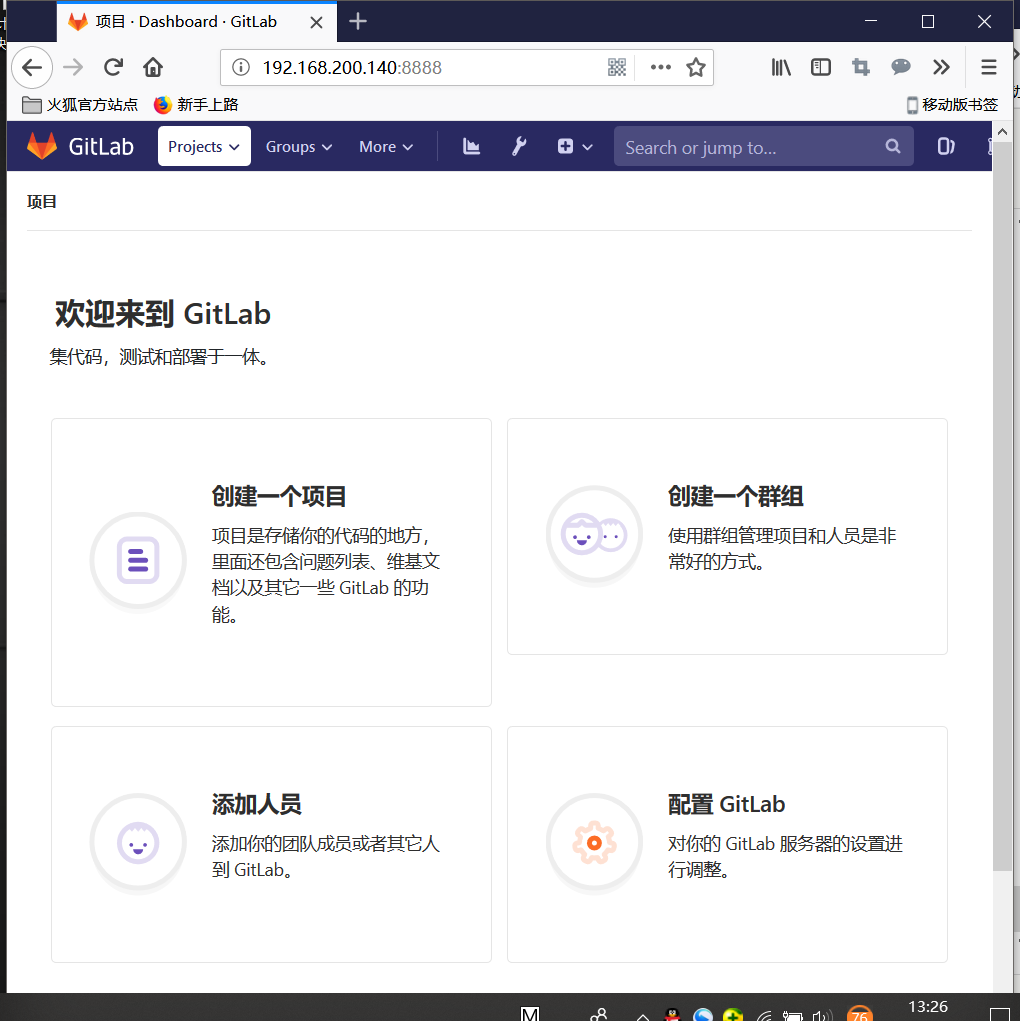
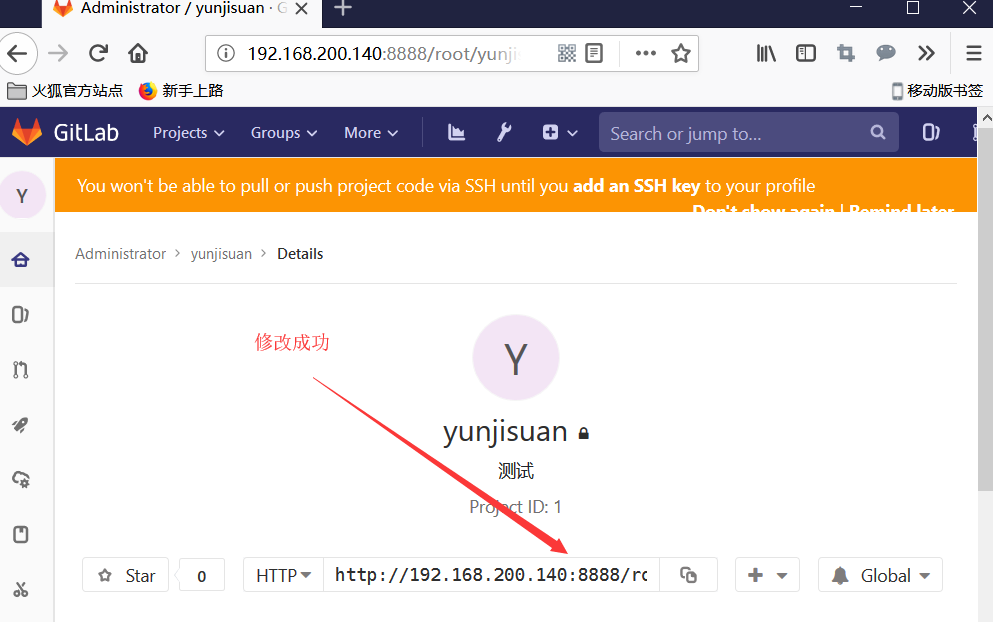
重新訪問瀏覽器192.168.200.144:8888
嘗試將本地倉庫程式碼推送到私有GitLab
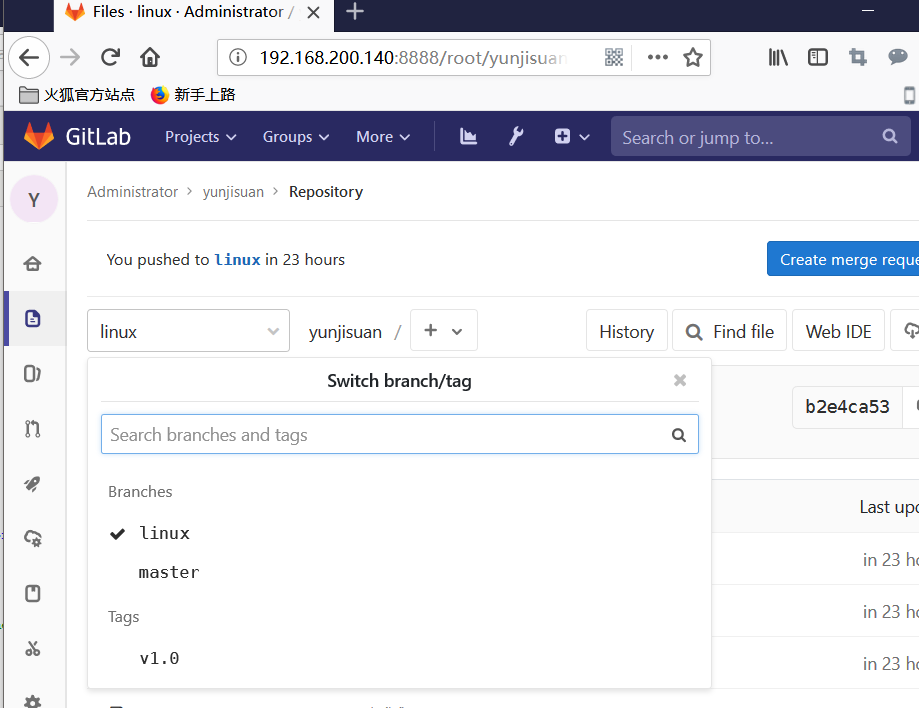
 1 #新增GitLab倉庫管理
 2 [[email protected] mycode]# git remote add test http://192.168.200.140:8888/root/yunjisuan.git
 3 [[email protected] mycode]# git remote -v
 4 test    http://192.168.200.140:8888/root/yunjisuan.git (fetch)
 5 test    http://192.168.200.140:8888/root/yunjisuan.git (push)
 6
 7 #推送本地倉庫master分支到遠端倉庫GitLab上
 8 [[email protected] mycode]# git add *
 9 [[email protected] mycode]# git commit -m "測試一下"
10 ####省略輸出#####
11 [[email protected] mycode]# git push -u test master
12 Username for 'http://192.168.200.140:8888': root
13 Password for 'http://[email protected]:8888':
14 Counting objects: 3, done.
15 Compressing objects: 100% (2/2), done.
16 Writing objects: 100% (3/3), 244 bytes | 0 bytes/s, done.
17 Total 3 (delta 0), reused 0 (delta 0)
18 To http://192.168.200.140:8888/root/yunjisuan.git
19  * [new branch]      master -> master
20
21 #推送本地倉庫標籤V1.0到遠端倉庫GitLab上
22 [[email protected] mycode]# git tag v1.0
23 [[email protected] mycode]# git push -u test v1.0
24 Username for 'http://192.168.200.140:8888': root
25 Password for 'http://[email protected]:8888':
26 Total 0 (delta 0), reused 0 (delta 0)
27 To http://192.168.200.140:8888/root/yunjisuan.git
28  * [new tag]         v1.0 -> v1.0
29
30 #推送本地倉庫Linux分支到遠端倉庫GitLab上
31 [[email protected] mycode]# git branch linux
32 [[email protected] mycode]# git checkout linux
33 Switched to branch 'linux'
34 #切換到linux分支
35 [[email protected] mycode]# git branch
36 * linux
37   master
38 #新增一個檔案
39 [[email protected] mycode]# touch linun.txt
40 [[email protected] mycode]# git add *
41 [[email protected] mycode]# git commit -m "分支第一次"
42 [linux b2e4ca5] 分支第一次
43  1 file changed, 0 insertions(+), 0 deletions(-)
44  create mode 100644 linun.txt
45
46 [[email protected] mycode]# git push -u test linux
47 Username for 'http://192.168.200.140:8888': root
48 Password for 'http://[email protected]:8888':
49 Counting objects: 2, done.
50 Compressing objects: 100% (2/2), done.
51 Writing objects: 100% (2/2), 256 bytes | 0 bytes/s, done.
52 Total 2 (delta 1), reused 0 (delta 0)
53 remote:
54 remote: To create a merge request for linux, visit:
55 remote:   http://192.168.200.140:8888/root/yunjisuan/merge_reques
56 ts/new?merge_request%5Bsource_branch%5D=linuxremote:
57 To http://192.168.200.140:8888/root/yunjisuan.git
58  * [new branch]      linux -> linux
嘗試在本地倉庫克隆GitLab的專案Linux分支到本地倉庫
 1 #建立測試目錄
 2 [[email protected] mycode]# mkdir -p /test
 3 [[email protected] mycode]# cd /test/
 4 #克隆遠端倉庫分支Linux
 5 [[email protected] test]# git clone -b linux http://192.168.200.
 6 140:8888/root/yunjisuan.git
 7 Cloning into 'yunjisuan'...
 8 Username for 'http://192.168.200.140:8888': root
 9 Password for 'http://[email protected]:8888':
10 remote: Enumerating objects: 5, done.
11 remote: Counting objects: 100% (5/5), done.
12 remote: Compressing objects: 100% (4/4), done.
13 remote: Total 5 (delta 1), reused 0 (delta 0)
14 Unpacking objects: 100% (5/5), done.
15 Checking connectivity... done.
16 [[email protected] test]# ls
17 yunjisuan
18 [[email protected] test]# ls yunjisuan/
19 1  10  2  3  4  5  6  7  8  9  linun.txt
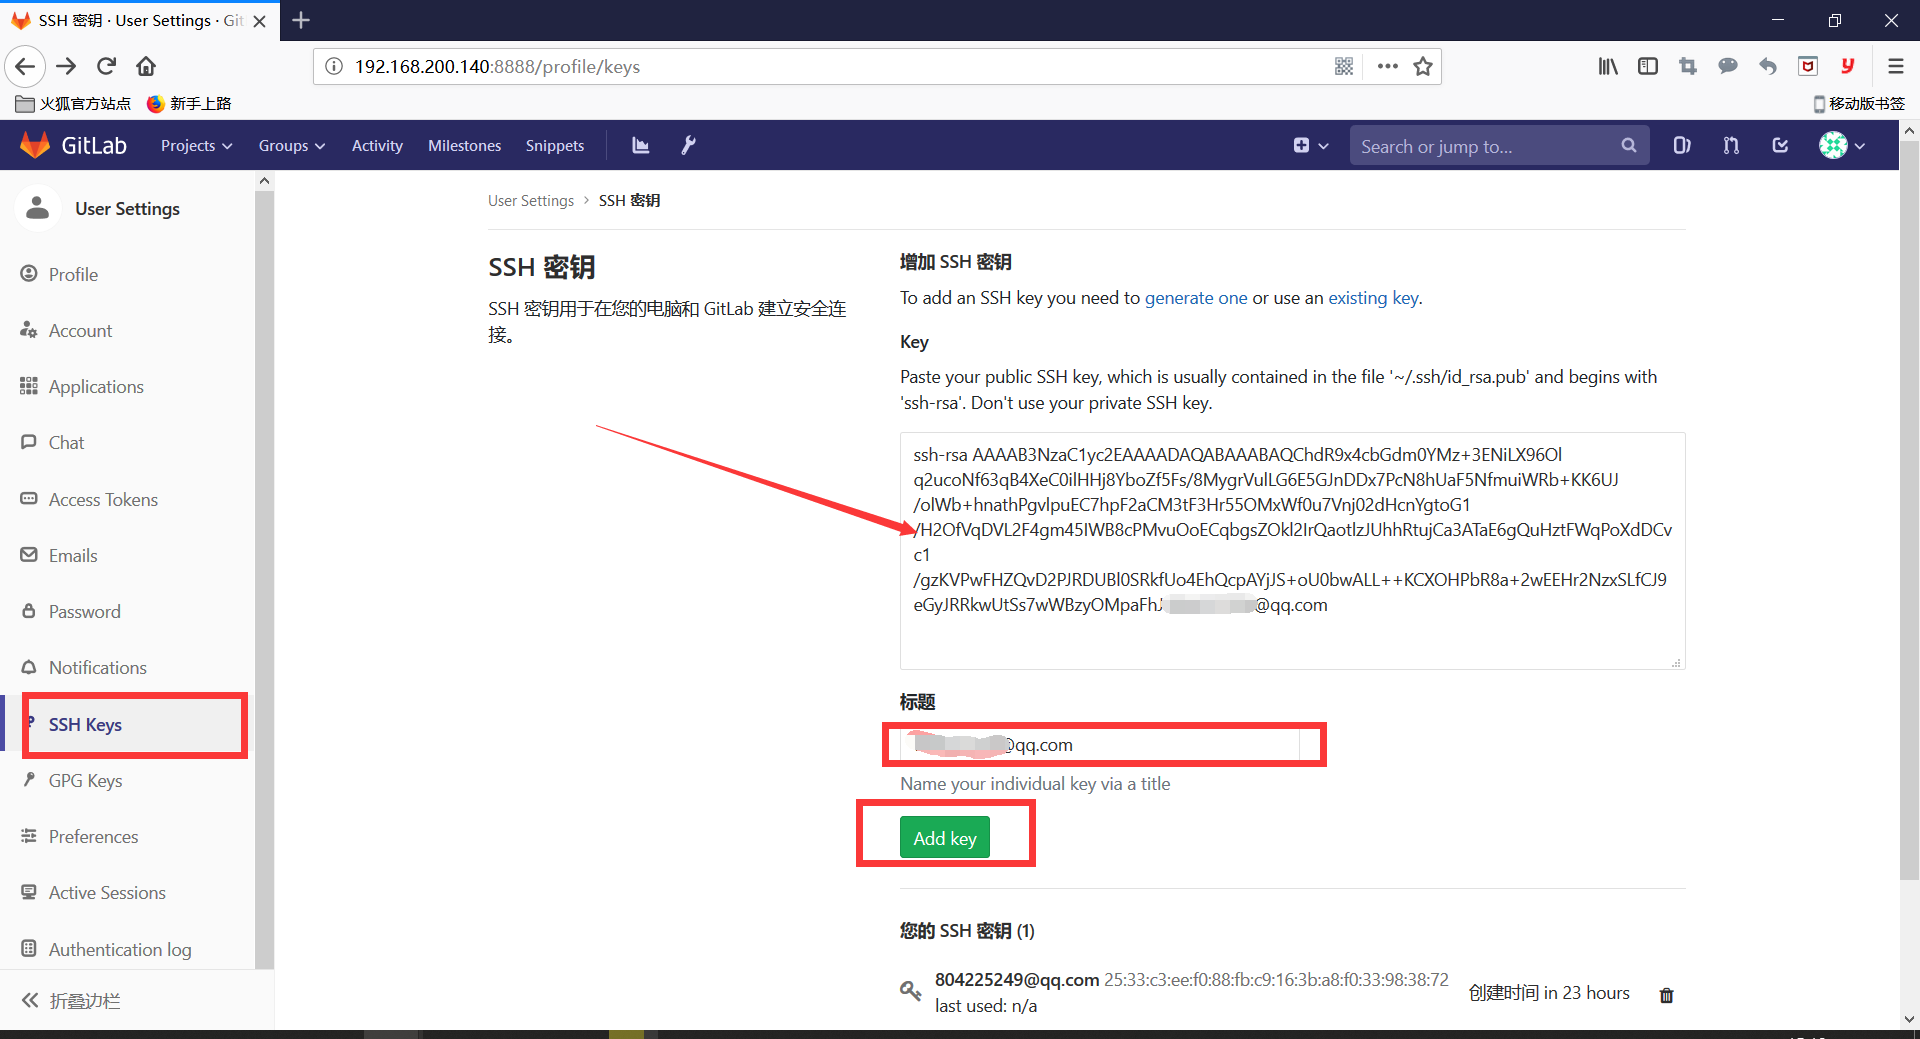
配置GitLab的SSH金鑰連線方式
#git01生成金鑰對
[[email protected] ~]# ssh-keygen -t rsa -C '[email protected]'
Generating public/private rsa key pair.
Enter file in which to save the key (/root/.ssh/id_rsa):
Created directory '/root/.ssh'.
Enter passphrase (empty for no passphrase):
Enter same passphrase again:
Your identification has been saved in /root/.ssh/id_rsa.
Your public key has been saved in /root/.ssh/id_rsa.pub.
The key fingerprint is:
SHA256:EPfg/7kL5kvu5lKrpD1o//ONoWVNvBizwNfWyeIBK9o [email protected]
omThe key's randomart image is:
+---[RSA 2048]----+
|      . o        |
|       + o       |
|      . . ..     |
|       . o  oo...|
|        S.+.+o=o.|
|        o o+.Xo. |
|       o.E+.O.o  |
|      o+o=+= =   |
|     ...+OO+=..  |
+----[SHA256]-----+

#公鑰內容,複製到GitLab上
[[email protected] ~]# cd ~/.ssh/
[[email protected] .ssh]# cat id_rsa.pub
ssh-rsa AAAAB3NzaC1yc2EAAAADAQABAAABAQChdR9x4cbGdm0YMz+3ENiLX96Ol
q2ucoNf63qB4XeC0ilHHj8YboZf5Fs/8MygrVulLG6E5GJnDDx7PcN8hUaF5NfmuiWRb+KK6UJ/olWb+hnathPgvlpuEC7hpF2aCM3tF3Hr55OMxWf0u7Vnj02dHcnYgtoG1/H2OfVqDVL2F4gm45IWB8cPMvuOoECqbgsZOkl2IrQaotlzJUhhRtujCa3ATaE6gQuHztFWqPoXdDCvc1/gzKVPwFHZQvD2PJRDUBl0SRkfUo4EhQcpAYjJS+oU0bwALL++KCXOHPbR8a+2wEEHr2NzxSLfCJ9eGyJRRkwUtSs7wWBzyOMpaFhJ 804225249@qq.com
在瀏覽器開啟GitLab

利用SSH方式克隆GitLab上的一個專案
 1 [[email protected] ~]# mkdir -p /test
 2 [email protected] ~]# cd /test/
 3
 4 [[email protected] test]# git clone -b linux [email protected]192.168.200.140
 5 :root/yunjisuan.git
 6 Cloning into 'yunjisuan'...
 7 .The authenticity of host '192.168.200.140 (192.168.200.140)' can
 8 't be established.ECDSA key fingerprint is SHA256:Eeo38Y88KcOSuPspyYgLADrIhrx3wRCQQ
 9 fm1/4qHYZY.ECDSA key fingerprint is MD5:93:67:c9:91:71:11:9b:af:80:d0:ed:79:
10 bc:f9:a3:bd.Are you sure you want to continue connecting (yes/no)? yes
11 Warning: Permanently added '192.168.200.140' (ECDSA) to the list
12 of known hosts.\remote: Enumerating objects: 5, done.
13 remote: Counting objects: 100% (5/5), done.
14 remote: Compressing objects: 100% (4/4), done.
15 remote: Total 5 (delta 1), reused 0 (delta 0)
16 Receiving objects: 100% (5/5), done.
17 Resolving deltas: 100% (1/1), done.
18 Checking connectivity... done.
19
20 [[email protected] test]# ls
21 yunjisuan
22 [[email protected] test]# ls yunjisuan/
23 1  10  2  3  4  5  6  7  8  9  linun.txt
配置GitLab郵件服務
配置郵件服務的用途:
- 有和並要求時,郵件通知
- 賬號註冊時,郵件驗證
- 修改密碼時,通過郵件修改
配置步驟:
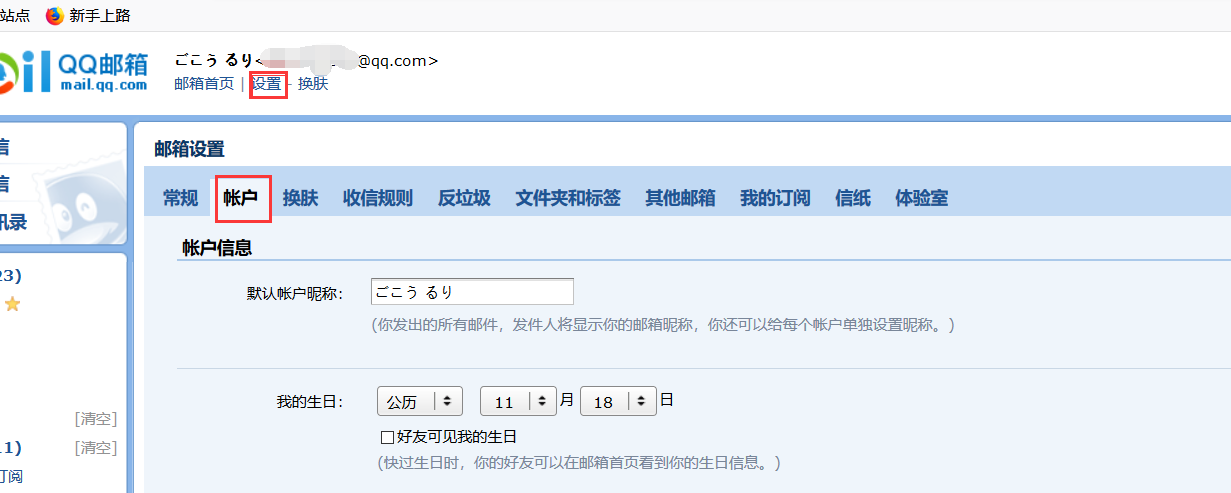
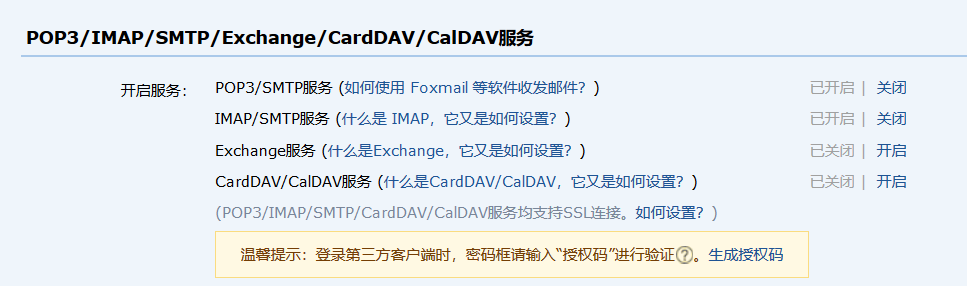
- 開啟QQ郵箱的smtp服務
- 修改GitLab配置
- 測試郵件服務是否正常
開啟GitLab服務postfix服務並開啟QQ郵箱的smtp服務
[[email protected] ~]# systemctl start postfix
[[email protected] ~]# systemctl enable postfix
[[email protected] ~]# systemctl status postfi
修改配置檔案/etc/gitlab/gitlab.rb
[[email protected] ~]# cat -n /etc/gitlab/gitlab.rb | sed -n '53p;472,480p;618p;'
    53     gitlab_rails['gitlab_email_from'] = '[email protected]' #GitLab預設郵箱
   472    gitlab_rails['smtp_enable'] = true                     #開啟功能
   473    gitlab_rails['smtp_address'] = "smtp.qq.com"      #QQ的smtp服務
   474    gitlab_rails['smtp_port'] = 465
   475    gitlab_rails['smtp_user_name'] = "[email protected]"  #smtp的郵箱
   476    gitlab_rails['smtp_password'] = "開通QQsmtp的字串"
   477    gitlab_rails['smtp_domain'] = "qq.com"                 #smtp域名
   478    gitlab_rails['smtp_authentication'] = "login"
   479    gitlab_rails['smtp_enable_starttls_auto'] = true
   480    gitlab_rails['smtp_tls'] = true
   618    user['git_user_email'] = "[email protected]"      #git使用者郵箱

#重新載入GitLab配置檔案
[[email protected] ~]# gitlab-ctl reconfigure

#重啟服務
[[email protected] ~]# gitlab-ctl restart

#進入GitLab控制檯進行郵箱傳送測試
[[email protected] ~]# gitlab-rails console
-----------------------------------------------------------------
-------------------- GitLab:       11.2.3 (06cbee3)
 GitLab Shell: 8.1.1
 postgresql:   9.6.8
-----------------------------------------------------------------
--------------------Loading production environment (Rails 4.2.10)
irb(main):001:0> Notify.test_email('[email protected]','this is ti
irb(main):002:1' tle','hello').deliver_now


特別說明:
Notify.test.email('收件人郵箱','郵件標題','郵件內容')

GitLab的賬號註冊及分組
賬戶註冊測試
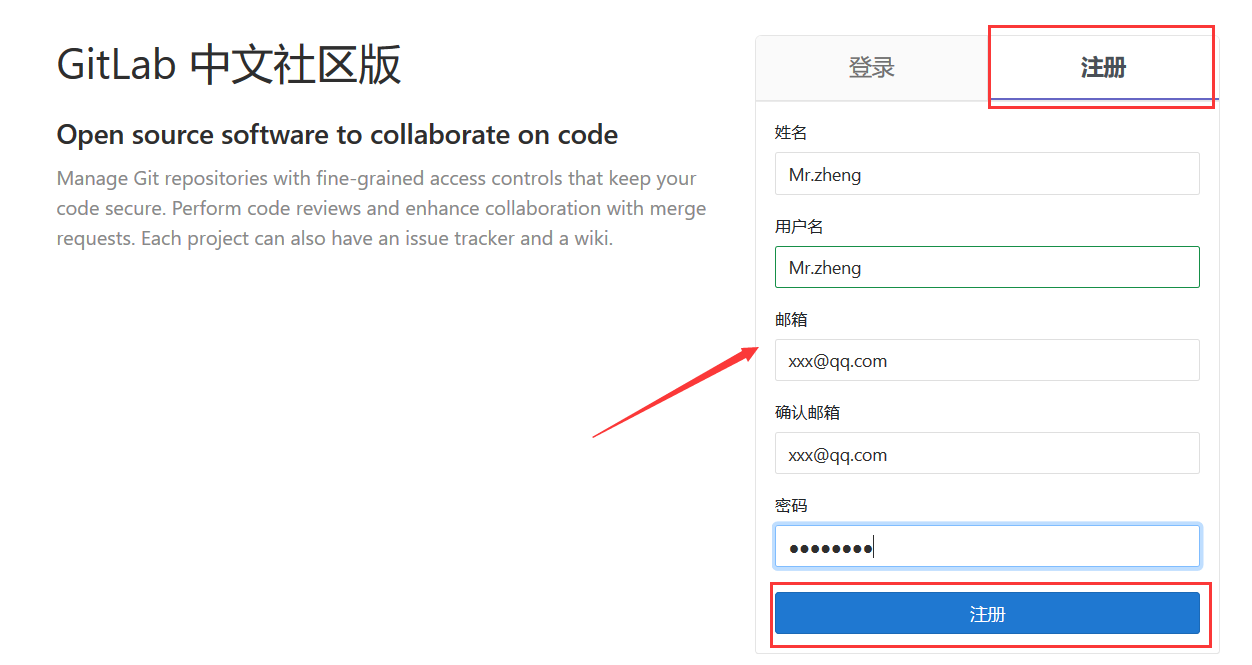
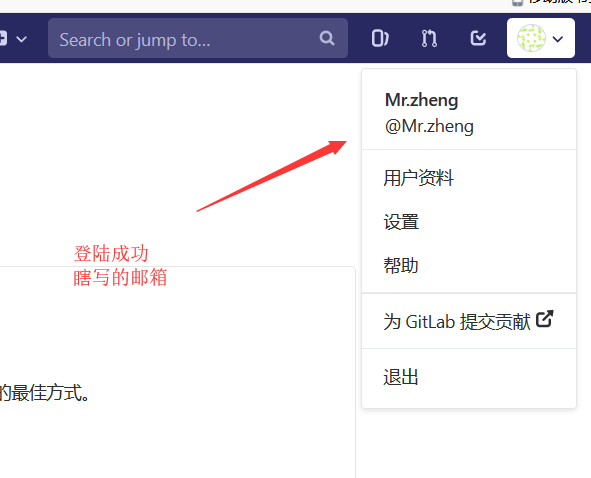
我們在註冊的時候,用的時亂寫的郵箱並能註冊和登陸
顯然這在企業裡是絕對不允許的
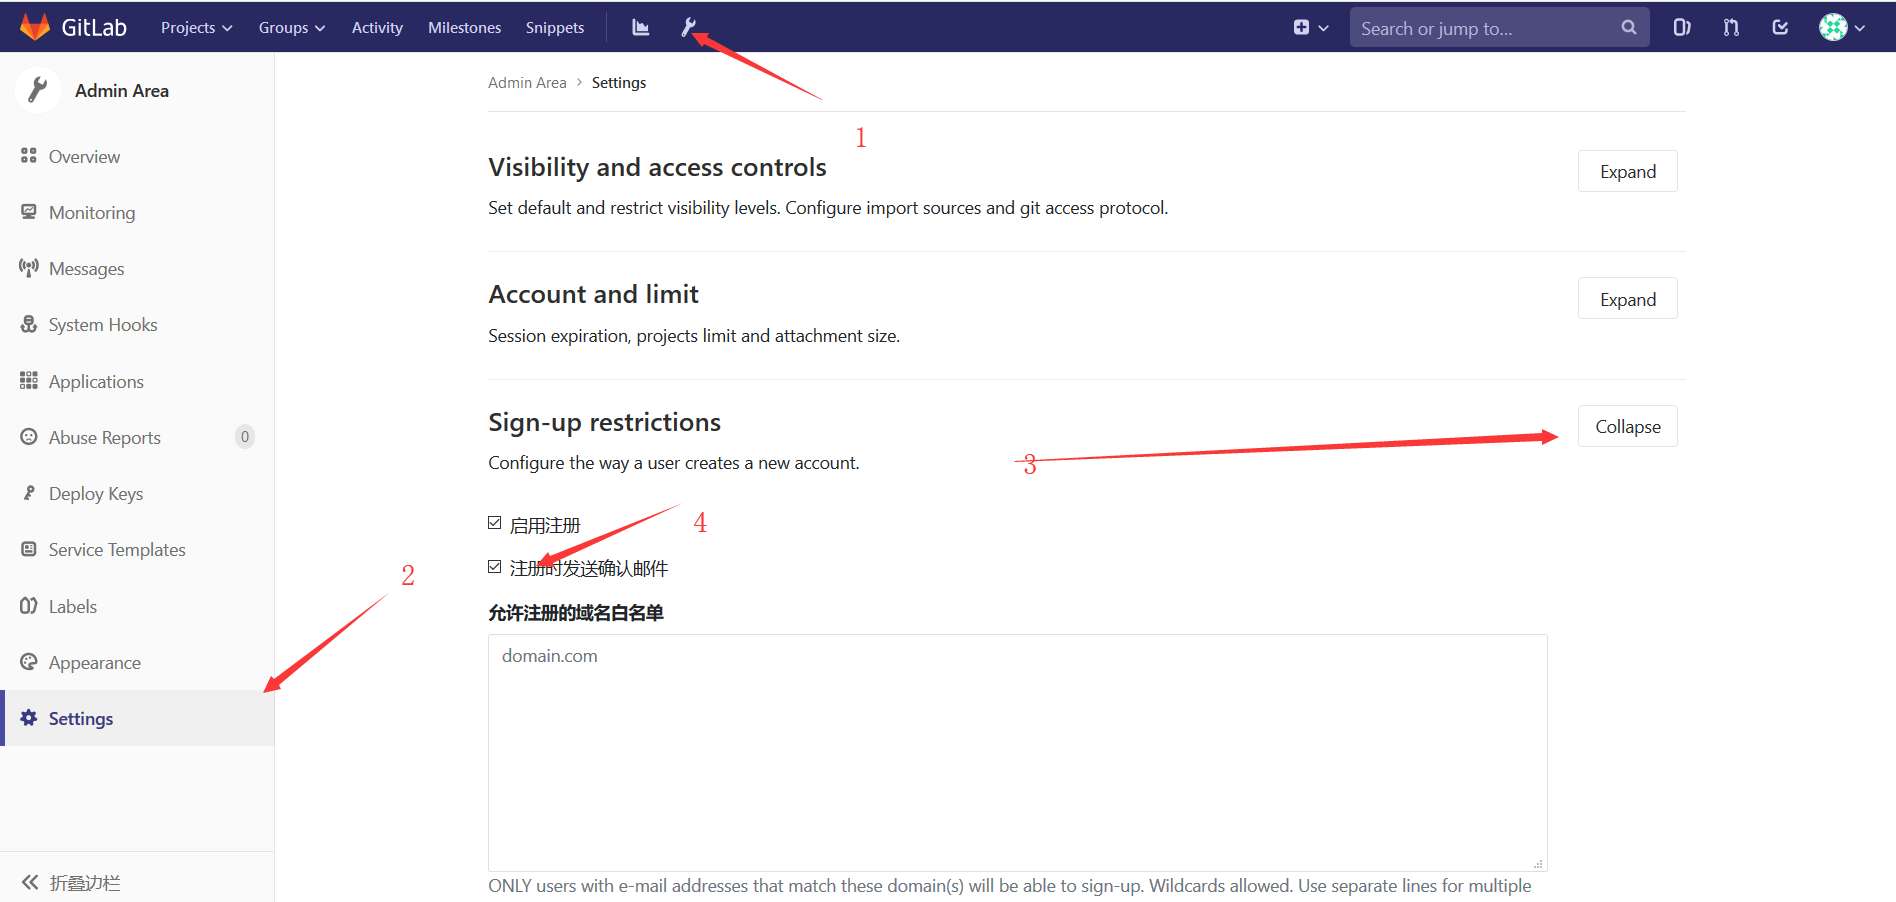
開啟GitLab郵箱驗證功能
重新登陸管理員賬戶root,密碼666666,進行如下操作

退出賬號,從新註冊後
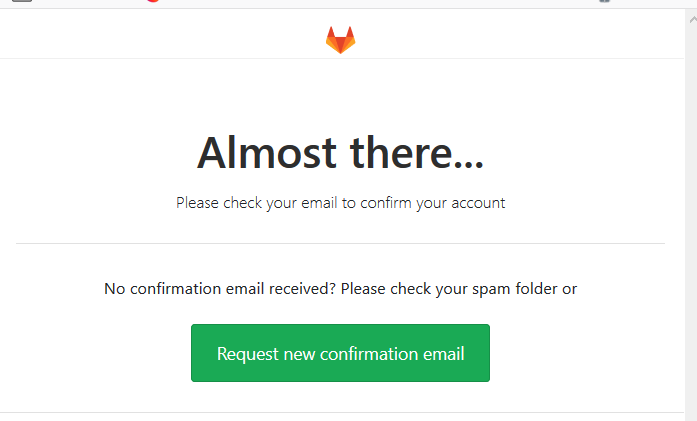


由上圖,我們發現,此時註冊使用者,已經進不去GitLab了
必須要使用者進行郵箱確認後,才可登陸
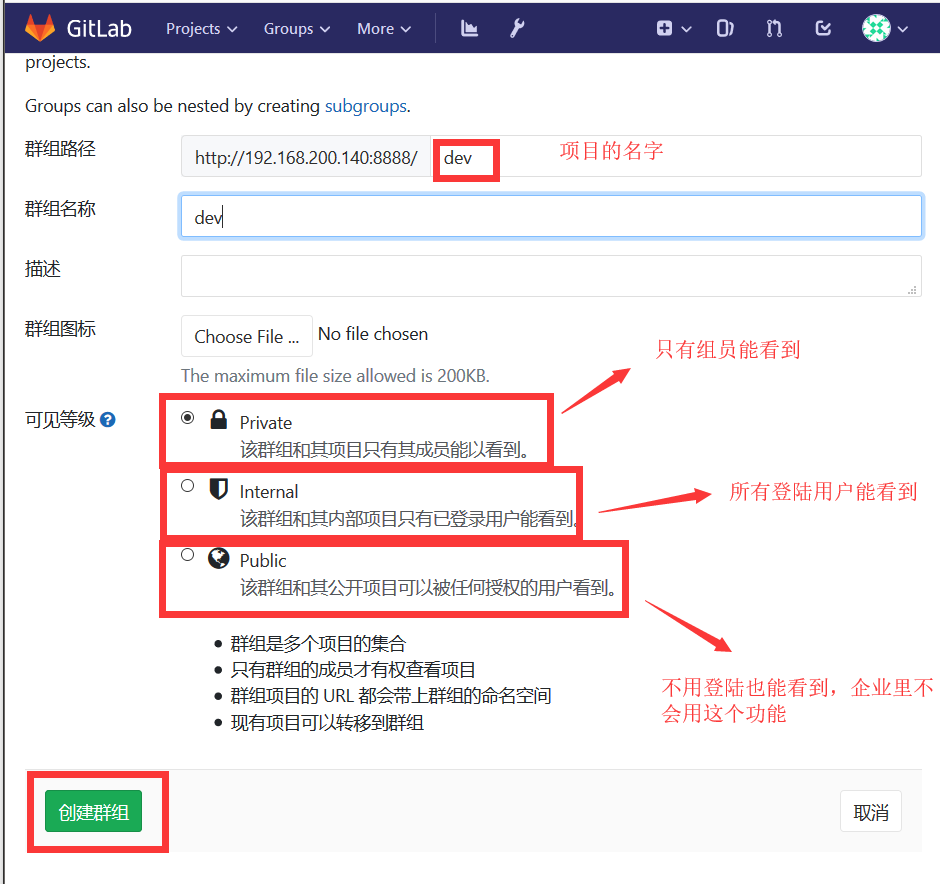
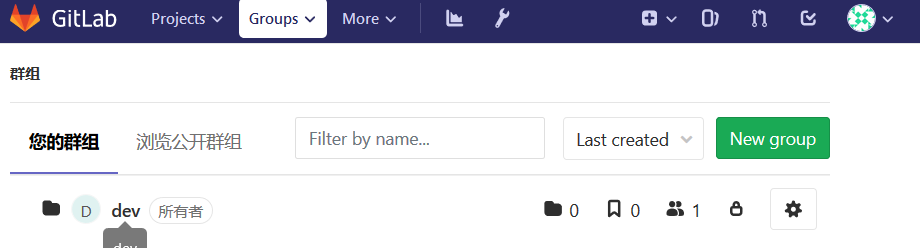
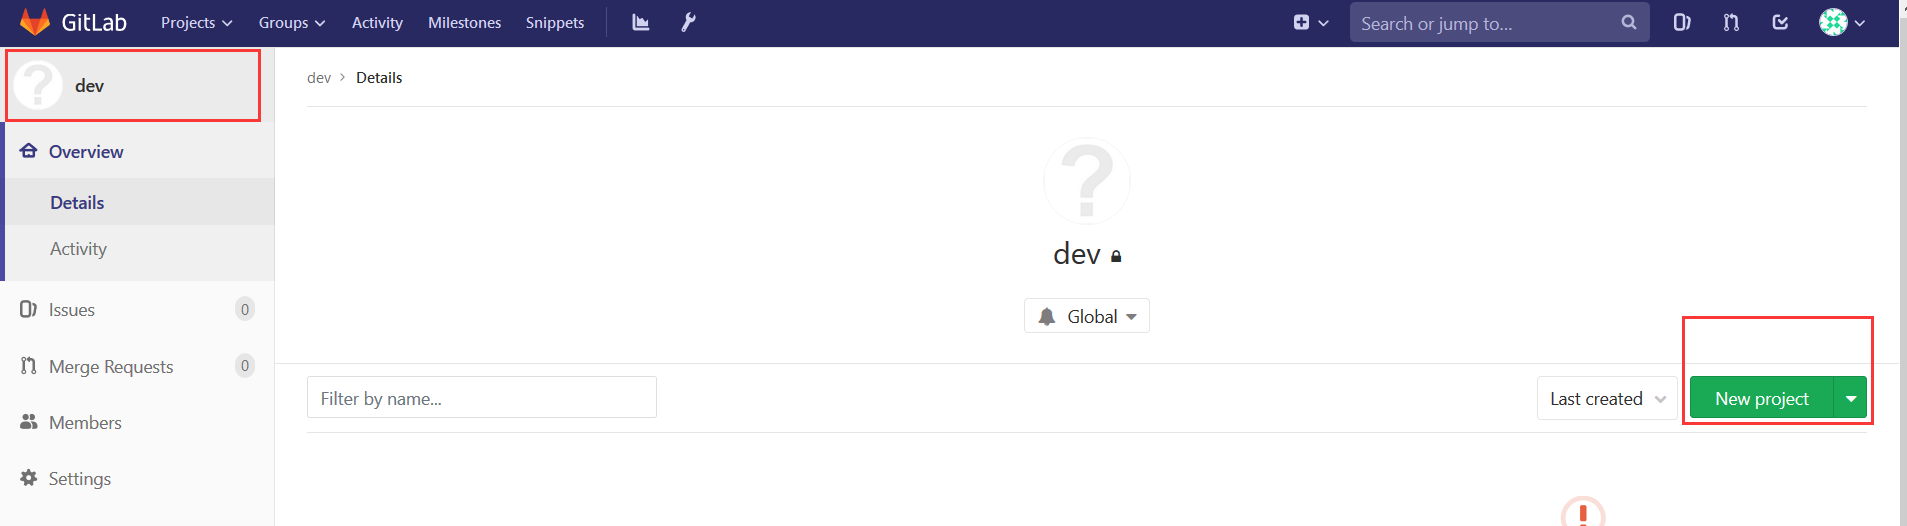
建立一個專案組

給組員新增成員並授權
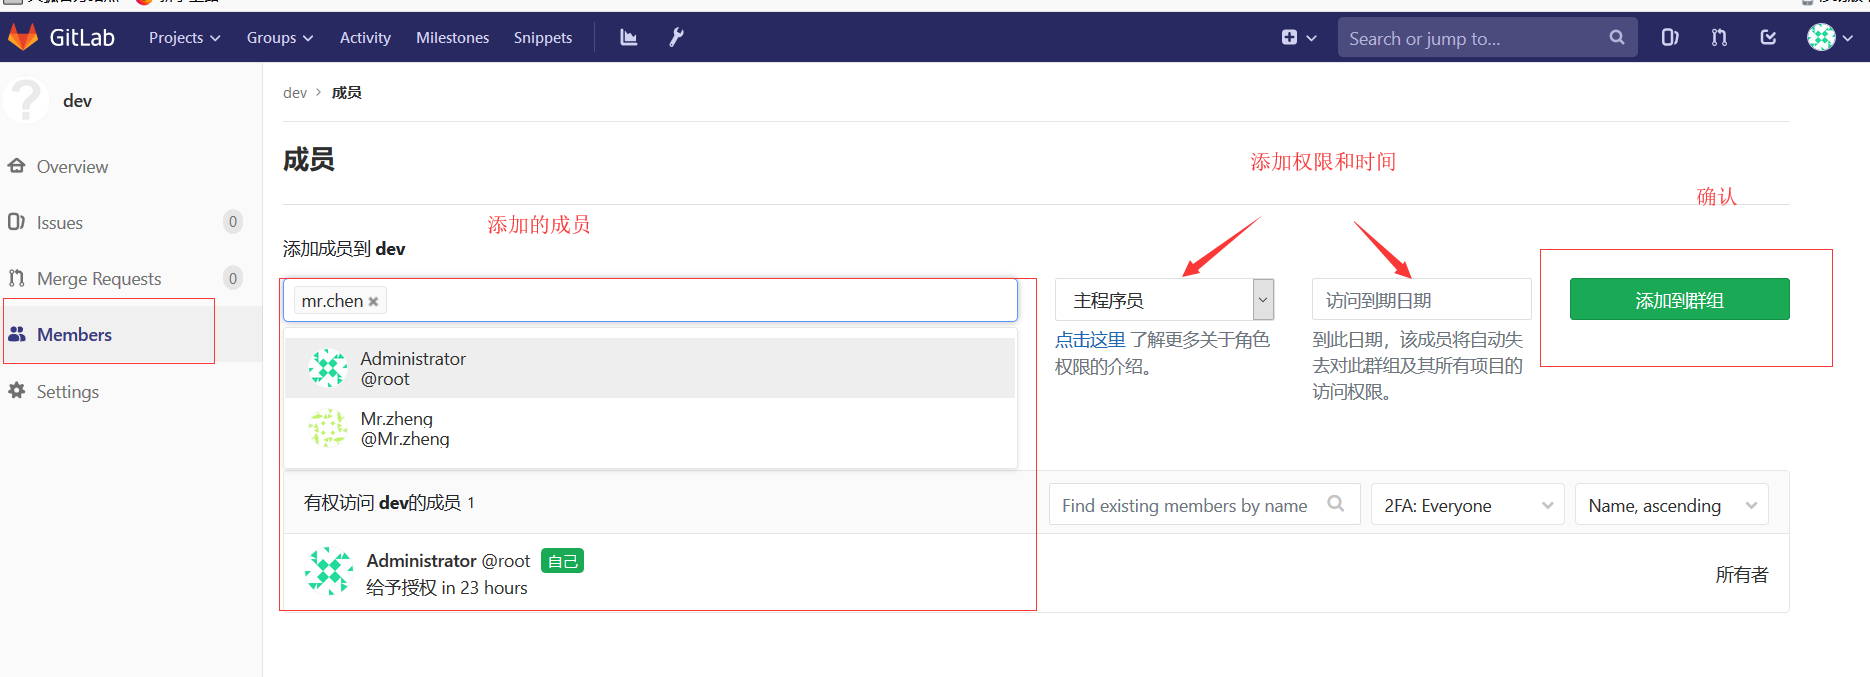

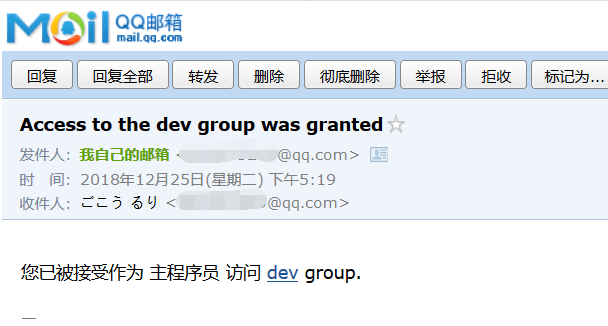
新增許可權成功後,GitLab會自動郵件通知這個使用者
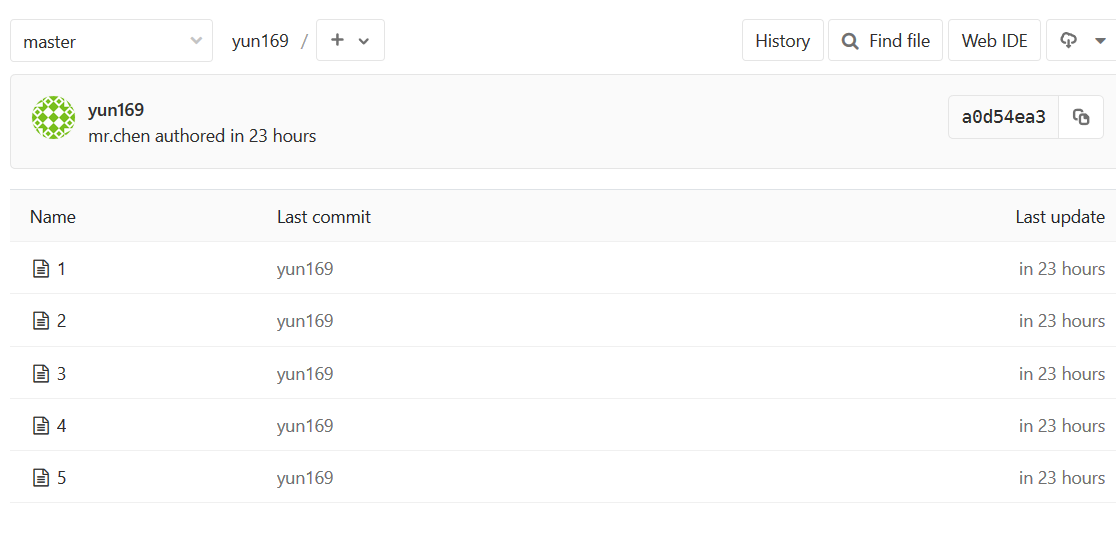
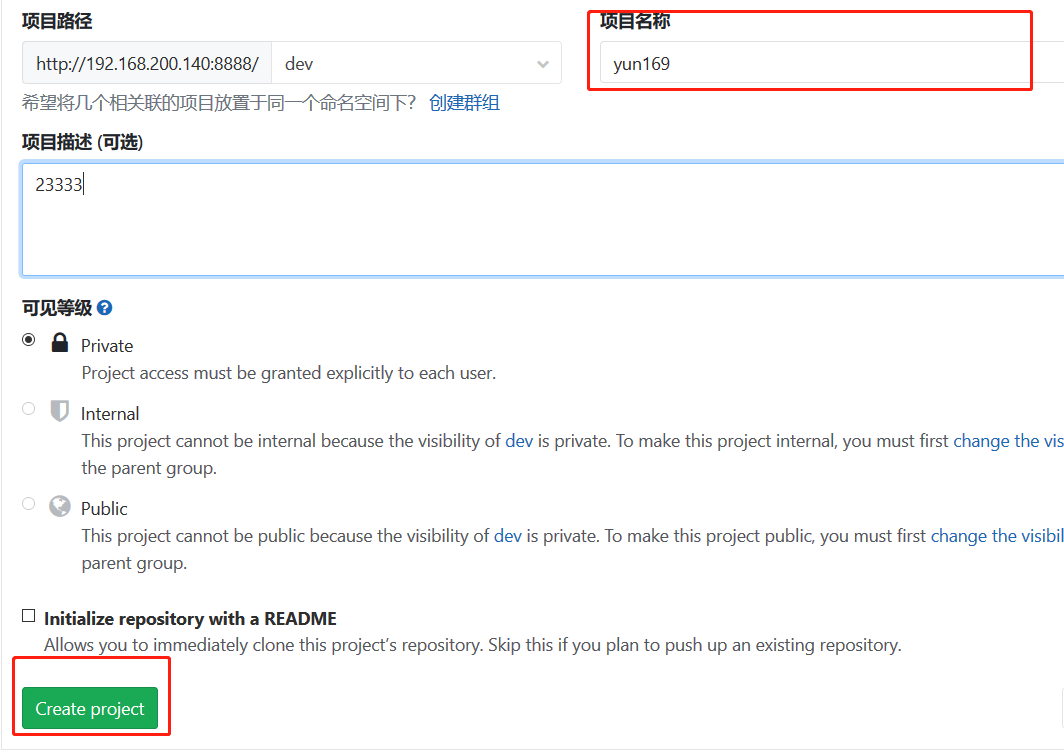
給專案組建立一個新專案
[[email protected] ~]# mkdir test
[[email protected] ~]# cd test/
[[email protected] test]# git init
Initialized empty Git repository in /root/test/.git/
[[email protected] test]#
[[email protected] test]# touch {1..5}
[[email protected] test]# git add *
[[email protected] test]# git commit -m "yun169"

[[email protected] test]# git push -u test master
Username for 'http://192.168.200.140:8888': [email protected]
Password for 'http://[email protected]@192.168.200.140:8888': Counting objects: 3, done.
Compressing objects: 100% (2/2), done.
Writing objects: 100% (3/3), 215 bytes | 0 bytes/s, done.
Total 3 (delta 0), reused 0 (delta 0)
To http://192.168.200.140:8888/dev/yun169.git
 * [new branch]      master -> master