
Spring Cloud學習筆記11——天氣預報系統微服務(5)城市資料 API 微服務
阿新 • • 發佈:2018-12-20
開發環境
JDK8+Gradle4+Spring Boot Web Starter
建立專案
新建專案資料夾:
 將
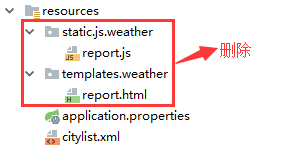
將micro-weather-report專案中的原始碼檔案複製貼上到新專案資料夾中:

修改原始碼
修改build.gradle配置,刪除HttpClient、redis、quartz、thymeleaf的依賴:
//依賴關係
dependencies {
//該依賴用於編譯階段
compile('org.springframework.boot:spring-boot-starter-web')
//該依賴用於測試階段
testCompile('org.springframework.boot:spring-boot-starter-test' 在com.study.spring.cloud.weather.controller包下新建類CityController:
package com.study.spring.cloud.weather.controller;
import com.study.spring.cloud.weather.service.CityDataService;
import com.study.spring.cloud.weather.vo.City;
import org.springframework.beans.factory.annotation.Autowired;
import org. 
 修改
修改application.properties配置檔案,將
#熱部署靜態檔案
spring.thymeleaf.cache=false
內容刪除
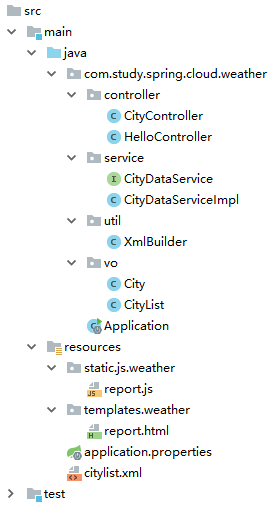
此時src目錄結構如下:
執行
注意一定要先執行Redis
執行應用:
 執行結果如下:
 訪問
訪問http://localhost:8080/cities頁面:
