
SpringMVC國際化與檔案上傳(五)
其實SpringMVC中的頁面國際化與上一章的驗證國際化基本一致。
1.對頁面進行國際化
1)首先我們對Spring配置檔案中新增國際化bean配置
<!-- 註冊國際化資訊,必須有id,指定資原始檔名稱,資原始檔在src目錄下 --> <bean id="messageSource" class="org.springframework.context.support.ResourceBundleMessageSource"> <property name="basename" value="i18n"></property> </bean> <!-- 配置LocalResolver用來獲取本地化語言 --> <bean id="localeResolver" class="org.springframework.web.servlet.i18n.SessionLocaleResolver"></bean> <!-- 配置LocaleChanceInterceptor攔截器 --> <mvc:interceptors> <bean class="org.springframework.web.servlet.i18n.LocaleChangeInterceptor" /> </mvc:interceptors>
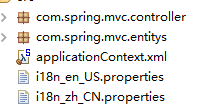
2)然後新增我們的資原始檔,這個資原始檔的字首要與我們上面配置的bean的value相同。
我們在資原始檔寫入我們需要國際化的內容

然後我們在跳轉頁面的時候需要載入國際化資源
@RequestMapping(value="login",method=RequestMethod.GET) public String login(Locale locale,Map<String ,Object> map){ String name= messageSource.getMessage("name", null, locale); String pass = messageSource.getMessage("pass", null, locale); String title = messageSource.getMessage("title", null, locale); String submit = messageSource.getMessage("submit", null, locale); map.put("title", title); map.put("pass", pass); map.put("name", name); map.put("submit", submit); map.put("user", new User()); return "login"; }
我們在頁面中可以使用jstl或者spring標籤資料國際化資訊,spring中的form標籤是用來輸入spring驗證錯誤之後的提示資訊(上章有提過)
<%@ taglib uri="http://java.sun.com/jsp/jstl/fmt" prefix="fmt"%>
<%@ taglib uri="http://www.springframework.org/tags" prefix="spring" %>
<%@ taglib uri="http://www.springframework.org/tags/form" prefix="form" %>
然後我們頁面中的國際化資訊可以可這顯示出來
<form:form action="login" method="post" commandName="user">
        <fmt:message key="name"/>
        <form:input path="username"/>
        <form:errors path="username"/>
        <br>
        <fmt:message key="pass"/>
        <form:input path="userpass"/>
        <input type="submit" value="<spring:message code="submit"/>">
 </form:form>
我們還可以完成一個語言切換功能,我們在頁面上加入兩個超連結,當接收到請求,SpringMVC會在上下文中查詢一個本地解析器,找到後使用它獲取請求所對應的本地化型別資訊,SpringMVC還允許還允許裝配一個動態更改本地化型別的攔截器,這樣通過指定一個請求引數就可以控制單個請求的本地化型別。
<a href="login?locale=zh_CN">中文</a>
<a href="login?locale=en_US">英文</a>
SpringMVC接到請求後首先會判斷有沒有這個引數,如果有這個引數就新增到session裡面,如果沒這個引數會到session裡面去找,session裡面沒有找到會預設讀取瀏覽器的語言。
2.檔案上傳
SpringMVC的檔案上傳非常的簡單,它直接提供了直接的支援,這種支援是通過即插即用的MultipartResolver介面實現的。Spring用它的實現類CommonsMultipartResolver來實現。SpringMVC上下文中沒有自動裝配所以需要我們手動來配置。我們這裡就直接實現一個多檔案上傳,多檔案上傳會了害怕單檔案上傳不會?
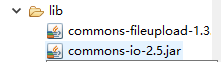
配置之前我們首先來匯入檔案上傳的jar包,這些包在我們spring中是沒有的。
然後我們手動配置下Bean
<!-- 配置檔案上傳 -->
    <bean id="multipartResolver"
        class="org.springframework.web.multipart.commons.CommonsMultipartResolver">
        <!-- 指定預設的編碼格式 -->
        <property name="defaultEncoding" value="UTF-8" />
        <!-- 指定允許上傳的檔案大小,單位Byte -->
        <property name="maxUploadSize" value="512000" />
    </bean>
這個bean裡還可以設定型別啊什麼什麼的,有需要的可以閱讀原始碼。
<form action="${pageContext.request.contextPath}/upload" method="post" enctype="multipart/form-data">
        <input type="file" name="file"/><br>
        <input type="file" name="file"/><br>
        <input type="file" name="file"/><br>
        <input type="submit" value="submit">
    </form>
enctype="multipart/form-data" 注意檔案上傳必須加上這個,而且必須是post請求。然後我們來看下我們伺服器是怎麼接收到檔案的,多檔案上傳使用 MultipartFile[] 並且一定要在引數前加上註解 @RequestParam("file")否則會報錯。單檔案上傳我們只需要使用一個MultipartFile物件,並且無需加註解。
/**
     *    單檔案上傳 :  MultipartFile file
     *    多檔案上傳 :  @RequestParam("file") MultipartFile[] file
     *    多檔案上傳必須加上 @RequestParam("file")註解否則會報錯
     *  @author:MiYa.
     *  @time:2018-9-28 11:50
     */
    @RequestMapping(value="upload",method=RequestMethod.POST)
    public String testFileUpload(HttpServletRequest request , @RequestParam("file") MultipartFile[] file){
        for (int i = 0; i < file.length; i++) {
            MultipartFile multipartFile = file[i];
            System.out.println(" ContentType: " + multipartFile.getContentType());
            System.out.println(" Name: " + multipartFile.getName());
            System.out.println(" OriginalFilename: " + multipartFile.getOriginalFilename());
            System.out.println(" Size: " + multipartFile.getSize());
            //判斷是否提交檔案,如果沒有那麼跳過上傳
            if(multipartFile.isEmpty()){
                continue;
            }
            // 獲取檔案的上傳路徑
            String uploadpath = request.getServletContext().getRealPath("uploads");
            //獲取檔名稱
            String filename = multipartFile.getOriginalFilename();
            //擷取檔案字尾
            String fileext = filename.substring(filename.lastIndexOf("."));
            //生成新的隨機檔名稱
            String newfileName = UUID.randomUUID() + fileext;
            //檔案儲存路徑
            File savepath = new File(uploadpath + "/" + newfileName);
            //上傳檔案
            try {
                multipartFile.transferTo(savepath);
            } catch (IllegalStateException e) {
                e.printStackTrace();
            } catch (IOException e) {
                e.printStackTrace();
            }

        }
        return "welcome";
    }
整理下MultipartFile經常使用的方法:
isEmpty():判斷是否提交檔案上來
getContextType():獲取檔案型別
getName():獲取表單元素名稱
getOriginalFilename():獲取檔名
getSize():獲取檔案大小
getBytes():獲取位元組陣列