
Spring Security學習(一):自定義登入認證
阿新 • • 發佈:2021-02-19
技術標籤:Spring Securityjava
一、前言
本篇部落格主要記錄Spring Security自定義登入認證,以及在前後端分離的情況下認證成功或失敗返回json資料的流程。
二、Spring Security 自定義登入認證處理
1.配置SecurityConfig類,繼承自WebSecurityConfigurerAdapter類
@Configuration
public class SecurityConfig extends WebSecurityConfigurerAdapter {
//具體程式碼實現都在下面
}
- 為了方便,先配置不使用密碼加密
@Bean
PasswordEncoder passwordEncoder - 為了方便,直接使用configure(AuthenticationManagerBuilder)方法手動建立使用者賬號密碼,用於登入認證
@Override
protected void configure(AuthenticationManagerBuilder auth) throws Exception {
//使用者名稱為alan,密碼為123,使用者角色為admin
auth.inMemoryAuthentication()
.withUser - 忽略靜態資源
@Override
public void configure(WebSecurity web) throws Exception {
    web.ignoring().antMatchers("/js/**", "/css/**", "/images/**");
}
- 配置請求攔截及對映,其中使用addFilterAt方法配置自定義過濾器。預設的UsernamePasswordAuthenticationFilter過濾器中表單登入要通過key/value的形式傳遞引數,而不能通過JSON形式傳遞引數;所以自定義一個過濾器實現JSON形式傳遞引數
@Override
protected void configure(HttpSecurity http) throws Exception {
     http.authorizeRequests()
             .anyRequest().authenticated()
             .and()
             .formLogin()
             .loginPage("/login.html") //自定義登入頁面
             .permitAll() //表示不攔截登入頁面
             .and()
             .logout().logoutUrl("/user/logout") //登出連結
             .logoutSuccessHandler((request, response, auth) -> {
                 response.setContentType("application/json;charset=utf-8");
                 PrintWriter out = response.getWriter();
                 Map<String, Object> maps = new HashMap<>();
                 maps.put("status", 200); //設定狀態碼
                 maps.put("msg", "退出成功"); //使用者資訊
                 out.write(new ObjectMapper().writeValueAsString(maps));
                 out.flush();
                 out.close();
             }).permitAll()
             .and()
             .csrf().disable();
      //新增自定義的過濾器
     http.addFilterAt(myFilter(), UsernamePasswordAuthenticationFilter.class);
 }
- 配置自定義過濾器方法myFilter(),其中的UserAuthenticationFilter類是自定義的filter類,其實現見後面的程式碼;在myFilter()方法中配置登入的介面,以及成功和失敗返回的結果
@Bean
UserAuthenticationFilter myFilter() throws Exception {
    UserAuthenticationFilter filter = new UserAuthenticationFilter();
    filter.setFilterProcessesUrl("/user/login"); //設定登入介面
    //自定義認證成功返回結果
    filter.setAuthenticationSuccessHandler(new AuthenticationSuccessHandler() {
        @Override
        public void onAuthenticationSuccess(HttpServletRequest request, HttpServletResponse response, Authentication auth)
                throws IOException, ServletException {
            response.setContentType("application/json;charset=utf-8");
            PrintWriter out = response.getWriter();
            Map<String, Object> maps = new HashMap<>();
            maps.put("status", 200); //設定狀態碼
            maps.put("msg", auth.getPrincipal()); //使用者資訊
            out.write(new ObjectMapper().writeValueAsString(maps));
            out.flush();
            out.close();
        }
    });
    //自定義認證失敗返回結果
    filter.setAuthenticationFailureHandler(new AuthenticationFailureHandler() {
        @Override
        public void onAuthenticationFailure(HttpServletRequest request, HttpServletResponse response, AuthenticationException e)
                throws IOException, ServletException {
            response.setContentType("application/json;charset=utf-8");
            PrintWriter out = response.getWriter();
            Map<String, Object> maps = new HashMap<>();
            maps.put("status", 500);
            maps.put("msg", e.getMessage());
            out.write(new ObjectMapper().writeValueAsString(maps));
            out.flush();
            out.close();
        }
    });
    filter.setAuthenticationManager(super.authenticationManagerBean());
    return filter;
}
2. 自定義過濾器類UserAuthenticationFilter,繼承自UsernamePasswordAuthenticationFilter類
public class UserAuthenticationFilter extends UsernamePasswordAuthenticationFilter {
    @Override
    public Authentication attemptAuthentication(HttpServletRequest request, HttpServletResponse response) throws AuthenticationException {
        String username = null;
        String password = null;
        //判斷是否以json形式傳遞引數
        if (request.getContentType().equals(MediaType.APPLICATION_JSON_VALUE)) {
            try {
                Map<String, String> maps = new ObjectMapper().readValue(request.getInputStream(), Map.class);
                username = maps.get("username");
                password = maps.get("password");
            } catch (IOException e) {
                e.printStackTrace();
            }
            UsernamePasswordAuthenticationToken token = new UsernamePasswordAuthenticationToken(username, password);
            setDetails(request, token);
            return this.getAuthenticationManager().authenticate(token);
        }
        //否則使用原來的key-value傳遞引數
        return super.attemptAuthentication(request, response);
    }
}
三、前端登入頁面
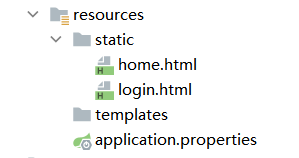
這裡在SpringBoot專案中的resources下的static目錄下新建兩個頁面login.html和home.html來模擬前後端分離登入場景。在login.html中點選登入按鈕,向後臺傳送ajax請求,根據返回的響應碼,由前端跳轉到home.html頁面;在home.html中點選退出按鈕,向後臺傳送ajax請求,根據返回結果由前端跳轉到login.html頁面。
1.登入頁login.html
<!DOCTYPE html>
<html lang="en">
<head>
    <meta charset="UTF-8">
    <title>登入</title>
    <script src="https://cdn.bootcdn.net/ajax/libs/jquery/3.5.1/jquery.min.js"></script>
</head>
<body>
    <h1>系統登入</h1>
    <form>
        <span>使用者名稱稱</span><input type="text" name="username" id="username"><br>
        <span>使用者密碼</span><input type="password" name="password" id="password"><br>
        <button onclick="login()">登入</button>
    </form>
    <script>
        function login() {
            var username = document.getElementById("username").value;
            var password = document.getElementById("password").value;
            $.ajax({
                type: "POST",
                dataType: "json",
                url: '/user/login',
                contentType: "application/json",
                data: JSON.stringify({
                    "username": username,
                    "password": password
                }),
                success: function (result) {
                    console.log(result)
                    if (result.status == 200) {
                        alert("登入成功");
                        window.location.href = "home.html";
                    } else {
                        alert("登入失敗" + result.msg);
                    }
                },
                error: function () {
                    alert("系統錯誤");
                }
            });
        }
    </script>
</body>
</html>
2.主頁home.html
<!DOCTYPE html>
<html lang="en">
<head>
    <meta charset="UTF-8">
    <title>Title</title>
    <script src="https://cdn.bootcdn.net/ajax/libs/jquery/3.5.1/jquery.min.js"></script>
</head>
<body>
    主頁
    <a href="javascript:;" onclick="logout()">退出</a>
    <script>
        function logout() {
            $.ajax({
                url: '/user/logout',
                dataType: 'json',
                type: 'GET',
                success: function (result) {
                    if (result.status === 200) {
                        alert(result.msg);
                        window.location.href = 'login.html';
                    }
                },
                error: function (result) {
                    alert('退出異常');
                }
            });
        }
    </script>
</body>
</html>
四、總結
- 使用Spring Security做登入認證,不需要自己寫contorller類實現,全部實現都是在一系列的過濾器鏈中完成的。
- Spring Security中預設表單登入是以key/value形式傳遞引數的,要想通過JSON形式傳遞引數,需要自定義一個過濾器來實現,並通過http.addFilterAt方法新增到配置中。