
程式設計師也是會浪漫的->打造浪漫的Android表白程式
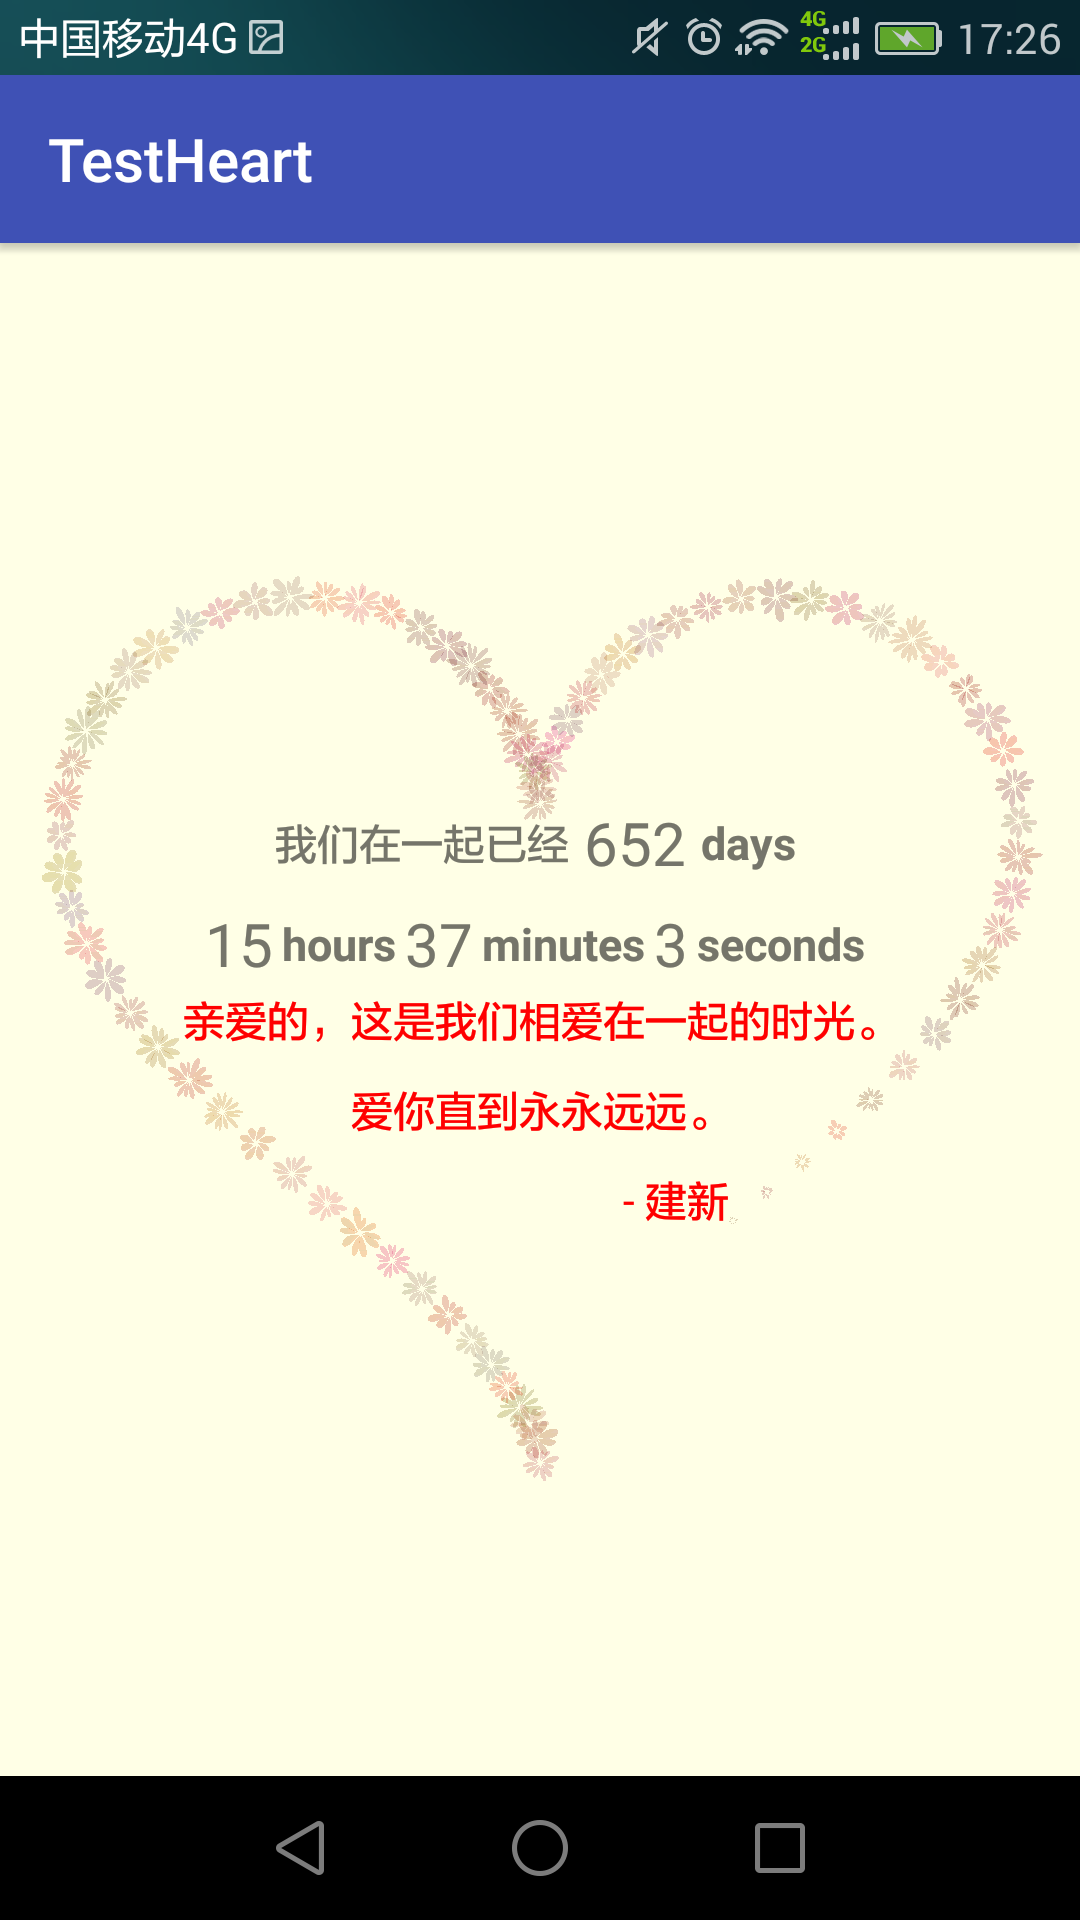
一年前,看到過有個牛人用HTML5繪製了浪漫的愛心表白動畫,後來又在華超的這篇文章上看到大神用Android寫出了相同的效果,於是也動手寫了一下,並加了一些功能,感謝大神的指引,寫給女票看她很開心呢。地址在這:浪漫程式設計師 HTML5愛心表白動畫。發現原來程式設計師也是可以很浪……漫…..的。那麼在Android怎麼打造如此這個效果呢?參考了一下前面Html5的演算法,在Android中實現了類似的效果。先貼上最終效果圖:


生成心形線
心形線的表示式可以參考:桃心線。裡面對桃心線的表示式解析的挺好。可以通過使用極座標的方式,傳入角度和距離(常量)計算出對應的座標點。其中距離是常量值,不需改變,變化的是角度。
桃心線極座標方程式為:
x=16×sin3α
y=13×cosα−5×cos2α−2×cos3α−cos4α如果生成的桃心線不夠大,可以把x、y乘以一個常數,使之變大。考慮到大部分人都不願去研究具體的數學問題,我們直接把前面HTML5的JS程式碼直接翻譯成Java程式碼就好。程式碼如下:
public Point getHeartPoint(float angle) {
float t = (float) (angle / Math.PI);
float x = (float) (19.5 * (16 * Math.pow(Math.sin(t), 3)));
float y = (float 其中offsetX和offsetY是偏移量。使用偏移量主要是為了能讓心形線處於中央。offsetX和offsetY的值分別為:
offsetX = width / 2;
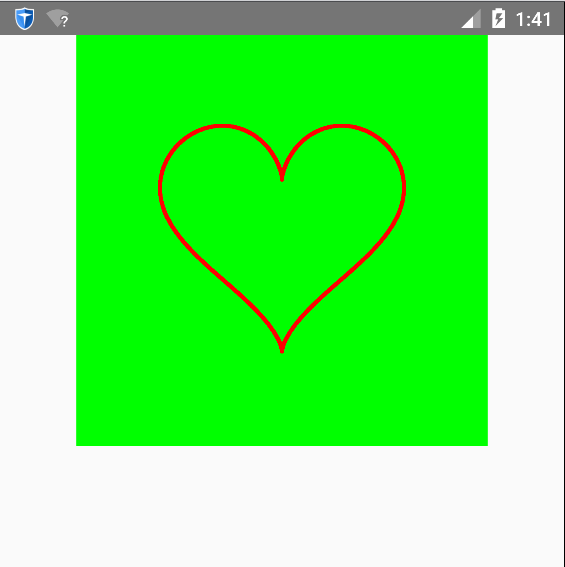
offsetY = height / 2 - 55;通過這個函式,我們可以將角度從(0,180)變化,不斷取點並畫點將這個心形線顯示出來。好了,我們自定義一個View,然後把這個心形線畫出來吧!
 @Override
  protected void onDraw(Canvas canvas) {
       float angle = 10;
       while (angle < 180) {
           Point p = getHeartPoint(angle);
           canvas.drawPoint(p.x, p.y, paint);
           angle = angle + 0.02f;
        }
   }
執行結果如下:
繪製花瓣原理
我們想要的並不是簡單繪製一個桃心線,要的是將花朵在桃心線上擺放。首先,得要知道怎麼繪製花朵,而花朵是由一個個花瓣組成。因此繪製花朵的核心是繪製花瓣。繪製花瓣的原理是:3次貝塞爾曲線。三次貝塞爾曲線是由兩個端點和兩個控制點決定。假設花芯是一個圓,有n個花瓣,那麼兩個端點與花芯的圓心連線之間的夾角即為360/n。因此可以根據花瓣數量和花芯半徑確定每個花瓣的位置。將兩個端點與花芯的圓心連線的延長線分別確定另外兩個控制點。通過隨機生成花芯半徑、每個花瓣的起始角以及隨機確定延長線得到兩個控制點,可以繪製一個隨機的花朵。引數的改變如下圖所示:
將花朵繪製到桃心線上
首先定義花瓣類Petal:
 package com.example.administrator.testheart;

import android.graphics.Canvas;
import android.graphics.Paint;
import android.graphics.Path;

public class Petal {
    private float stretchA;//第一個控制點延長線倍數
    private float stretchB;//第二個控制點延長線倍數
    private float startAngle;//起始旋轉角,用於確定第一個端點
    private float angle;//兩條線之間夾角,由起始旋轉角和夾角可以確定第二個端點
    private int radius = 2;//花芯的半徑
    private float growFactor;//增長因子,花瓣是有開放的動畫效果,這個引數決定花瓣展開速度
    private int color;//花瓣顏色
    private boolean isFinished = false;//花瓣是否綻放完成
    private Path path = new Path();//用於儲存三次貝塞爾曲線
    private Paint paint = new Paint();//畫筆
    //建構函式,由花朵類呼叫
    public Petal(float stretchA, float stretchB, float startAngle, float angle, int color, float growFactor) {
        this.stretchA = stretchA;
        this.stretchB = stretchB;
        this.startAngle = startAngle;
        this.angle = angle;
        this.color = color;
        this.growFactor = growFactor;
        paint.setColor(color);
    }
    //用於渲染花瓣,通過不斷更改半徑使得花瓣越來越大
    public void render(Point p, int radius, Canvas canvas) {
        if (this.radius <= radius) {
            this.radius += growFactor; // / 10;
        } else {
            isFinished = true;
        }
        this.draw(p, canvas);
    }

    //繪製花瓣,引數p是花芯的圓心的座標
    private void draw(Point p, Canvas canvas) {
        if (!isFinished) {

            path = new Path();
            //將向量(0,radius)旋轉起始角度,第一個控制點根據這個旋轉後的向量計算
            Point t = new Point(0, this.radius).rotate(MyUtil.degrad(this.startAngle));
            //第一個端點,為了保證圓心不會隨著radius增大而變大這裡固定為3
            Point v1 = new Point(0, 3).rotate(MyUtil.degrad(this.startAngle));
            //第二個端點
            Point v2 = t.clone().rotate(MyUtil.degrad(this.angle));
            //延長線,分別確定兩個控制點
            Point v3 = t.clone().mult(this.stretchA);
            Point v4 = v2.clone().mult(this.stretchB);
            //由於圓心在p點,因此,每個點要加圓心座標點
            v1.add(p);
            v2.add(p);
            v3.add(p);
            v4.add(p);
            path.moveTo(v1.x, v1.y);
            //引數分別是:第一個控制點,第二個控制點,終點
            path.cubicTo(v3.x, v3.y, v4.x, v4.y, v2.x, v2.y);
        }
        canvas.drawPath(path, paint);
    }

}
花瓣類是最重要的類,因為真正繪製在螢幕上的是一個個小花瓣。每個花朵包含一系列花瓣,花朵類Bloom如下:
package com.example.administrator.testheart;

import android.graphics.Canvas;

import java.util.ArrayList;

public class Bloom {
    private int color;//整個花朵的顏色
    private Point point;//花芯圓心
    private int radius; //花芯半徑
    private ArrayList<Petal> petals;//用於儲存花瓣

    public Point getPoint() {
        return point;
    }


    public Bloom(Point point, int radius, int color, int petalCount) {
        this.point = point;
        this.radius = radius;
        this.color = color;
        petals = new ArrayList<>(petalCount);


        float angle = 360f / petalCount;
        int startAngle = MyUtil.randomInt(0, 90);
        for (int i = 0; i < petalCount; i++) {
            //隨機產生第一個控制點的拉伸倍數
            float stretchA = MyUtil.random(Garden.Options.minPetalStretch, Garden.Options.maxPetalStretch);
            //隨機產生第二個控制地的拉伸倍數
            float stretchB = MyUtil.random(Garden.Options.minPetalStretch, Garden.Options.maxPetalStretch);
            //計算每個花瓣的起始角度
            int beginAngle = startAngle + (int) (i * angle);
            //隨機產生每個花瓣的增長因子(即綻放速度)
            float growFactor = MyUtil.random(Garden.Options.minGrowFactor, Garden.Options.maxGrowFactor);
            //建立一個花瓣,並新增到花瓣列表中
            this.petals.add(new Petal(stretchA, stretchB, beginAngle, angle, color, growFactor));
        }
    }

    //繪製花朵
    public void draw(Canvas canvas) {
        Petal p;
        for (int i = 0; i < this.petals.size(); i++) {
            p = petals.get(i);
            //渲染每朵花朵
            p.render(point, this.radius, canvas);

        }

    }

    public int getColor() {
        return color;
    }
}
接下來是花園類Garden,主要用於建立花朵以及一些相關配置:
package com.example.administrator.testheart;

import java.util.ArrayList;

public class Garden {

    //建立一個隨機的花朵
    public Bloom createRandomBloom(int x, int y) {
        //建立一個隨機的花朵半徑
        int radius = MyUtil.randomInt(Options.minBloomRadius, Options.maxBloomRadius);
        //建立一個隨機的花朵顏色
        int color = MyUtil.randomrgba(Options.minRedColor, Options.maxRedColor, Options.minGreenColor, Options.maxGreenColor, Options.minBlueColor, Options.maxBlueColor, Options.opacity);
        //建立隨機的花朵中花瓣個數
        int petalCount = MyUtil.randomInt(Options.minPetalCount, Options.maxPetalCount);
        return createBloom(x, y, radius, color, petalCount);
    }

    //建立花朵
    public Bloom createBloom(int x, int y, int radius, int color, int petalCount) {
        return new Bloom(new Point(x, y), radius, color, petalCount);
    }

    static class Options {
        //用於控制產生隨機花瓣個數範圍
        public static int minPetalCount = 8;
        public static int maxPetalCount = 15;
        //用於控制產生延長線倍數範圍
        public static float minPetalStretch = 2f;
        public static float maxPetalStretch = 3.5f;
        //用於控制產生隨機增長因子範圍,增長因子決定花瓣綻放速度
        public static float minGrowFactor = 1f;
        public static float maxGrowFactor = 1.1f;
        //用於控制產生花朵半徑隨機數範圍
        public static int minBloomRadius = 8;
        public static int maxBloomRadius = 10;
        //用於產生隨機顏色
        public static int minRedColor = 128;
        public static int maxRedColor = 255;
        public static int minGreenColor = 0;
        public static int maxGreenColor = 128;
        public static int minBlueColor = 0;
        public static int maxBlueColor = 128;
        //花瓣的透明度
        public static int opacity = 50;//0.1
    }
}
考慮到重新整理的比較頻繁,選擇使用SurfaceView作為顯示檢視。自定義一個HeartView繼承SurfaceView。程式碼如下:
package com.example.administrator.testheart;

import android.content.Context;
import android.graphics.Bitmap;
import android.graphics.Canvas;
import android.graphics.Color;
import android.graphics.Paint;
import android.util.AttributeSet;
import android.view.SurfaceHolder;
import android.view.SurfaceView;

import java.util.ArrayList;

public class HeartView extends SurfaceView implements SurfaceHolder.Callback {
    SurfaceHolder surfaceHolder;
    int offsetX;
    int offsetY;
    private Garden garden;
    private int width;
    private int height;
    private Paint backgroundPaint;
    private boolean isDrawing = false;
    private Bitmap bm;
    private Canvas canvas;
    private int heartRadio = 1;

    public HeartView(Context context) {
        super(context);
        init();
    }

    public HeartView(Context context, AttributeSet attrs) {
        super(context, attrs);
        init();
    }


    private void init() {
        surfaceHolder = getHolder();
        surfaceHolder.addCallback(this);
        garden = new Garden();
        backgroundPaint = new Paint();
        backgroundPaint.setColor(Color.rgb(0xff, 0xff, 0xe0));


    }

    ArrayList<Bloom> blooms = new ArrayList<>();

    public Point getHeartPoint(float angle) {
        float t = (float) (angle / Math.PI);
        float x = (float) (heartRadio * (16 * Math.pow(Math.sin(t), 3)));
        float y = (float) (-heartRadio * (13 * Math.cos(t) - 5 * Math.cos(2 * t) - 2 * Math.cos(3 * t) - Math.cos(4 * t)));

        return new Point(offsetX + (int) x, offsetY + (int) y);
    }


    //繪製列表裡所有的花朵
    private void drawHeart() {
        canvas.drawRect(0, 0, width, height, backgroundPaint);
        for (Bloom b : blooms) {
            b.draw(canvas);
        }
        Canvas c = surfaceHolder.lockCanvas();

        c.drawBitmap(bm, 0, 0, null);

        surfaceHolder.unlockCanvasAndPost(c);

    }

    public void reDraw() {
        blooms.clear();


        drawOnNewThread();
    }

    @Override
    public void draw(Canvas canvas) {
        super.draw(canvas);

    }

    //開啟一個新執行緒繪製
    private void drawOnNewThread() {
        new Thread() {
            @Override
            public void run() {
                if (isDrawing) return;
                isDrawing = true;

                float angle = 10;
                while (true) {

                    Bloom bloom = getBloom(angle);
                    if (bloom != null) {
                        blooms.add(bloom);
                    }
                    if (angle >= 30) {
                        break;
                    } else {
                        angle += 0.2;
                    }
                    drawHeart();
                    try {
                        sleep(20);
                    } catch (InterruptedException e) {
                        e.printStackTrace();
                    }
                }
                isDrawing = false;
            }
        }.start();
    }


    private Bloom getBloom(float angle) {

        Point p = getHeartPoint(angle);

        boolean draw = true;
        /**迴圈比較新的座標位置是否可以建立花朵,
         * 為了防止花朵太密集
         * */
        for (int i = 0; i < blooms.size(); i++) {

            Bloom b = blooms.get(i);
            Point bp = b.getPoint();
            float distance = (float) Math.sqrt(Math.pow(p.x - bp.x, 2) + Math.pow(p.y - bp.y, 2));
            if (distance < Garden.Options.maxBloomRadius * 1.5) {
                draw = false;
                break;
            }
        }
        //如果位置間距滿足要求,就在該位置建立花朵並將花朵放入列表
        if (draw) {
            Bloom bloom = garden.createRandomBloom(p.x, p.y);
            return bloom;
        }
        return null;
    }


    @Override
    public void surfaceCreated(SurfaceHolder holder) {


    }

    @Override
    public void surfaceChanged(SurfaceHolder holder, int format, int width, int height) {

        this.width = width;
        this.height = height;
        //我的手機寬度畫素是1080,發現引數設定為30比較合適,這裡根據不同的寬度動態調整引數
        heartRadio = width * 30 / 1080;

        offsetX = width / 2;
        offsetY = height / 2 - 55;
        bm = Bitmap.createBitmap(width, height, Bitmap.Config.RGB_565);
        canvas = new Canvas(bm);
        drawOnNewThread();
    }

    @Override
    public void surfaceDestroyed(SurfaceHolder holder) {

    }
}
還有兩個比較重要的工具類
Point.java儲存點資訊,或者說是向量資訊。包含向量的基本運算。
package com.example.administrator.testheart;

public class Point {

    public int x;
    public int y;

    public Point(int x, int y) {
        this.x = x;
        this.y = y;
    }

    //旋轉
    public Point rotate(float theta) {
        int x = this.x;
        int y = this.y;
        this.x = (int) (Math.cos(theta) * x - Math.sin(theta) * y);
        this.y = (int) (Math.sin(theta) * x + Math.cos(theta) * y);
        return this;
    }

    //乘以一個常數
    public Point mult(float f) {
        this.x *= f;
        this.y *= f;
        return this;
    }

    //複製
    public Point clone() {
        return new Point(this.x, this.y);
    }

    //該點與圓心距離
    public float length() {
        return (float) Math.sqrt(this.x * this.x + this.y * this.y);
    }

    //向量相減
    public Point subtract(Point p) {
        this.x -= p.x;
        this.y -= p.y;
        return this;
    }

    //向量相加
    public Point add(Point p) {
        this.x += p.x;
        this.y += p.y;
        return this;
    }

    public Point set(int x, int y) {
        this.x = x;
        this.y = y;
        return this;
    }
}
工具類MyUtil.java主要是產生隨機數、顏色等
package com.example.administrator.testheart;

import android.graphics.Color;

public class MyUtil {

    public static float circle = (float) (2 * Math.PI);

    public static int rgba(int r, int g, int b, int a) {
        return Color.argb(a, r, g, b);
    }

    public static int randomInt(int min, int max) {
        return (int) Math.floor(Math.random() * (max - min + 1)) + min;
    }

    public static float random(float min, float max) {
        return (float) (Math.random() * (max - min) + min);
    }

    //產生隨機的argb顏色
    public static int randomrgba(int rmin, int rmax, int gmin, int gmax, int bmin, int bmax, int a) {
        int r = Math.round(random(rmin, rmax));
        int g = Math.round(random(gmin, gmax));
        int b = Math.round(random(bmin, bmax));
        int limit = 5;
        if (Math.abs(r - g) <= limit && Math.abs(g - b) <= limit && Math.abs(b - r) <= limit) {
            return rgba(rmin, rmax, gmin, gmax);
        } else {
            return rgba(r, g, b, a);
        }
    }

    //角度轉弧度
    public static float degrad(float angle) {
        return circle / 360 * angle;
    }
}
Activity自動跳轉及日期計時及打字機效果實現類MainActivity
package com.example.administrator.testheart;

import android.graphics.Color;
import android.os.Bundle;
import android.os.Handler;
import android.os.Message;
import android.support.v7.app.AppCompatActivity;
import android.view.MotionEvent;
import android.view.View;
import android.widget.RelativeLayout;
import android.widget.TextView;

import java.util.Timer;
import java.util.TimerTask;

public class MainActivity extends AppCompatActivity {

    HeartView heartView;
    private TextView tv_text;
    private TextView tv_text_1;
    private TextView tv_text_2;
    private int clo = 0;

    private RelativeLayout countDown;
    // 倒計時
    private TextView daysTv, hoursTv, minutesTv, secondsTv;
    private long mDay = 652;
    private long mHour = 15;
    private long mMin = 37;
    private long mSecond = 00;// 天 ,小時,分鐘,秒
    private boolean isRun = true;

    private Handler timeHandler = new Handler() {

        @Override
        public void handleMessage(Message msg) {
            super.handleMessage(msg);
            if (msg.what==1) {
                computeTime();
                daysTv.setText(mDay+"");
                hoursTv.setText(mHour+"");
                minutesTv.setText(mMin+"");
                secondsTv.setText(mSecond+"");
                if (mDay==0&&mHour==0&&mMin==0&&mSecond==0) {
                    countDown.setVisibility(View.GONE);
                }
            }
        }
    };

    @Override
    protected void onCreate(Bundle savedInstanceState) {
        super.onCreate(savedInstanceState);
        setContentView(R.layout.activity_main);
        heartView = (HeartView) findViewById(R.id.surfaceView);
        tv_text = (TextView) findViewById(R.id.myword);
        tv_text_1 = (TextView) findViewById(R.id.myword_1);
        tv_text_2 = (TextView) findViewById(R.id.myword_2);
        shark();

        countDown = (RelativeLayout) findViewById(R.id.countdown_layout);
        daysTv = (TextView) findViewById(R.id.days_tv);
        hoursTv = (TextView) findViewById(R.id.hours_tv);
        minutesTv = (TextView) findViewById(R.id.minutes_tv);
        secondsTv = (TextView) findViewById(R.id.seconds_tv);

        startRun();
    }

    @Override
    public boolean onTouchEvent(MotionEvent event) {
        heartView.reDraw();
        return super.onTouchEvent(event);
    }

    public void reDraw(View v) {

        heartView.reDraw();
    }

    private void shark() {
        Timer timer = new Timer();
        TimerTask taskcc = new TimerTask() {
            public void run() {
                runOnUiThread(new Runnable() {
                    public void run() {
                        if (clo == 0) {
                            clo = 1;
                            tv_text.setTextColor(Color.TRANSPARENT);
                            tv_text_1.setTextColor(Color.TRANSPARENT);
                            tv_text_2.setTextColor(Color.TRANSPARENT);
                        } else {
                            if (clo == 1) {

                                clo = 2;
                                tv_text.setTextColor(Color.YELLOW);
                                tv_text_1.setTextColor(Color.YELLOW);
                                tv_text_2.setTextColor(Color.YELLOW);
                            } else if (clo == 2) {

                                clo = 3;
                                tv_text.setTextColor(Color.RED);
                                tv_text_1.setTextColor(Color.RED);
                                tv_text_2.setTextColor(Color.RED);

                            } else if (clo == 3){

                                clo = 4;
                                tv_text.setTextColor(Color.BLACK);
                                tv_text_1.setTextColor(Color.BLACK);
                                tv_text_2.setTextColor(Color.BLACK);
                            } else if (clo == 4){

                                clo = 5;
                                tv_text.setTextColor(Color.WHITE);
                                tv_text_1.setTextColor(Color.WHITE);
                                tv_text_2.setTextColor(Color.WHITE);
                            }else if (clo == 5){

                                clo = 6;
                                tv_text.setTextColor(Color.GREEN);
                                tv_text_1.setTextColor(Color.GREEN);
                                tv_text_2.setTextColor(Color.GREEN);
                            } else if (clo == 6){

                                clo = 7;
                                tv_text.setTextColor(Color.MAGENTA);
                                tv_text_1.setTextColor(Color.MAGENTA);
                                tv_text_2.setTextColor(Color.MAGENTA);
                            }else if (clo == 7){

                                clo = 8;
                                tv_text.setTextColor(Color.CYAN);
                                tv_text_1.setTextColor(Color.CYAN);
                                tv_text_2.setTextColor(Color.CYAN);
                            }else if (clo == 8){

                                clo = 9;
                                tv_text.setTextColor(Color.DKGRAY);
                                tv_text_1.setTextColor(Color.DKGRAY);
                                tv_text_2.setTextColor(Color.DKGRAY);
                            }
                            else if (clo == 9){

                                clo = 10;
                                tv_text.setTextColor(Color.GRAY);
                                tv_text_1.setTextColor(Color.GRAY);
                                tv_text_2.setTextColor(Color.GRAY);
                            }else if (clo == 10){

                                clo = 11;
                                tv_text.setTextColor(Color.LTGRAY);
                                tv_text_1.setTextColor(Color.LTGRAY);
                                tv_text_2.setTextColor(Color.LTGRAY);
                            }else {
                                clo = 0;
                                    tv_text.setTextColor(Color.BLUE);
                                tv_text_1.setTextColor(Color.BLUE);
                                tv_text_2.setTextColor(Color.BLUE);
                            }
                        }
                    }
                });
            }
        };
        timer.schedule(taskcc, 1, 1500);  //<span style="color: rgb(85, 85, 85); font-family: 'microsoft yahei'; font-size: 15px; line-height: 35px;">第二個引數分別是delay(多長時間後執行),第三個引數是:duration(執行間隔)單位為:ms</span>
    }

    /**
     * 開啟計時
     */
    private void startRun() {
        new Thread(new Runnable() {

            @Override
            public void run() {
                // TODO Auto-generated method stub
                while (isRun) {
                    try {
                        Thread.sleep(1000); // sleep 1000ms
                        Message message = Message.obtain();
                        message.what = 1;
                        timeHandler.sendMessage(message);
                    } catch (Exception e) {
                        e.printStackTrace();
                    }
                }
            }
        }).start();
    }

    /**
     * 倒計時計算
     */
    private void computeTime() {
        mSecond++;
        if (mSecond > 60) {
            mSecond = 0;
            mMin++;
            if (mMin > 60) {
                mMin = 0;
                mHour++;
                if (mHour > 24) {
                    mHour = 0;
                    // 倒計時結束
                    mDay++;
                }
            }
        }
    }
}
到了這一步就可以實現上面的效果了。
原始碼地址在這。