
Mybatis執行原理及原始碼解析
Mybatis原始碼解析
一、前言
本文旨在mybatis原始碼解析,將整個mybatis執行原理講解清楚,本文程式碼地址:
https://github.com/lchpersonal/mybatis-learn
本文使用的mybatis版本:3.2.8,
jdk版本:1.8
資料庫版本:mysql 5.6,資料庫指令碼如下,此外在原始檔為:resources/mybatis.sql
-- 匯出 mybatis 的資料庫結構
CREATE DATABASE IF NOT EXISTS `mybatis` /*!40100 DEFAULT CHARACTER SET utf8 */;
USE `mybatis`; 本文主要是探究mybatis執行原理,所以示例專案非常簡單,目錄結構如下:
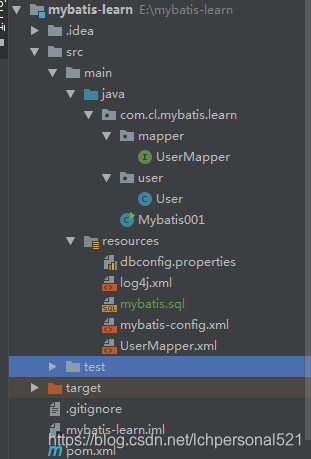
mybatis主配置檔案mybatis-config.xml內容如下:
<?xml version="1.0" encoding="UTF-8" ?>
<!DOCTYPE configuration
PUBLIC "-//mybatis.org//DTD Config 3.0//EN"
"http://mybatis.org/dtd/mybatis-3-config.dtd"> UserMapper.xml的內容如下:
<?xml version="1.0" encoding="UTF-8" ?>
<!DOCTYPE mapper
        PUBLIC "-//mybatis.org//DTD Mapper 3.0//EN"
        "http://mybatis.org/dtd/mybatis-3-mapper.dtd">
<mapper namespace="com.cl.mybatis.learn.mapper.UserMapper">
    <select id="selectById" resultType="com.cl.mybatis.learn.user.User">
    select * from user where id = #{id}
  </select>
</mapper>
UserMapper.java內容如下:
package com.cl.mybatis.learn.mapper;
import com.cl.mybatis.learn.user.User;
/**
 * @Author: chengli
 * @Date: 2018/11/24 12:08
 */
public interface UserMapper {
    User selectById(int id);
}
Mybatis001.java 主函式內容如下:
package com.cl.mybatis.learn;
/**
 * @Author: chengli
 * @Date: 2018/11/24 12:00
 */
public class Mybatis001 {
    public static void main(String[] args) throws IOException {
        String resource = "mybatis-config.xml";
        InputStream inputStream = Resources.getResourceAsStream(resource);
        SqlSessionFactory sqlSessionFactory = new SqlSessionFactoryBuilder().build(inputStream);
        SqlSession session = sqlSessionFactory.openSession();
        try {
            UserMapper mapper = session.getMapper(UserMapper.class);
            System.out.println(mapper.selectById(1));
        } finally {
            session.close();
        }
    }
}
其他內容過於簡單,詳情請移步github下載原始碼檢視。
從main函式的執行步驟,本文將主要通過四個部分探討mybatis的原理:
- SqlSessionFactory的建立
- SqlSession的建立
- UserMapper代理的生成
- 資料庫查詢操作執行流程
二、SqlSessionFactory的建立
2.1 整體介紹
SqlSessionFactory的建立是SqlSessionFactoryBuilder通過mybatis主配置檔案構建出的:
public SqlSessionFactory build(InputStream inputStream, String environment, Properties properties) {
    SqlSessionFactory var5;
    try {
        XMLConfigBuilder parser = new XMLConfigBuilder(inputStream, environment, properties);
        /**主要邏輯在下面這行程式碼*/
        var5 = this.build(parser.parse());
    }
    ……
    ……
    return var5;
}
parser.parse()到底做了什麼呢?看如下程式碼:
private void parseConfiguration(XNode root) {
    try {
        /**解析配置檔案中的各種屬性*/
        this.propertiesElement(root.evalNode("properties"));
        /**解析別名配置*/
        this.typeAliasesElement(root.evalNode("typeAliases"));
        /**解析外掛配置*/
        this.pluginElement(root.evalNode("plugins"));
        /**解析物件工廠元素*/
        this.objectFactoryElement(root.evalNode("objectFactory"));
        this.objectWrapperFactoryElement(root.evalNode("objectWrapperFactory"));
        /**解析mybatis的全域性設定資訊*/
        this.settingsElement(root.evalNode("settings"));
        /**解析mybatis的環境配置*/
        this.environmentsElement(root.evalNode("environments"));
        this.databaseIdProviderElement(root.evalNode("databaseIdProvider"));
        /**解析型別處理器配置資訊*/
        this.typeHandlerElement(root.evalNode("typeHandlers"));
        /**解析mapper配置資訊*/
        this.mapperElement(root.evalNode("mappers"));
    } catch (Exception var3) {
        throw new BuilderException("Error parsing SQL Mapper Configuration. Cause: " + var3, var3);
    }
}
實際上就是解析主配置檔案中的各個節點,然後儲存在Configuration當中,然後使用Configuration創建出一個DefaultSqlsessionFactory物件,至此過程結束:
public SqlSessionFactory build(Configuration config) {
    return new DefaultSqlSessionFactory(config);
}
此處,我們可以重點關注如下兩個地方,看看具體在做了什麼動作:
this.pluginElement(root.evalNode("plugins")); this.mapperElement(root.evalNode("mappers"));
以上兩個點分別是外掛註冊,和mapper的掃描註冊。
2.2 外掛的註冊
首先我們先看一下原始碼:
    private void pluginElement(XNode parent) throws Exception {
        if (parent != null) {
            Iterator i$ = parent.getChildren().iterator();
            while(i$.hasNext()) {
                XNode child = (XNode)i$.next();
                String interceptor = child.getStringAttribute("interceptor");
                Properties properties = child.getChildrenAsProperties();
                /**例項化攔截器類*/
                Interceptor interceptorInstance = (Interceptor)this.resolveClass(interceptor).newInstance();
                interceptorInstance.setProperties(properties);
                /**將例項化的攔截器類放到configuration中的interceptorChain中*/
                this.configuration.addInterceptor(interceptorInstance);
            }
        }
    }
實際上就是通過interceptor標籤,解析出攔截器類,然後將其例項化並儲存到Configuration類中的InterceptorChain中,以備後用。
public void addInterceptor(Interceptor interceptor) {
    this.interceptorChain.addInterceptor(interceptor);
}
2.3 mappers的掃描與解析
this.mapperElement(root.evalNode("mappers"));
通過程式碼我們可以知道,這裡主要是解析mappers標籤的。我們先來看一下mappers標籤裡面是什麼:
<mappers>
    <mapper resource="UserMapper.xml"/>
</mappers>
所以他會去解析UserMapper.xml中的內容:
<mapper namespace="com.cl.mybatis.learn.mapper.UserMapper">
    <select id="selectById" resultType="com.cl.mybatis.learn.user.User">
    select * from user where id = #{id}
  </select>
</mapper>
我們看一下原始碼:
private void mapperElement(XNode parent) throws Exception {
  if (parent != null) {
    for (XNode child : parent.getChildren()) {
      /**如果子節點是配置的package,那麼進行包自動掃描處理*/
      if ("package".equals(child.getName())) {
        String mapperPackage = child.getStringAttribute("name");
        configuration.addMappers(mapperPackage);
      } else {
        String resource = child.getStringAttribute("resource");
        String url = child.getStringAttribute("url");
        String mapperClass = child.getStringAttribute("class");
        /**如果子節點配置的是resource、url、mapperClass,本文我們使用的是resource*/
        if (resource != null && url == null && mapperClass == null) {
          ErrorContext.instance().resource(resource);
          InputStream inputStream = Resources.getResourceAsStream(resource);
          XMLMapperBuilder mapperParser = new XMLMapperBuilder(inputStream, configuration, resource, configuration.getSqlFragments());
          mapperParser.parse();
        } else if (resource == null && url != null && mapperClass == null) {
          ErrorContext.instance().resource(url);
          InputStream inputStream = Resources.getUrlAsStream(url);
          /**解析resource引入的另外一個xml檔案*/
          XMLMapperBuilder mapperParser = new XMLMapperBuilder(inputStream, configuration, url, configuration.getSqlFragments());
          mapperParser.parse();
        } else if (resource == null && url == null && mapperClass != null) {
          Class<?> mapperInterface = Resources.classForName(mapperClass);
          configuration.addMapper(mapperInterface);
        } else {
          throw new BuilderException("A mapper element may only specify a url, resource or class, but not more than one.");
        }
      }
    }
  }
}
下面我們具體看一下他是如何解析另一個xml檔案的:
public void parse() {
  if (!configuration.isResourceLoaded(resource)) {
    /**解析sql語句*/
    configurationElement(parser.evalNode("/mapper"));
    configuration.addLoadedResource(resource);
    /**解析名稱空間,實際上就是對應繫結的介面類*/
    bindMapperForNamespace();
  }
  parsePendingResultMaps();
  parsePendingChacheRefs();
  parsePendingStatements();
}
下面我們來看一下 configurationElement(parser.evalNode("/mapper"))到底做了什麼:
public void parseStatementNode() {
String id = context.getStringAttribute("id");
String databaseId = context.getStringAttribute("databaseId");
if (!databaseIdMatchesCurrent(id, databaseId, this.requiredDatabaseId)) return;
Integer fetchSize = context.getIntAttribute("fetchSize");
Integer timeout = context.getIntAttribute("timeout");
String parameterMap = context.getStringAttribute("parameterMap");
String parameterType = context.getStringAttribute("parameterType");
Class<?> parameterTypeClass = resolveClass(parameterType);
String resultMap = context.getStringAttribute("resultMap");
String resultType = context.getStringAttribute("resultType");
String lang = context.getStringAttribute("lang");
LanguageDriver langDriver = getLanguageDriver(lang);
Class<?> resultTypeClass = resolveClass(resultType);
String resultSetType = context.getStringAttribute("resultSetType");
StatementType statementType = StatementType.valueOf(context.getStringAttribute("statementType", StatementType.PREPARED.toString()));
ResultSetType resultSetTypeEnum = resolveResultSetType(resultSetType);
String nodeName = context.getNode().getNodeName();
SqlCommandType sqlCommandType = SqlCommandType.valueOf(nodeName.toUpperCase(Locale.ENGLISH));
boolean isSelect = sqlCommandType == SqlCommandType.SELECT;
boolean flushCache = context.getBooleanAttribute("flushCache", !isSelect);
boolean useCache = context.getBooleanAttribute("useCache", isSelect);
boolean resultOrdered = context.getBooleanAttribute("resultOrdered", false);
// Include Fragments before parsing
XMLIncludeTransformer includeParser = new XMLIncludeTransformer(configuration, builderAssistant);
includeParser.applyIncludes(context.getNode());
// Parse selectKey after includes and remove them.
processSelectKeyNodes(id, parameterTypeClass, langDriver);
// Parse the SQL (pre: <selectKey> and <include> were parsed and removed)
SqlSource sqlSource = langDriver.createSqlSource(configuration, context, parameterTypeClass);
String resultSets = context.getStringAttribute("resultSets");
String keyProperty = context.getStringAttribute("keyProperty");
String keyColumn = context.getStringAttribute("keyColumn");
KeyGenerator keyGenerator;
String keyStatementId = id + SelectKeyGenerator.SELECT_KEY_SUFFIX;
keyStatementId = builderAssistant.applyCurrentNamespace(keyStatementId, true);
if (configuration.hasKeyGenerator(keyStatementId)) {
keyGenerator = configuration.getKeyGenerator(keyStatementId);
} else {
keyGenerator = context.getBooleanAttribute("useGeneratedKeys",
configuration.isUseGeneratedKeys() && SqlCommandType.INSERT.equals(sqlCommandType))
? new Jdbc3KeyGenerator() : new NoKeyGenerator();
}
builderAssistant.addMappedStatement(id, sqlSource, statementType, sqlCommandType,
fetchSize, timeout, parameterMap, parameterTypeClass, resultMap, resultTypeClass,
resultSetTypeEnum