
部落格園 首頁 新隨筆 聯絡 訂閱 管理 七天學會ASP.NET MVC (三)——ASP.Net MVC 資料處理
第三天我們將學習Asp.Net中資料處理功能,瞭解資料訪問層,EF,以及EF中常用的程式碼實現方式,建立資料訪問層和資料入口,處理Post資料,以及資料驗證等功能。
系列文章
目錄:
資料訪問層
實體框架(EF)簡述
什麼是程式碼優先的方法?
實驗8——在專案中新增資料訪問層
關於實驗8
實驗9——建立資料輸入螢幕
實驗10——獲取服務端或控制器端傳遞的資料。
實驗11——重置及取消按鈕
實驗12——儲存資料。庫記錄並更新表格
實驗13——新增伺服器端驗證
實驗14——自定義伺服器端驗證
結論
資料訪問層
在實際開發中,如果一個專案不包含任何資料庫,那麼這個專案是不完整的,我們在一二節例項中未涉及資料庫,在本節開始,實驗8中講解一個關於資料庫和資料庫層的例項。
本節將使用SQL Server和EF(Entity Framework)建立相關的資料庫及資料庫訪問層。
簡述實體框架(EF)
EF是一種ORM工具,ORM表示物件關聯對映。
在RDMS中,物件稱為表格和列物件,而在.net中(面向物件)稱為類,物件以及屬性。
任何資料驅動的應用實現的方式有兩種:
1. 通過程式碼與資料庫關聯(稱為資料訪問層或資料邏輯層)
2. 通過編寫程式碼將資料庫資料對映到面向物件資料,或反向操作。
ORM是一種能夠自動完成這兩種方式的工具。EF是微軟的ORM工具。
什麼是程式碼優先的方法?
EF提供了三種方式來實現專案:
l 資料庫優先方法——建立資料庫,包含表,列以及表之間的關係等,EF會根據資料庫生成相應的Model類(業務實體)及資料訪問層程式碼。
l 模型優先方法——模型優先指模型類及模型之間的關係是由Model設計人員在VS中手動生成和設計的,EF將模型生成資料訪問層和資料庫。
l 程式碼優先方法——程式碼優先指手動建立POCO類。這些類之間的關係使用程式碼定義。當應用程式首次執行時,EF將在資料庫伺服器中自動生成資料訪問層以及相應的資料庫。
什麼是POCO類?
POCO即Plain Old CLR物件,POCO類就是已經建立的簡單.Net類。在上兩節的例項中,Employee類就是一個簡單的POCO類。
實驗8——新增資料訪問層
1. 建立資料庫
連線SQL SERVER ,建立資料庫 “SalesERPDB”。

2. 建立連線字串(ConnectionString
開啟Web.Config 檔案,在< Configuration >標籤內新增以下程式碼:
1: <connectionStrings>2: <add connectionString="Data Source=(local);Initial Catalog=SalesERPDB;Integrated Security=True"
3: name="SalesERPDAL"
4: providerName="System.Data.SqlClient"/>
5: </connectionStrings>3. 新增EF引用
右擊專案->管理Nuget 包。選擇Entity Framework 並點選安裝。

4. 建立資料訪問層
- 在根目錄下,新建資料夾”Data Access Layer“,並在Data Access Layer資料夾中新建類” SalesERPDAL “
- 在類檔案頂部新增 Using System.Data.Entity程式碼。
- 繼承DbContext類
1: public class SalesERPDAL: DbContext
2: { 3: }5. 建立Employee類的主鍵
開啟Employee類,輸入using語句
1: using System.ComponentModel.DataAnnotations;
新增Employee的屬性,並使用Key 關鍵字標識主鍵。
| 12345678 | public class Employee{[Key]public int EmployeeId { get; set; }public string FirstName { get; set; }public string LastName { get; set; }public int Salary { get; set; }} |
6. 定義對映關係
在SalesERPDAL類檔案輸入using語句。
1: using WebApplication1.Models;
在 SalesERPDAL 類中重寫 OnModelCreating方法,程式碼如下:
1: protected override void OnModelCreating(DbModelBuilder modelBuilder)
2: {3: modelBuilder.Entity<employee>().ToTable("TblEmployee");
4: base.OnModelCreating(modelBuilder);
5: } 6: </employee>注意:上述程式碼中提到“TblEmployee”是表名稱,是執行時自動生成的。
7. 在資料庫中新增新屬性Employee
在 SalesERPDAL 類中新增新屬性 Employee。
1: public DbSet<employee> Employees{get;set;}
2: </employee>DbSet表示資料庫中能夠被查詢的所有Employee
8. 改變業務層程式碼,並從資料庫中獲取資料
開啟 EmployeeBusinessLayer 類,輸入Using 語句。
1: using WebApplication1.DataAccessLayer;
修改GetEmployees 方法:
1: public List<employee> GetEmployees()
2: {3: SalesERPDAL salesDal = new SalesERPDAL();
4: return salesDal.Employees.ToList();
5: } 6: </employee>9. 執行並測試
右擊,檢視並沒有任何Employee的表格,檢視資料庫檔案,我們會看到 TblEmployee 表

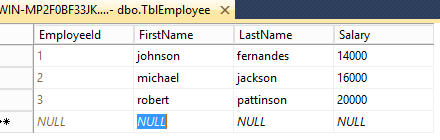
10. 插入測試資料
在TblEmployee 中插入一些測試資料
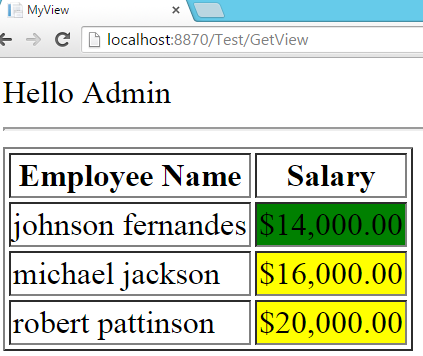
11. 執行程式
關於實驗8
什麼是資料集?
DbSet資料集是資料庫方面的概念 ,指資料庫中可以查詢的實體的集合。當執行Linq 查詢時,Dbset物件能夠將查詢內部轉換,並觸發資料庫。
在本例項中,資料集是Employees,是所有Employee的實體的集合。當每次需要訪問Employees時,會獲取“TblEmployee”的所有記錄,並轉換為Employee物件,返回Employee物件集。
如何連線資料訪問層和資料庫?
資料訪問層和資料庫之間的對映通過名稱實現的,在實驗8中,ConnectionString(連線字串)的名稱和資料訪問層的類名稱是相同的,都是SalesERPDAL,因此會自動實現對映。
連線字串的名稱可以改變嗎?
可以改變,在實驗8中,在資料訪問層中定義了建構函式,如下:
1: public SalesERPDAL():base("NewName")
2: { 3: }實驗8已經完成,相信大家已經瞭解基本的原理和操作,接下來我們將做一些改變,使得每件事情都變得有組織有意義:
1. 重新命名
- 將“TestController”改成 “EmployeeController”
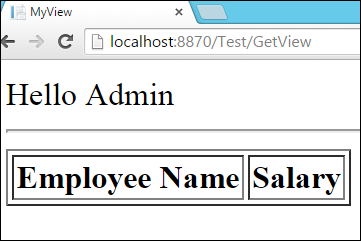
- GetView的行為方法改為Index
- Views資料夾目錄下的Test 資料夾改成Employee
- MyView的View 改為“Index”
2. 刪除EmployeeListViewModel 的 UserName 屬性
3. 刪除View中的 UserName
開啟 Views/Employee.Index.cshtml View ,刪除 UserName ,即刪除以下程式碼:
1: Hello @Model.UserName 2: <hr />4. 修改 EmployeeController 中的 Index方法
根據以下程式碼修改Index 方法,執行時URL會變成 “…./Employee/Index”:

public ActionResult Index()
{
    ……
    ……
    ……
    employeeListViewModel.Employees = empViewModels;
    //employeeListViewModel.UserName = "Admin";-->Remove this line -->Change1
    return View("Index", employeeListViewModel);//-->Change View Name -->Change 2
}
實驗 9——建立資料入口(Data Entry Screen)
1. 新建 action 方法
在 EmployeeController 中新建 “AddNew”action 方法:
1: public ActionResult AddNew()
2: {3: return View("CreateEmployee");
4: }2. 建立 View
在View/Employee目錄下 新建 View 命名為:CreateEmployee。
1: @{2: Layout = null;
3: } 4: <!DOCTYPE html> 5: <html> 6: <head>7: <meta name="viewport" content="width=device-width" />
8: <title>CreateEmployee</title> 9: </head> 10: <body> 11: <div>12: <form action="/Employee/SaveEmployee" method="post">
13: First Name: <input type="text" id="TxtFName" name="FirstName" value="" /><br />
14: Last Name: <input type="text" id="TxtLName" name="LastName" value="" /><br />
15: Salary: <input type="text" id="TxtSalary" name="Salary" value="" /><br />
16: <input type="submit" name="BtnSave" value="Save Employee" />
17: <input type="button" name="BtnReset" value=