【UWP通用應用開發】檔案選取器、獲取檔案屬性、寫入和讀取、儲存讀取和刪除應用資料
讀取檔案和資料夾名
這一節開始我們將陸續看到UWP通用應用是如何獲取到檔案及資料夾的屬性等資訊,以及如何寫入和讀取資料等,當然了最重要的還是如何儲存讀取和刪除應用的資料。
在Windows上讀取檔名、資料夾名
首先我們在XAML中定義一個Button和TextBlock,將讀取檔案/資料夾名的過程寫在前者的click事件中,後者則用來顯示檔案資訊。
<Grid Background="{ThemeResource ApplicationPageBackgroundThemeBrush}">
<StackPanel Orientation 以下這段程式碼,首先通過StorageFolder類讀取圖片庫,然後使用非同步的方式將圖片庫的檔案和資料夾資訊載入相應的List中。新建一個StringBuilder用以儲存這些檔案的資訊,在這裡只是使用了檔案/資料夾的Name屬性,但屬性還有很多,比如Path屬性。最後再將這些獲取到的資訊賦值給TextBlock即可。
private async void btnGetName_Click(object sender, RoutedEventArgs e)
{
StorageFolder pictureFolder = KnownFolders.PicturesLibrary;
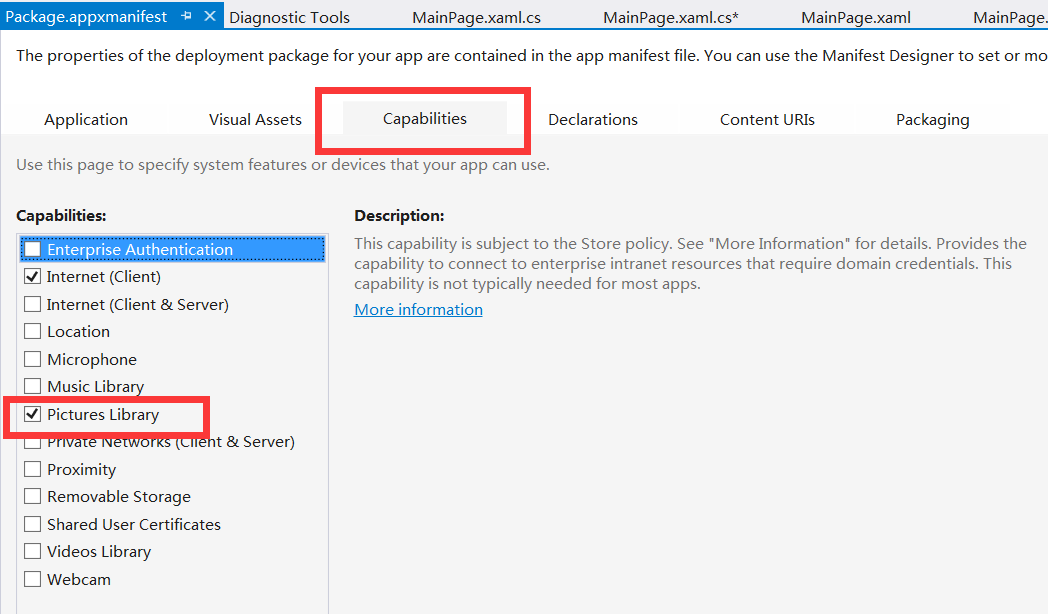
IReadOnlyList<StorageFile> pictureFileList = await 注意要在方法名前面加上async哦。還有要在清單檔案中宣告我們的應用要使用圖片庫哦,一會在Windows Phone中也一樣。
在Windows Phone上讀取檔名、資料夾名
後臺程式碼不用做任何修改,只需把XAML程式碼修改修改以適應螢幕即可~
<Grid>
    <StackPanel Orientation="Vertical">
         <Button Name="btnGetName" Width="150" Height="70" HorizontalAlignment="Center"
                        Content="讀取檔名" Click="btnGetName_Click"/>
         <TextBlock Name="textBlockFileName" Width="300" Height="300" FontSize="30" Margin="12" TextWrapping="Wrap"/>
    </StackPanel>
</Grid>
讀取檔名的其他方法
        private async void btnGetName_Click(object sender, RoutedEventArgs e)
        {
            StorageFolder picutureFolder = KnownFolders.PicturesLibrary;
            StringBuilder pictureFolderInfo = new StringBuilder();
            IReadOnlyList<IStorageItem> pictureFileItem = await picutureFolder.GetItemsAsync();
            foreach(var i in pictureFileItem)
            {
                if (i is StorageFolder)
                    pictureFolderInfo.Append(i.Name + "\n");
                else
                    pictureFolderInfo.Append(i.Name + "\n");
            }
            textBlockFileName.Text = pictureFolderInfo.ToString();
        }
檔案選取器
使用檔案選取器儲存檔案
就我個人而言,還是非常喜歡使用檔案選取器的,因為能夠用自己的程式碼來呼叫系統的各種彈框。
在這個示例中,首先在XAML中新增一個Button和一個TextBlock,分別命名為btnSaveFile和tBlockSaveInfo。對於這個儲存檔案這個操作在後臺的Click事件中就可以輕易完成了。
private async void btnSaveFile_Click(object sender, RoutedEventArgs e)
{
      FileSavePicker saveFile = new FileSavePicker();
      saveFile.SuggestedStartLocation = PickerLocationId.DocumentsLibrary;

      // 顯示在下拉列表的檔案型別
      saveFile.FileTypeChoices.Add("批處理檔案", new List<string>() { ".bat" });

      // 預設的檔名
      saveFile.SuggestedFileName = "SaveFile";

      StorageFile file = await saveFile.PickSaveFileAsync();
      if(file!=null)
      {
           // 在使用者完成更改並呼叫CompleteUpdatesAsync之前,阻止對檔案的更新
           CachedFileManager.DeferUpdates(file);
           string fileContent = "@echo off \n dir/s \n  pause";
           await FileIO.WriteTextAsync(file, fileContent);
           // 當完成更改時,其他應用程式才可以對該檔案進行更改。
           FileUpdateStatus updateStatus = await CachedFileManager.CompleteUpdatesAsync(file);
           if(updateStatus==FileUpdateStatus.Complete)
           {
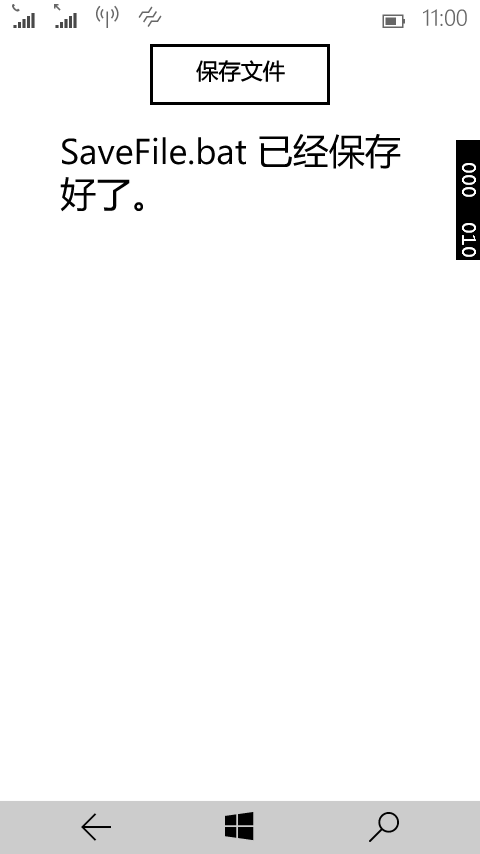
               tBlockSaveInfo.Text = file.Name + " 已經儲存好了。";
           }
           else
           {
               tBlockSaveInfo.Text = file.Name + " 儲存失敗了。";
           }
      }
      else
      {
           tBlockSaveInfo.Text = "儲存操作被取消。";
      }
}
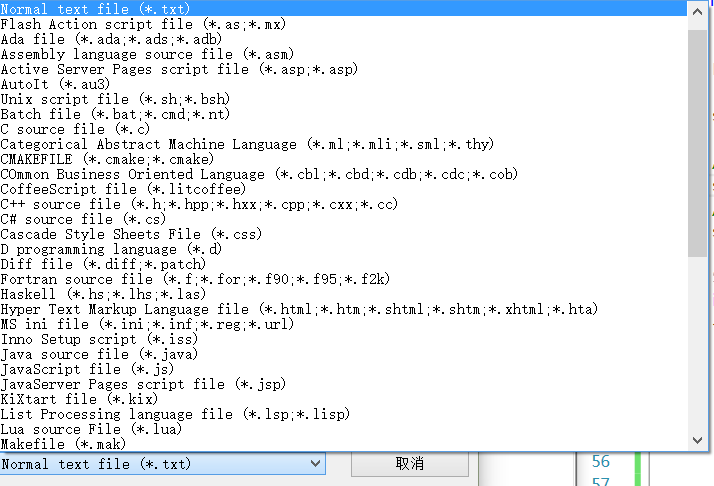
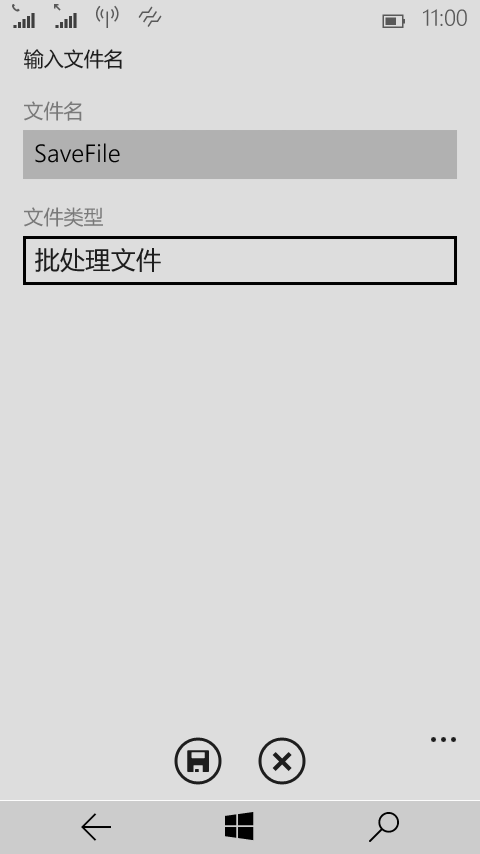
程式碼中的下拉列表的檔案型別就是如下所示這個樣子喲。
大部分的內容我都已經通過註釋的方式新增到程式碼中了,至於fileContent的那段程式碼到底是什麼意思,大家試試就知道了,我感覺蠻有意思的。3行程式碼列出硬碟上所有檔案及資料夾
如果大家試過開啟這個bat檔案,有沒有覺得有趣呢?
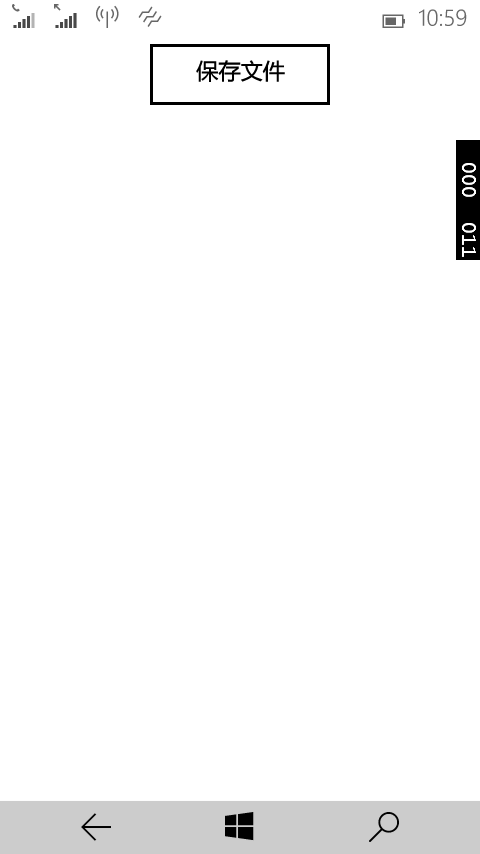
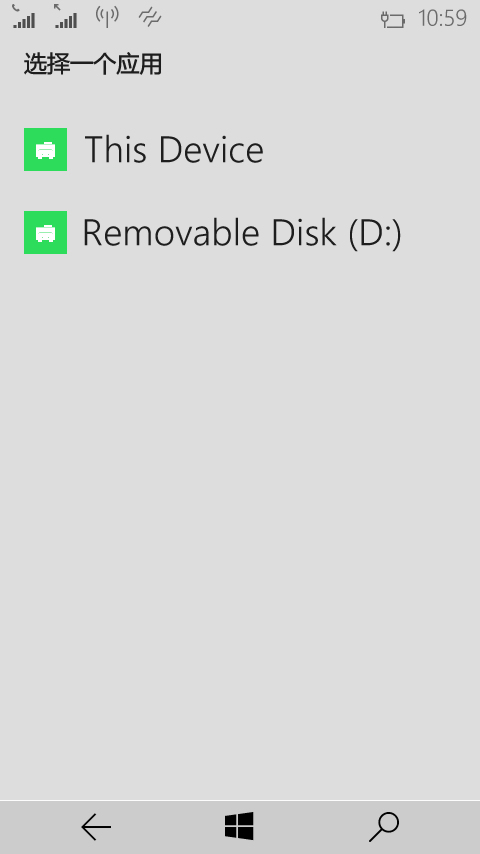
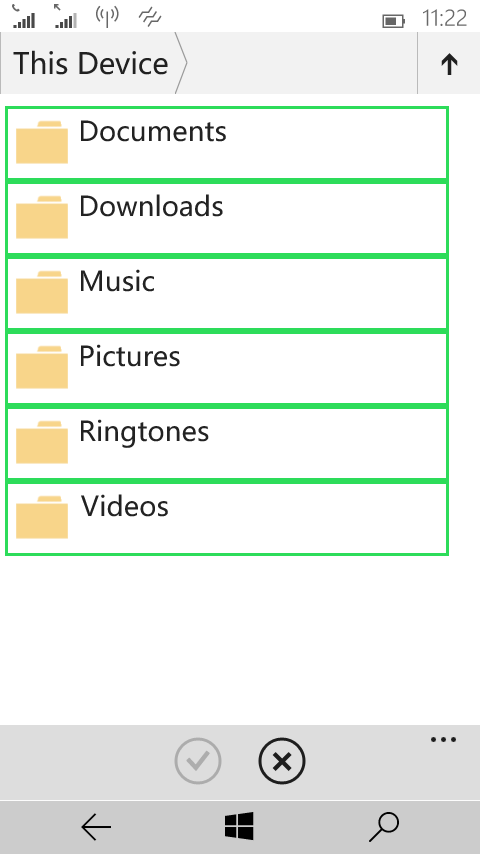
更厲害的是,我們剛才所寫的程式碼可以在Windows Phone上不經修改而直接使用。我的Lumia 638已經刷上了Windows 10預覽版,大家可以瞧瞧,全新的資源管理器。
使用檔案選取器開啟檔案
和用檔案選取器儲存檔案相類似,開啟檔案的邏輯都差不多。這個示例中同樣在XAML中定義一個名為btnOpenFile的Button和一個名為tBlockOpenInfo的TextBlock。
private async void btnOpenFile_Click(object sender, RoutedEventArgs e)
{
     FileOpenPicker openFile = new FileOpenPicker();
     openFile.SuggestedStartLocation = PickerLocationId.DocumentsLibrary;
     openFile.ViewMode = PickerViewMode.List;
     openFile.FileTypeFilter.Add(".txt");
     openFile.FileTypeFilter.Add(".docx");
     openFile.FileTypeFilter.Add(".pptx");

     // 選取單個檔案
     StorageFile file = await openFile.PickSingleFileAsync();
     if (file != null)
     {
          tBlockOpenInfo.Text = "你所選擇的檔案是: " + file.Name;
     }
     else
     {
          tBlockOpenInfo.Text = "開啟檔案操作被取消。";
     }

     // 選擇多個檔案
     //IReadOnlyList<StorageFile> fileList = await openFile.PickMultipleFilesAsync();
     //StringBuilder fileOpenInfo = new StringBuilder();
     //if(fileList!=null)
     //{
     //    foreach( StorageFile f in fileList)
     //    {
     //        fileOpenInfo.Append(f.Name + "\n");
     //    }
     //    tBlockOpenInfo.Text = "你所選擇的檔案是: "+"\n"+ fileOpenInfo.ToString();
     //}
     //else
     //{
     //    tBlockOpenInfo.Text = "開啟檔案操作被取消。";
     //}
}
我已經將選取多個檔案的程式碼也列了出來,只需要取消註釋即可。像ViewMode和FileTypeFilter這種屬性,看看名字應該都知道了吧。重在實踐。
在手機上也是通用的,剛才我試過了,成功進入了資源管理器,不過沒能開啟檔案。應該是因為預覽版的原因,這個預覽版連Office都被移除了,估計會在下一版中新增通用版的Office應用。
寫入和讀取
準備工作
在XAML中新增一個TextBlock用於顯示相關資訊,新增一個Button來使用它的Click事件,當然了,最後分別建立2個。
建立檔案和讀取檔案
1.例項化StorageFolder類
我們的檔案不可能讓其隨意儲存在計算機/手機中的任何一個地方,應該先確定它的資料夾,對吧?
在新的Windows 8中,微軟開啟了Windows上的App時代,下載的軟體再也不能隨意安裝到任何地方了,而是由作業系統統一放到一塊叫做“獨立儲存”的地方。這也是出於安全的考慮。用過Windows Phone 8的朋友應該更加清楚了。
那麼下面這行程式碼的LocalFolder究竟在哪裡呢?
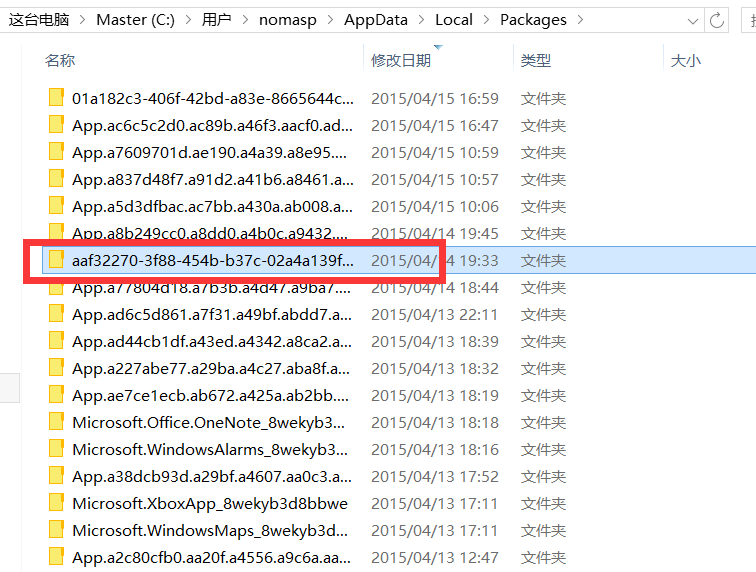
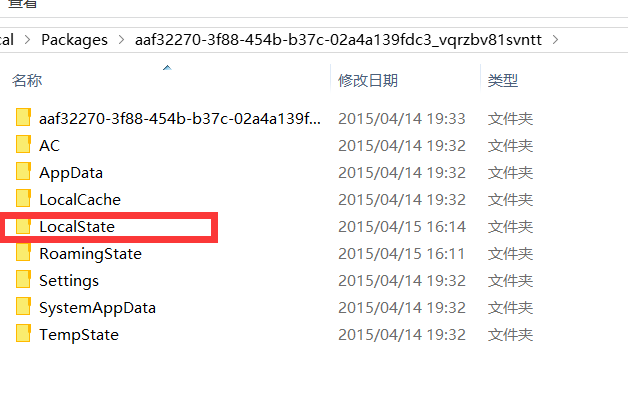
StorageFolder folder = Windows.Storage.ApplicationData.Current.LocalFolder;下圖中的檔案,就是我當前所寫的App。(補充一條哦,一開始我裝了Win8後,下載了一個遊戲,模擬類的,有金幣呀什麼的,後來我找到這個App的檔案,將資料改了之後金幣就嘩嘩的啦。當然了,對於其他單機而言這個完全不值一提,但App的資料,相信還有很多人沒有改過吧。)
那麼這張圖中的紅方框的資料夾就是LocalFolder啦,下面還有一個儲存漫遊檔案的資料夾。
不論是讀取檔案還是寫入檔案,都得先確定一個資料夾哦。
2.例項化StorageFile
確定了資料夾,就得確定檔案咯。對於建立檔案而言,執行以下程式碼。既然用到了非同步,在函式上加上async是必不可少的咯,這一點我們在前面講到過。後面的ReplaceExisting屬性是指的,如果該檔案(名)已經存在了,則替換它。
 StorageFile file =
            await folder.CreateFileAsync("New Document.txt", CreationCollisionOption.ReplaceExisting);
那麼對於讀取檔案呢,就直接讀取好啦。
StorageFile file = await folder.GetFileAsync("sample.txt");3.建立和讀取檔案
將文字寫入檔案按照如下程式碼,將檔名和文字內容(字串)。
await FileIO.WriteTextAsync(file, "Write text to file.");讀取檔案也是類似的。
string text = await FileIO.ReadTextAsync(file);我們還可以將這個讀取的字串傳遞給前面定義的TextBlock來加以除錯。以下是完整的程式碼。
 // 建立檔案
StorageFolder folder = Windows.Storage.ApplicationData.Current.LocalFolder;
StorageFile file = await folder.CreateFileAsync("New Document.txt", CreationCollisionOption.ReplaceExisting);
await FileIO.WriteTextAsync(file, "Write text to file.");
// 2 從文字讀取檔案
StorageFolder folder = Windows.Storage.ApplicationData.Current.LocalFolder;
StorageFile file = await folder.GetFileAsync("sample.txt");
string text = await Windows.Storage.FileIO.ReadTextAsync(file);
tBlockReadInfo.Text = text;使用緩衝區將位元組寫入到檔案或從檔案讀取位元組
1.例項化StorageFolder類
同上。
2.例項化StorageFile
同上。
3.將位元組寫入到檔案
a.建立緩衝區
var buffer = Windows.Security.Cryptography.CryptographicBuffer.ConvertStringToBinary("There's buffer ...... ", Windows.Security.Cryptography.BinaryStringEncoding.Utf8);
b.將緩衝區中的位元組寫入到檔案
await Windows.Storage.FileIO.WriteBufferAsync(file, buffer);4.從檔案讀取位元組
a.將檔案載入到緩衝區
var buffer = await Windows.Storage.FileIO.ReadBufferAsync(file);b.例項化DataReader,讀取緩衝區
DataReader dataReader = Windows.Storage.Streams.DataReader.FromBuffer(buffer);c.從DataReader物件中讀取字串
string text = dataReader.ReadString(buffer.Length);使用流將文字寫入檔案或從檔案讀取文字
1.例項化StorageFolder類
同上。
2.例項化StorageFile
同上。
3.新建流,並非同步地將file開啟,使用可讀寫的方式
var stream = await file.OpenAsync(Windows.Storage.FileAccessMode.ReadWrite);4.將文字寫入到檔案
a.使用using
using (var writeStream= stream.GetOutputStreamAt(0))
{
    ......
}
b.(在using語句的花括號內)建立DataWriter物件,並呼叫DataWriter.WriteString方法,將文字寫入到writeStream中
DataWriter dataWriter = new DataWriter(writeStream);
dataWriter.WriteString("Stream is a good thing.");
c.將文字儲存到檔案中,並通過StoreAsync和FlushAsync方法儲存和關閉流
await dataWriter.StoreAsync();
await writeStream.FlushAsync();
5.從檔案讀取文字
a.獲取該流的size
var size = stream.Size;b.使用using
using (var readStream = stream.GetOutputStreamAt(0))
{
    ......
}
c.(在using語句的花括號內)建立DataWriter物件,並呼叫LoadAsync方法,最後呼叫ReadString即可。最後還可以將資訊輸出到TextBlock中。
DataReader dataReader = new DataReader(readStream);
uint uintBytes = await dataReader.LoadAsync((uint)size);
string text = dataReader.ReadString(uintBytes);
tBlockReadInfo.Text = text;
獲取檔案屬性
這一節來看看獲取檔案屬性吧,可以獲取到檔名、型別、最近訪問時間等等屬性。
建立Button和TextBlock
下面這段程式碼呢,都很簡單。
 <Grid Background="{ThemeResource ApplicationPageBackgroundThemeBrush}">
        <StackPanel Orientation="Horizontal" HorizontalAlignment="Center" VerticalAlignment="Center">
            <Button Width="200" Height="70" Name="btnGetProp" Content="獲取檔案屬性" Click="btnGetProp_Click"/>
            <TextBlock Name="tBlockProp" Margin="12" Width="480" FontSize="30"/>
        </StackPanel>
    </Grid>
</Page>
在Click事件中,先獲取到圖片庫,當然了,你可以獲取其他地方,我電腦上的庫檔案中,就只有文件庫和圖片庫有檔案了。然後建立一個檔案查詢,最後將這些檔案都賦給files。這裡的var可謂是非常的強大啊。例項化一個StringBuilder物件來輔助輸出資訊那真是太完美不過了,我們在前面也常用到它。
var folder = KnownFolders.PicturesLibrary;
var fileQuery = folder.CreateFileQuery();
var files = await fileQuery.GetFilesAsync();
StringBuilder fileProperties = new StringBuilder();
for (int i = 0; i < files.Count; i++)
{
     StorageFile file = files[i];
     fileProperties.AppendLine("File name: " + file.Name);
     fileProperties.AppendLine("File type: " + file.FileType);
     BasicProperties basicProperties = await file.GetBasicPropertiesAsync();
     string fileSize = string.Format("{0:n0}", basicProperties.Size);
     fileProperties.AppendLine("File size: " + fileSize + " bytes");
     fileProperties.AppendLine("Date modified: " + basicProperties.DateModified);
     fileProperties.AppendLine(" ");
}
tBlockProp.Text = fileProperties.ToString();
這樣一來就完成對Name、FileType、Size和DateModified屬性的獲取,但還有一類屬性,則比較難以獲取,它們就是“擴充套件屬性”。
List<string> propertiesName = new List<string>();
propertiesName.Add("System.DateAccessed");
propertiesName.Add("System.FileOwner");
IDictionary<string, object> extraProperties = await file.Properties.RetrievePropertiesAsync(propertiesName);
var propValue = extraProperties[dateAccessedProperty];
if (propValue != null)
     fileProperties.AppendLine("Date accessed: " + propValue);
propValue = extraProperties[fileOwnerProperty];
if (propValue != null)
     fileProperties.AppendLine("File owner: " + propValue);
最後將fileProperties傳遞給TextBlock即可。
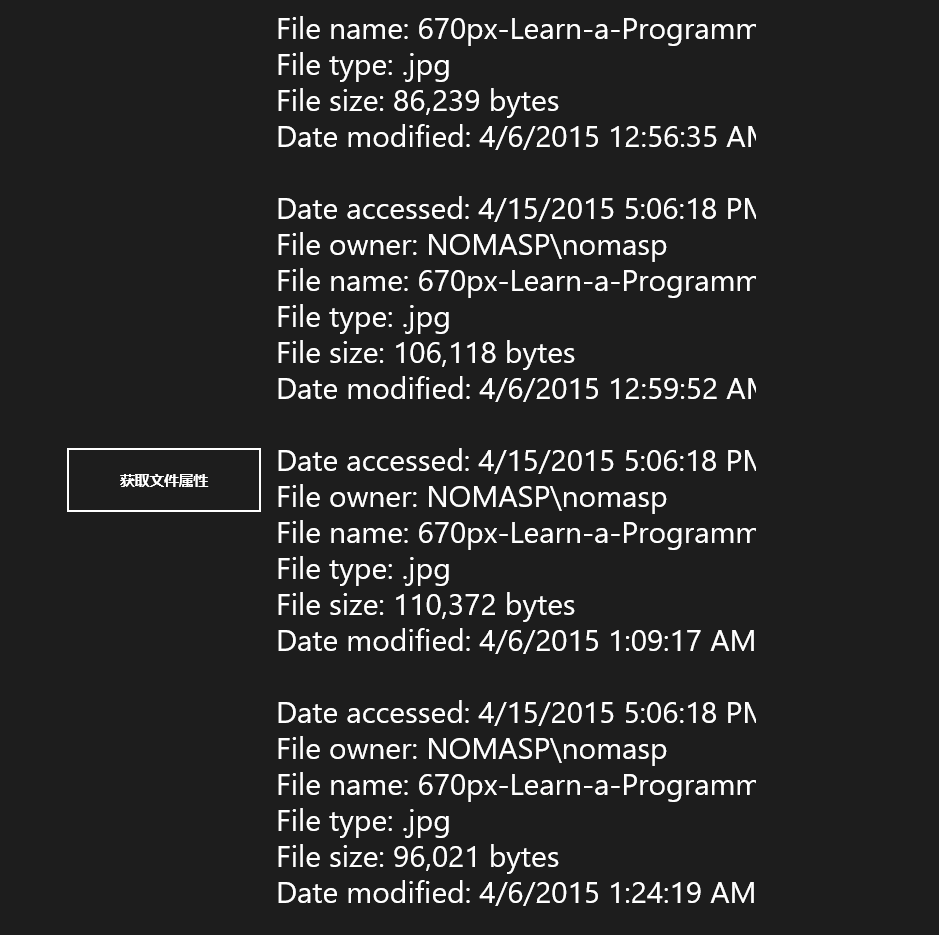
tBlockProp.Text = fileProperties.ToString();最後除錯App,就會像下圖一樣了。
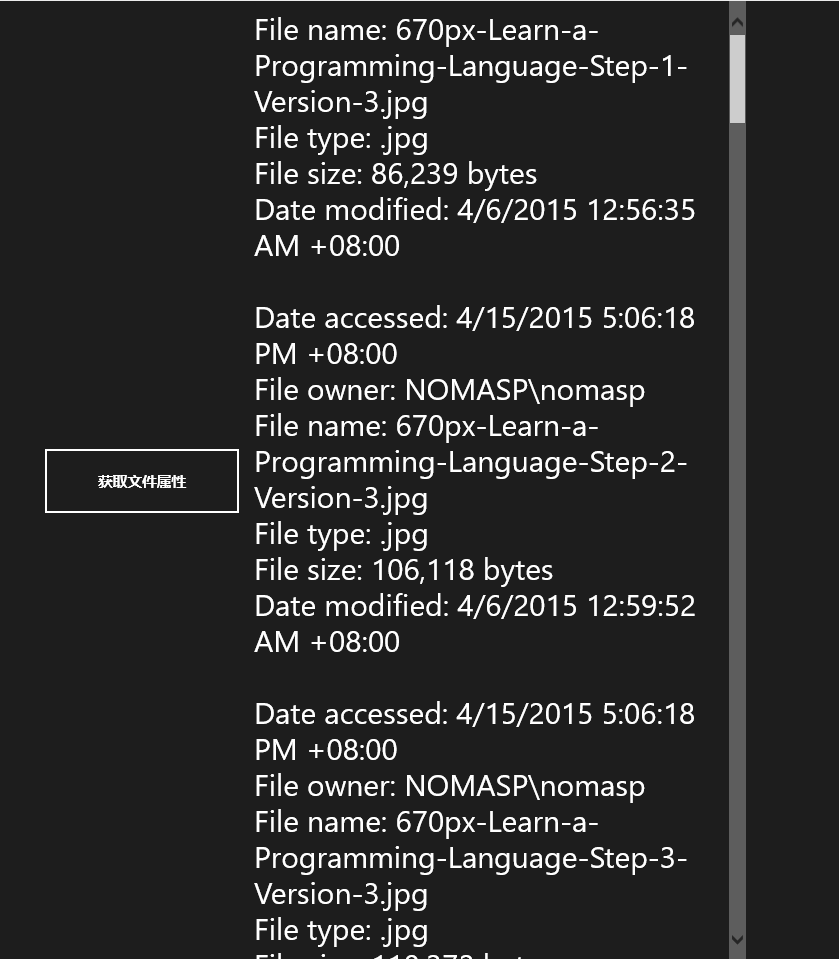
但是如你所見,檔名太長了卻無法自動換行,而且資料也顯示不完整。改改XAML中的TextBlock即可。TextWrapping屬性設定為Wrap,則可以換行;將TextBlock新增到ScrollViewer內則會顯示出一個滾動條。
<Grid Background="{ThemeResource ApplicationPageBackgroundThemeBrush}">
        <StackPanel Orientation="Horizontal" HorizontalAlignment="Center" VerticalAlignment="Center">
            <Button Width="200" Height="70" Name="btnGetProp" Content="獲取檔案屬性" Click="btnGetProp_Click"/>
            <ScrollViewer>
                <TextBlock Name="tBlockProp" Margin="12" Width="480" FontSize="30" TextWrapping="Wrap"/>
            </ScrollViewer>
        </StackPanel>
    </Grid>
儲存、讀取、刪除應用資料
在前面的幾節中,都是關於資料的,這方面的內容其實還有很多很多,省略掉一部分後,也還是有很多。這一節是很重要的一部分,它關於如何儲存和讀取資料。
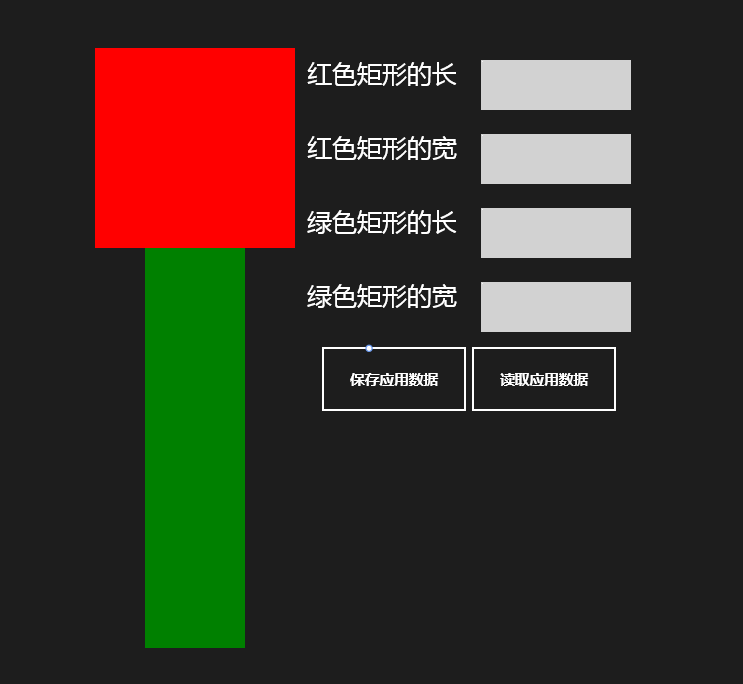
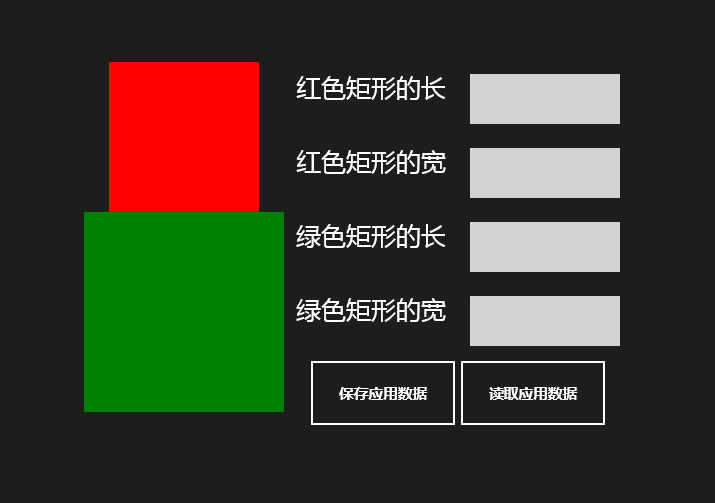
先來看看一個大概的背景吧,我這裡寫的很簡單啦。
儲存的內容就是這四個框框裡填寫的資料咯。先上XAML程式碼。
   <Grid Background="{ThemeResource ApplicationPageBackgroundThemeBrush}">
        <StackPanel Orientation="Horizontal" HorizontalAlignment="Center" VerticalAlignment="Center">
            <StackPanel Orientation="Vertical">
                <Rectangle Name="recRed" Width="200" Height="200" Fill="Red"/>
                <Rectangle Name="recGreen" Width="100" Height="400" Fill="Green"/>
            </StackPanel>
            <StackPanel Orientation="Vertical">
                <StackPanel Orientation="Horizontal">
                    <StackPanel Orientation="Vertical">
                        <TextBlock Text="紅色矩形的長" FontSize="25" Margin="12" Width="150" Height="50" />
                        <TextBlock Text="紅色矩形的寬" FontSize="25" Margin="12" Width="150" Height="50" />
                        <TextBlock Text="綠色矩形的長" FontSize="25" Margin="12" Width="150" Height="50" />
                        <TextBlock Text="綠色矩形的寬" FontSize="25" Margin="12" Width="150" Height="50"  />
                    </StackPanel>
                    <StackPanel Orientation="Vertical">
                        <TextBox Name="tBoxRedHeight" FontSize="25" Width="150" Height="50" Margin="12"/>
                        <TextBox Name="tBoxRedWidth" FontSize="25" Width="150" Height="50"  Margin="12"/>
                        <TextBox Name="tBoxGreenHeight" FontSize="25" Width="150" Height="50"  Margin="12" />
                        <TextBox Name="tBoxGreenWidth" FontSize="25" Width="150" Height="50"  Margin="12" />
                    </StackPanel>
                </StackPanel>
                <StackPanel Orientation="Horizontal" HorizontalAlignment="Center" VerticalAlignment="Center">
                    <Button Width="150" Height="70" Name="btnSaveAppData" Click="btnSaveAppData_Click" Content="儲存應用資料"/>
                    <Button Width="150" Height="70" Name="btnReadAppData" Click="btnReadAppData_Click" Content="讀取應用資料"/>
                </StackPanel>
            </StackPanel>
        </StackPanel>
    </Grid>
單個設定
先來看看單個設定唄,下面就是程式碼咯。
Windows.Storage.ApplicationDataContainer localSettings = Windows.Storage.ApplicationData.Current.LocalSettings;
Windows.Storage.StorageFolder localFolder = Windows.Storage.ApplicationData.Current.LocalFolder;
public MainPage()
{
     this.InitializeComponent();
}
private void btnSaveAppData_Click(object sender, RoutedEventArgs e)
{
    localSettings.Values["RectangleRedHeight"] = tBoxRedHeight.Text;
    localSettings.Values["RectangleRedWidth"] = tBoxRedWidth.Text;
    localSettings.Values["RectangleGreenHeight"] = tBoxGreenHeight.Text;
    localSettings.Values["RectangleGreenWidth"] = tBoxGreenWidth.Text;
}

private void btnReadAppData_Click(object sender, RoutedEventArgs e)
{
     Object objRectangleRedHeight = localSettings.Values["RectangleRedHeight"];
     Object objRectangleRedWidth = localSettings.Values["RectangleRedWidth"];
     Object objRectangleGreenHeight = localSettings.Values["RectangleGreenHeight"];
     Object objRectangleGreenWidth = localSettings.Values["RectangleGreenWidth"];

     recRed.Height = double.Parse(objRectangleRedHeight.ToString());
     recRed.Width = double.Parse(objRectangleRedWidth.ToString());
     recGreen.Height = double.Parse(objRectangleGreenHeight.ToString());
     recGreen.Width = double.Parse(objRectangleGreenWidth.ToString());
}
首先定義了兩個全域性變數,如果看過前面幾篇文章,這個應該就非常清楚了。顧名思義,第一個是用來儲存本地設定的,第二個則是用來訪問本地資料夾的。這裡是單個設定地進行儲存的,後面還有2種方式。那麼就來除錯吧,注意在點選了儲存資料按鈕之後把App關掉哦,關掉之後再載入,這樣才算是儲存了應用資料嘛,你說對不對呢?
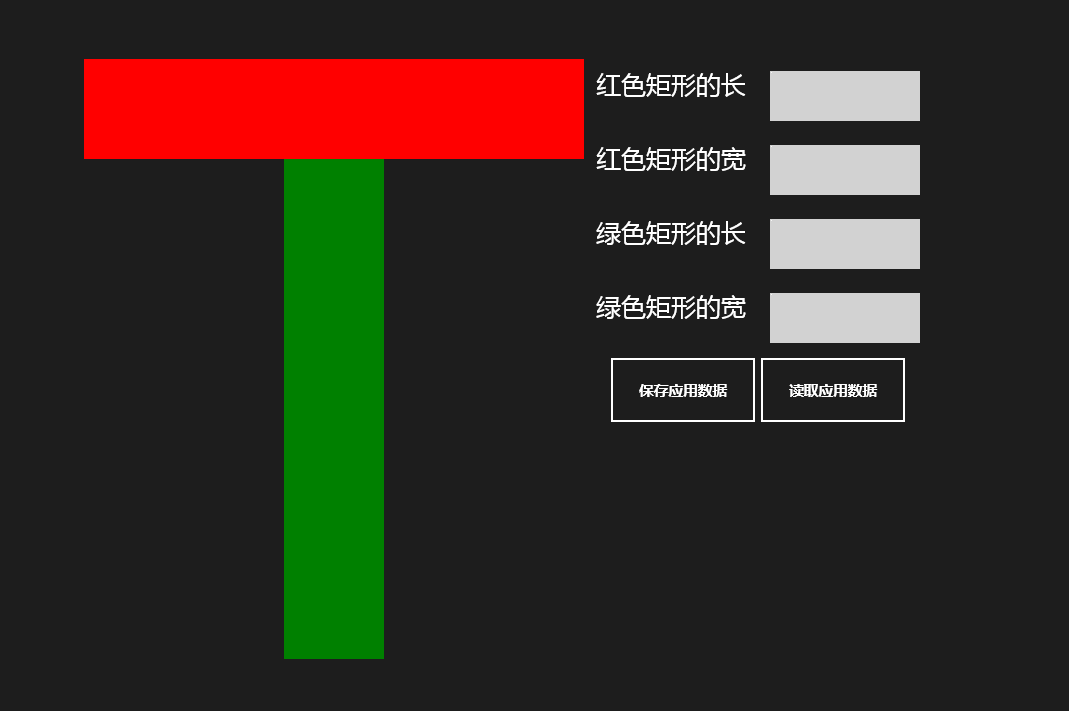
以下就是我的測試結果了。
複合設定
我們的設計都不用變,後臺程式碼修改如下。
       Windows.Storage.ApplicationDataContainer localSettings = Windows.Storage.ApplicationData.Current.LocalSettings;
        Windows.Storage.StorageFolder localFolder = Windows.Storage.ApplicationData.Current.LocalFolder;
        public MainPage()
        {
            this.InitializeComponent();
        }
        private void btnSaveAppData_Click(object sender, RoutedEventArgs e)
        {
            Windows.Storage.ApplicationDataCompositeValue compositeSettings = new ApplicationDataCompositeValue();

            compositeSettings["RectangleRedHeight"] = tBoxRedHeight.Text;
            compositeSettings["RectangleRedWidth"] = tBoxRedWidth.Text;
            compositeSettings["RectangleGreenHeight"] = tBoxGreenHeight.Text;
            compositeSettings["RectangleGreenWidth"] = tBoxGreenWidth.Text;

            localSettings.Values["RectangleSettings"] = compositeSettings;
        }
        private async void btnReadAppData_Click(object sender, RoutedEventArgs e)
        {
            Windows.Storage.ApplicationDataCompositeValue compositeSettings =
                (Windows.Storage.ApplicationDataCompositeValue)localSettings.Values["RectangleSettings"];

            if (compositeSettings == null)
            {
                Windows.UI.Popups.MessageDialog messageDialog =
                    new Windows.UI.Popups.MessageDialog("你好像沒有儲存任何應用資料哦!");
                await messageDialog.ShowAsync();
            }
            else
            {
                recRed.Height = double.Parse(compositeSettings["RectangleRedHeight"].ToString());
                recRed.Width = double.Parse(compositeSettings["RectangleRedWidth"].ToString());
                recGreen.Height = double.Parse(compositeSettings["RectangleGreenHeight"].ToString());
                recGreen.Width = double.Parse(compositeSettings["RectangleGreenWidth"].ToString());
            }
        }
使用ApplicationDataCompositeValue 會建立一個複合設定,通過程式碼所示方式即可新增資料,最後會將其新增到localSettings中。
讀取資料的時候,同樣是先在localSettings中通過鍵值對的方式來取出這個複合設定。如果該設定為空,就會呼叫MessageDialog控制元件彈窗通知沒有儲存資料。對於這個控制元件,可以訪問這裡:【萬里征程——Windows App開發】控制元件大集合2。如果複合設定存在則將他們分別進行型別轉換後複製給相應的矩形的屬性。
在容器中存放資料
在容器存放資料其實也就這麼回事啦,無非就是先建立一個容器,然後如果建立成功了,就在其中新增相應的資料即可。
至於載入資料,在這裡我使用了一個bool變數來檢查容器是不是已經建立好了,如果建立好了就可以將相應的資料取出然後賦值了,如果沒有的話則一樣挑出彈窗。
        Windows.Storage.ApplicationDataContainer localSettings = Windows.Storage.ApplicationData.Current.LocalSettings;
        Windows.Storage.StorageFolder localFolder = Windows.Storage.ApplicationData.Current.LocalFolder;
        public MainPage()
        {
            this.InitializeComponent();
        }
        private void btnSaveAppData_Click(object sender, RoutedEventArgs e)
        {
            Windows.Storage.ApplicationDataContainer containerSettings =
                localSettings.CreateContainer("RecSettingsContainer", Windows.Storage.ApplicationDataCreateDisposition.Always);
            if (localSettings.Containers.ContainsKey("RecSettingsContainer"))
            {
                localSettings.Containers["RecSettingsContainer"].Values["RectangleRedHeight"] = tBoxRedHeight.Text;
                localSettings.Containers["RecSettingsContainer"].Values["RectangleRedWidth"] = tBoxRedWidth.Text;
                localSettings.Containers["RecSettingsContainer"].Values["RectangleGreenHeight"] = tBoxGreenHeight.Text;
                localSettings.Containers["RecSettingsContainer"].Values["RectangleGreenWidth"] = tBoxGreenWidth.Text;
            }
        }
        private async void btnReadAppData_Click(object sender, RoutedEventArgs e)
        {
            bool hasContainerSettings = localSettings.Containers.ContainsKey("RecSettingsContainer");
            if(hasContainerSettings)
            {
                recRed.Height = double.Parse(localSettings.Containers["RecSettingsContainer"].Values["RectangleRedHeight"].ToString());
                recRed.Width = double.Parse(localSettings.Containers["RecSettingsContainer"].Values["RectangleRedWidth"].ToString());
                recGreen.Height = double.Parse(localSettings.Containers["RecSettingsContainer"].Values["RectangleGreenHeight"].ToString());
                recGreen.Width = double.Parse(localSettings.Containers["RecSettingsContainer"].Values["RectangleGreenWidth"].ToString());
            }
            else
            {
                Windows.UI.Popups.MessageDialog messageDialog =
                    new Windows.UI.Popups.MessageDialog("你好像沒有儲存任何應用資料哦!");
                await messageDialog.ShowAsync();
            }
        }
接下來就來個執行的截圖咯,還有彈框的截圖^_^
刪除資料
1.對於單個設定和複合設定
localSettings.Values.Remove("compositeSettings");2.對於複合資料
localSettings.DeleteContainer("containerSettings");刪除操作並不難,有了這些,我們在做遊戲的時候,就可以將使用者對遊戲的設定都儲存下來;在做一些工具類的App時更是如此。

