
android遊戲引擎andengine學習系列三:繪製遊戲虛擬搖桿
如何高效的學習,這才是我們最值得去學習的。
andengine中繪製虛擬遊戲搖桿非常簡單,只需要實現AnalogOnScreenControl模擬搖桿類,在設定一些屬性即可。先看效果圖:
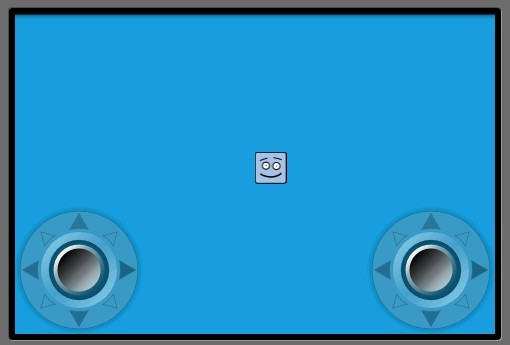
左邊的搖桿是控制精靈上下左右移動,右邊的搖桿空值精靈的旋轉。程式碼結構跟andengine學習系列二一樣,其中很多註釋在系列二中有說明,在該章內便不多複述。
onLoadEngine()方法:
@Override
	public Engine onLoadEngine() {
		this.mCamera = new Camera(0, 0, CAMERA_WIDTH, CAMERA_HEIGHT);
		final Engine engine = new Engine(new EngineOptions(true, ScreenOrientation.LANDSCAPE, new RatioResolutionPolicy(CAMERA_WIDTH, CAMERA_HEIGHT), this.mCamera));

		try {		//因為有兩個搖桿,需要兩個手指同時進行,所以這裡要註冊多點觸控
			if(MultiTouch.isSupported(this)) {
				engine.setTouchController(new MultiTouchController());
				if(MultiTouch.isSupportedDistinct(this)) {
					Toast.makeText(this, "MultiTouch detected --> Both controls will work properly!", Toast.LENGTH_LONG).show();
				} else {
					this.mPlaceOnScreenControlsAtDifferentVerticalLocations = true;
					Toast.makeText(this, "MultiTouch detected, but your device has problems distinguishing between fingers.\n\nControls are placed at different vertical locations.", Toast.LENGTH_LONG).show();
				}
			} else {
				Toast.makeText(this, "Sorry your device does NOT support MultiTouch!\n\n(Falling back to SingleTouch.)\n\nControls are placed at different vertical locations.", Toast.LENGTH_LONG).show();
			}
		} catch (final MultiTouchException e) {
			Toast.makeText(this, "Sorry your Android Version does NOT support MultiTouch!\n\n(Falling back to SingleTouch.)\n\nControls are placed at different vertical locations.", Toast.LENGTH_LONG).show();
		}

		return engine;
	}
onLoadResources()方法:
public void onLoadResources() {

		this.mTexture = new Texture(32, 32, TextureOptions.BILINEAR_PREMULTIPLYALPHA);
		this.mFaceTextureRegion = TextureRegionFactory.createFromAsset(this.mTexture, this, "face_box.png", 0, 0);

		this.mOnScreenControlTexture = new Texture(256, 128, TextureOptions.BILINEAR_PREMULTIPLYALPHA);
		this.mOnScreenControlBaseTextureRegion = TextureRegionFactory.createFromAsset(this.mOnScreenControlTexture, this, "onscreen_control_base.png", 0, 0);	//這裡是載入搖桿的地盤的紋理圖片
		this.mOnScreenControlKnobTextureRegion = TextureRegionFactory.createFromAsset(this.mOnScreenControlTexture, this, "onscreen_control_knob.png", 128, 0);	//這裡是載入搖桿的紋理圖片

		this.mEngine.getTextureManager().loadTextures(this.mTexture, this.mOnScreenControlTexture);
	}
onLoadScene()方法,關鍵的業務邏輯便在該方法中:
public Scene onLoadScene() {
		this.mEngine.registerUpdateHandler(new FPSLogger());

		final Scene scene = new Scene(1);
		scene.setBackground(new ColorBackground(0.09804f, 0.6274f, 0.8784f));

		final int centerX = (CAMERA_WIDTH - this.mFaceTextureRegion.getWidth()) / 2;
		final int centerY = (CAMERA_HEIGHT - this.mFaceTextureRegion.getHeight()) / 2;
		final Sprite face = new Sprite(centerX, centerY, this.mFaceTextureRegion);

		scene.getTopLayer().addEntity(face);

//-------------------------------------------以下為左搖桿的實現----------------------------------------------------------------------																final int x1 = 0;													//y座標為螢幕的高度減去搖桿底盤的高度,注意螢幕在前面已經被強制橫屏
		final int y1 = CAMERA_HEIGHT - this.mOnScreenControlBaseTextureRegion.getHeight();																				//AnalogOnScreenControl構造方法中:第一第二引數是該搖桿的座標,第三個引數為上面定義camera,第四第五個引數為搖桿底盤和搖桿的紋理區域,第六個引數為pTimeBetweenUpdates介面的更新
		final AnalogOnScreenControl velocityOnScreenControl = new AnalogOnScreenControl(x1, y1, this.mCamera, this.mOnScreenControlBaseTextureRegion, this.mOnScreenControlKnobTextureRegion, 0.1f, new IAnalogOnScreenControlListener() {											//備註1
			@Override
			public void onControlChange(final BaseOnScreenControl pBaseOnScreenControl, final float pValueX, final float pValueY) {
				Log.i("test","x1:"+x1+",y1:"+y1+",pValueX:"+pValueX+",pValueY:"+pValueY);
				face.setVelocity(pValueX * 100, pValueY * 100);	//備註2
			}

			@Override
			public void onControlClick(final AnalogOnScreenControl pAnalogOnScreenControl) {	//備註3
				/* Nothing. */
			}
		});
		velocityOnScreenControl.getControlBase().setBlendFunction(GL10.GL_SRC_ALPHA, GL10.GL_ONE_MINUS_SRC_ALPHA);											//備註4
		velocityOnScreenControl.getControlBase().setAlpha(0.5f);

		scene.setChildScene(velocityOnScreenControl);
//-------------------------------------------------------end 坐搖桿的實現------------------------------------------------------------//-------------------------------------------------------以下為右搖桿的實現----------------------------------------------------------

		final int y2 = (this.mPlaceOnScreenControlsAtDifferentVerticalLocations) ? 0 : y1;
		final int x2 = CAMERA_WIDTH - this.mOnScreenControlBaseTextureRegion.getWidth();
		final AnalogOnScreenControl rotationOnScreenControl = new AnalogOnScreenControl(x2, y2, this.mCamera, this.mOnScreenControlBaseTextureRegion, this.mOnScreenControlKnobTextureRegion, 0.1f, new IAnalogOnScreenControlListener() {
			@Override
			public void onControlChange(final BaseOnScreenControl pBaseOnScreenControl, final float pValueX, final float pValueY) {
				Log.i("test","x2:"+x2+",y2:"+y2+",pValueX:"+pValueX+",pValueY:"+pValueY);
				if(pValueX == x1 && pValueY == x1) {
					face.setRotation(x1);
				} else {
					face.setRotation(MathUtils.radToDeg((float)Math.atan2(pValueX, -pValueY)));
								//備註5
				}
			}

			@Override
			public void onControlClick(final AnalogOnScreenControl pAnalogOnScreenControl) {
				/* Nothing. */
			}
		});
		rotationOnScreenControl.getControlBase().setBlendFunction(GL10.GL_SRC_ALPHA, GL10.GL_ONE_MINUS_SRC_ALPHA);
		rotationOnScreenControl.getControlBase().setAlpha(0.5f);

		velocityOnScreenControl.setChildScene(rotationOnScreenControl);		//備註6

		return scene;
	}														//---------------------------------------------end 右搖桿的實現------------------------------------------------------------
備註1:關於AnalogOnScreenControl 類的第六個引數pTimeBetweenUpdates,我在這裡把他理解成介面的延時程度,值設的越高,則精靈跟隨搖桿變換的越緩慢;但是如果設成0,則兩個搖桿失靈,於是我們在這裡把他設定成0.1f,便可以看到精靈跟隨搖桿很靈活的變換而沒有卡殼和延時的現象
備註2:face.setVelocity,整個精靈移動的核心程式碼便是這一句,怎麼樣?比起用SurfaceView實現的搖桿簡單方便的多吧!
備註3:onControlClick(),這個方法是當我們點選搖桿的時候會觸發的方法,比如我們在這裡可以把搖桿設定放大1.5倍,當沒有點選的時候又恢復原來的狀態,給人一種真實的感覺。
備註5:face.setRotation(),精靈的轉動也是這一句程式碼便可實現,MathUtils.radToDeg方法返回的是:(180/PI)*方法中的引數; Math.atan2()函式返回點(x,y)和原點(0,0)之間直線的傾斜角。具體可以參考http://apps.hi.baidu.com/share/detail/50270911。
備註6:這裡可能會有疑問,為什麼是velocityOnScreenControl.setChildScene,而不是scene.setChildScene,事實上,經過測試發現,scene.setChildScene這種情況會把前面定義好的左邊的搖桿覆掉,也就沒有了,scene只會顯示最後一個定義的搖桿,於是我們在這裡寫好的右邊的搖桿需要setChildScene左邊的搖桿中,然後一起setChildScene整個場景中,這樣兩個搖桿都會顯示了。