
條形碼、二維碼的生成與掃描、解析本地二維碼
自行添加了條形碼的生成功能,圖片路徑獲取程式碼。
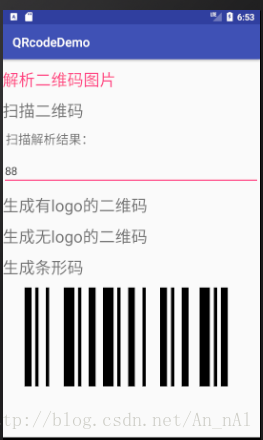
效果圖:

**
準備工作
**:
1.新增許可權
<!-- 對儲存裝置的讀寫許可權 -->
<uses-permission android:name="android.permission.WRITE_EXTERNAL_STORAGE" />
<uses-permission android:name="android.permission.MOUNT_UNMOUNT_FILESYSTEMS" />
<!-- 相機 -->
<uses-permission 2.新增依賴:
compile 'cn.yipianfengye.android:zxing-library:2.2'準備就緒了,馬上開幹啦。最開始解析本地含二維碼的圖片時,獲取圖片路徑總報錯,我就把它單獨放出來進行測試了,現在當然是沒問題啦~
所以首介面的功能就是:二維碼的掃描、生成(有無logo)、條形碼的生成,解析圖片介面的功能就只是解析本地包含二維碼的圖片而已。說了這麼多的廢話了,是時候亮傢伙了
**
功能
**
1.首頁佈局
<?xml version="1.0" encoding="utf-8"?>
<LinearLayout xmlns:android="http://schemas.android.com/apk/res/android"
xmlns:app="http://schemas.android.com/apk/res-auto"
xmlns:tools="http://schemas.android.com/tools"
android:layout_width="match_parent"
android:layout_height 2.activity程式碼
我喜歡寫很多註釋,這樣方便自己複習功能時,直接看程式碼就可以看到很多相關的知識點,但也許這篇的註釋並不多,因為不需要啊。
注意,需要先執行初始化操作ZXingLibrary.initDisplayOpinion(this);
/**
 * 掃描二維碼
 * 解析圖片二維碼
 * 根據輸入的文字生成有無logo的二維碼
 * 根據輸入的文字生成條形碼
 */
public class HomeActivity extends AppCompatActivity {

    private TextView tvScan;
    private TextView tvParseResult;
    private TextView tvMakeCode;
    private TextView tvMakeCodeNoLogo;
    private TextView tvMakeBarCode;
    private EditText edInput;
    private ImageView imgCode;
    private Bitmap mBitmap;
    private TextView tvParseImage;

    private static final int REQUEST_CODE = 1001;

    @Override
    protected void onCreate(Bundle savedInstanceState) {
        super.onCreate(savedInstanceState);
        setContentView(R.layout.activity_home);

        //初始化
        ZXingLibrary.initDisplayOpinion(this);

        tvScan = (TextView) this.findViewById(R.id.tv_scan);
        tvParseResult  =  (TextView) this.findViewById(R.id.tv_parse_result);
        edInput = (EditText) this.findViewById(R.id.ed_input);
        tvMakeCode = (TextView) this.findViewById(R.id.tv_make_code);
        tvMakeCodeNoLogo = (TextView) this.findViewById(R.id.tv_make_code_no_logo);
        tvMakeBarCode = (TextView) this.findViewById(R.id.tv_make_bar_code);
        imgCode = (ImageView) this.findViewById(R.id.img_code);
        tvParseImage =  (TextView) this.findViewById(R.id.tv_parse_image);

        //解析二維碼圖片
        tvParseImage.setOnClickListener(new View.OnClickListener() {
            @Override
            public void onClick(View view) {
                Intent intent = new Intent(HomeActivity.this,ActParseImage.class);
                startActivity(intent);
            }
        });

        //掃描二維碼
        tvScan.setOnClickListener(new View.OnClickListener() {
            @Override
            public void onClick(View view) {
                Intent intent = new Intent(HomeActivity.this, CaptureActivity.class);
                startActivityForResult(intent, REQUEST_CODE);
            }
        });

        //生成有logo的二維碼圖片
        tvMakeCode.setOnClickListener(new View.OnClickListener() {
            @Override
            public void onClick(View view) {
                String textContent = edInput.getText().toString();
                if (TextUtils.isEmpty(textContent)) {
                    Toast.makeText(HomeActivity.this, "您的輸入為空!", Toast.LENGTH_SHORT).show();
                    return;
                }
                mBitmap = CodeUtils.createImage(textContent, 400, 400, BitmapFactory.decodeResource(getResources(), R.mipmap.ic_launcher));
                imgCode.setImageBitmap(mBitmap);
            }
        });
        //生成無logo的二維碼圖片
        tvMakeCodeNoLogo.setOnClickListener(new View.OnClickListener() {
            @Override
            public void onClick(View view) {
                String textContent = edInput.getText().toString();
                if (TextUtils.isEmpty(textContent)) {
                    Toast.makeText(HomeActivity.this, "您的輸入為空!", Toast.LENGTH_SHORT).show();
                    return;
                }
                mBitmap = CodeUtils.createImage(textContent, 400, 400, null);
                imgCode.setImageBitmap(mBitmap);
            }
        });
        tvMakeBarCode.setOnClickListener(new View.OnClickListener() {
            @Override
            public void onClick(View v) {
                String textContent = edInput.getText().toString();
                if (TextUtils.isEmpty(textContent)) {
                    Toast.makeText(HomeActivity.this, "您的輸入為空!", Toast.LENGTH_SHORT).show();
                    return;
                }
                makeBarCode(textContent);
            }
        });
    }

    @Override
    protected void onActivityResult(int requestCode, int resultCode, Intent data) {
        switch (requestCode){
            case REQUEST_CODE:
                //處理掃描結果(在介面上顯示)
                if (null != data) {
                    Bundle bundle = data.getExtras();
                    if (bundle == null) {
                        return;
                    }
                    if (bundle.getInt(CodeUtils.RESULT_TYPE) == CodeUtils.RESULT_SUCCESS) {
                        String result = bundle.getString(CodeUtils.RESULT_STRING);
                        tvParseResult.setText("掃描解析結果:" + result);
                    } else if (bundle.getInt(CodeUtils.RESULT_TYPE) == CodeUtils.RESULT_FAILED) {
                        Toast.makeText(HomeActivity.this, "解析二維碼失敗", Toast.LENGTH_LONG).show();
                    }
                }
                break;
        }
    }

    /**
     * 製作條形碼
     */
    public void makeBarCode(String barCode){
        int size = barCode.length();
        for (int i = 0; i < size; i++) {
            int c = barCode.charAt(i);
            if ((19968 <= c && c < 40623)) {
                Toast.makeText(HomeActivity.this, "生成條形碼的時刻不能是中文", Toast.LENGTH_SHORT).show();
                return;
            }
        }
        Bitmap bmp = null;
        try {
            if (!TextUtils.isEmpty(barCode)) {
                bmp = CreateOneDCode(barCode);
            }
        } catch (WriterException e) {
            e.printStackTrace();
        }
        if (bmp != null) {
            imgCode.setImageBitmap(bmp);
        }
    }

    /**
     * 用於將給定的內容生成成一維條碼 注:目前生成內容為中文的話將直接報錯,要修改底層jar包的內容
     *
     * @param content 將要生成一維條碼的內容
     * @return 返回生成好的一維條碼bitmap
     * @throws WriterException WriterException異常
     */
    public Bitmap CreateOneDCode(String content) throws WriterException {
        // 生成一維條碼,編碼時指定大小,不要生成了圖片以後再進行縮放,這樣會模糊導致識別失敗
        int imgWidth = this.getResources().getDisplayMetrics().widthPixels - 40;
        int imgHeight = imgWidth / 5 * 2;

        BitMatrix matrix = new MultiFormatWriter().encode(content,
                BarcodeFormat.CODE_128, imgWidth, imgHeight);
        int width = matrix.getWidth();
        int height = matrix.getHeight();
        int[] pixels = new int[width * height];
        for (int y = 0; y < height; y++) {
            for (int x = 0; x < width; x++) {
                if (matrix.get(x, y)) {
                    pixels[y * width + x] = 0xff000000;
                }
            }
        }

        Bitmap bitmap = Bitmap.createBitmap(width, height,
                Bitmap.Config.ARGB_8888);
        // 通過畫素陣列生成bitmap,具體參考api
        bitmap.setPixels(pixels, 0, width, 0, 0, width, height);
        return bitmap;
    }
}
3.解析二維碼圖片佈局
<?xml version="1.0" encoding="utf-8"?>
<LinearLayout xmlns:android="http://schemas.android.com/apk/res/android"
    android:orientation="vertical"
    android:layout_width="match_parent"
    android:layout_height="match_parent">

    <TextView
        android:id="@+id/tv_parse_image"
        android:layout_width="wrap_content"
        android:layout_height="wrap_content"
        android:textSize="26sp"
        android:layout_marginTop="15dp"
        android:text="解析二維碼圖片"/>
    <TextView
        android:id="@+id/tv_parse_result"
        android:layout_width="match_parent"
        android:layout_height="wrap_content"
        android:textSize="20sp"
        android:layout_marginTop="15dp"
        android:paddingLeft="5dp"
        android:text="解析結果:"/>
    <ImageView
        android:id="@+id/img_code"
        android:layout_marginTop="15dp"
        android:layout_width="wrap_content"
        android:layout_height="wrap_content" />

</LinearLayout>
4.解析二維碼圖片activity
注意哦,Android6.0及以上不僅要宣告許可權,還需要在使用的時候,自動詢問,此處讀取本地圖片是必須要進行這樣的操作的,但我在這偷了個懶,我沒有寫自動詢問許可權,直接去設定裡面全部授予了
public class ActParseImage extends AppCompatActivity{

    private TextView tvParseImage;
    private TextView tvParseResult;
    private ImageView imgCode;

    private static final int REQUEST_IMAGE = 1102;

    @Override
    protected void onCreate(@Nullable Bundle savedInstanceState) {
        super.onCreate(savedInstanceState);
        setContentView(R.layout.activity_act_parseimage);

        //初始化
        ZXingLibrary.initDisplayOpinion(this);

        tvParseImage =  (TextView) this.findViewById(R.id.tv_parse_image);
        tvParseResult  =  (TextView) this.findViewById(R.id.tv_parse_result);
        imgCode = (ImageView) this.findViewById(R.id.img_code);

        //解析二維碼圖片
        tvParseImage.setOnClickListener(new View.OnClickListener() {
            @Override
            public void onClick(View view) {
                tvParseResult.setText("");
                Intent intent = new Intent(Intent.ACTION_GET_CONTENT);
                intent.addCategory(Intent.CATEGORY_OPENABLE);
                intent.setType("image/*");
                startActivityForResult(intent, REQUEST_IMAGE);
            }
        });
    }

    @Override
    protected void onActivityResult(int requestCode, int resultCode, Intent data) {
        switch (requestCode){
            case REQUEST_IMAGE:
                if (data != null) {
                    String imagePath = "";//獲得圖片路徑
                    Uri uri = data.getData();
                    imagePath = getRealPathFromUri(this,uri);
                    try {
                        CodeUtils.analyzeBitmap(imagePath, new CodeUtils.AnalyzeCallback() {
                            @Override
                            public void onAnalyzeSuccess(Bitmap mBitmap, String result) {
                                tvParseResult.setText("解析結果:" + result);
                                imgCode.setImageBitmap(mBitmap);
                            }

                            @Override
                            public void onAnalyzeFailed() {
                                Toast.makeText(ActParseImage.this, "解析二維碼失敗", Toast.LENGTH_LONG).show();
                            }
                        });
                    } catch (Exception e) {
                        e.printStackTrace();
                    }
                }
                break;
        }
    }

    /**
     * 根據Uri獲取圖片的絕對路徑
     *
     * @param context 上下文物件
     * @param uri     圖片的Uri
     * @return 如果Uri對應的圖片存在, 那麼返回該圖片的絕對路徑, 否則返回null
     */
    public static String getRealPathFromUri(Context context, Uri uri) {
        int sdkVersion = Build.VERSION.SDK_INT;
        if (sdkVersion >= 19) { // api >= 19
            return getRealPathFromUriAboveApi19(context, uri);
        } else { // api < 19
            return getRealPathFromUriBelowAPI19(context, uri);
        }
    }

    /**
     * 適配api19以下(不包括api19),根據uri獲取圖片的絕對路徑
     *
     * @param context 上下文物件
     * @param uri     圖片的Uri
     * @return 如果Uri對應的圖片存在, 那麼返回該圖片的絕對路徑, 否則返回null
     */
    private static String getRealPathFromUriBelowAPI19(Context context, Uri uri) {
        return getDataColumn(context, uri, null, null);
    }

    /**
     * 適配api19及以上,根據uri獲取圖片的絕對路徑
     *
     * @param context 上下文物件
     * @param uri     圖片的Uri
     * @return 如果Uri對應的圖片存在, 那麼返回該圖片的絕對路徑, 否則返回null
     */
    @SuppressLint("NewApi")
    private static String getRealPathFromUriAboveApi19(Context context, Uri uri) {
        String filePath = null;
        if (DocumentsContract.isDocumentUri(context, uri)) {
            // 如果是document型別的 uri, 則通過document id來進行處理
            String documentId = DocumentsContract.getDocumentId(uri);
            if (isMediaDocument(uri)) { // MediaProvider
                // 使用':'分割
                String id = documentId.split(":")[1];

                String selection = MediaStore.Images.Media._ID + "=?";
                String[] selectionArgs = {id};
                filePath = getDataColumn(context, MediaStore.Images.Media.EXTERNAL_CONTENT_URI, selection, selectionArgs);
            } else if (isDownloadsDocument(uri)) { // DownloadsProvider
                Uri contentUri = ContentUris.withAppendedId(Uri.parse("content://downloads/public_downloads"), Long.valueOf(documentId));
                filePath = getDataColumn(context, contentUri, null, null);
            }
        } else if ("content".equalsIgnoreCase(uri.getScheme())){
            // 如果是 content 型別的 Uri
            filePath = getDataColumn(context, uri, null, null);
        } else if ("file".equals(uri.getScheme())) {
            // 如果是 file 型別的 Uri,直接獲取圖片對應的路徑
            filePath = uri.getPath();
        }
        return filePath;
    }

    /**
     * 獲取資料庫表中的 _data 列,即返回Uri對應的檔案路徑
     * @return
     */
    private static String getDataColumn(Context context, Uri uri, String selection, String[] selectionArgs) {
        String path = null;

        String[] projection = new String[]{MediaStore.Images.Media.DATA};
        Cursor cursor = null;
        try {
            cursor = context.getContentResolver().query(uri, projection, selection, selectionArgs, null);
            if (cursor != null && cursor.moveToFirst()) {
                int columnIndex = cursor.getColumnIndexOrThrow(projection[0]);
                path = cursor.getString(columnIndex);
            }
        } catch (Exception e) {
            if (cursor != null) {
                cursor.close();
            }
        }
        return path;
    }

    /**
     * @param uri the Uri to check
     * @return Whether the Uri authority is MediaProvider
     */
    private static boolean isMediaDocument(Uri uri) {
        return "com.android.providers.media.documents".equals(uri.getAuthority());
    }

    /**
     * @param uri the Uri to check
     * @return Whether the Uri authority is DownloadsProvider
     */
    private static boolean isDownloadsDocument(Uri uri) {
        return "com.android.providers.downloads.documents".equals(uri.getAuthority());
    }

}
相關推薦
條形碼、二維碼的生成與掃描、解析本地二維碼
自行添加了條形碼的生成功能,圖片路徑獲取程式碼。 效果圖: ** 準備工作 **: 1.新增許可權 <!-- 對儲存裝置的讀寫許可權 --> <uses-permission android:name="an
Android開發——Android中的二維碼生成與掃描
0. 前言今天這篇文章主要描述二維碼的生成與掃描,使用目前流行的Zxing,為什麼要講二維碼,因為二維碼太普遍了,隨便一個Android APP都會有二維碼掃描。本篇旨在幫助有需求的同學快速完成二維碼生成和掃描的功能。本篇轉載自:http://blog.csdn.net/ha
iOS第三方二維碼生成與掃描
匯入第三方框架libqrencode(生成二維碼)和ZBarSDK(二維碼掃描) 匯入標頭檔案 #import "QRCodeGenerator.h" #import "ZBarSDK.h" 建立兩個按鈕點選事件 點選按鈕一實現生成二維碼 - (I
二維碼、條碼的生成與掃描(ZXing ZBar)
SwetakeQRCode、QRCode、BarCode4j、Zxing、ZBar…, 生成二維碼的開源項很多。二維碼與條形碼處理類庫。> 二維碼、條碼的生成與掃描 二維碼zxing- https://github.com/zxing/zxing 玩轉Android之
APIcoud 手機二維碼or條碼 生成與掃描模組
剛接觸APIcoud 的時候覺得很多模組真的好難,初次接觸二維碼的時候覺得,生成二維碼真的很費勁呢,其實不然,是真的很難,但是APIcoud 已經封裝好生成和掃描二維碼的模組, 我們只需要呼叫就可以愉快的使用二維碼了。 官方文件裡面的使用方法裡面,難免有些不易懂,本文教你如何愉快的開發二維碼模組。 廢話
unityZXing二維碼的生成與掃描
借鑑自某位大佬不記得了 using System.Collections; using System.Collections.Generic; using UnityEngine; using ZXing; using UnityEngine.UI; /// <summary> //
QR Code 二維碼的生成與掃描
前言 現在大街小巷、各大網站都有二維碼的蹤跡,不管是IOS、Android、WP都有相關支援的軟體。 最近因為工作需要使用相關技術,所以做了初步瞭解。今天主要是講述如何使用ZXing庫,在專案中要使用到二維碼的相關內容,百度(原諒我還在用)之
Java二維碼生成與解碼工具Zxing使用
trace character sta 解碼 iter() font 生成 char type 1 package com.csii.zxing.test; 2 3 import java.awt.image.BufferedImage; 4 import j
Java二維碼生成與解碼
添加 1.3 pin part 字符集 bit reader -- inpu 基於google zxing 的Java二維碼生成與解碼 一、添加Maven依賴(解碼時需要上傳二維碼圖片,所以需要依賴文件上傳包) <!-- google二維碼工具 --&g
如何生成二維碼並統計掃描次數,展示二維碼頁面
引入了 phpqrcode 外掛來生成自定義二維碼 //建立空二維碼 唯一標識code public function mkCode() { // 引入外掛 include '/static/phpqrcode/phpqrcode.php'
微信帶場景引數的二維碼生成與使用
應用場景:公眾號推廣時,使用者通過掃碼關注公眾號,需要統計使用者是通過誰的二維碼進行關注。 思路:在使用者掃碼關注公眾號時,二維碼帶上推廣者的id,在關注公眾號後,獲取到該推廣者的id。 目前有2種類型的二維碼: 1、臨時二維碼,是有過期時間的,最長可以設
Android 二維碼生成,掃描,近距離識別優化,從相簿選擇二維碼識別
做了一個二維碼掃描圖片,主要是掃描不出來,看到一篇部落格,其中的第二種方法可以掃描到,在此做筆記,以備後用,前面的進入相簿,返回,到獲取圖片路徑方法都一樣; (1):二維碼生成的方法順便貼上: private Bitmap createQRImage(String url, final
玩轉Android之二維碼生成與識別
二維碼,我們也稱作QRCode,QR表示quick response即快速響應,在很多App中我們都能見到二維碼的身影,最常見的莫過於微信了。那麼今天我們就來看看怎麼樣在我們自己的App中整合二維碼的掃描與生成功能。OK,廢話不多說,我們就開始做吧。二維碼的使用我主要想分為兩
二維碼生成與讀取
一、通過Zxing生成與讀取: 生成二維碼: int width=300; int height=300; String format="png"; String conte
在android上實現二維碼生成和掃描
先在androidstudio上匯入libzing的Module,然後再app上把那個libzing新增上去,這樣我們的app就關聯了那個libzing庫了 然後我們就只在app這個工程下寫程式碼就行了。activity_main.xml佈局如下
GO語言學習筆記(二)IDE安裝與配置、格式化代碼、生成代碼文檔
dea mit sts eid mark idea current href alt 一、安裝goland IDE1、goland IDE的下載 下載地址:(我這裏是下載的mac版,因為我的是mac本)https://download-cf.jetbrains.com/g
Android使用zxing-android-embedded(由zxing開發)實現二維碼生成和掃描
前言: 目前二維碼(條形碼)的使用非常廣泛,所以啊,就想去實現以下嘛,最簡單的方法就是選擇開源庫了。 在網上一查開源庫還是很多的,介紹使用最多的就是zxing,所以這裡也就是用zxing了。但是由於zxing開源庫太大了,有很多不是Android要用的,所以
你不可錯過的二維碼生成與解析-java後臺與前端js都有
1.二維碼分類 二維條碼也有許多不同的碼制,就碼制的編碼原理而言,通常分為三種類型。 線性堆疊式二維碼 編碼原理: 建立在一維條碼基礎之上,按需要堆積成兩行或多行。 圖示: 矩陣式二維碼 最常用編碼,原理: 在一個矩形空間通過黑白畫素在矩陣中的不同分佈進行編碼。在
微信帶場景參數的二維碼生成與使用功能實現?
mar 進入 分享 mage term 永久 擔心 type color 參數二維碼原理介紹:公眾號目前有2種類型的二維碼1、臨時二維碼,30天有效期2、永久二維碼,沒有失效時間 渠道二維碼生成(參數二維碼生成) 1、登錄微號幫 2、登錄後進入管理中心首頁選擇->功能
12. HTTP協議二:HTTP請求與響應、常見狀態碼
pro per 多重 並發 not 條件 轉換 tip author HTTP請求與響應 HTTP請求 HTTP請求是指從客戶端到服務器端的請求消息。HTTP請求主要由三部分構成,請求行、請求頭(headers)、body(請求數據)。 上圖是筆者用Charles抓包工