從.Net到Java學習第十篇——Spring Boot檔案上傳和下載
圖片上傳
Spring Boot中的檔案上傳就是Spring MVC中的檔案上傳,將其整合進來了。
在模板目錄建立一個新的頁面 profile/uploadPage.html
<!DOCTYPE html> <html xmlns:th="http://www.thymeleaf.org"> <head> <meta charset="UTF-8"/> <title>Title</title> </head> <body> <h2 class="indigo-text center">Upload</h2> <form th:action="@{/upload}" method="post" enctype="multipart/form-data" class="col m8 s12 offset-m2"> <div class="input-field col s6"> <input type="file" id="file" name="file"/> </div> <div class="col s6 center"> <buttonclass="btn indigo waves-effect waves-light" type="submit" name="save" >Submit <i class="mdi-content-send right"></i> </button> </div> <div class="col s12 center red-text" th:text="${error}" th:if="${error}"> Error during upload</div> <div class="col m8 s12 offset-m2"> <img th:src="@{${picturePath}}" width="100" height="100"/> </div> </form> </body> </html>
除了表單中的 enctype 屬性以外,並沒有太多值得關注的。檔案將會通過 POST 方法傳送到 upload URL 上,新建控制器PictureUploadController
@Controller
@SessionAttributes("picturePath")
public class PictureUploadController {
    //跳轉到上傳檔案的頁面
    @RequestMapping("upload")
    public String uploadPage() {
        return "profile/uploadPage";
    }
    //處理檔案上傳
    @RequestMapping(value = "/upload", method = RequestMethod.POST)
    public String onUpload(MultipartFile file, HttpServletRequest request, RedirectAttributes redirectAttrs, Model model) throws IOException {
        if (file.isEmpty() || !isImage(file)) {
            redirectAttrs.addFlashAttribute("error", "Incorrect file.Please upload a picture.");
            return "redirect:/upload";
        }
        String filePath =  request.getSession().getServletContext().getRealPath("pictures/");
        Resource picturePath = copyFileToPictures(file,filePath);
        String _path="/pictures/"+picturePath.getFilename();
        model.addAttribute("picturePath",_path);
        return "profile/uploadPage";
    }

    private Resource copyFileToPictures(MultipartFile file,String filePath) throws IOException {
        String filename = file.getOriginalFilename();
        File tempFile = File.createTempFile("pic",
                getFileExtension(filename),  new FileSystemResource(filePath).getFile());
        try (InputStream in = file.getInputStream();
             OutputStream out = new FileOutputStream(tempFile)) {
            IOUtils.copy(in, out);
        }
        return new FileSystemResource(tempFile);
    }

    //判斷上傳檔案的型別是否是圖片
    private boolean isImage(MultipartFile file) {
        return file.getContentType().startsWith("image");
    }
    //獲取上傳檔案的副檔名
    private static String getFileExtension(String name) {
        return name.substring(name.lastIndexOf("."));
    }
}
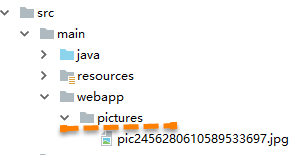
在專案的根目錄下建立 pictures 目錄 ,上述程式碼做的第一件事情是在 pictures 目錄下建立一個臨時檔案,這個目錄位於專案的根資料夾下,所以要確保該目錄是存在的。在 Java 中,臨時檔案只是用來獲取檔案系統中唯一的檔案識別符號的,使用者可以自行決定是否要刪除它 。使用者提交的檔案將會以 MultipartFile 介面的形式注入到控制器中,這個介面提供了多個方法,用來獲取檔案的名稱、大小及其內容 。try...with 程式碼塊將會自動關閉流,即便出現異常也會如此,從而移除了finally 這樣的樣板式程式碼 。我們還可以定義上傳檔案的功能。
- multipart.maxFileSize:這定義了所允許上傳檔案的最大容量。嘗試上傳更大的檔案將會出現 MultipartException,其預設值是 1Mb;
- multipart.maxRequestSize:這定義了整個 multipart 請求的最大容量,預設值是 10MB。

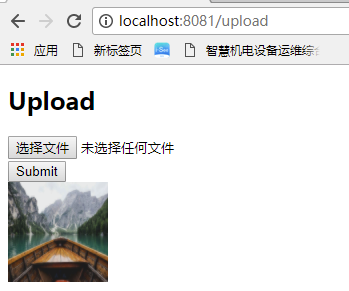
執行預覽:

圖片下載
修改控制器PictureUploadController,新增如下程式碼:
   //圖片下載
    @RequestMapping(value = "/DownloadPic", method = RequestMethod.GET)
    public void Download(HttpServletRequest req,HttpServletResponse res) {
        String fileName = "pic2456280610589533697.jpg";
        res.setHeader("content-type", "application/octet-stream");
        res.setContentType("application/octet-stream");
        res.setHeader("Content-Disposition", "attachment;filename=" + fileName);
        byte[] buff = new byte[1024];
        BufferedInputStream bis = null;
        OutputStream os = null;
        try {
            os = res.getOutputStream();
            String filePath =  req.getSession().getServletContext().getRealPath("pictures/");
            bis = new BufferedInputStream(new FileInputStream(new File(filePath + fileName)));
            int i = bis.read(buff);
            while (i != -1) {
                os.write(buff, 0, buff.length);
                os.flush();
                i = bis.read(buff);
            }
        } catch (IOException e) {
            e.printStackTrace();
        } finally {
            if (bis != null) {
                try {
                    bis.close();
                } catch (IOException e) {
                    e.printStackTrace();
                }
            }
        }
        System.out.println("success");
    }
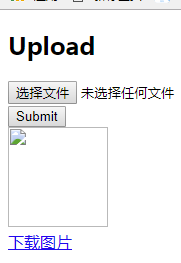
修改uploadPage.html,新增:
<a href="/DownloadPic">下載圖片</a>

相關推薦
從.Net到Java學習第十篇——Spring Boot檔案上傳和下載
圖片上傳 Spring Boot中的檔案上傳就是Spring MVC中的檔案上傳,將其整合進來了。 在模板目錄建立一個新的頁面 profile/uploadPage.html <!DOCTYPE html> <html xmlns:th="http://www.thymel
Spring Boot 檔案上傳和下載
前言:以前的專案中檔案上傳下載會寫大量程式碼來實現,但是在Spring Boot中,簡化了大量程式碼,上傳只需要2行程式碼即可 package com.demo.controller; import com.demo.model.FileInfo; import org.
struts2學習筆記十五(第15講.Struts2的檔案上傳和下載續三)
[/code][b][size=xx-large]Struts2的檔案上傳和下載續三[/size][/b][color=red]功能:[/color]使用者可以自定義上傳檔案的個數,如果新增的個數多了的話,還可以進行刪減。一、修改之前根目錄下的upload.jsp檔案:[co
Spring框架學習筆記(7)——Spring Boot 實現上傳和下載
最近忙著都沒時間寫部落格了,做了個專案,實現了下載功能,沒用到上傳,寫這篇文章也是順便參考學習瞭如何實現上傳,上傳和下載做一篇筆記吧 下載 主要有下面的兩種方式: 通過ResponseEntity實現 通過寫HttpServletResponse的OutputStream實現 我只測試了ResponseE
Spring Boot——檔案上傳與下載
<project xmlns="http://maven.apache.org/POM/4.0.0" xmlns:xsi="http://www.w3.org/2001/XMLSchema-instance" xsi:schemaLocation="http://maven.apac
Spring Boot 檔案上傳與下載
一、上傳檔案 @RequestMapping(value="/upfile", method = RequestMethod.POST) public ResultVo uploadFile(@Req
spring實現檔案上傳和下載 完整方案
1. 簡介 提供基於spring實現檔案(筆記附件)的上傳和下載的完整方案。方案將檔案上傳,並將檔名稱作為欄位與關聯的筆記繫結在一起,更新筆記在資料庫中的記錄。顯示筆記時,根據筆記所繫結的檔名生成下載
spring實現檔案上傳和下載完整方案
1. 簡介 提供基於spring實現檔案(筆記附件)的上傳和下載的完整方案。方案將檔案上傳,並將檔名稱作為欄位與關聯的筆記繫結在一起,更新筆記在資料庫中的記錄。顯示筆記時,根據筆記所繫結的檔名生成下載路徑,提交給服務端完成下載。 2. 檔案上傳 2. 1 前端 在html中插入一個表單用於提交檔案 &
從.Net到Java學習第三篇——spring boot+mybatis+mysql
jar fig targe list pro ble TE png tween 環境:mysql5.7 新建mysql數據庫demo,然後執行如下sql腳本進行數據表創建和數據初始化: -- ---------------------------- -- Tabl
從.Net到Java學習第四篇——spring boot+redis
“學習java已經十天,有時也懷念當初.net的經典,讓這語言將你我相連,懷念你......”接上一篇,本篇使用到的框架redis、FastJSON。 環境準備 安裝redis,下圖是我本機的redis綠色版,你可以網上自行下載安裝,如果不知道如何怎麼操作,可以移步到我的另一篇文章:ASP.NET R
從.Net到Java學習第五篇——Spring Boot &&Profile &&Swagger2
剛學java不久,我有個疑問,為何用到的各種java開源jar包許多都是阿里巴巴的開源專案,為何幾乎很少見百度和騰訊?不是說好的BAT嗎? Spring Boot 的配置檔案及多環境配置 Spring Boot 使用一個全域性的配置檔案 application.properties 或 appli
spring boot實戰(第十篇)Spring boot Bean載入原始碼分析
public static void invokeBeanFactoryPostProcessors( ConfigurableListableBeanFactory beanFactory, List<BeanFactoryPostProcessor> beanFactoryPostPro
29. Spring boot 檔案上傳(多檔案上傳)【從零開始學Spring Boot】
【視訊&交流平臺】 http://study.163.com/course/introduction.htm?courseId=1004329008&utm_campaign=commission&utm_source=40000000
Spring boot 檔案上傳(多檔案上傳)【從零開始學Spring Boot】
檔案上傳主要分以下幾個步驟: (1)新建maven java project; (2)在pom.xml加入相應依賴; (3)新建一個表單頁面(這裡使用thymeleaf); (4)編寫controller; (5)測試; (6)對上傳的檔案做一些限制; (7)多檔案上傳
Spring Boot檔案上傳
spring boot 2.0.5 要實現檔案上傳並直接訪問(檢視/下載) 配置靜態檔案路徑 application.properties uploadPath=/opt/data1/uploads/ ## 上傳路徑設定為靜態資源路徑,可以通過http直接訪問,
Spring Boot -- 檔案上傳
Spring Boot -- 檔案上傳 一:檔案上傳 1. pom.xml 2. application.properties 3. Controller 4.測試 二:熱部署 spring-boot
spring boot 檔案上傳配置檔案
spring: thymeleaf.cache : false messages.basename : static/message/messages http: multipart: &n
第三十一章:檔案上傳&下載
作者:java_wxid 檔案的上傳介紹 檔案的上傳和下載功能是很多系統中非常常見的功能。非常的重要。 檔案的上傳 1、首先需要一個form表單 2、然後在表單內有input type=”file” 3、提交的方式必須是method=”POST” 4、enctype="multi
spring boot 檔案上傳 最基礎的
首先:在控制層 controller 建 FileUploadController 程式碼: package com.example.springdemo.controller; import org.springframework.stereotype.Contro
Spring boot 檔案上傳commons-fileupload
錯誤返回: Required request part 'file' is not present 請檢查你是否引入了這個jar包 自帶了upload files的配置 1.如果沒有 上傳檔案時需要引入並在webMvc配置 <!-- fileup
