devops——1、virtualbox虛擬機器及python環境準備
1、virtualbox安裝路徑需要寫到環境變數
否則會出現下面報錯:
Vagrant could not detect VirtualBox! Make sure VirtualBox is properly installed.
Vagrant uses the VBoxManage binary that ships with VirtualBox, and requires this to be available on the PATH.
If VirtualBox is installed, please find the VBoxManage binary and add it to the PATH environmental variable.
D:\devops\data>vagrant box add centos7.2 vagrant-centos-7.2.box
D:\devops\data>vagrant box list
centos7.2 (virtualbox, 0)
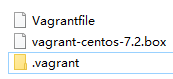
D:\devops\data>vagrant init centos7.2
生成一個Vagrantfile檔案:
vagrant up (啟動虛擬機器)
vagrant halt (關閉虛擬機器——對應就是關機)
vagrant suspend (暫停虛擬機器——只是暫停,虛擬機器記憶體等資訊將以狀態檔案的方式儲存在本地,可以執行恢復操作後繼續使用)
vagrant resume (恢復虛擬機器 —— 與前面的暫停相對應)
vagrant box remove centos6.6 (移除box,其中centos6.6是box名)
vagrant destroy (刪除虛擬機器,刪除後在當前虛擬機器所做進行的除開Vagrantfile中的配置都不會保留)
Vagrant連線:
D:\devops\data>vagrant ssh
[
注意關機之前都要關閉下虛擬機器。如果不關閉的話 明天早上起來就發現啟動不了
在.Vagrantfile檔案中設定:
Vagrant.configure("2") do |config|
config.vm.box = "centos7.2"
# 設定使用者名稱以及密碼:
    config.ssh.username = "vagrant"
    config.ssh.password = "vagrant"
#設定虛擬網路
#config.vm.network "private_network", ip: "192.168.33.10"
    config.vm.network "forwarded_port", guest: 8000, host: 8000
end
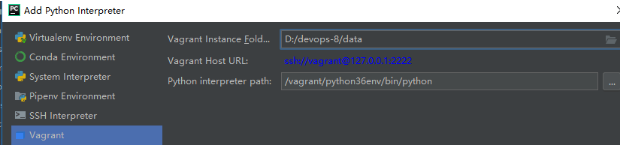
使用連線:
ssh 127.0.0.1:2222 使用者名稱vagrant 密碼vagrant
私鑰檔案存放位置:
E:\devops-8\data\.vagrant\machines\default\virtualbox\private_key
環境準備:django 1.11 python3.6
#安裝python:
wget https://www.python.org/ftp/python/3.6.6/Python-3.6.6.tgz
#安裝依賴環境:
yum install gcc openssl-devel readline-devel unzip -y
tar -zxf Python-3.6.6.tgz
cd Python-3.6.6
./configure --prefix=/usr/local/python36
make && make install
配置pip源:
tee /etc/pip.conf <<EOF
[global]
index-url = http://pypi.douban.com/simple
trusted-host = pypi.douban.com
[list]
format=columns
EOF
========================================================
安裝虛擬環境:

將Linux裡面的/home/vagrant 對映到 win的D:\devops-8\data了
報錯:/sbin/mount.vboxsf: mounting failed with the error: No such device
解決辦法:
yum clean all
yum update
yum install kernel kernel-devel kernel-headers gcc make -y
reboot
cd /opt/VBoxGuestAdditions-*/init
./vboxadd setup
reboot
[[email protected] ~]$ df -TH
Filesystem Type Size Used Avail Use% Mounted on
/dev/mapper/centos-root xfs 8.9G 5.4G 3.5G 61% /
devtmpfs devtmpfs 305M 0 305M 0% /dev
tmpfs tmpfs 322M 0 322M 0% /dev/shm
tmpfs tmpfs 322M 5.1M 317M 2% /run
tmpfs tmpfs 322M 0 322M 0% /sys/fs/cgroup
/dev/sda1 xfs 521M 221M 301M 43% /boot
none vboxsf 149G 49G 101G 33% /media/sf_data
tmpfs tmpfs 65M 0 65M 0% /run/user/1000
[[email protected] ~]$ sudo ln -s /media/sf_data /home/vagrant
===========================================================
出現報錯:
 [[email protected] vagrant]# /usr/local/python36/bin/virtualenv ./python36env
    Using base prefix '/usr/local/python36'
    New python executable in /vagrant/python36env/bin/python3.6
    Also creating executable in /vagrant/python36env/bin/python
    Traceback (most recent call last):
      File "/usr/local/python36/bin/virtualenv", line 11, in <module>
        sys.exit(main())
      File "/usr/local/python36/lib/python3.6/site-packages/virtualenv.py", line 762, in main
        symlink=options.symlink,
      File "/usr/local/python36/lib/python3.6/site-packages/virtualenv.py", line 998, in create_environment
        install_python(home_dir, lib_dir, inc_dir, bin_dir, site_packages=site_packages, clear=clear, symlink=symlink)
      File "/usr/local/python36/lib/python3.6/site-packages/virtualenv.py", line 1459, in install_python
        os.symlink(py_executable_base, full_pth)
    OSError: [Errno 71] Protocol error: 'python3.6' -> '/vagrant/python36env/bin/python'
解決方法:
export PIPENV_VENV_IN_PROJECT=1
export PIPENV_IGNORE_VIRTUALENVS=1
export VIRTUALENV_ALWAYS_COPY=1
/usr/local/python36/bin/virtualenv --always-copy ./python36env
=====================================================================
[[email protected] ~]$ sudo /usr/local/python36/bin/pip3 install virtualenv
[[email protected] ~]$ /usr/local/python36/bin/virtualenv ./python36env
[[email protected] ~]$ source ./python36env/bin/activate
(python36env) [[email protected] ~]$ pip list
Package    Version
---------- -------
pip        18.1
setuptools 40.6.2
wheel      0.32.3
(python36env) [[email protected] ~]$ pip install "django>=1.11,<2.0"
Successfully installed django-1.11.17 pytz-2018.7
安裝資料庫
(python36env) [[email protected] ~]$ sudo yum -y install mariadb mariadb-server mariadb-devel
(python36env) [[email protected] ~]$ sudo vim /etc/my.cnf
[mysqld]
default-storage-engine = innodb
innodb_file_per_table
collation-server = utf8_general_ci
init-connect = 'SET NAMES utf8'
character-set-server = utf8
(python36env) [[email protected] ~]$ sudo systemctl start mariadb
(python36env) [[email protected] ~]$ sudo systemctl enable mariadb
(python36env) [[email protected] ~]$ pip install mysqlclient
初始化資料庫
(python36env) [[email protected] ~]$ mysql_secure_installation
(python36env) [[email protected] ~]$ mysql -uroot -pAbcd.1234
MariaDB [(none)]> create database devops CHARACTER SET utf8;
建立Django專案:
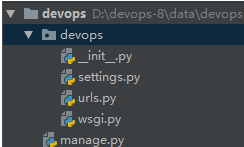
(python36env) [[email protected] ~]$ django-admin startproject devops
配置pycharm選編譯器 setting -> Project:devops -> Project Interpreter
連線mysql資料庫:
devops/settings.py
DATABASES = {
    'default': {
        'ENGINE': 'django.db.backends.mysql',
        'NAME': 'devops',
        'USER': 'root',
        'PASSWORD': 'Abcd.1234',
        'HOST': '127.0.0.1',
        'PORT': 3306,
        'OPTIONS':{
            'init_command':'SET default_storage_engine=INNODB;',
        },
    }
}
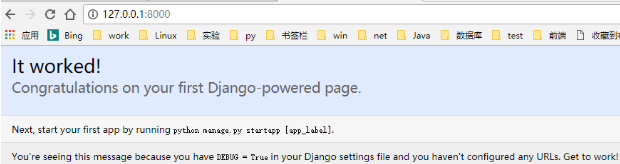
啟動服務:
方法一:
(python36env) [[email protected] devops]$ python manage.py runserver 0.0.0.0:8000
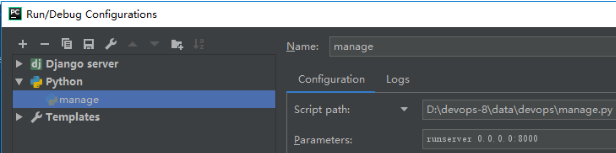
方法二:
在pycharm的manage.py點選run的Edit Configurations,新增引數,然後再執行manage.py
(python36env) [[email protected] devops]$ tree
.
├── devops
│   ├── __init__.py
│   ├── __pycache__
│   │   ├── __init__.cpython-36.pyc
│   │   ├── settings.cpython-36.pyc
│   │   ├── urls.cpython-36.pyc
│   │   └── wsgi.cpython-36.pyc
│   ├── settings.py
│   ├── urls.py
│   └── wsgi.py
└── manage.py


2 directories, 9 files
最外層的devops/目錄是專案的一個容器
manage.py一個實用的命令列工具,可讓你以各種方式與該Django專案進行交付;
內層的devops/目錄是專案中的實際Python包,通過它可以匯入它裡面的任何東西;
devops/init.py:一個空檔案,告訴Python該目錄是一個Python包;
devops/setting.py:該Django專案的配置檔案;
devops/urls.py:該Django專案的URL宣告;
devops/wsgi.py:一個WSGI相容的Web伺服器入口;
使用APPS
步驟一:新建Django app名為dashboard
(python36env) [[email protected] devops]$ python manage.py startapp dashboard
(python36env) [[email protected] devops]$ cd dashboard/
(python36env) [[email protected] dashboard]$ tree
.
├── admin.py
├── apps.py
├── __init__.py
├── migrations
│   └── __init__.py
├── models.py
├── tests.py
└── views.py

1 directory, 7 files
步驟二:讓專案呼叫apps,配置URL:
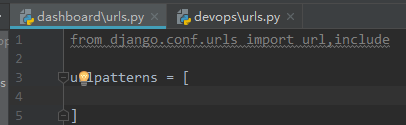
devops/urls.py
from django.conf.urls import url,include
from django.contrib import admin

urlpatterns = [
    url(r'^admin/', admin.site.urls),
    url(r'^dashboard/',include("dashboard.urls")),
]
步驟三:啟用APP:
devops/settings.py
INSTALLED_APPS = [
    'django.contrib.admin',
    'django.contrib.auth',
    'django.contrib.contenttypes',
    'django.contrib.sessions',
    'django.contrib.messages',
    'django.contrib.staticfiles',
    'dashboard',
]
步驟四:編寫檢視函式
devops/views.py
from django.shortcuts import render
from django.http import HttpResponse
# Create your views here.
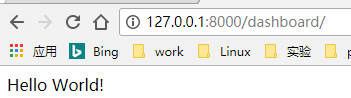
def index(request):
return HttpResponse("Hello World!")
步驟五:配置URL
dashoard/urls.py
from django.conf.urls import url,include
from .views import index

urlpatterns = [
    url(r'^$', index, name='index'),
]