
Spring boot入門五 spring mvc spring boot mybatis配置整合
備註:
通過前面幾章的操作,對Spring Boot已經有了基本的瞭解,不過Spring Boot他也僅僅是個封裝整合引用的盒子而已,需要與具體的專案相結合才能真正的使用起來,
主要是記錄下 使用Spring Boot實現 Spring Mvc 和mybatis的整合:
具體配置如下:
1、建立Maven專案,可以是web專案或者也可以是基本maven專案,
2、配置pom.xml
<project xmlns="http://maven.apache.org/POM/4.0.0" xmlns:xsi="http://www.w3.org/2001/XMLSchema-instance"
	xsi:schemaLocation="http://maven.apache.org/POM/4.0.0 http://maven.apache.org/maven-v4_0_0.xsd">
	<modelVersion>4.0.0</modelVersion>
	<groupId>com.sam.project</groupId>
	<artifactId>spring_boot_mvc</artifactId>
	<packaging>war</packaging>
	<version>0.0.1-SNAPSHOT</version>
	<name>spring_boot_mvc Maven Webapp</name>
	<url>http://maven.apache.org</url>

	<parent>
		<groupId>org.springframework.boot</groupId>
		<artifactId>spring-boot-starter-parent</artifactId>
		<version>1.5.1.RELEASE</version>
	</parent>

	<properties>
		<webVersion>3.1</webVersion>
	</properties>
	<dependencies>
		<dependency>
			<groupId>org.springframework.boot</groupId>
			<artifactId>spring-boot-starter-web</artifactId>
			<exclusions>
				<exclusion>
					<artifactId>log4j-over-slf4j</artifactId>
					<groupId>org.slf4j</groupId>
				</exclusion>
				<exclusion>
					<groupId>org.springframework.boot</groupId>
					<artifactId>spring-boot-starter-tomcat</artifactId>
				</exclusion>
			</exclusions>
		</dependency>
		<dependency>
			<groupId>org.springframework.boot</groupId>
			<artifactId>spring-boot-starter-tomcat</artifactId>
			<scope>provided</scope>
		</dependency>

		<dependency>
			<groupId>org.springframework.boot</groupId>
			<artifactId>spring-boot-configuration-processor</artifactId>
			<optional>true</optional>
		</dependency>

		<dependency>
			<groupId>org.springframework.boot</groupId>
			<artifactId>spring-boot-starter-jdbc</artifactId>
		</dependency>
		<dependency>
			<groupId>org.springframework.boot</groupId>
			<artifactId>spring-boot-starter-aop</artifactId>
		</dependency>

		<dependency>
			<groupId>mysql</groupId>
			<artifactId>mysql-connector-java</artifactId>
		</dependency>
		<!--mybatis -->
		<dependency>
			<groupId>org.mybatis.spring.boot</groupId>
			<artifactId>mybatis-spring-boot-starter</artifactId>
			<version>1.2.0</version>
		</dependency>
		<dependency>
			<groupId>com.alibaba</groupId>
			<artifactId>druid</artifactId>
			<version>1.0.11</version>
		</dependency>

		<!-- spring boot tomcat jsp 支援開啟 -->
		<dependency>
			<groupId>org.apache.tomcat.embed</groupId>
			<artifactId>tomcat-embed-jasper</artifactId>
		</dependency>
		<!-- servlet支援開啟 -->
		<dependency>
			<groupId>javax.servlet</groupId>
			<artifactId>javax.servlet-api</artifactId>
		</dependency>
		<!-- jstl 支援開啟 -->
		<dependency>
			<groupId>javax.servlet</groupId>
			<artifactId>jstl</artifactId>
		</dependency>
	</dependencies>

	<build>
		<plugins>
			<plugin>
				<artifactId>maven-compiler-plugin</artifactId>
				<configuration>
					<source>1.8</source>
					<target>1.8</target>
				</configuration>
			</plugin>
		</plugins>
	</build>
</project>
3、配置屬性檔案
在resources目錄下建立application.properties
#資料來源驅動
jdbc.ds.url=jdbc:mysql://localhost/springboot?autoReconnect=true&useUnicode=true&characterEncoding=utf-8&zeroDateTimeBehavior=convertToNull
jdbc.ds.username=root
jdbc.ds.password=root
jdbc.ds.driver-class-name=com.mysql.jdbc.Driver

#mybatis配置
mybatis.type-aliases-package=com.sam.project.*.model
mybatis.mapper-locations=classpath:mapper/*.xml

server.port=8088
server.contextPath=/spring_boot
#設定環境配置
#spring.profiles.active=dev


#http encoding
spring.http.encoding.charset=UTF-8
spring.http.encoding.enabled=true
spring.http.encoding.force=true


#日誌
logging.file=/export/log
logging.level.root=INFO
logging.level.org.springframework.web=INFO
logging.level.sample.mybatis.mapper=TRACE

#關閉啟動Logo
spring.main.banner-mode=off


#設定mvc頁面跳轉
spring.mvc.view.prefix=/WEB-INF/jsp/
spring.mvc.view.suffix=.jsp
4、配置Mybatis
1)、建立Mapper介面檔案
package com.sam.project.mvc.mapper;

import java.util.List;

import com.sam.project.mvc.model.User;

/**
 * @ClassName: UserMapper
 * @Description: mybites資料查詢介面
 */
public interface UserMapper {

	List<User> queryList();

	void save(User user);

	void batchDelete(Integer[] ids);

	void update(User user);

}
2)、建立mapper.xml
在resources目錄下建立mapper目錄,並建立UserMapper.xml
/mapper/UserMapper.xml
<?xml version="1.0" encoding="UTF-8"?>
<!DOCTYPE mapper PUBLIC "-//mybatis.org//DTD Mapper 3.0//EN"
	"http://mybatis.org/dtd/mybatis-3-mapper.dtd">
<mapper namespace="com.sam.project.mvc.mapper.UserMapper">
	<select id="queryList" resultType="com.sam.project.mvc.model.User">
		SELECT u.id, u.username, u.password, u.email, u.useable, u.addtime, u.logintime, u.loginip FROM t_user u
	</select>

	<select id="queryById" resultType="com.sam.project.mvc.model.User">
		SELECT u.id, u.username, u.password, u.email, u.useable, u.addtime, u.logintime, u.loginip FROM t_user u where u.id = #{id}
	</select>

	<insert id="save">
		insert into t_user(username, password, email, useable, addtime)
		values(#{username}, #{password}, #{email}, #{useable}, now())
	</insert>

	<update id="update">
		update t_user set password = #{password}, email = #{email}, useable = #{useable} where id = #{id}
	</update>

	<delete id="batchDelete">
		delete from t_user where id in
		<foreach collection="array" item="item" open="(" separator="," close=")">
			#{item}
		</foreach>
	</delete>

	<!-- <delete id="delUsers">
		delete from t_user where id in
		<foreach collection="list" item="item" open="(" separator="," close=")">
			#{item}
		</foreach>
	</delete> -->
</mapper>
3)、建立實體類
package com.sam.project.mvc.model;

/**
 * @ClassName: User
 * @Description: 實體模型
 */
public class User {
	private Integer id;

	private String username;

	private String password;

	private String email;

	/**
	 * 是否可用(0禁用,1可用)
	 */
	private Integer useable;

	/**
	 * 建立時間
	 */
	private String addtime;

	/**
	 * 登陸時間
	 */
	private String logintime;

	/**
	 * 登陸IP
	 */
	private String loginip;

	/**
	 * @return id
	 */
	public Integer getId() {
		return id;
	}

	/**
	 * @param id
	 */
	public void setId(Integer id) {
		this.id = id;
	}

	/**
	 * @return username
	 */
	public String getUsername() {
		return username;
	}

	/**
	 * @param username
	 */
	public void setUsername(String username) {
		this.username = username;
	}

	/**
	 * @return password
	 */
	public String getPassword() {
		return password;
	}

	/**
	 * @param password
	 */
	public void setPassword(String password) {
		this.password = password;
	}

	/**
	 * @return email
	 */
	public String getEmail() {
		return email;
	}

	/**
	 * @param email
	 */
	public void setEmail(String email) {
		this.email = email;
	}

	/**
	 * 獲取是否可用(0禁用,1可用)
	 *
	 * @return useable - 是否可用(0禁用,1可用)
	 */
	public Integer getUseable() {
		return useable;
	}

	/**
	 * 設定是否可用(0禁用,1可用)
	 *
	 * @param useable
	 *            是否可用(0禁用,1可用)
	 */
	public void setUseable(Integer useable) {
		this.useable = useable;
	}

	/**
	 * 獲取建立時間
	 *
	 * @return addtime - 建立時間
	 */
	public String getAddtime() {
		return addtime;
	}

	/**
	 * 設定建立時間
	 *
	 * @param addtime
	 *            建立時間
	 */
	public void setAddtime(String addtime) {
		this.addtime = addtime;
	}

	/**
	 * 獲取登陸時間
	 *
	 * @return logintime - 登陸時間
	 */
	public String getLogintime() {
		return logintime;
	}

	/**
	 * 設定登陸時間
	 *
	 * @param logintime
	 *            登陸時間
	 */
	public void setLogintime(String logintime) {
		this.logintime = logintime;
	}

	/**
	 * 獲取登陸IP
	 *
	 * @return loginip - 登陸IP
	 */
	public String getLoginip() {
		return loginip;
	}

	/**
	 * 設定登陸IP
	 *
	 * @param loginip
	 *            登陸IP
	 */
	public void setLoginip(String loginip) {
		this.loginip = loginip;
	}
}
4)、建立Service業務處理類UserService
package com.sam.project.mvc.service;

import java.util.List;

import org.springframework.beans.factory.annotation.Autowired;
import org.springframework.stereotype.Service;

import com.sam.project.mvc.common.AjaxResult;
import com.sam.project.mvc.mapper.UserMapper;
import com.sam.project.mvc.model.User;

@Service
public class UserService {

	@Autowired
	private UserMapper userMapper;

	public AjaxResult queryList() {
		List<User> list = userMapper.queryList();
		return new AjaxResult(list);
	}

	public AjaxResult save(User user) {
		user.setUsername("user" + System.currentTimeMillis());
		user.setPassword("123456");
		user.setEmail("user" + System.currentTimeMillis() + "@test.com");
		user.setUseable(1);
		userMapper.save(user);
		return new AjaxResult();
	}

	public AjaxResult batchDelete(Integer[] ids) {
		userMapper.batchDelete(ids);
		return new AjaxResult();
	}

	public AjaxResult update(User user) {
		userMapper.update(user);
		return new AjaxResult();
	}

}
4、配置Controller類UserController
package com.sam.project.mvc.controller;

import org.springframework.beans.factory.annotation.Autowired;
import org.springframework.stereotype.Controller;
import org.springframework.web.bind.annotation.RequestMapping;
import org.springframework.web.bind.annotation.ResponseBody;

import com.sam.project.mvc.common.AjaxResult;
import com.sam.project.mvc.model.User;
import com.sam.project.mvc.service.UserService;

/**
 * @ClassName: UserController
 * @Description: 使用者Controller
 */
@Controller
public class UserController {

	@Autowired
	private UserService userService;

	@ResponseBody
	@RequestMapping("/queryList")
	public AjaxResult queryList(){
		return userService.queryList();
	}

	@ResponseBody
	@RequestMapping("/addUser")
	public AjaxResult addUser(User user){
		return userService.save(user);
	}

	@ResponseBody
	@RequestMapping("/delUser")
	public AjaxResult delUser(Integer[] ids){
		return userService.batchDelete(ids);
	}

	@ResponseBody
	@RequestMapping("/updateUser")
	public AjaxResult updateUser(User user){
		return userService.update(user);
	}

}
5、配置資料庫處理類
package com.sam.project.mvc.common;

import javax.sql.DataSource;

import org.mybatis.spring.annotation.MapperScan;
import org.springframework.boot.context.properties.ConfigurationProperties;
import org.springframework.context.annotation.Bean;
import org.springframework.context.annotation.Configuration;

import com.alibaba.druid.pool.DruidDataSource;

/**
 * @ClassName: DataSourceConfiguration
 * @Description: 單資料來源配置
 */
@Configuration
@MapperScan(basePackages = "com.sam.project.*.mapper")
public class DataSourceConfiguration {

    @Bean
    @ConfigurationProperties(prefix = "jdbc.ds")
    public DataSource readDataSource() {
        return new DruidDataSource();
    }
}
資料庫建立指令碼:
CREATE TABLE `t_user` (
  `id` int(11) NOT NULL,
  `username` varchar(255) default NULL,
  `password` varchar(255) default NULL,
  `email` varchar(255) default NULL,
  `useable` int(20) default NULL,
  `addtime` datetime default NULL,
  `logintime` datetime default NULL,
  `loginip` varchar(255) default NULL,
  PRIMARY KEY  (`id`)
) ENGINE=InnoDB DEFAULT CHARSET=utf8;
6、寫個測試jason返回的公用類
package com.sam.project.mvc.common;

/**
 * @ClassName: AjaxResult
 * @Description: 封裝返回資料
 */
public class AjaxResult {

	private int retcode = 1;
	private String retmsg = "操作成功";
	private Object data;

	public AjaxResult(int retcode, String retmsg, Object data){
		this.retcode = retcode;
		this.retmsg = retmsg;
		this.data = data;
	}

	public AjaxResult(int retcode, String retmsg){
		this.retcode = retcode;
		this.retmsg = retmsg;
	}

	public AjaxResult(Object data){
		this.retmsg = "查詢成功";
		this.data = data;
	}

	public AjaxResult(int retcode){
		this.retcode = retcode;
		this.retmsg = "操作失敗";
	}

	public AjaxResult(String retmsg){
		this.retcode = 0;
		this.retmsg = retmsg;
	}

	public AjaxResult(){

	}

	public int getRetcode() {
		return retcode;
	}
	public void setRetcode(int retcode) {
		this.retcode = retcode;
	}
	public String getRetmsg() {
		return retmsg;
	}
	public void setRetmsg(String retmsg) {
		this.retmsg = retmsg;
	}
	public Object getData() {
		return data;
	}
	public void setData(Object data) {
		this.data = data;
	}

	@Override
	public String toString() {
		return "AjaxResult [retcode=" + retcode + ", retmsg=" + retmsg + ", data=" + data + "]";
	}

}
7、建立啟動入口:
package com.sam.project.mvc;

import org.springframework.boot.SpringApplication;
import org.springframework.boot.autoconfigure.SpringBootApplication;
import org.springframework.boot.builder.SpringApplicationBuilder;
import org.springframework.boot.web.support.SpringBootServletInitializer;
import org.springframework.cache.annotation.EnableCaching;

/**
 * @ClassName: Application
 * @Description: springboot啟動器
 */
// 開啟快取
@EnableCaching
@SpringBootApplication
public class Application extends SpringBootServletInitializer {

	@Override
	protected SpringApplicationBuilder configure(SpringApplicationBuilder application) {
		return application.sources(Application.class);
	}

	public static void main(String[] args) {
		SpringApplication.run(Application.class, args);
	}
}
好了,至此,配置完成,建立完成後目錄如下:
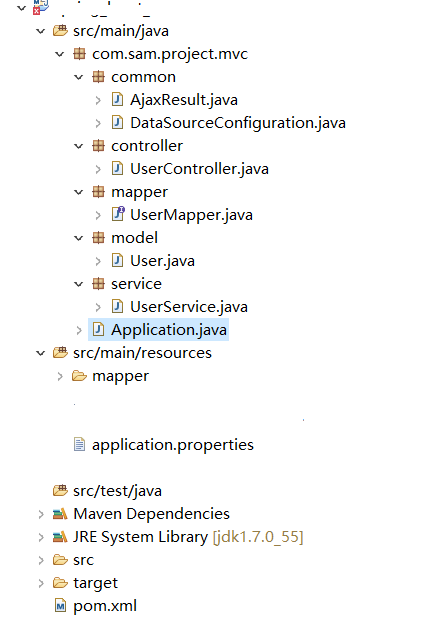
啟動Application 類Main方法進行開啟Spring Boot
由於沒有做頁面,所以啟動完成後,直接訪問後臺方法 http://localhost:8088/spring_boot/queryList

至此使用Spring Boot配置Spring Mvc 和MyBatis完成!
相關推薦
Spring boot入門五 spring mvc spring boot mybatis配置整合
備註:通過前面幾章的操作,對Spring Boot已經有了基本的瞭解,不過Spring Boot他也僅僅是個封裝整合引用的盒子而已,需要與具體的專案相結合才能真正的使用起來,主要是記錄下 使用Spring Boot實現 Spring Mvc 和mybatis的整合:具體配置如
spring boot 入門1-----如何使用@Value註解讀取配置檔案以及使用@ConfigrationProperties註解
讀取.yml檔案屬性值的方式 1)如何將配置檔案中的屬性值與欄位匹配起來 @Value("${配置檔案中屬性的名}") 在application.yml檔案中 &n
Spring boot入門:快速搭建Spring boot專案(一)
(一)Spring boot介紹 本部分摘自:https://www.zhihu.com/question/64671972/answer/223383505 Spring Boot是由Pivotal團隊提供的全新框架,其設計目的是用來簡化新Spring應用的初始搭建以及開發過程。該框架使用了特定
Spring Boot(五):Spring Boot 整合 Spring Security (I)
1. 新增Maven依賴 在pom.xml引用spring security. <dependency> <groupId>org.springframework.boot</groupId> <artifac
Spring Boot入門(一):搭建Spring Boot專案
從本篇部落格開始,我們開始進入Spring Boot的世界,它的出現使Spring的開發變得更加簡潔,因此一經推出受到眾多程式設計師的喜愛。 作為Spring Boot系列的第一篇部落格,我們先來講解下如何搭建Spring Boot專案。 如果你直接就使用的是Spring Boot,建議你有時間可以學習下S
Spring框架第五篇之Spring與AOP
lease nco 列表 odi 動態 www implement .get org 一、AOP概述 AOP(Aspect Orient Programming),面向切面編程,是面向對象編程OOP的一種補充。面向對象編程是從靜態角度考慮程序的結構,而面向切面編程是從動態角
Spring Cloud 入門教程:聊聊Spring Cloud
一、 Spring Cloud 是什麼? Spring Cloud 是將分散式系統中一系列基礎框架/工具進行整合的框架。其中包含:服務註冊與發現、服務閘道器、熔斷器、配置中心、訊息中心、服務鏈路追蹤等等。 Spring Cloud 並沒有重複造輪子,Spring Cloud只是依賴於Spring Boo
Spring 初探(五)(Spring Bean 自動裝配與自定義監聽事件)
現在通行的使用bean的方法是不通過xml進行配置,而僅僅採用java 內建的類指明bean及相應的依賴關係,下面展開敘述。 @Configuration可以宣告某個類是作為配置類,在這樣的類中 通過@Bean進行修飾的方法可以返回相應的bean類 通過由Annotatio
Myeclipse——Spring 從入門到精通一 Spring簡單開發步驟
一、Spring詳解 二、第一個例子(本例子使用的是spring 3) 首先在Myeclipse中建立一個java project。 1、在建立的目錄中新建資料夾lib,拷貝spring的dist中的jar包和commons-logging包(單獨下載的)並新增,Bui
Spring實戰 | 第二部分 Web中的Spring(第五章 構建Spring Web應用程式)
第五章 構建Spring Web應用程式 對映請求到Spring控制器 透明地繫結表單引數 校驗表單提交 一
Spring系列(五):Spring AOP原始碼解析
一、@EnableAspectJAutoProxy註解 在主配置類中新增@EnableAspectJAutoProxy註解,開啟aop支援,那麼@EnableAspectJAutoProxy到底做了什麼?接下來分析下: @EnableAspectJAutoProxy點進去如下: &nb
Flutter快速入門 五步搞定Flutter環境配置
Flutter是什麼? Flutter是一款移動應用程式SDK,一份程式碼可以同時生成iOS和Android兩個高效能、高保真的應用程式。 Flutter目標是使開發人員能夠交付在不同平臺上都感覺自然流暢的高效能應用程式。我們相容滾動行為、排版、圖示等方面的
Java - Struts框架教程 Hibernate框架教程 Spring框架入門教程(新版) sping mvc spring boot spring cloud Mybatis
java ee cloud pac .cn java get pin nat 輕量級 https://www.zhihu.com/question/21142149 http://how2j.cn/k/hibernate/hibernate-tutorial/31.html
Spring Boot入門系列五(FreeMarker模板的使用)
前端 start marker pin 用戶 需要 類庫 準備 control FreeMarker模板的使用 FreeMarker是一款模板引擎: 即一種基於模板和要改變的數據, 並用來生成輸出文本(HTML網頁、電子郵件、配置文件、源代碼等)的通用工具。 它不是面向
Spring Boot入門教程(四十五): 事務@Transactional
一:簡介 在Spring中事務可以通過兩種方式來管理,一種是程式設計式事務另一種是宣告式事務 宣告式事務:@Transactional 在方法的開頭開始事務,在方法的結束提交事務 程式設計式事務:TransactionTemplate或者PlatformTransa
Spring Boot入門教程(五十): httpclient
在開發中經常會遇到呼叫第三方的介面,這裡介紹一下在spring boot中如何使用httpclient來發送get和post請求。 引入依賴 <dependency> <groupId>org.apache.httpco
Spring Boot入門教程(五十二): 在Docker上執行Spring Boot
一:基礎示例 1.1 安裝JDK和Maven 安裝openjdk: yum -y install java-1.8.0-openjdk* export JAVA_HOME=/usr/lib/jvm/java-1.8.0-openjdk-1.8.0.191.b12-0.el7_
Spring Boot入門教程(五十一): JSON Web Token(JWT)
一:認證 在瞭解JWT之前先來回顧一下傳統session認證和基於token認證。 1.1 傳統session認證 http協議是一種無狀態協議,即瀏覽器傳送請求到伺服器,伺服器是不知道這個請求是哪個使用者發來的。為了讓伺服器知道請求是哪個使用者發來的,需要讓使用者提供
Spring Boot入門系列(十五)Spring Boot 開發環境熱部署
在實際的專案開發過中,當我們修改了某個java類檔案時,需要手動重新編譯、然後重新啟動程式的,整個過程比較麻煩,特別是專案啟動慢的時候,更是影響開發效率。其實Spring Boot的專案碰到這種情況,同樣也同樣需要經歷重新編譯、重新啟動程式的過程。 只不過 Spring Boot 提供了一個spring-bo
spring boot入門
pom.xml evel 建議 主函數 log 16px eight dev 連接數 一、對spring boot的解釋:(百度百科) Spring Boot是由Pivotal團隊提供的全新框架,其設計目的是用來簡化新Spring應用的初始搭建以及開發過程。該