
SpringCloud+MyBatis+Redis整合—— 超詳細例項(一)
SpringCloud+MyBatis+Redis整合—— 超詳細例項(一)
1、SpringCloud+MyBatis
MyBatis 是一款優秀的輕量級半自動持久層框架,與之相對應的還有hibernate框架。①
話不多說,接下來搭建SpringCloud+MyBatis環境:
- 第一步,在SpringCloud環境中的pom.xml中加入:

 1 <!-- 引用Mybatis 和 Mysql驅動開始  -->
 2         <dependency>
 3             <groupId>org.mybatis.spring.boot</groupId>
 4             <artifactId>mybatis-spring-boot-starter</artifactId>
 5             <version>1.3.0</version>
 6         </dependency>
 7         <dependency>
 8             <groupId>mysql</groupId>
 9             <artifactId>mysql-connector-java</artifactId>
10         </dependency>
11 <!-- 引用Mybatis 和 Mysql驅動結束  -->
- 第二步,在Mysql資料庫中建立User表
-- ----------------------------
-- Table structure for user
-- ----------------------------
DROP TABLE IF EXISTS `user`;
CREATE TABLE `user` (
  `id` int(11) NOT NULL COMMENT '主鍵',
  `name` varchar(64) NOT NULL COMMENT '姓名',
  `birthday` date DEFAULT NULL COMMENT '生日',
  `address` varchar(256) DEFAULT NULL COMMENT '地址',
  PRIMARY KEY (`id`)
) ENGINE=InnoDB DEFAULT CHARSET=utf8;

-- ----------------------------
-- Records of user
-- ----------------------------
INSERT INTO `user` VALUES ('1', '石露露', '1994-10-08', '卡布奇諾國際社群');
- 第三步,在SpringCloud中配置反向生成工具對User表生成相應的實體類和配置檔案
在pom.xml檔案的<bulid>標籤②中通過maven新增外掛引用
 1         <plugin>
 2                 <groupId>org.mybatis.generator</groupId>
 3                 <artifactId>mybatis-generator-maven-plugin</artifactId>
 4                 <version>1.3.5</version>
 5                 <dependencies>
 6                     <dependency>
 7                         <groupId> mysql</groupId>
 8                         <artifactId> mysql-connector-java</artifactId>
 9                         <version> 5.1.39</version>
10                     </dependency>
11                     <dependency>
12                         <groupId>org.mybatis.generator</groupId>
13                         <artifactId>mybatis-generator-core</artifactId>
14                         <version>1.3.5</version>
15                     </dependency>
16                 </dependencies>
17                 <executions>
18                     <execution>
19                         <id>Generate MyBatis Artifacts</id>
20                         <phase>package</phase>
21                         <goals>
22                             <goal>generate</goal>
23                         </goals>
24                     </execution>
25                 </executions>
26                 <configuration>
27                     <!--允許移動生成的檔案 -->
28                     <verbose>true</verbose>
29                     <!-- 是否覆蓋 -->
30                     <overwrite>true</overwrite>
31                     <!-- 自動生成的配置 -->
32                     <configurationFile>
33                         src/main/resources/mybatis-generator.xml
34                     </configurationFile>
35                 </configuration>
36             </plugin>
新建配置檔案generatorConfig.xml,配置檔案需配置資料庫jar包位置,生成的檔案存放位置等資訊:
 1 <?xml version="1.0" encoding="UTF-8"?>
 2 <!DOCTYPE generatorConfiguration
 3         PUBLIC "-//mybatis.org//DTD MyBatis Generator Configuration 1.0//EN"
 4         "http://mybatis.org/dtd/mybatis-generator-config_1_0.dtd">
 5 <generatorConfiguration>
 6     <!--mysql 連線資料庫jar 這裡選擇自己本地位置-->
 7     <classPathEntry location="F:\dev-space\repo\mysql\mysql-connector-java\5.1.45\mysql-connector-java-5.1.45.jar" />
 8     <context id="testTables" targetRuntime="MyBatis3">
 9         <commentGenerator>
10             <!-- 是否去除自動生成的註釋 true:是 : false:否 -->
11             <property name="suppressAllComments" value="true" />
12         </commentGenerator>
13         <!--資料庫連線的資訊:驅動類、連線地址、使用者名稱、密碼 -->
14         <jdbcConnection driverClass="com.mysql.jdbc.Driver"
15                         connectionURL="jdbc:mysql://192.168.1.100:3306/test?serverTimezone=UTC" userId="bdgascloud"
16                         password="bdgascloud">
17         </jdbcConnection>
18         <!-- 預設false,把JDBC DECIMAL 和 NUMERIC 型別解析為 Integer,為 true時把JDBC DECIMAL 和
19            NUMERIC 型別解析為java.math.BigDecimal -->
20         <javaTypeResolver>
21             <property name="forceBigDecimals" value="false" />
22         </javaTypeResolver>
23
24         <!-- targetProject:生成PO類的位置 -->
25         <javaModelGenerator targetPackage="com.didispace.web.jdbc.po"
26                             targetProject="src/main/java">
27             <!-- enableSubPackages:是否讓schema作為包的字尾 -->
28             <property name="enableSubPackages" value="false" />
29             <!-- 從資料庫返回的值被清理前後的空格 -->
30             <property name="trimStrings" value="true" />
31         </javaModelGenerator>
32         <!-- targetProject:mapper對映檔案生成的位置
33            如果maven工程只是單獨的一個工程,targetProject="src/main/java"
34            若果maven工程是分模組的工程,targetProject="所屬模組的名稱",例如:
35            targetProject="ecps-manager-mapper",下同-->
36         <sqlMapGenerator targetPackage="mapXml"
37                          targetProject="src/main/resources">
38             <!-- enableSubPackages:是否讓schema作為包的字尾 -->
39             <property name="enableSubPackages" value="false" />
40         </sqlMapGenerator>
41         <!-- targetPackage:mapper介面生成的位置 -->
42         <javaClientGenerator type="XMLMAPPER"
43                              targetPackage="com.didispace.web.jdbc.mapper"
44                              targetProject="src/main/java">
45             <!-- enableSubPackages:是否讓schema作為包的字尾 -->
46             <property name="enableSubPackages" value="false" />
47         </javaClientGenerator>
48         <!-- 指定資料庫表 -->
49         <table schema="" tableName="user"></table>③
50     </context>
51 </generatorConfiguration>
最好先右鍵專案選擇maven–>update project… ④
然後再maven build…. 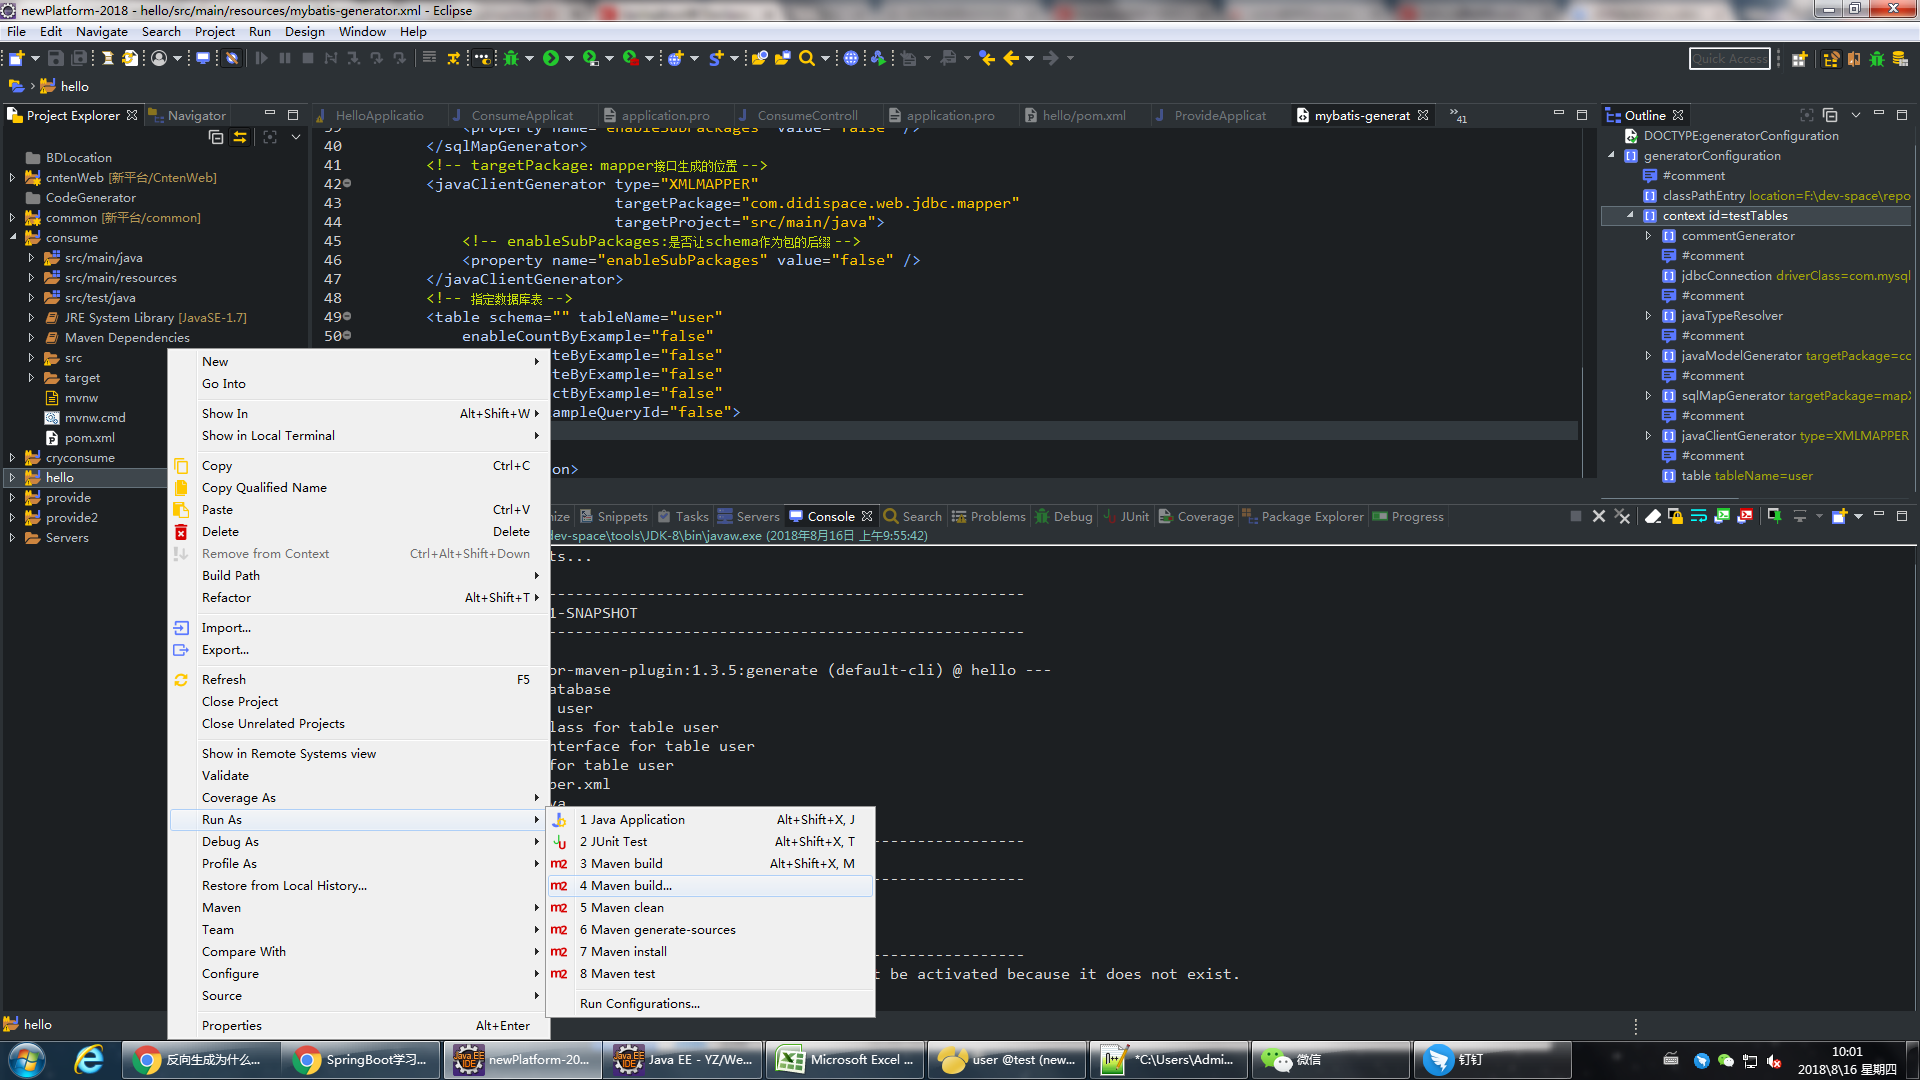
配置執行引數:
Goals:mybatis-generator:generate -e
Profiles:generatorConfig.xml
最後點選run等待完成 ,會發現如下檔案被自動生成:

- 第四步,在application.properties中新增
spring.datasource.url=jdbc:mysql://192.168.1.100:3306/test?serverTimezone=UTC #springboot會直接在容器中構建一個dataSource供我們使用。
spring.datasource.username=bdgascloud
spring.datasource.password=bdgascloud
spring.datasource.driver-class-name=com.mysql.jdbc.Driver
mybatis.typeAliasesPackage=com.didispace.web.jdbc.po  ⑤
mybatis.mapperLocations=classpath:mapXml/UserMapper.xml
- 第五步,在主application類中新增
 3 @MapperScan("com.didispace.web.jdbc.mapper")⑥
 4 @SpringBootApplication
 5 //@SpringBootApplication(exclude={DataSourceAutoConfiguration.class,HibernateJpaAutoConfiguration.class})
 6 public class HelloApplication {
 7
 8     public static void main(String[] args) {
 9         SpringApplication.run(HelloApplication.class, args);
10     }
11 }
最後在controller中執行方法,頁面展示效果
 1 @RestController
 2 public class HelloController {
 3     @Autowired
 4     private UserMapper userMapper;
 5
 6     @RequestMapping("/hello")
 7     public String index() {
 8
 9         User  user = userMapper.selectByPrimaryKey(1);
10
11         return "Hello SpringBoot"+user.getName();
12
13     }
14
15 }
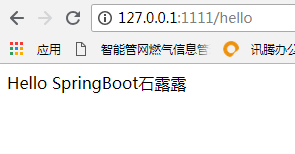
至此SpringCloud+MyBatis搭建成功!
註釋一:Mybatis和Hibernate框架的區別
- 說起Hibernate和MyBatis最大的區別,用很寬泛的話講就是hibernate是自動的,mybatis是半自動的。自動指的是hibernate因為有良好的對映機制,針對高階查詢,也可以不必手動編寫sql,開發者可以更關注於業務邏輯而不用擔心sql的生成和結果對映。mybatis半自動指的是它在做高階查詢時,必須手動寫sql以及resultMap。所以說,mybatis比hibernate開發工作量大。
- 第二點就是在sql優化方面,hibernate預設是會把表中所有的列都查出來的,而mybatis是自己指定要查哪些列。當然,hibernate允許自己指定查什麼,但是就會破壞hibernate開發的簡潔性。所以mybatis在sql優化上還是比hibernate靈活的。
- 第三點hibernate自帶日誌統計,而mybatis需要依靠log4j來實現
- 第四點hibernate強大的資料庫無關性,只需在xml檔案中配置驅動和方言,就可以實現和不同資料庫的互動。而mybatis的所有sql和所使用的資料庫有直接關係,一旦變更資料庫,那麼你的sql語句基本就是要修改了。
- 第五點隨便提一句,mybatis比hibernate更加適合開發複雜查詢的專案,且更容易上手,從第一點就可以看出來。
註釋二:Maven中構建外掛的標籤
註釋三:生成 po 和 mapper,都會生成 Example 類和其對應的 CURD方法(用於輔助查詢等)如果不需要在 table 標籤裡將要生成的方法給關掉即可,程式碼如下:
<table tableName="user"
enableCountByExample="false"
enableUpdateByExample="false"
enableDeleteByExample="false"
enableSelectByExample="false"
selectByExampleQueryId="false">
</table>
註釋四:update project本身是更新專案的意思。當Maven工程被做了一些改變後(主要是結構上的改變),必須讓maven重新生成或修改相關檔案。否則eclipse將不知道變化。這時候需要執行“update project”來更新相對應的“eclipse的.classpath”檔案,來更新它,讓eclipse知道這個包是buildpath。
註釋五:當沒有設定該屬性時,*.Mapper.xml檔案裡parameterType必須為類的全路徑 <insert id="insertSelective" parameterType="com.didispace.web.jdbc.po.User">,加上後為 <insert id="insertSelective" parameterType="User">即可。
註釋六:之前是直接在Mapper類上面添加註解@Mapper,這種方式要求每一個mapper類都需要新增此註解,麻煩,通過使用@MapperScan可以指定要掃描的Mapper類的包的路徑(支援多路徑)。