路由器逆向分析------MIPS交叉編譯環境的搭建(Buildroot)
為了能在我們熟悉的windows或者ubuntu下開發mips架構的程式,需要搭建mips程式的交叉編譯環境。mips程式的交叉編譯環境的構建需要用編譯Buildroot,Buildroot在編譯的過程中,會下載一些依賴包,所以在Buildroot的編譯安裝過程中必須確保網路暢通。
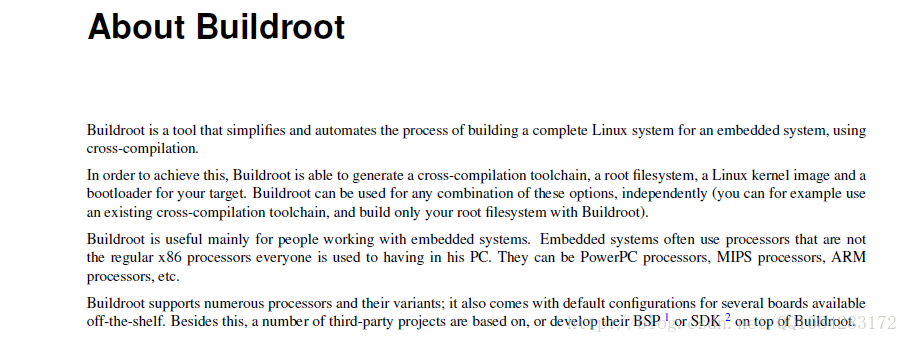
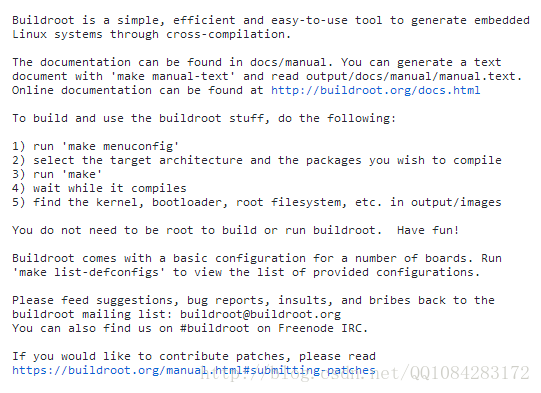
(1) what is Buildroot ?
(2) Buildroot 原始碼工程下載和編譯
Buildroot工程原始碼的下載,官方提供了兩種方法。
1.通過github的方式獲取:
RepositoryThe buildroot repository can be browsed online through cgit at
git clone git://git.buildroot.net/buildrootOr if you're behind a firewall blocking git:
git clone https://git.buildroot.net/buildrootIf you are not already familiar with using Git, we recommend you visit
Once you've checked out a copy of the source tree, you can update your source tree at any time so it is in sync with the latest and greatest by entering your buildroot directory and running the command:
git pull
Because you've only been granted anonymous access to the tree, you won't be able to push your changes to the repo. Changes can instead be submitted for inclusion by posting them to the buildroot mailing list.Older versions can be downloaded from the release archive.
1.github的方式
# 安裝依賴庫
$ sudo apt-get update
$ sudo apt-get install libncurses5-dev patch

# 下載原始碼
$ git clone https://github.com/buildroot/buildroot.git

# 進行編譯的配置
$ cd buildroot
$ make clean
$ make menuconfig
2.直接下載解壓
# 安裝依賴庫
$ sudo apt-get update
$ sudo apt-get install libncurses5-dev patch
# 下載原始碼
$ wget https://buildroot.org/downloads/snapshots/buildroot-snapshot.tar.bz2
$ tar -jxvf buildroot-snapshot.tar.bz2
# 進行編譯的配置
$ cd buildroot
$ make clean
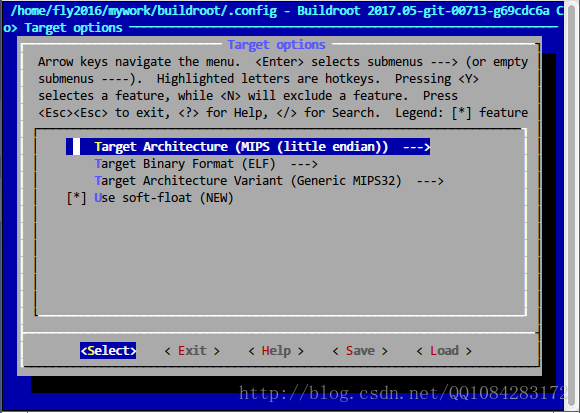
$ make menuconfig執行make menuconfig命令以後會出現Buildroot的編譯配置介面,截圖如下:
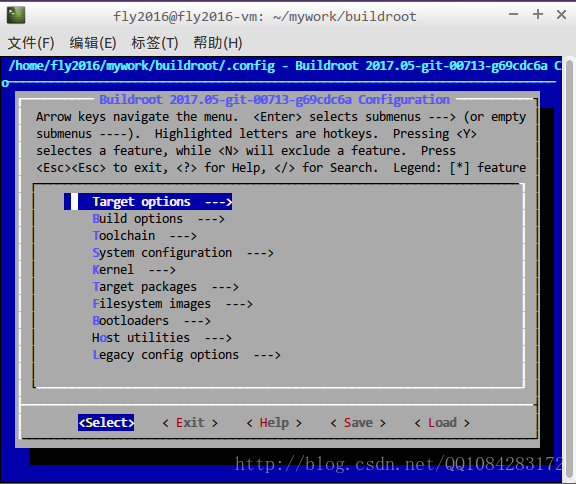
選擇 Target options--->Target Architecture (MIPS (little endian)),配置 Target Architecture 為 MIPS (little endian),Target Architecture Variant 自動配置為 (Generic MIPS32) ,不需要修改。其實,最後生成的編譯器在編譯程式的時,可以新增選項供使用者進行大端或者小端的設定。
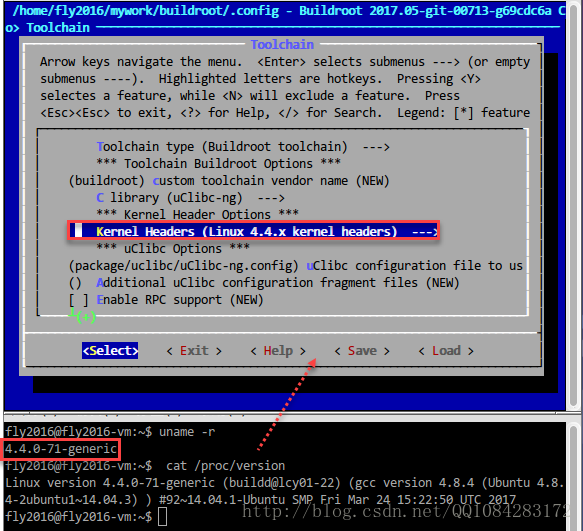
選擇 “Toolchain”, 將 “kernel headers” 改成 機器環境的Kernel版本(即改為編譯當前Buildroot的主機核心版本)。可以在主機上通過uname -r 或者cat /proc/version 檢視當前主機的核心版本。
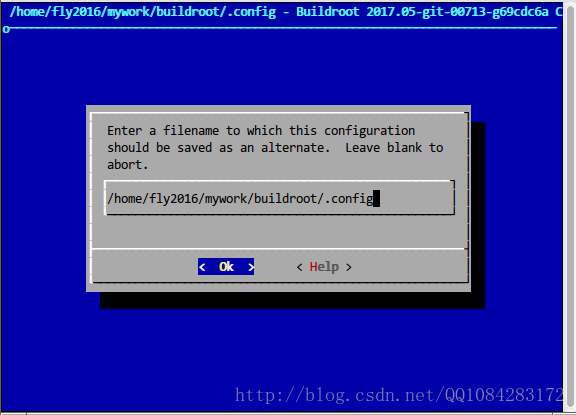
上面操作完成以後,儲存、退出Buildroot的編譯配置介面。
執行 ./configure 命令根據設定的配置引數生成編譯需要的Makefile檔案。
$ ./configure根據自己的具體需求配置好Buildroot的編譯配置引數之後,執行make進行編譯。在進行Buildroot編譯的過程中,一定要保持網路的暢通,因為在Buildroot的編譯過程中,會下載一些依賴包參與編譯。
$ make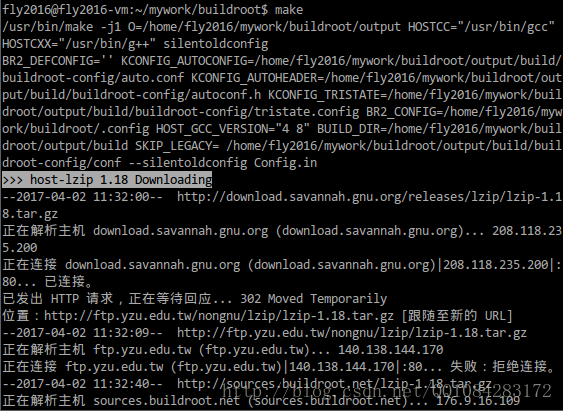
經過一段時間的編譯完成以後,在Buildroot的根目錄下會增加一個output檔案,其中包含已經編譯好的檔案。可以在 buildroot/output/host/usr/bin目錄下找到生成的交叉編譯工具,mips的編譯器就是該目錄下的mipsel-linux-gcc。
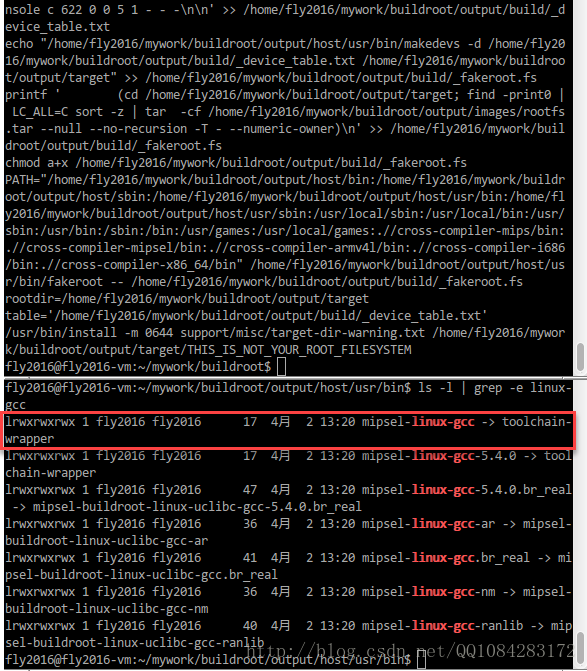
通過如下的命令,檢視一下 mipsel-linux-gcc的版本資訊。
$ ./mipsel-linux-gcc --version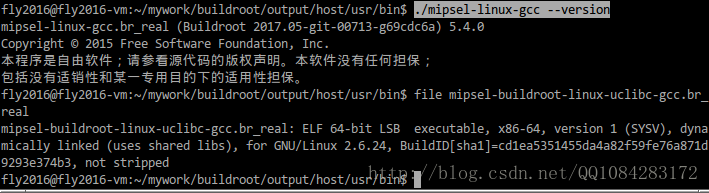
有關mipsel-linux-gcc的命令使用幫助:
[email protected]:~/mywork/buildroot/output/host/usr/bin$ ./mipsel-linux-gcc --h
用法:mipsel-linux-gcc.br_real [選項] 檔案...
選項:
  -pass-exit-codes         在某一階段退出時返回最高的錯誤碼
  --help                   顯示此幫助說明
  --target-help            顯示目標機器特定的命令列選項
  --help={common|optimizers|params|target|warnings|[^]{joined|separate|undocumented}}[,...]
                           顯示特定型別的命令列選項
  (使用‘-v --help’顯示子程序的命令列引數)
  --version                顯示編譯器版本資訊
  -dumpspecs               顯示所有內建 spec 字串
  -dumpversion             顯示編譯器的版本號
  -dumpmachine             顯示編譯器的目標處理器
  -print-search-dirs       顯示編譯器的搜尋路徑
  -print-libgcc-file-name  顯示編譯器伴隨庫的名稱
  -print-file-name=<庫>    顯示 <庫> 的完整路徑
  -print-prog-name=<程式>  顯示編譯器元件 <程式> 的完整路徑
  -print-multiarch         顯示目標的標準化 GNU 三元組(被用於庫路徑的一部分)
  -print-multi-directory   顯示不同版本 libgcc 的根目錄
  -print-multi-lib         顯示命令列選項和多個版本庫搜尋路徑間的對映
  -print-multi-os-directory 顯示作業系統庫的相對路徑
  -print-sysroot           顯示目標庫目錄
  -print-sysroot-headers-suffix 顯示用於尋找標頭檔案的 sysroot 字尾
  -Wa,<選項>               將逗號分隔的 <選項> 傳遞給彙編器
  -Wp,<選項>               將逗號分隔的 <選項> 傳遞給前處理器
  -Wl,<選項>               將逗號分隔的 <選項> 傳遞給連結器
  -Xassembler <引數>       將 <引數> 傳遞給彙編器
  -Xpreprocessor <引數>    將 <引數> 傳遞給前處理器
  -Xlinker <引數>          將 <引數> 傳遞給連結器
  -save-temps              不刪除中間檔案
  -save-temps=<arg>        不刪除中間檔案
  -no-canonical-prefixes   生成其他 gcc 元件的相對路徑時不生成規範化的
                           字首
  -pipe                    使用管道代替臨時檔案
  -time                    為每個子程序計時
  -specs=<檔案>            用 <檔案> 的內容覆蓋內建的 specs 檔案
  -std=<標準>              指定輸入原始檔遵循的標準
  --sysroot=<目錄>         將 <目錄> 作為標頭檔案和庫檔案的根目錄
  -B <目錄>                將 <目錄> 新增到編譯器的搜尋路徑中
  -v                       顯示編譯器呼叫的程式
  -###                     與 -v 類似,但選項被引號括住,並且不執行命令
  -E                       僅作預處理,不進行編譯、彙編和連結
  -S                       編譯到組合語言,不進行彙編和連結
  -c                       編譯、彙編到目的碼,不進行連結
  -o <檔案>                輸出到 <檔案>
  -pie                     生成位置無關可執行檔案
  -shared                  生成一個共享庫
  -x <語言>                指定其後輸入檔案的語言
                           允許的語言包括:c c++ assembler none
                           ‘none’意味著恢復預設行為,即根據檔案的副檔名猜測
                           原始檔的語言

以 -g、-f、-m、-O、-W 或 --param 開頭的選項將由 mipsel-linux-gcc.br_real 自動傳遞給其呼叫的
 不同子程序。若要向這些程序傳遞其他選項,必須使用 -W<字母> 選項。

報告程式缺陷的步驟請參見:
<http://bugs.buildroot.net/>.mipsel-linux-gcc其實是一個軟連線,mipsel-linux-gcc真實連線到的是mipsel-buildroot-linux-uclibc-cc.br_real程式。使用mipsel-linux-gcc交叉編譯工具進行mips程式的編譯測試,下面是測試的程式碼 hello.c:
#include <stdio.h>
#include <string.h>

int vul(char *src)
{
	char output[20] = {0};
	strcpy(output, src);
	printf("%s\n", output);

	return 0;
}


int main(int argc, char *argv[])
{
	if (argc < 2)
	{
		printf("need more arguments\n");

		return 1;
	}

	vul(argv[1]);

	return 0;
}# 靜態-static 編譯
$ ./mipsel-linux-gcc -o ./code/hello ./code/hello.c -static
# 檢視編譯後生成的程式
$ ls -l ./code
# 檢視編譯後生成的程式的格式
$ file ./code/hello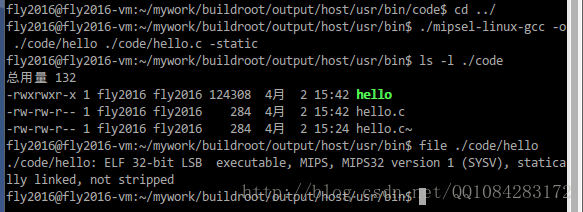
參考資料:
《解密家用路由器0day漏洞挖掘技術》小錯誤不少,感覺有些都是不該犯的低階錯誤。
(3) 直接下載MIPS程式的交叉編譯工具鏈
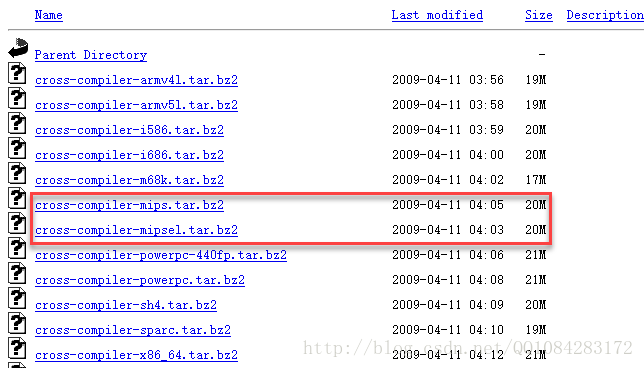
其實MIPS程式的交叉編譯工具gcc不必非得自己編譯得到,網站https://uclibc.org/上已經有編譯後的mips程式的交叉編譯工具提供給我們下載,在ubuntu系統上,可以使用指令碼 config.sh進行下載,指令碼檔案的內容如下:
#!/bin/bash
#this file aim to download xcompiler and install it
download_url="https://www.uclibc.org/downloads/binaries/0.9.30.1/cross-compiler-"
function download_bins {
echo "ready to download: $1.tar.bz2"
wget "${download_url}$1.tar.bz2" "--no-check-certificate"
echo "ready to tar: $1.tar.bz2"
tar -jxf $install_path/cross-compiler-$1.tar.bz2
sed -i '$a\export PATH=$PATH:'$install_path'/cross-compiler-'$1'/bin' /etc/profile
}
if [ $# == 0 ]
then
echo "Usage: $0 intall_path"
exit -1
elif [ $# == 1 ]
then
install_path=$1
fi
cd $install_path
download_bins mips
download_bins mipsel
download_bins armv4l
download_bins i686
download_bins x86_64
source /etc/profile
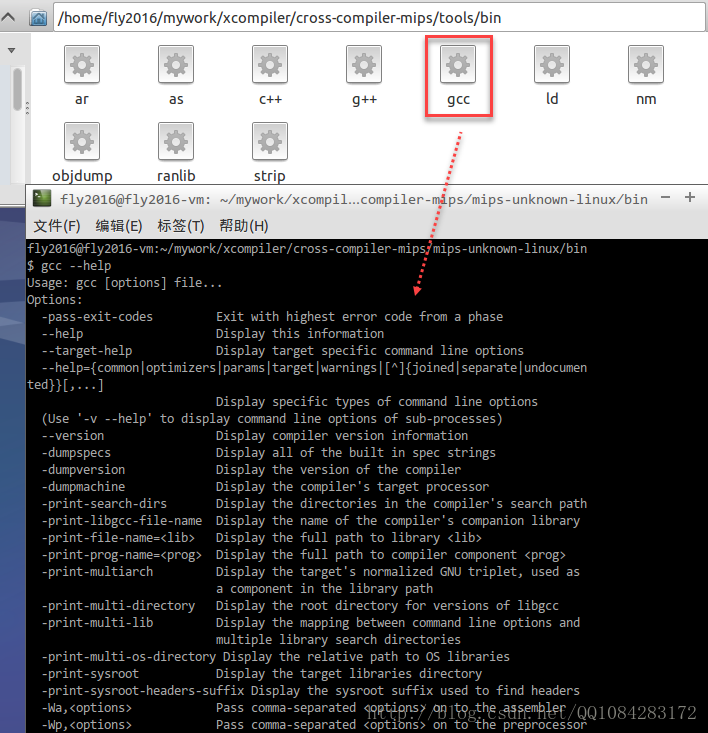
echo "Done"結果截圖:

這個config.sh指令碼來自於《IoT裝置程式開發及編譯環境搭建初體驗》的作者scu-igroup的github上 IoT_bot工程程式碼的指令碼。config.sh指令碼執行完成以後,各種平臺的交叉編譯鏈的工具都下載下來了,在 /cross-compiler-mips/tools/bin 目錄和 /cross-compiler-mipsel/tools/bin目錄下有mips程式的交叉編譯工具鏈,直接拿來使用就可以。IoT_bot工程