1. 程式人生 > >Android Studio匯入Android整個系統原始碼

Android Studio匯入Android整個系統原始碼

簡介

【本文章轉自https://blog.csdn.net/QQxiaoqiang1573/article/details/72903237】

 由於怕博文丟失就拷一份過來,很實用

偶然發現一個神器idegen,通過它我們可以用Android Studio閱讀整個系統原始碼,非常方便。話不多說直接來看怎麼使用idegen,匯入系統原始碼到Android Studio。

見證奇蹟的時候

Windows環境下,將整個Android系統原始碼匯入到Android Studio中。 
首先,我們要做的就是在原始碼環境下,即Linux環境下,執行以下命令:

$ source build/envsetup.sh
$ lunch aosp_x86-eng #(or pick your favorite lunch target)
$ make
$ mmm development/tools/idegen/
$ development/tools/idegen/idegen.sh
  • 1
  • 2
  • 3
  • 4
  • 5

注:上面的編譯命令以實際的系統編譯命令為準 
依次執行完上面的命令,就會在系統根目錄下生成如下檔案

.classpath (Eclipse)
android.ipr (IntelliJ / Android Studio)
android.iml (IntelliJ / Android Studio)
  • 1
  • 2
  • 3

因為我這用的是Android Studio匯入原始碼,所以我們只需要選擇android.ipr這個檔案即可。同時,在development/tools/idegen/目錄下有個README檔案,我們來看下其中的內容。 
development/tools/idegen/README

IDEGen automatically generates Android IDE configurations for
IntelliJ IDEA and Eclipse. Your IDE should be able to compile everything in a reasonable amount of time with no errors. If you're using IntelliJ... If this is your first time using IDEGen... IDEA needs a lot of memory. Add "-Xms748m -Xmx748m" to your VM options in "IDEA_HOME/bin/idea.vmoptions" on Linux or "IntelliJ IDEA.app/Contents/Info.plist" on OS X. Create a JDK configuration named "1.6 (No Libraries)" by adding a new JDK like you normally would and then removing all of the jar entries under the "Classpath" tab. This will ensure that you only get access to Android'
s core libraries and not those from your desktop VM. From the project's root directory... Repeat these steps after each sync... 1) make (to produce generated .java source) 2) development/tools/idegen/idegen.sh 3) Open android.ipr in IntelliJ. If you already have the project open, hit the sync button in IntelliJ, and it will automatically detect the updated configuration. If you get unexpected compilation errors from IntelliJ, try running "Build -> Rebuild Project". Sometimes IntelliJ gets confused after the project changes significantly. If you're using Eclipse... If this is your first time using IDEGen... Edit eclipse.ini ("Eclipse.app/Contents/MacOS/eclipse.ini" on OS X) and add "-Xms748m -Xmx748m" to your VM options. Configure a JRE named "1.5 (No Libraries)" under "Preferences -> Java -> Installed JREs". Remove all of the jar entries underneath "JRE system libraries". Eclipse will not let you save your configuration unless at least one jar is present, so include a random jar that won't get in the way. From the project's root directory... Repeat these steps after each sync... 1) make (to produce generated .java source) 2) development/tools/idegen/idegen.sh 3) Import the project root directory into your Eclipse workspace. If you already have the project open, simply refresh it (F5). Excluding source roots and jars IDEGen keeps an exclusion list in the "excluded-paths" file. This file has one regular expression per line that matches paths (relative to the project root) that should be excluded from the IDE configuration. We use Java's regular expression parser (see java.util.regex.Parser). You can create your own additional exclusion list by creating an "excluded-paths" file in the project's root directory. For example, you might exclude all apps except the Browser in your IDE configuration with this regular expression: "^packages/apps/(?!Browser)". Controlling source root ordering (Eclipse) You may want some source roots to come before others in Eclipse. Simply create a file named "path-precedence" in your project's root directory. Each line in the file is a regular expression that matches a source root path (relative to the project's root directory). If a given source root's path matches a regular expression that comes earlier in the file, that source root will come earlier in the generated configuration. If a source root doesn't match any of the expressions in the file, it will come last, so you effectively have an implicit ".*" rule at the end of the file. For example, if you want your applications's source root to come first, you might add an expression like "^packages/apps/MyApp/src$" to the top of the "path-precedence" file. To make source roots under ./out come last, add "^(?!out/)" (which matches all paths that don't start with "out/").
  • 1
  • 2
  • 3
  • 4
  • 5
  • 6
  • 7
  • 8
  • 9
  • 10
  • 11
  • 12
  • 13
  • 14
  • 15
  • 16
  • 17
  • 18
  • 19
  • 20
  • 21
  • 22
  • 23
  • 24
  • 25
  • 26
  • 27
  • 28
  • 29
  • 30
  • 31
  • 32
  • 33
  • 34
  • 35
  • 36
  • 37
  • 38
  • 39
  • 40
  • 41
  • 42
  • 43
  • 44
  • 45
  • 46
  • 47
  • 48
  • 49
  • 50
  • 51
  • 52
  • 53
  • 54
  • 55
  • 56
  • 57
  • 58
  • 59
  • 60
  • 61
  • 62
  • 63
  • 64
  • 65
  • 66
  • 67
  • 68
  • 69
  • 70
  • 71
  • 72
  • 73
  • 74
  • 75
  • 76
  • 77
  • 78
  • 79
  • 80
  • 81

上面的文件介紹了IntelliJ和eclipse怎麼匯入系統原始碼的方法,這裡我們就只使用Android Studio來匯入原始碼。所以就不管eclipse部分的東西了。因為Android Studio的前身就是IntelliJ,所以Android Stduio的匯入方法和IntelliJ是一樣的。 
在執行完上面Linux系統部分的編譯工作後,我們就可以回到Windows環境了,來看看我們怎麼用Android Studio匯入系統原始碼。 
第一步: 
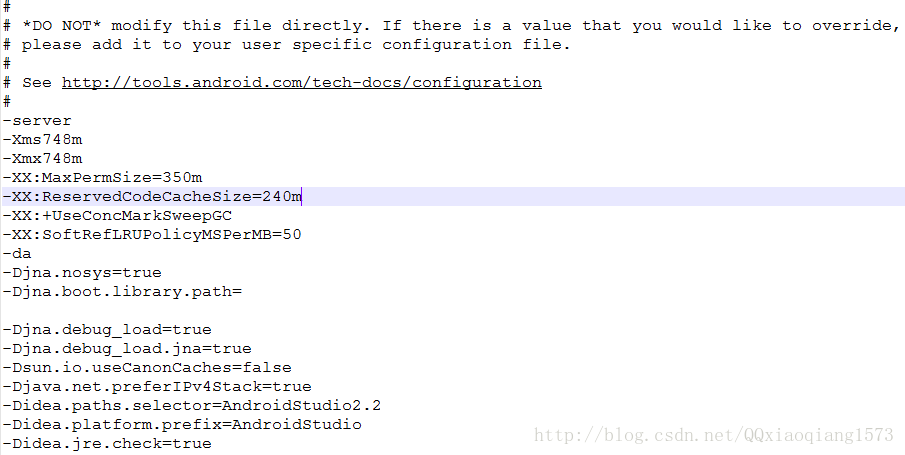
找到Android Studio的安裝路徑中的vmoptions檔案並開啟:”Android Studio Path”/bin/studio.exe.vmoptions或者studio64.exe.vmoptions 
新增

-Xms748m
-Xmx748m
  • 1
  • 2

到其檔案中。 
這裡寫圖片描述
第二步: 
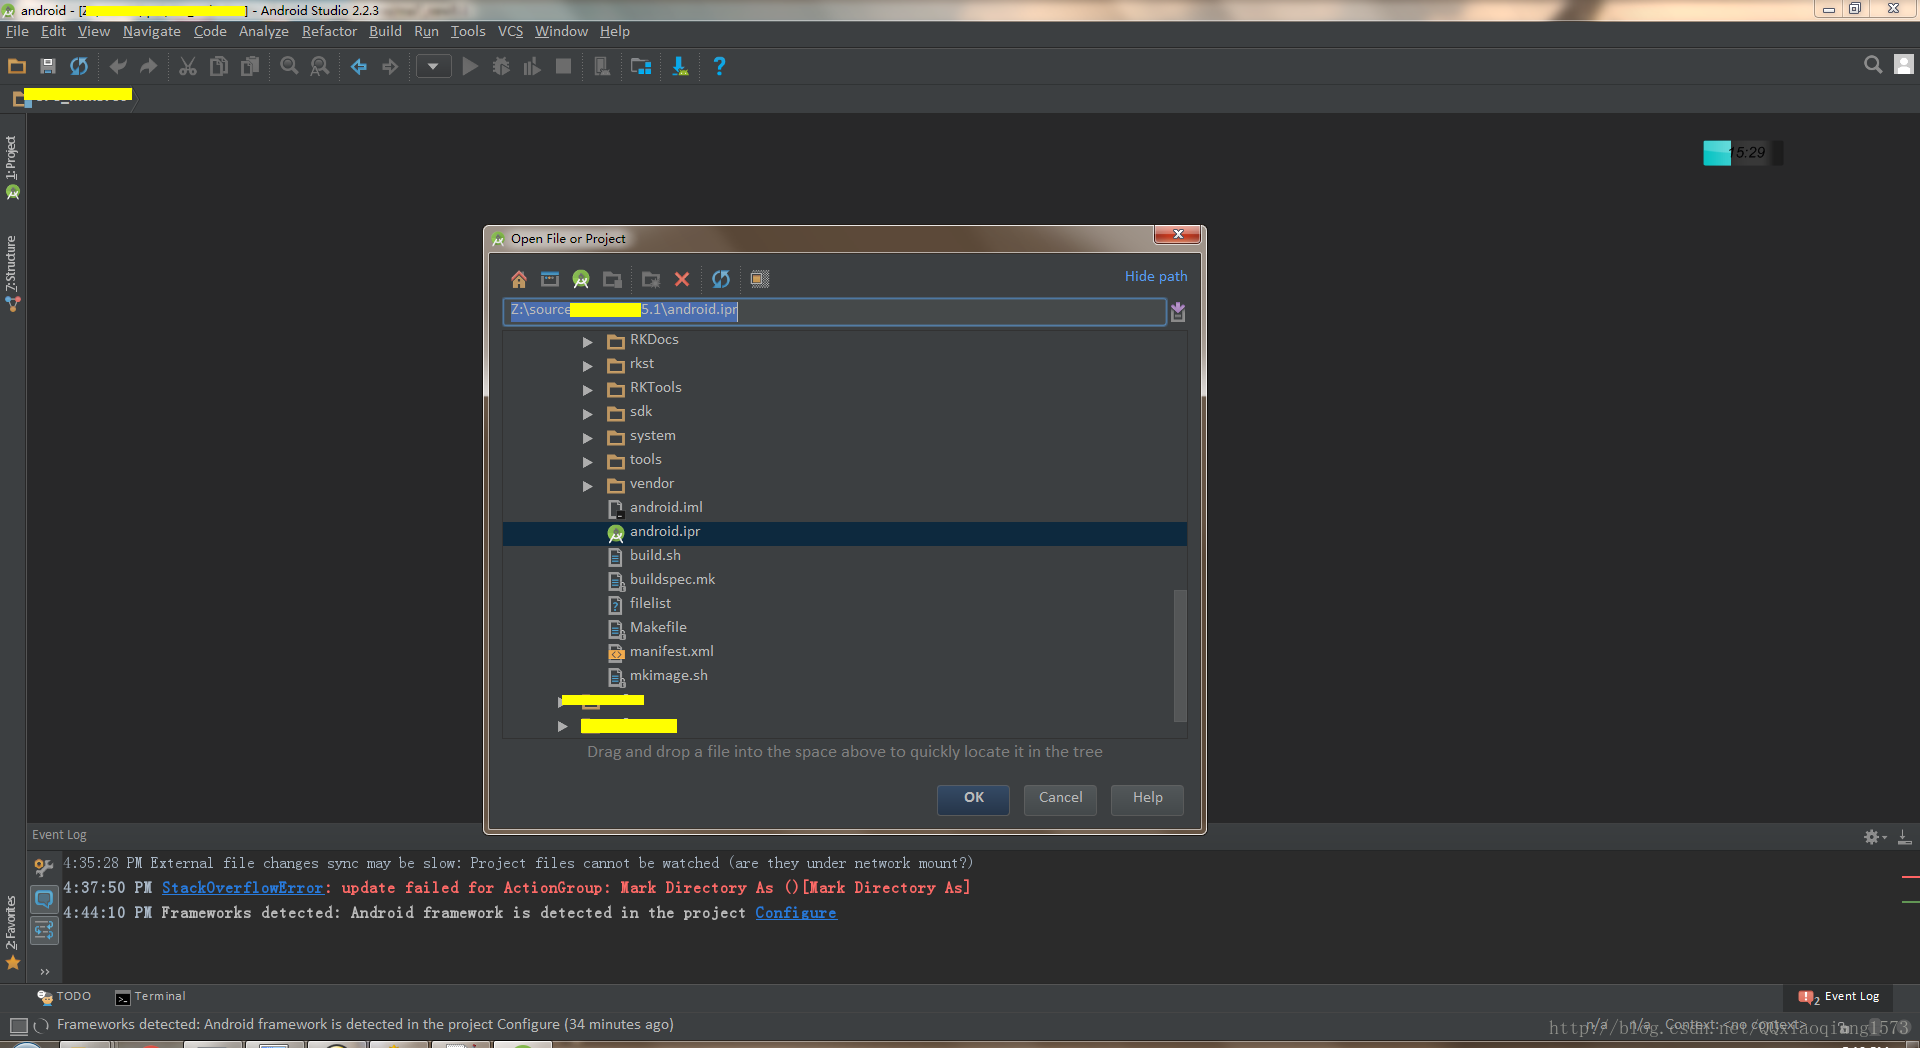
開啟Android Studio,選擇File->Open 
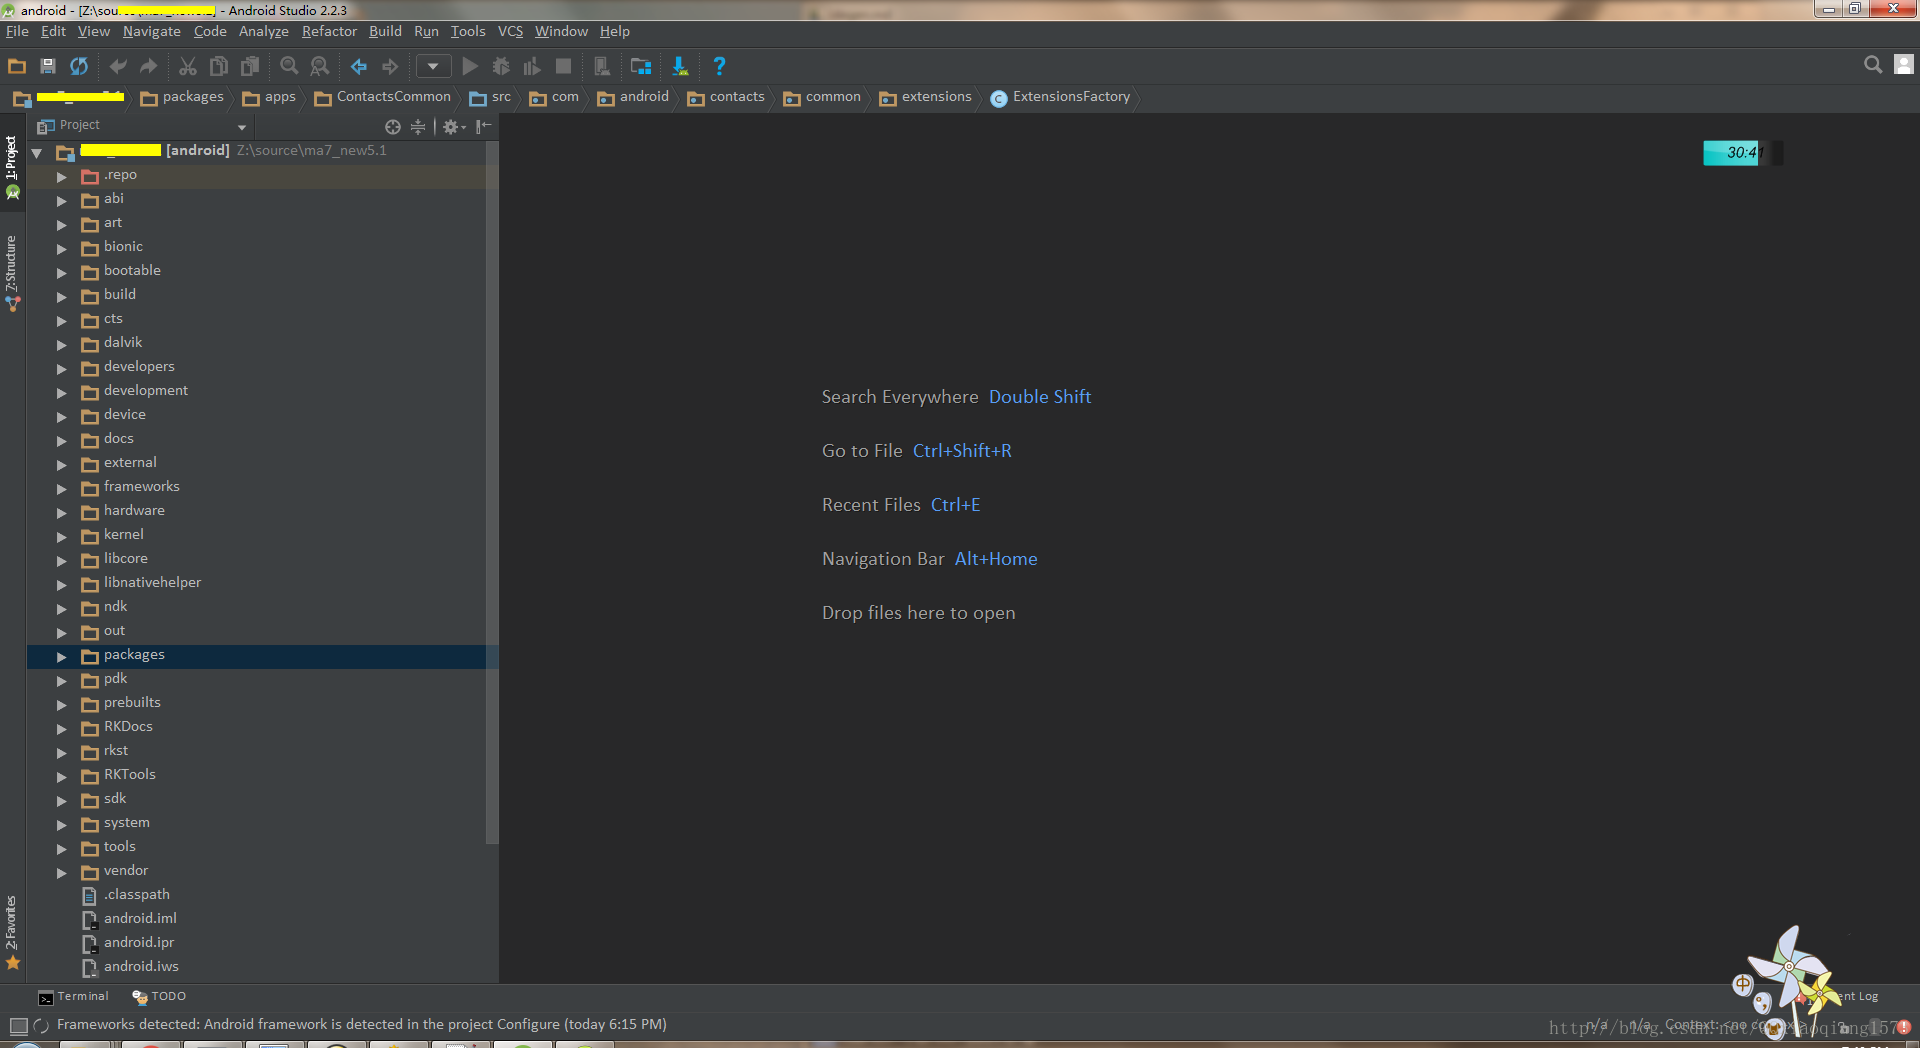
彈出路徑選擇框,輸入相應的原始碼根路徑,然後選擇android.ipr檔案,就開始匯入原始碼啦。在匯入過程中,需要等待索引的建立相關的關聯,大概需要花10~20分鐘。 
這裡寫圖片描述
這裡寫圖片描述
第三步: 
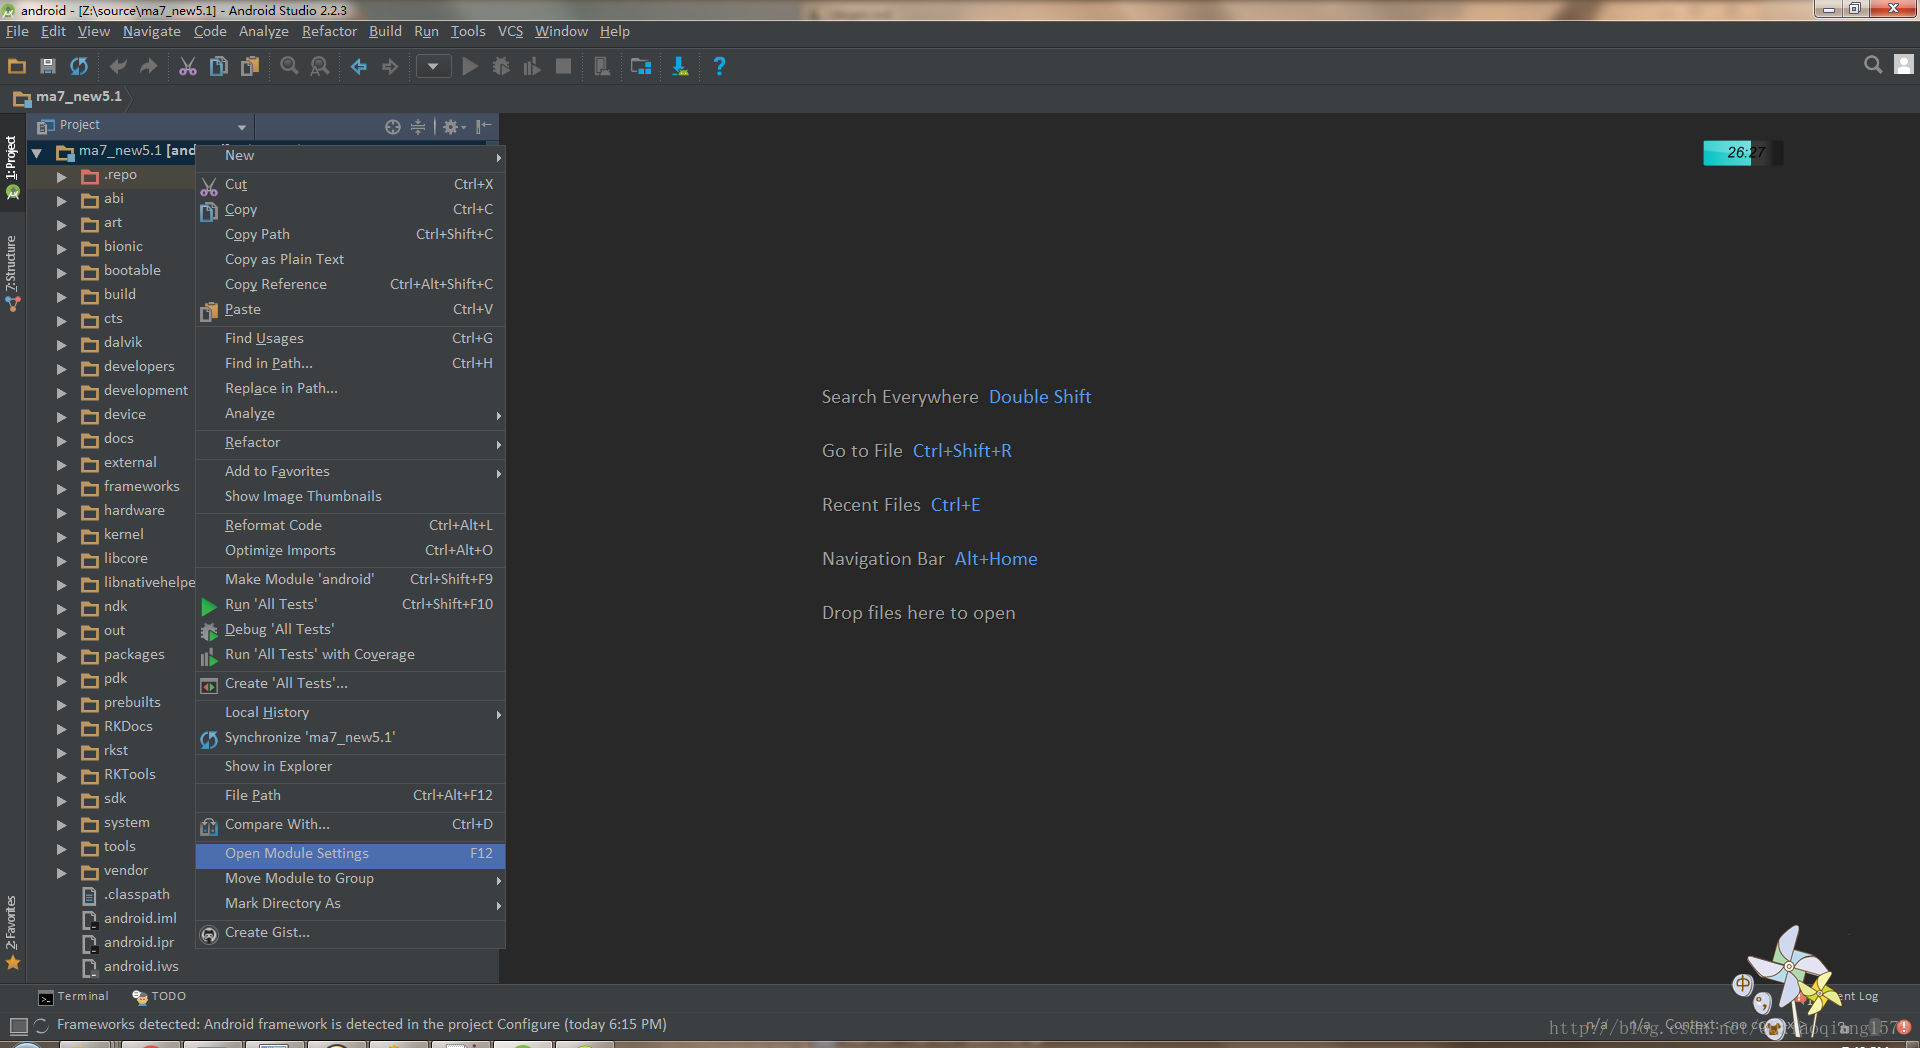
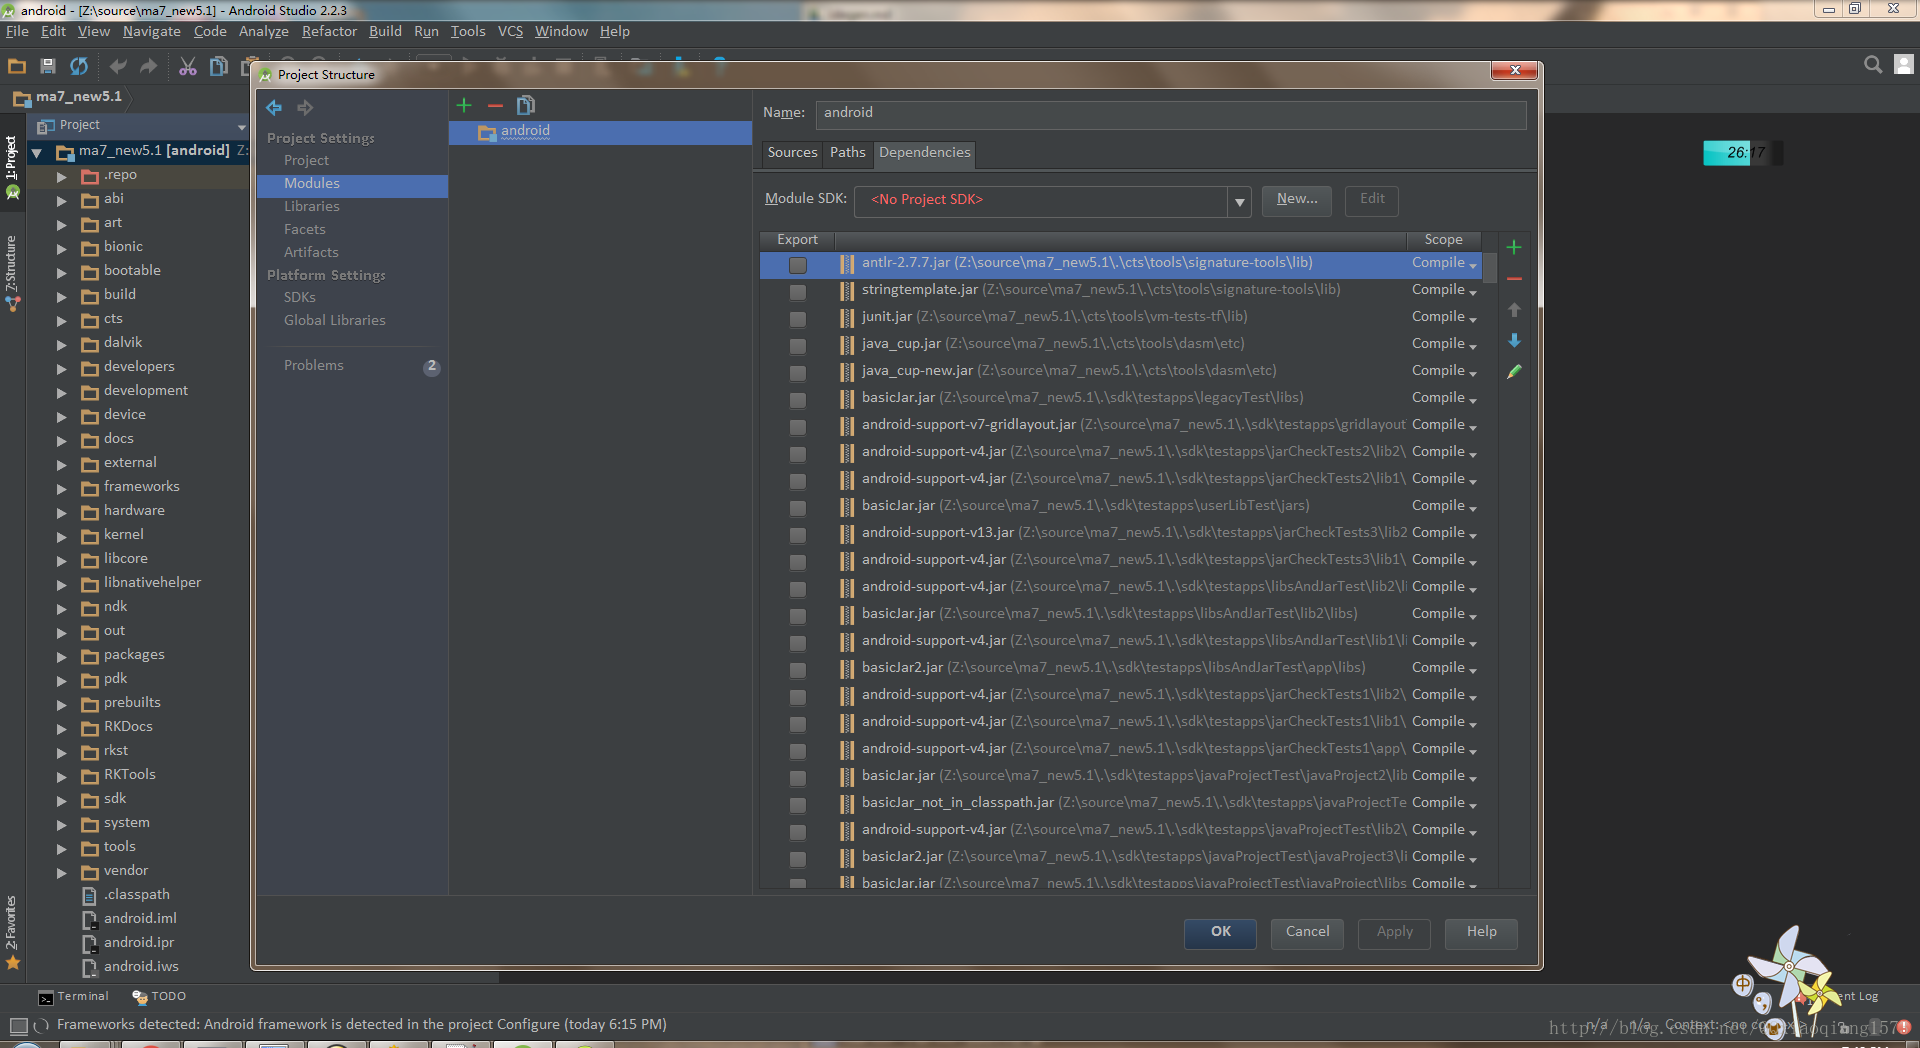
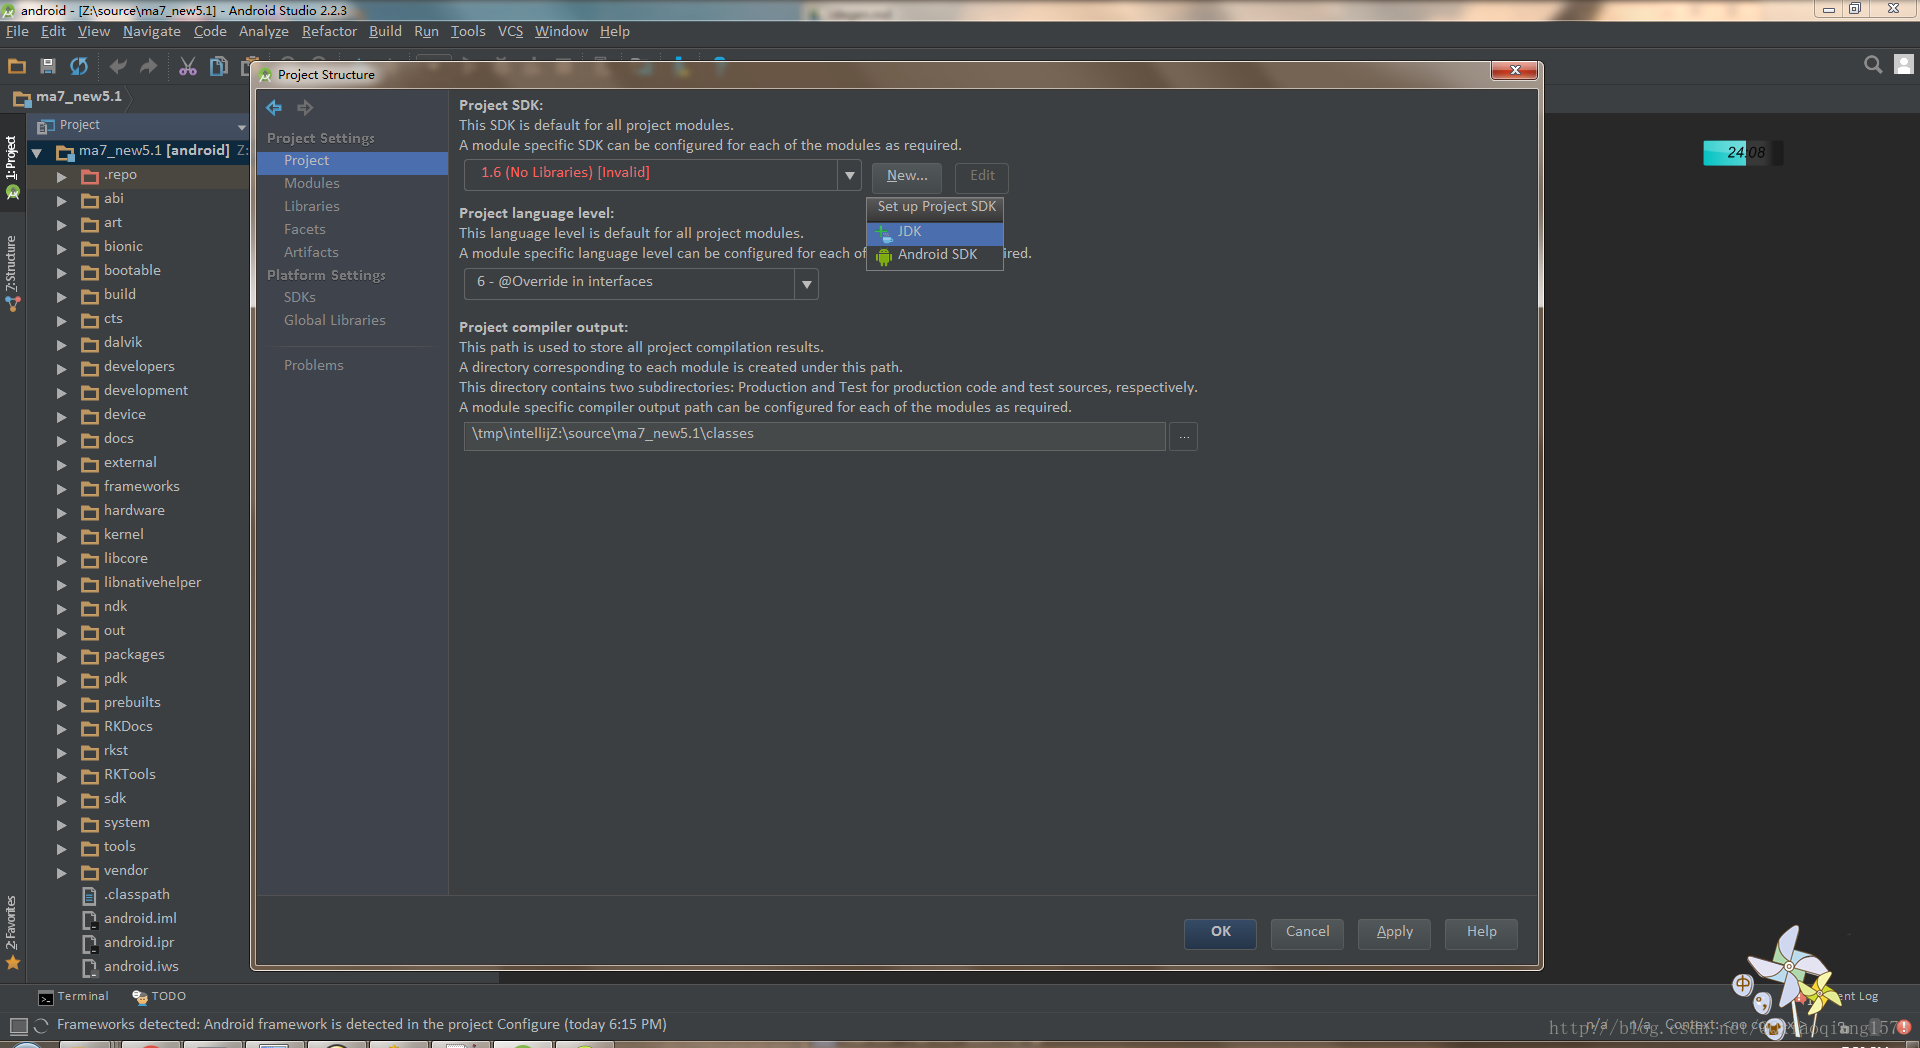
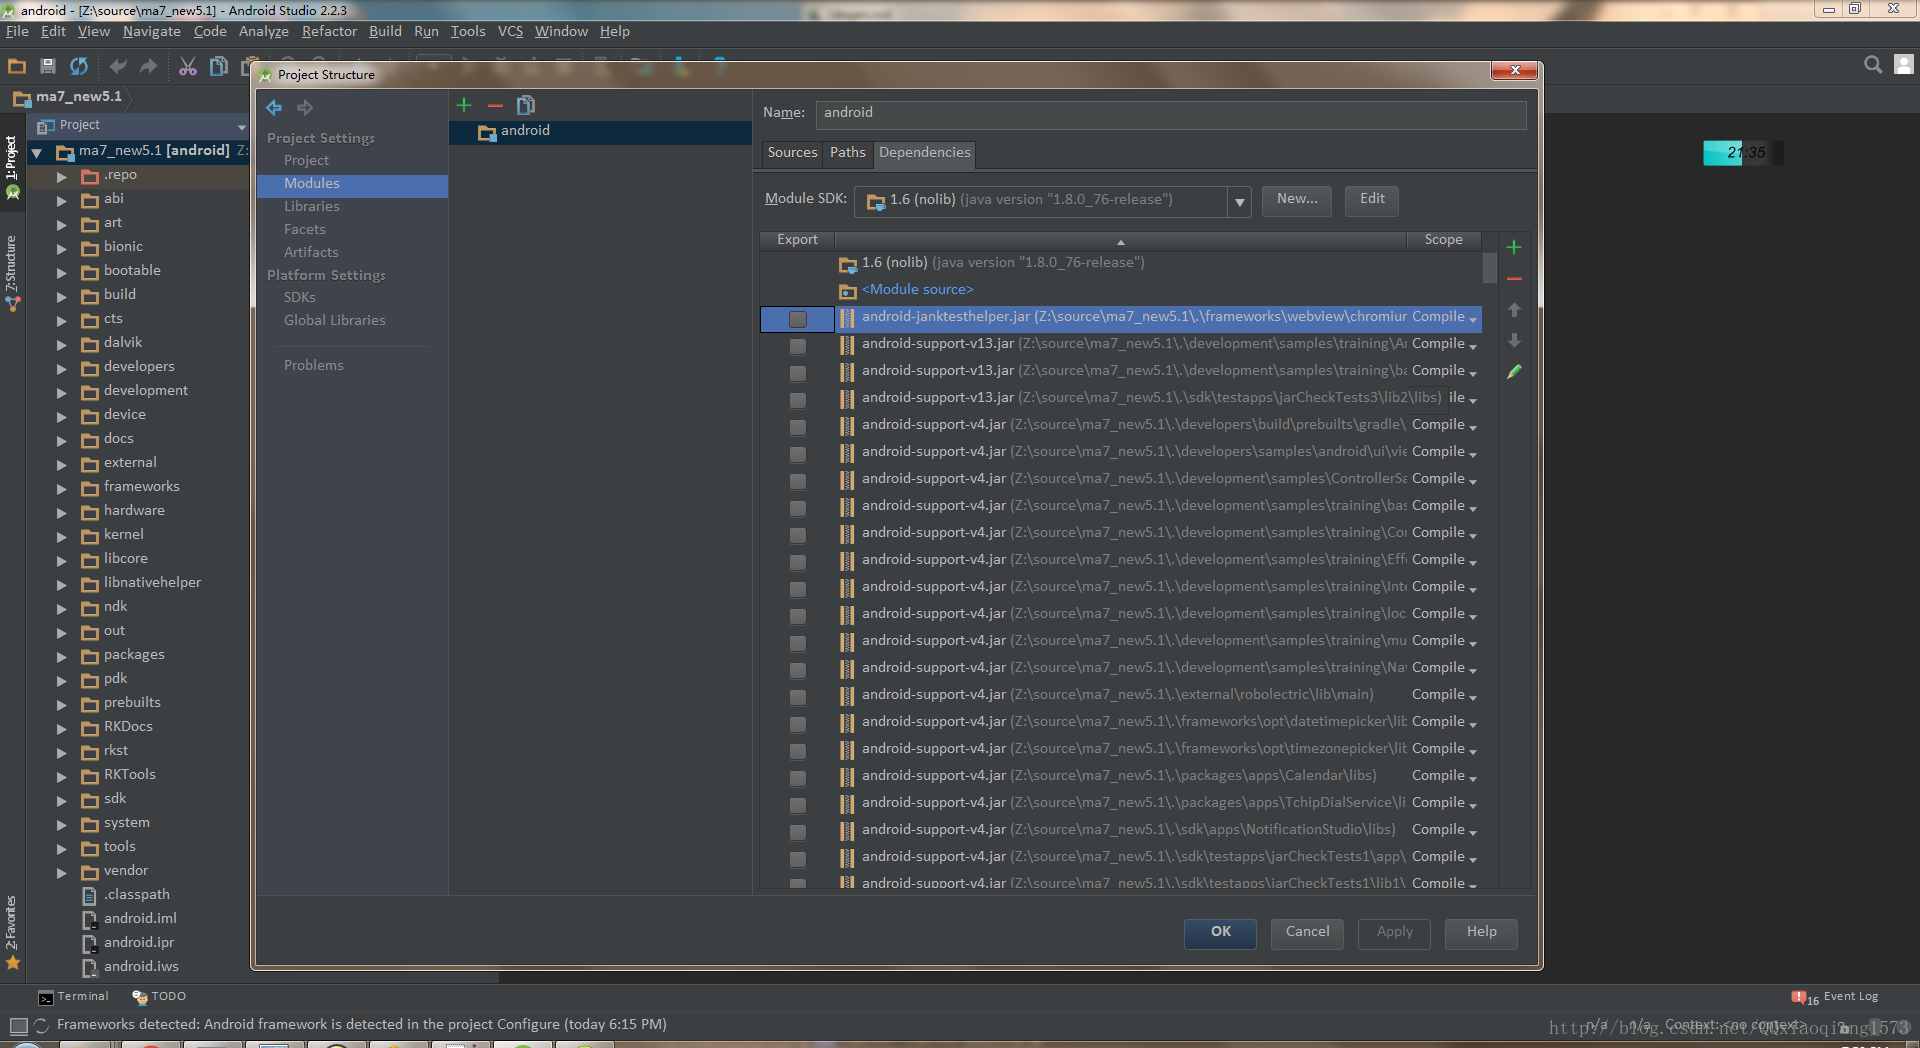
當我們匯入完原始碼後,我們就可以檢視整個系統的原始碼啦,但是我們在跳轉公共的類時,並沒有跳轉到frameworks目錄下對應的原始碼類,而是jar包中的類,這不是我們想要的,我們需要讓其跳轉到相應的類中。我們就需要新建一個沒有任何jar庫的SDK給到系統原始碼專案的依賴。 
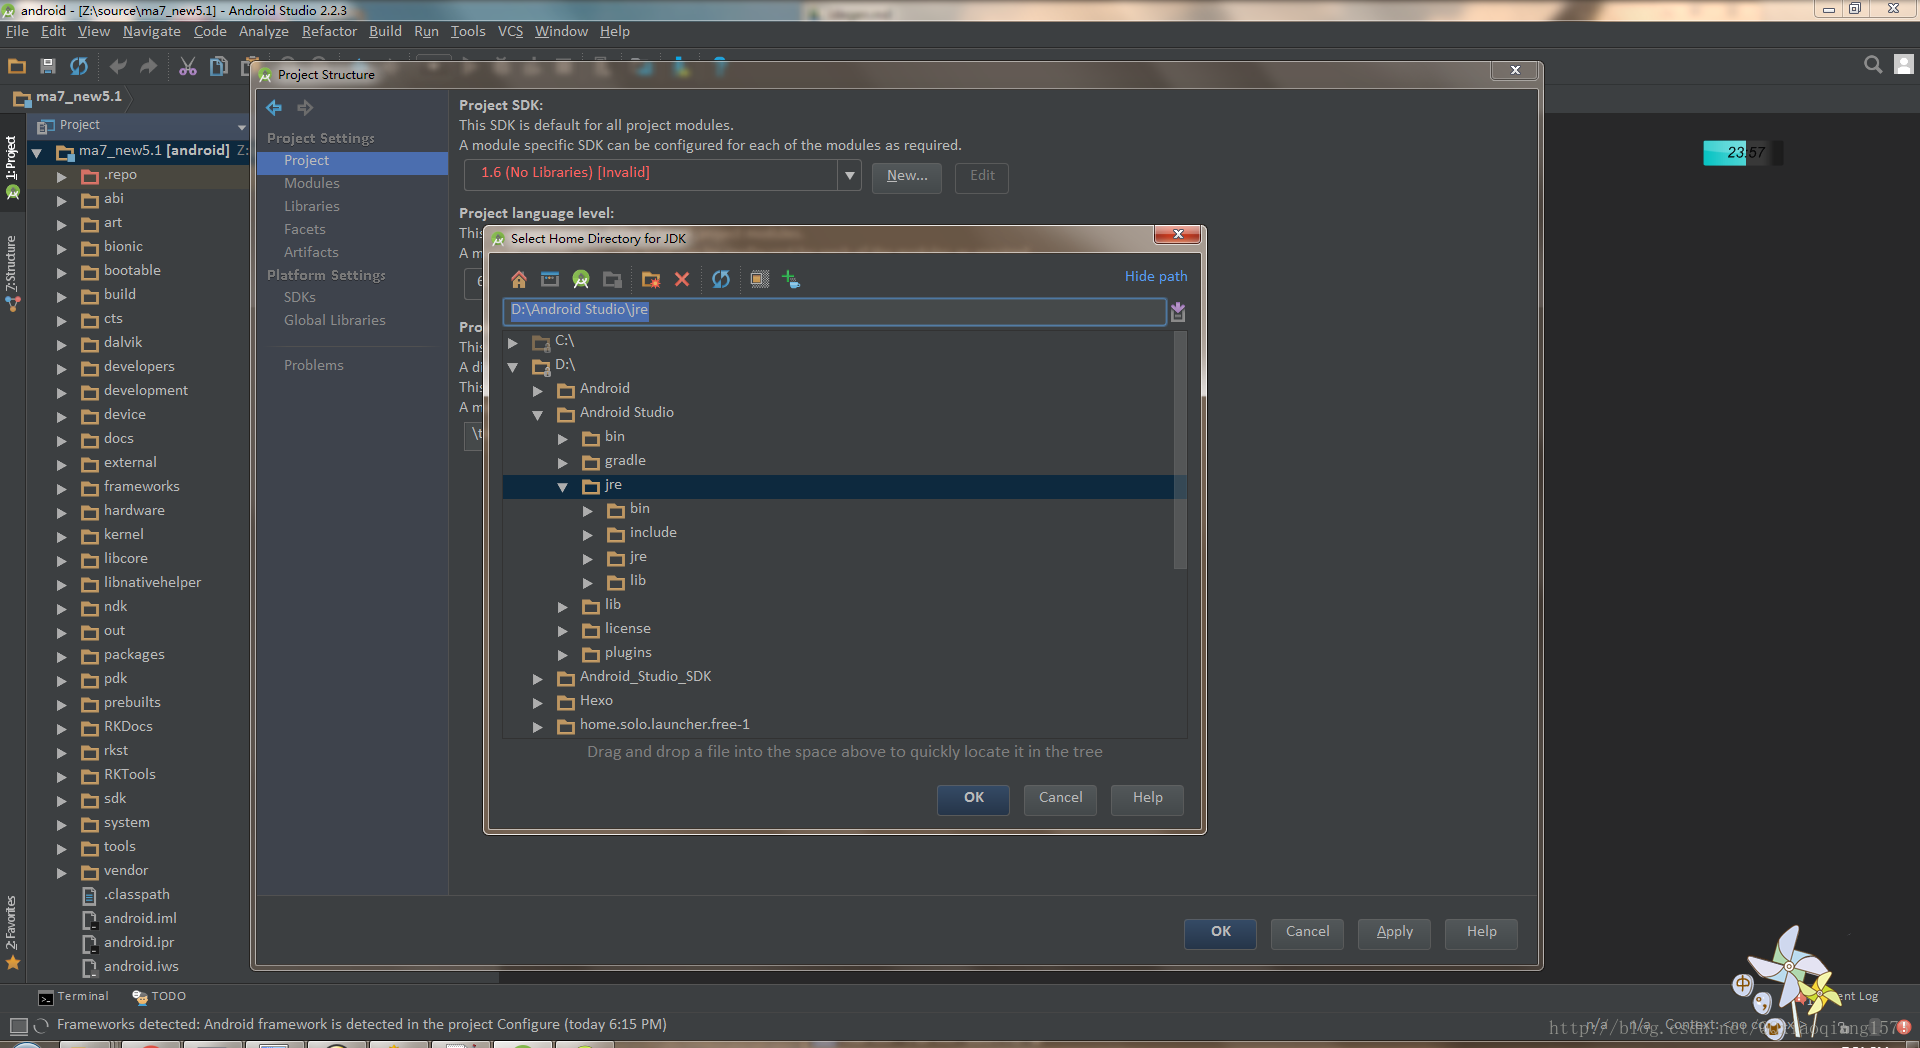
那我們要怎麼建立一個沒有jar的SDK呢?步驟如下: 
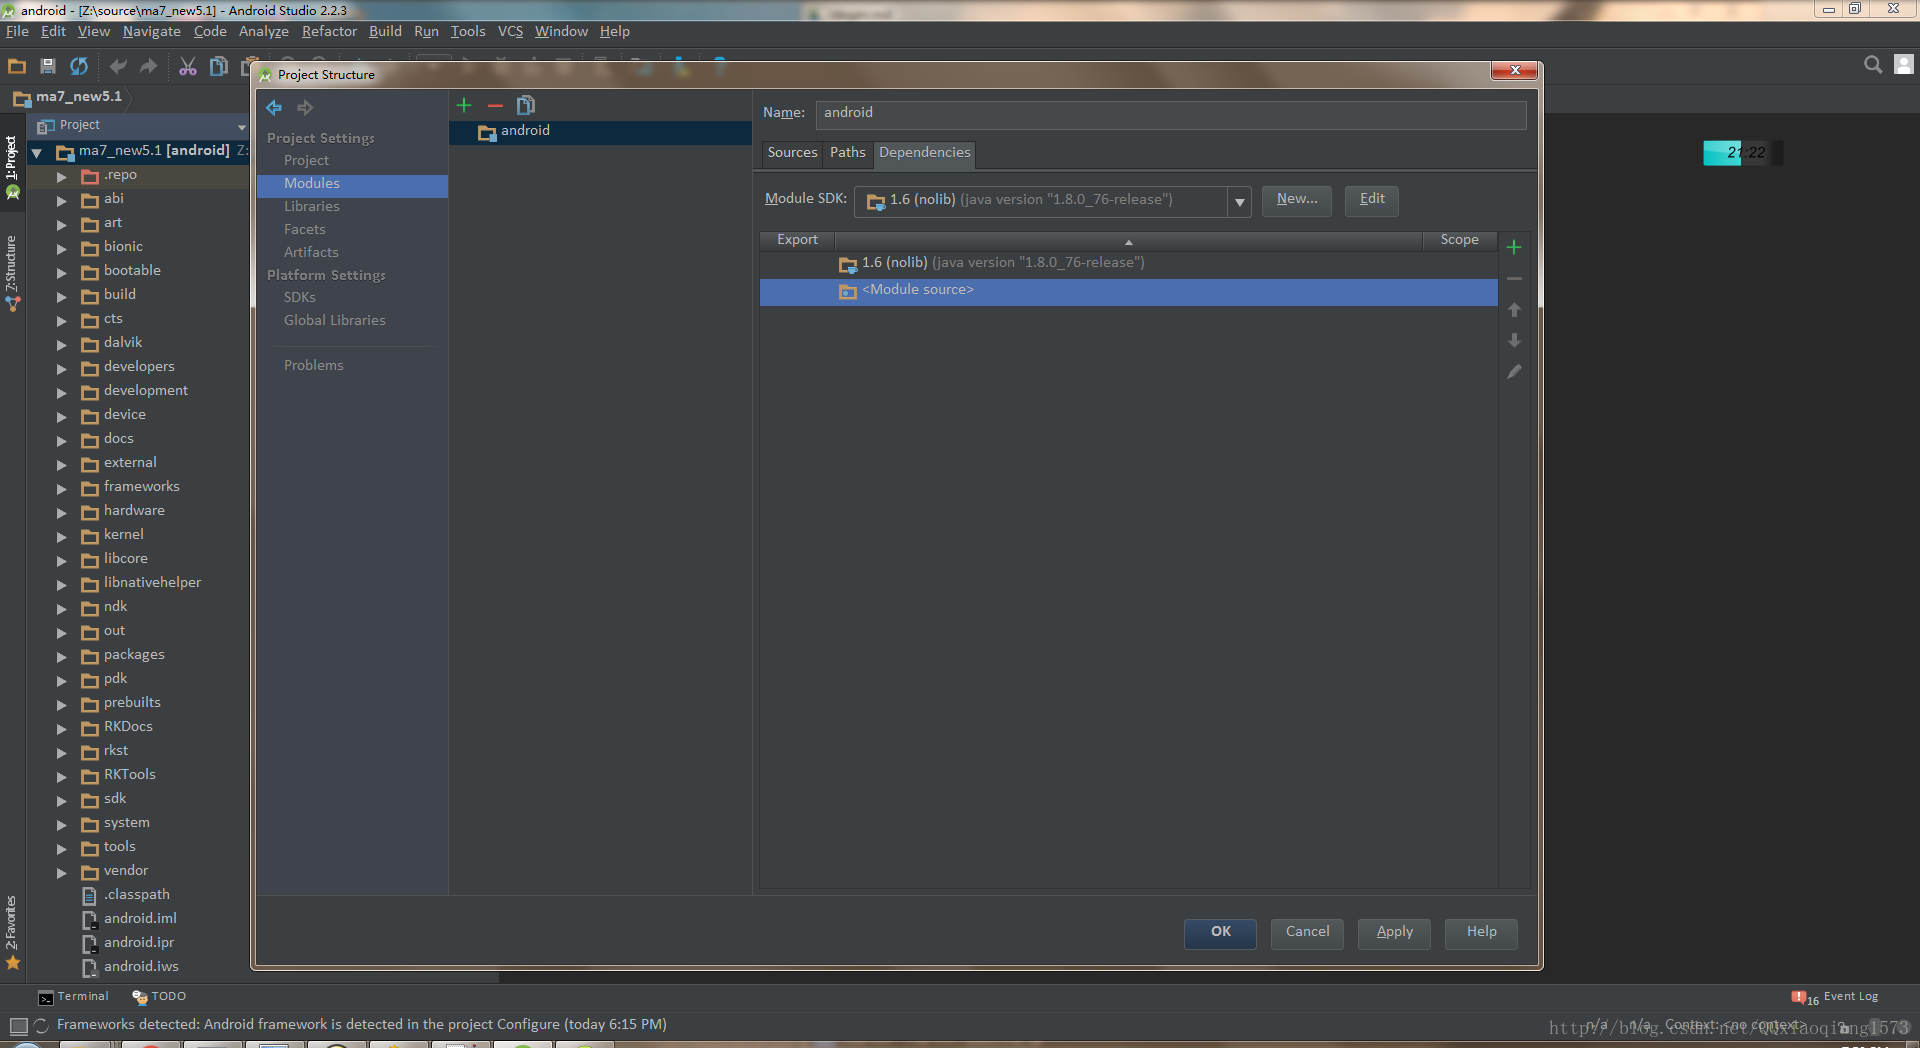
右鍵專案名->Open Module Settings->Project->New(JDK) 
然後選擇SDKs->編輯剛剛新增的jdk->刪除Classpath目錄下的所有包並命名為1.6(No Libraries) 
再選擇Modules->Module SDK選擇剛剛編輯的SDK(1.6(No Libraries)),並刪除下面所有的包。 
大功告成,完成上面的步驟後,公共的類就直接指向系統的原始碼啦。 
這裡寫圖片描述
這裡寫圖片描述
這裡寫圖片描述
這裡寫圖片描述
這裡寫圖片描述
這裡寫圖片描述
這裡寫圖片描述

參考文章