
用SpringSecurity從零搭建pc專案-01
在java的許可權框架裡,shiro和SpringSecurity是用的最多的。隨著springboot的流行,SpringSecurity也越來越火了,因為springboot預設支援SpringSecurity。所以很有必要把SpringSecurity也搞明白。shiro更加輕量級,SpringSecurity的功能更加豐富。
軟體環境:
開發工具:Idea
JDK:1.8
maven:3.3.9
* SpringBoot版本:1.5.18 (說明:springboot版本沒有用最新版的2.0x,因為2.0x和1.5 差別比較大吧,2.x好似是基於spring5的,SpringSecurity的更新速度好似跟不上springboot,所以這裡如果用springboot 2.x會有問題,保險起見這裡就不求新了)
SpringSecurity核心功能:認證、授權、攻擊防護(防止偽造身份)
話不多說,下邊開始打程式碼。
一、專案搭建
1.1 熱身 ,SpringSecurity預設的Httpbasic鑑權
1.1.1,新建專案

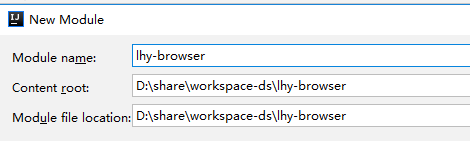
填好專案資訊,next

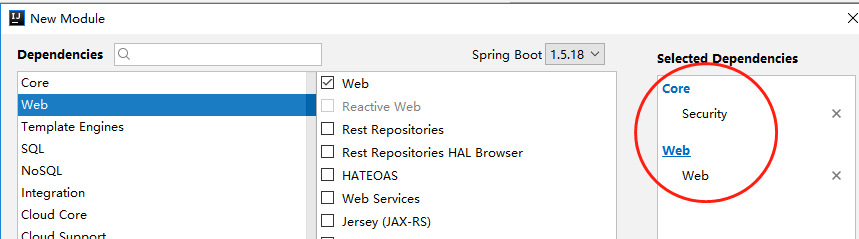
選啟動器:SpringSecurity、Web
設定專案目錄。finish
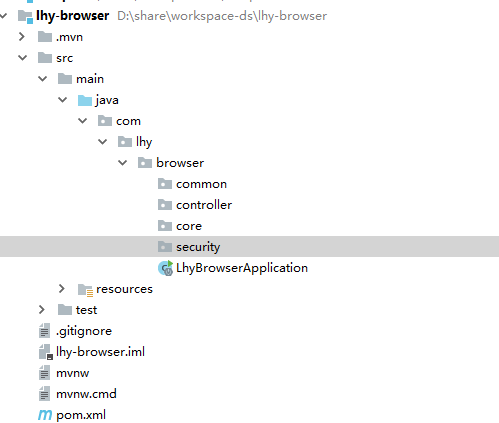
建好後的專案結構:security包放有關SpringSecurity的程式碼
maven依賴:
<dependencies> <dependency> <groupId>org.springframework.boot</groupId> <artifactId>spring-boot-starter-security</artifactId> </dependency> <dependency> <groupId>org.springframework.boot</groupId> <artifactId>spring-boot-starter-web</artifactId> </dependency> <dependency> <groupId>org.springframework.boot</groupId> <artifactId>spring-boot-starter-test</artifactId> <scope>test</scope> </dependency> <dependency> <groupId>org.springframework.security</groupId> <artifactId>spring-security-test</artifactId> <scope>test</scope> </dependency> </dependencies>
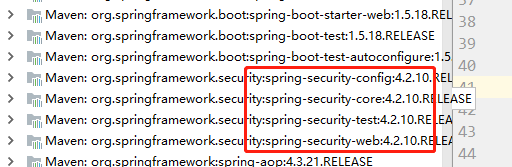
引入了SpringSecurity的starter後,會自動引入SpringSecurity相關的相關依賴:
1.1.2 訪問我們的服務
新建一個Controller:
@RestController
public class UserController {

    @RequestMapping("/hello")
    public String hello(){
        return "Hello ! ";
    }
}
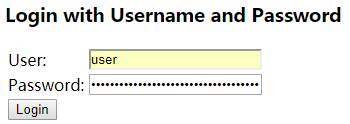
啟動專案,訪問localhost:8080/hello,預設就會出來這個登入框,只要引入了SpringSecurity,springboot就預設會啟用http basic認證,所有的服務都會被保護起來, ,。
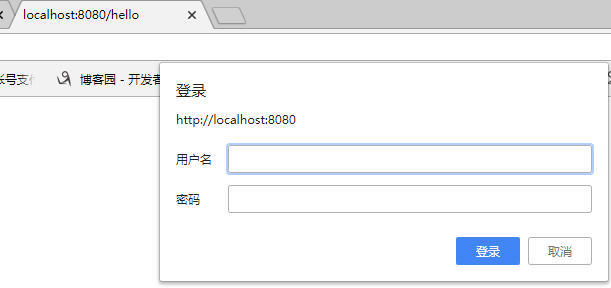
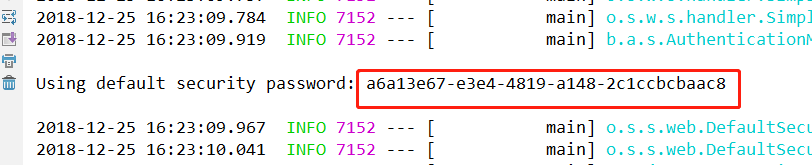
其中的預設使用者名稱是user,預設的密碼在啟動專案的時候會在控制檯列印。
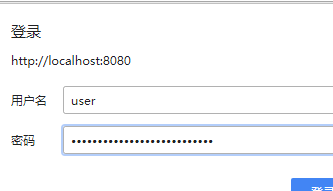
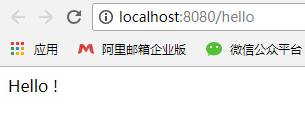
輸入使用者名稱密碼,就能訪問:
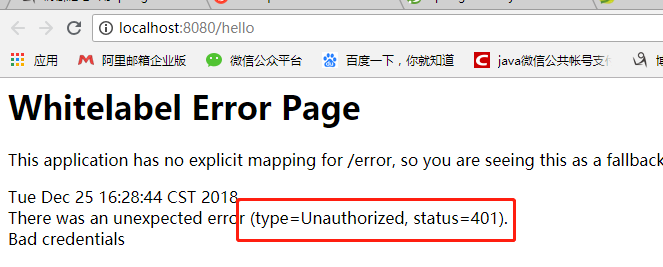
如果輸入的使用者名稱或密碼錯誤,Springboot會引導你到一個空白頁,這個也是可以配置的,後邊再說怎麼配置:
你還可以關閉這個預設的鑑權,只需在application.properties 裡配置: security.basic.enabled = false ,這個值預設是true。
二、表單登入
如果想去掉那個比較醜的basic登入框,只需要一個配置類即可。新建配置類 BrowserSecurityConfig,繼承 WebSecurityConfigurerAdapter
@EnableWebSecurity
public class BrowserSecurityConfig extends WebSecurityConfigurerAdapter {

}
(為什麼這麼寫?因為SpringSecurity官方文件這麼說的https://docs.spring.io/spring-security/site/docs/4.2.10.RELEASE/reference/htmlsingle/#samples):
5.1 Hello Web Security Java配置
第一步是建立Spring Security Java配置。配置建立一個Servlet過濾器,稱為springSecurityFilterChain負責應用程式內所有安全性(保護應用程式URL,驗證提交的使用者名稱和密碼,重定向到登入表單等)。您可以在下面找到Spring Security Java配置的最基本示例:
import org.springframework.beans.factory.annotation.Autowired;

import org.springframework.context.annotation.*;
import org.springframework.security.config.annotation.authentication.builders.*;
import org.springframework.security.config.annotation.web.configuration.*;

@EnableWebSecurity
public class WebSecurityConfig extends WebSecurityConfigurerAdapter {

    @Bean
    public UserDetailsService userDetailsService() throws Exception {
        InMemoryUserDetailsManager manager = new InMemoryUserDetailsManager();
        manager.createUser(User.withUsername("user").password("password").roles("USER").build());
        return manager;
    }
}
然後啟動application,訪問http://localhost:8080/hello,可以看到已經出來了一個登入頁面,輸入使用者名稱user,以及控制檯列印的密碼:
登入後 訪問的是登入之前的要訪問的hello服務: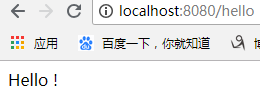
官網說明:
到目前為止,我們的WebSecurityConfig僅包含有關如何驗證使用者身份的資訊。Spring Security如何知道我們要求所有使用者進行身份驗證?Spring Security如何知道我們想要支援基於表單的身份驗證?原因是WebSecurityConfigurerAdapter在configure(HttpSecurity http)方法中提供了一個預設配置,如下所示:
protected void configure(HttpSecurity http) throws Exception {
    http
        .authorizeRequests()
            .anyRequest().authenticated()
            .and()
        .formLogin()
            .and()
        .httpBasic();
}
三、自定義使用者認證邏輯
3.1 ,處理使用者資訊獲取 、使用者校驗 、密碼的加密解密
新建一個類,MyUserDetailService (這個類必須是Spring裡的一個Bean,所以加上@Component註解)實現 UserDetailsService 介面,UserDetailsService 介面只有一個方法:通過使用者名稱查詢使用者資訊,返回UserDetail
UserDetailsService.java
public interface UserDetailsService {
    UserDetails loadUserByUsername(String var1) throws UsernameNotFoundException;
}
UserDetails.java : 提供了幾個方法,賬戶是否啟用、賬戶是否過期、密碼是否過期、賬戶是否鎖定、許可權集合資訊
public interface UserDetails extends Serializable {
    Collection<? extends GrantedAuthority> getAuthorities();

    String getPassword();

    String getUsername();

    boolean isAccountNonExpired();

    boolean isAccountNonLocked();

    boolean isCredentialsNonExpired();

    boolean isEnabled();
}
配置一個密碼的加密解密器類:PasswordEncoder,我們用其一個實現類 BCryptPasswordEncoder,只有兩個方法,一個是加密密碼,一個是匹配方法。如果已有系統已經有了自己的加密演算法,這裡可以換成自己的加解密邏輯。
  @Bean
    public PasswordEncoder passwordencoder(){
        //BCryptPasswordEncoder implements PasswordEncoder
        return new BCryptPasswordEncoder();
    }
這個介面的實現類會給加密的密碼隨機加鹽,所以一樣的密碼每次加密出來是不一樣的,更安全。如123456加密2次:
加密後密碼: $2a$10$BChH.C4.X8MYuI1mHFoOkefWhOsad7SvhZedHFt1OG4vjSu.z9weC
加密後密碼: $2a$10$YUbz.miE5C0aAcuU1FnHSu/U.Qm/BujTNw6X7S5i4/6AhjyDc6suK
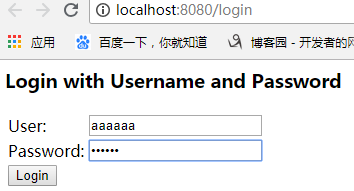
此時我們的邏輯是,只要密碼輸入123456,就能登入成功。啟動專案試驗:訪問/hello ,會自動跳轉/login ,隨便輸入使用者名稱aaaaaa,輸入密碼123456 ,成功訪問Hello!
 |
| 
3.2 自定義登入頁面
用SpringSecurity提供的預設的登入頁肯定是不行的,所以需要自定義登入頁(當然這裡還可以配置成一個Controller方法,然後跳轉到登入頁。或者從配置檔案裡讀取),在BrowserSecurityConfig類裡配置:
@Override
    protected void configure(HttpSecurity http) throws Exception {
        //http.httpBasic() //這個就是預設的彈框認證
        http.formLogin() //表單認證
                .loginPage("/login.html")
                .loginProcessingUrl("/authentication/form")
                .and()
                .authorizeRequests() //下邊的都是授權的配置
                .antMatchers("/login.html").permitAll() //放過登入頁不過濾
                .anyRequest()        //任何請求
                .authenticated();    //都需要身份認證
    }
.loginPage("/login.html") 配置登入頁面
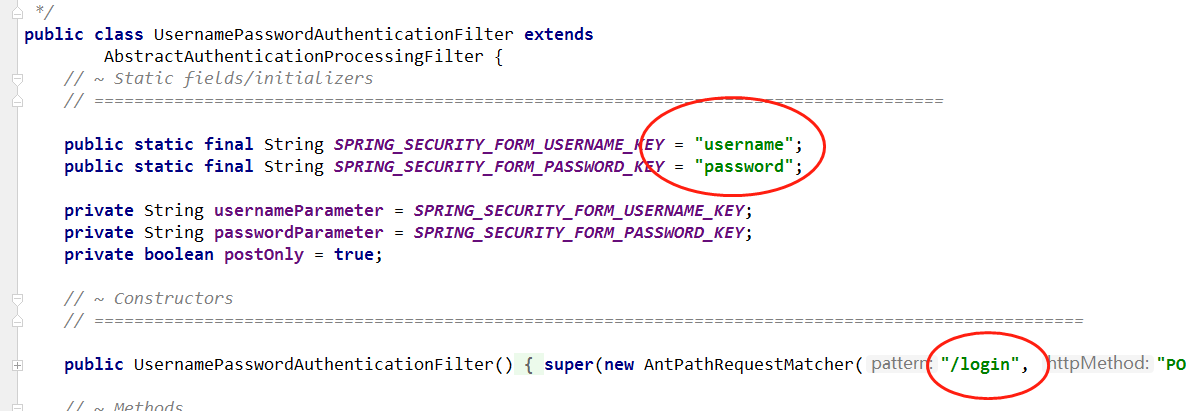
.loginProcessingUrl("/authentication/form") 配置處理登入表單的action,這個值預設在UsernamePasswordAuthenticationFilter 類裡,
注意一定要放過登入頁不過濾,否則一直不能跳轉到login.html
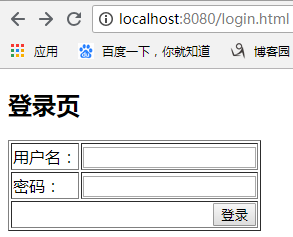
此時訪問 /hello ,跳轉到自定義的登入頁:
隨便輸入使用者名稱,密碼輸入123456 ,登入,出現
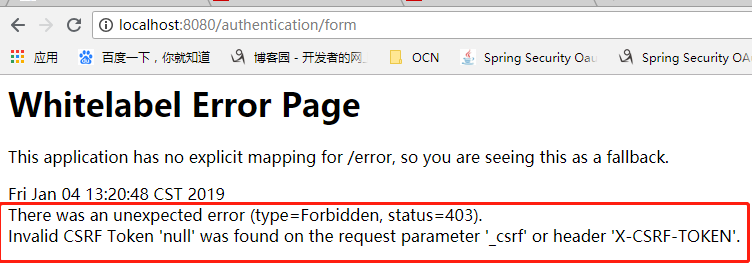
SpringSecurity預設提供了CSRF(跨站請求偽造)防護,是用CSRF token來完成防護的。暫時關閉CSRF防護,在BrowserSecurityConfig裡設定:
.csrf().disable();
再次登入,可以成功訪問到 /hello服務。
 至此自定義登入頁面完成嗎,下一步自定義登入成功處理。
也可以把登入頁做成在配置檔案application.properties裡配置,然後在程式碼裡讀取配置,這樣更靈活、更通用。
這裡有springboot讀取配置檔案的用法:https://www.cnblogs.com/lihaoyang/p/10223339.html
3.2 自定義登入成功/失敗處理
現在的流程是,訪問一個需要登入的服務,如果沒有登入,跳轉登入頁,等你登入後,立馬就訪問登入之前的服務。如果你想在登入成功後做一些處理,比如簽到,送積分等等。那就需要自定義登入成功的處理。如果沒有這種需求,這一步驟可以略過。
springsecurity提供了一個介面,AuthenticationSuccessHandler,用來處理登入成功後的邏輯:
/**
 * Strategy used to handle a successful user authentication.
 * <p>
 * Implementations can do whatever they want but typical behaviour would be to control the
 * navigation to the subsequent destination (using a redirect or a forward). For example,
 * after a user has logged in by submitting a login form, the application needs to decide
 * where they should be redirected to afterwards (see
 * {@link AbstractAuthenticationProcessingFilter} and subclasses). Other logic may also be
 * included if required.
 *
 * @author Luke Taylor
 * @since 3.0
 */
public interface AuthenticationSuccessHandler {

    /**
     * Called when a user has been successfully authenticated.
     *
     * @param request the request which caused the successful authentication
     * @param response the response
     * @param authentication the <tt>Authentication</tt> object which was created during
     * the authentication process.
     */
    void onAuthenticationSuccess(HttpServletRequest request,
            HttpServletResponse response, Authentication authentication)
            throws IOException, ServletException;

}
1,定義一個自己的成功處理器,實現這個Handler:
package com.lhy.browser.security.authentication;

import com.fasterxml.jackson.databind.ObjectMapper;
import org.slf4j.Logger;
import org.slf4j.LoggerFactory;
import org.springframework.beans.factory.annotation.Autowired;
import org.springframework.security.core.Authentication;
import org.springframework.security.web.authentication.AuthenticationSuccessHandler;
import org.springframework.stereotype.Component;

import javax.servlet.ServletException;
import javax.servlet.http.HttpServletRequest;
import javax.servlet.http.HttpServletResponse;
import java.io.IOException;

/**
 * 認證成功處理器
 */
@Component("myAuthenticationSuccessHandler")
public class MyAuthenticationSuccessHandler implements AuthenticationSuccessHandler {

    private Logger logger = LoggerFactory.getLogger(getClass());

    //springmvc啟動會自動註冊一個ObjectMapper
    @Autowired
    private ObjectMapper objectMapper;


    @Override
    public void onAuthenticationSuccess(HttpServletRequest request, HttpServletResponse response, Authentication authentication) throws IOException, ServletException {

        logger.info("登入成功");
        //把authentication返回給響應
        response.setContentType("application/json;charset=UTF-8");
        response.getWriter().write(objectMapper.writeValueAsString(authentication));

    }
}
2、新增到配置類,讓spring security執行自定義的處理器
在 BrowserSecurityConfig 配置類裡注入 AuthenticationSuccessHandler
@EnableWebSecurity
public class BrowserSecurityConfig extends WebSecurityConfigurerAdapter {


    //自定義的認證成功的處理器
    @Autowired
    private AuthenticationSuccessHandler myAuthenticationSuccessHandler;
    //自定義的認證失敗的處理器
    @Autowired
    private AuthenticationFailureHandler myAuthenticationFailureHandler;


    @Autowired
    private SecurityProperties securityProperties;


    @Override
    protected void configure(HttpSecurity http) throws Exception {
        //http.httpBasic() //這個就是預設的彈框認證
        http.formLogin() //表單認證
                .loginPage(securityProperties.getBrowser().getLoginPage())//登入頁
                .loginProcessingUrl("/authentication/form") //登入提交action
                .successHandler(myAuthenticationSuccessHandler) //自定義的認證成功處理器
                .failureHandler(myAuthenticationFailureHandler)//自定義的認證失敗的處理器
                .and()
                .authorizeRequests() //下邊的都是授權的配置
                .antMatchers(securityProperties.getBrowser().getLoginPage()).permitAll() //放過登入頁不過濾
                .anyRequest()        //任何請求
                .authenticated()    //都需要身份認證
                .and()
                .csrf().disable();
    }


}
登入失敗處理器和登入成功類似,自定義失敗處理類,實現 AuthenticationFailureHandler 介面即可:
/**
 * 認證失敗處理器
 */
@Component("/myAuthenticationFailureHandler")
public class MyAuthenticationFailureHandler  implements AuthenticationFailureHandler {

    private Logger logger = LoggerFactory.getLogger(getClass());

    //springmvc啟動會自動註冊一個ObjectMapper
    @Autowired
    private ObjectMapper objectMapper;


    @Override
    public void onAuthenticationFailure(HttpServletRequest request, HttpServletResponse response, AuthenticationException exception) throws IOException, ServletException {
        logger.info("登入失敗");

        //把authentication返回給響應
        //狀態碼500,伺服器內部錯誤
        response.setStatus(HttpStatus.INTERNAL_SERVER_ERROR.value());
        response.setContentType("application/json;charset=UTF-8");
        response.getWriter().write(objectMapper.writeValueAsString(exception.getMessage()));
    }
}
這樣就可以在登入成功和失敗後進入自己的處理邏輯了。