
spring學習(四) ———— 整合web專案(SSH)
清楚了spring的IOC 和 AOP,最後一篇就來整合SSH框架把,記錄下來,以後應該會用的到。
--WH
一、web專案中如何使用spring?
當tomcat啟動時,就應該載入spring的配置檔案,而不是每次都要手動使用new ClassPathXmlApplicationContext來載入xml。所以,spring提供了一個ContextLoaderListener。有了它,tomcat啟動時,就會載入配置檔案。
匯入spring.web....jar
![]()
1、web.xml中新增監聽器


1 <!-- 配置監聽器,用於載入spring 配置檔案 -->
2     <listener>
3         <listener-class>org.springframework.web.context.ContextLoaderListener</listener-class>
4     </listener>
1 <!-- 配置監聽器,用於載入spring 配置檔案 -->
2     <listener>
3         <listener-class>org.springframework.web.context.ContextLoaderListener</listener-class>
4     </listener>
這樣配置的監聽器,預設載入的是WEB-INF目錄下的xml檔案,而我們的配置檔案在src下,所以需要進行下一步的配置。
2、web.xml中配置 applicationContext.xml 位置

1 <!-- 設定web全域性初始化引數,設定配置檔案位置
2         * 名稱#contextConfigLocation 固定值
3         * 值# “classpath:”表示類路徑(src)
4             也可以有子包 #  classspath:com/wuhao/applicationContext.xml
5     -->
6     <context-param>
7         <param-name>contextConfigLocation</param-name>
8         <param-value>classpath:applicationContext.xml</param-value>
9     </context-param>
3、從ServletContext中獲得spring容器,建立的容器已經放在ServletContext中了
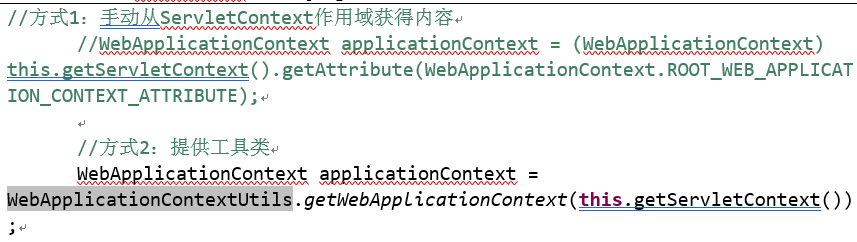
1 //方式1:手動從ServletContext作用域獲得內容
2         //WebApplicationContext applicationContext = (WebApplicationContext) this.getServletContext().getAttribute(WebApplicationContext.ROOT_WEB_APPLICATION_CONTEXT_ATTRIBUTE);
3
4         //方式2:提供工具類
5         WebApplicationContext applicationContext = WebApplicationContextUtils.getWebApplicationContext(this.getServletContext());
二、SSH整合所用到的jar包
2.1、struts2所需jar
版本:2.3.15.1
位置:struts-2.3.15.1\apps\struts2-blank\WEB-INF\lib

總共:13個jar包
2.2、hibernate
版本:3.6.10
所需jar
1、核心jar:hibernate3.jar

2、必須:lib/required 所有

3、jpa :lib\jpa 所有

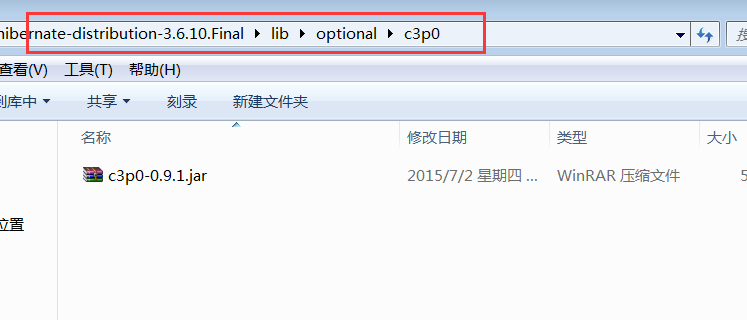
4、c3p0 \lib\optional\c3p0
5、 log4j 整合jar slf4j-log4j12-1.7.2.jar

6、mysql驅動包 mysql-connector-java-5.1.22-bin.jar

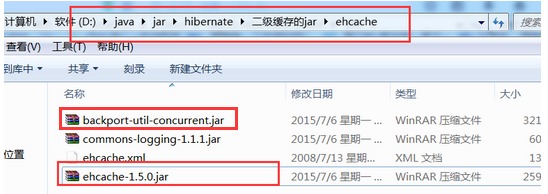
7、二級快取 ehcache-1.5.0.jar 、backport-util-concurrent.jar 原本要導3個,logging包在前面struts包中有了,所以無需在匯入
hibernate總共:13個jar包
2.3、spring
版本:3.2.0
jar包:
核心:4個(core、beans、expression、context) + commons-logging..jar(這個jar包在前面很多地方匯入過,struts2、hibernate的二級快取、spring都需要,只需要導一份即可)

aop:aop聯盟、spring aop、aspectj、spring-aspect
aop聯盟:spring-framework-3.0.2.RELEASE-dependencies\org.aopalliance\com.springsource.org.aopalliance\1.0.0
spring aop和spring-aspect:在核心包中
aspectj:spring-framework-3.0.2.RELEASE-dependencies\org.aspectj\com.springsource.org.aspectj.weaver\1.6.8.RELEASE
jdbc:2個 spring-jdbc、spring-tx
web:1個 spring-web
test:1個 spring-test (整合測試)
總共:12個
2.4、整合jar
spring3 整合hibernate3,spring提供整合jar : spring-orm...jar
struts2 整合 spring3 ,struts提供整合jar:struts2-spring-plugin-2.3.15.1.jar
位置:struts-2.3.15.1\lib
總共:2個
2.5、整理jar
前面拿到總共39個,去除一個重複的,剩下總共38個。
三、配置檔案
3.1、hibernate
hibernate.cfg.xml 核心配置檔案
*.hbm.xml 對映檔案(domain)
3.2、spring
applicationContext.xml
jdbcInfo.properties
web.xml(ContextLoaderListener)
3.3、struts2
struts.xml
web.xml(前端過濾器 StrutsPrepareAndExecuteFilter)
四、spring整合hibernate
4.1、首先要了解hibernate的配置檔案,和hibernate需要什麼,然後如何將其讓spring來管理。
hibernate.cfg.xml


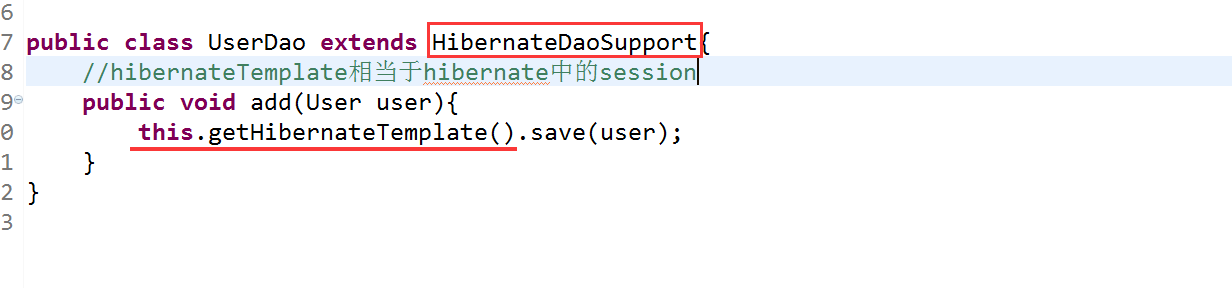
通過這兩個圖,可以知道,spring需要幫hibernate獲取session,而獲取session則先要獲得sessionFactory,獲取sessionFactory則需要載入配置檔案。所以spring就需要提供兩個東西,一個sessionFactory,一個session。spring如何做的呢?

 1 <?xml version="1.0" encoding="UTF-8"?>
 2 <beans xmlns="http://www.springframework.org/schema/beans"
 3        xmlns:xsi="http://www.w3.org/2001/XMLSchema-instance"
 4        xsi:schemaLocation="
 5 http://www.springframework.org/schema/beans http://www.springframework.org/schema/beans/spring-beans.xsd">
 6
 7 <!-- 配置資料來源  c3p0,-->
 8 <bean id="dataSource" class="com.mchange.v2.c3p0.ComboPooledDataSource">
 9     <property name="driverClass" value="com.mysql.jdbc.Driver"></property>
10     <property name="jdbcUrl" value="jdbc:mysql://localhost:3306/test_1"></property>
11     <property name="user" value="root"></property>
12     <property name="password" value="root"></property>
13 </bean>
14
15 <!-- 獲取sessionFactory需要載入hibernate.cfg.xml獲取其中的配置的資訊,那麼直接將那些配置資訊在這裡配置 -->
16 <bean id="sessionFactory" class="org.springframework.orm.hibernate3.LocalSessionFactoryBean">
17     <property name="dataSource" ref="dataSource"></property>
18     <!-- 配置一些其他的資訊,方言等 -->
19     <property name="hibernateProperties">
20         <props>
21             <prop key="hibernate.dialect">
22                 org.hibernate.dialect.MySQLDialect
23             </prop>
24             <prop key="hibernate.show_sql">true</prop>
25             <prop key="hibernate.format_sql">true</prop>
26             <prop key="hibernate.hbm2ddl.auto">update</prop>
27         </props>
28     </property>
29     <!-- 新增對映檔案 -->
30     <property name="mappingLocations" value="classpath:com/wuhao/domain/User.hbm.xml"></property>
31 </bean>
32
33 <!-- hibernate中通過sessionFactory建立得session對物件進行操作,spring提供一個hibernateTemplate進行操作,跟spring中的jdbcTemplate一樣,
34     繼承HibernateDaoSupport後,注入SessionFactory即可,在dao層就不用在寫hibernateTemplate的set方法了。
35  -->
36  <bean id="userDao" class="com.wuhao.dao.UserDao">
37      <property name="sessionFactory" ref="sessionFactory"></property>
38  </bean>
39
40
41 </beans>
使用:
這樣一來,就可以將hibernte.cfg.xml給刪除掉了。
還有一個問題,事務的處理。
簡單,之前一篇文章我們就講解了spring如何進行事務管理的,那時候使用的是jdbc管理器,現在換一個即可,使用hibernate事務管理器

所以整合完hibernate後,spring的配置檔案就成了這樣
 1 <?xml version="1.0" encoding="UTF-8"?>
 2 <beans xmlns="http://www.springframework.org/schema/beans"
 3        xmlns:xsi="http://www.w3.org/2001/XMLSchema-instance"
 4        xmlns:aop="http://www.springframework.org/schema/aop"
 5        xmlns:tx="http://www.springframework.org/schema/tx"
 6        xsi:schemaLocation="http://www.springframework.org/schema/beans
 7                               http://www.springframework.org/schema/beans/spring-beans.xsd
 8                               http://www.springframework.org/schema/aop
 9                               http://www.springframework.org/schema/aop/spring-aop.xsd
10                               http://www.springframework.org/schema/tx
11                               http://www.springframework.org/schema/tx/spring-tx.xsd">
12 <!-- hibernate -->
13 <!-- 配置資料來源  c3p0,-->
14 <bean id="dataSource" class="com.mchange.v2.c3p0.ComboPooledDataSource">
15     <property name="driverClass" value="com.mysql.jdbc.Driver"></property>
16     <property name="jdbcUrl" value="jdbc:mysql://localhost:3306/test_1"></property>
17     <property name="user" value="root"></property>
18     <property name="password" value="root"></property>
19 </bean>
20
21 <!-- 獲取sessionFactory需要載入hibernate.cfg.xml獲取其中的配置的資訊,那麼直接將那些配置資訊在這裡配置 -->
22 <bean id="sessionFactory" class="org.springframework.orm.hibernate3.LocalSessionFactoryBean">
23     <property name="dataSource" ref="dataSource"></property>
24     <!-- 配置一些其他的資訊,方言等 -->
25     <property name="hibernateProperties">
26         <props>
27             <prop key="hibernate.dialect">
28                 org.hibernate.dialect.MySQLDialect
29             </prop>
30             <prop key="hibernate.show_sql">true</prop>
31             <prop key="hibernate.format_sql">true</prop>
32             <prop key="hibernate.hbm2ddl.auto">update</prop>
33         </props>
34     </property>
35     <!-- 新增對映檔案 -->
36     <property name="mappingLocations" value="classpath:com/wuhao/domain/User.hbm.xml"></property>
37 </bean>
38
39 <!-- hibernate中通過sessionFactory建立得session對物件進行操作,spring提供一個hibernateTemplate進行操作,跟spring中的jdbcTemplate一樣,
40     繼承HibernateDaoSupport後,注入SessionFactory即可,在dao層就不用在寫hibernateTemplate的set方法了。
41  -->
42  <bean id="userDao" class="com.wuhao.dao.UserDao">
43      <property name="sessionFactory" ref="sessionFactory"></property>
44  </bean>
45
46  <!-- hiberntae事務管理器,也需要將sessionFactory加進來,從hibernate中得程式碼就可以看出來,事務也是由sessionFactory獲取來的-->
47 <bean id="txManager" class="org.springframework.orm.hibernate3.HibernateTransactionManager">
48     <property name="sessionFactory" ref="sessionFactory"></property>
49 </bean>
50 <!-- 事務詳情 -->
51 <tx:advice id="txAdvice" transaction-manager="txManager">
52     <tx:attributes>
53         <tx:method name="add" propagation="REQUIRED"/>
54     </tx:attributes>
55 </tx:advice>
56
57 <!-- aop事務管理 ,要使用事務和aop,需要在上面匯入dtd。我這裡圖方便,沒寫介面,所以需要叫spring使用cglib-->
58 <aop:aspectj-autoproxy proxy-target-class="true"></aop:aspectj-autoproxy>
59 <aop:config>
60     <aop:advisor advice-ref="txAdvice" pointcut="execution(* com.wuhao.service.*.*(..))"/>
61 </aop:config>
62 </beans>
總結:其實非常簡單,一開始整合肯定毫無頭緒,不知道從哪裡下手,那麼就先將一個最簡單的hibernate操作物件的小demo寫出來,看看hibernate需要什麼,然後spring就配置什麼,給什麼。這樣就簡單明瞭了。
五、struts2整合spring
5.1、struts2自己建立action。而不用spring幫我們建立
struts.xml

action中userService物件的建立就需要讓spring幫我們建立
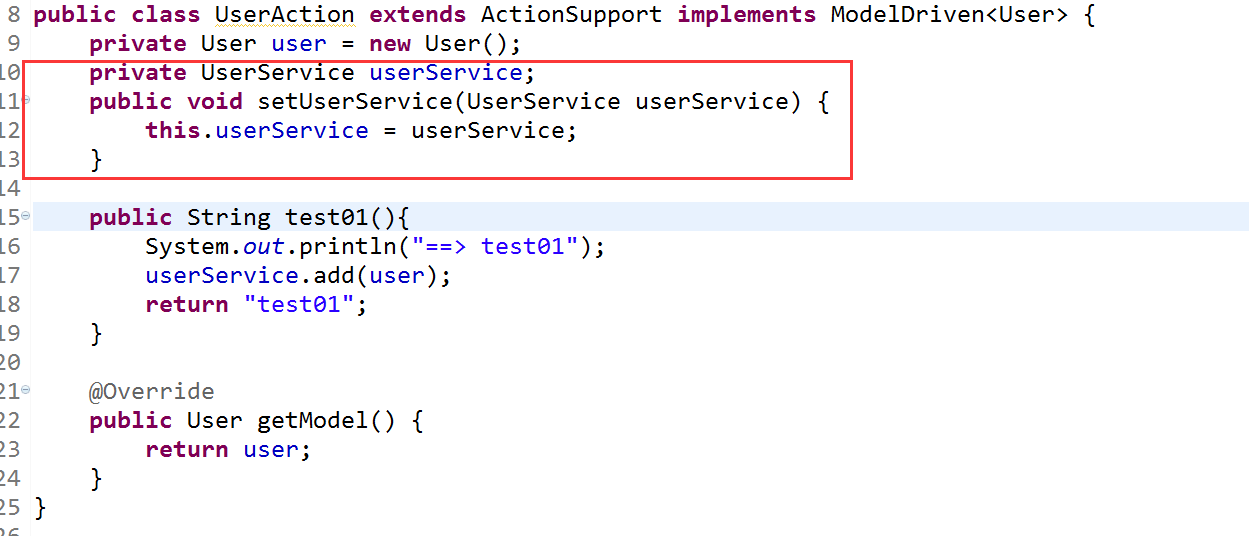
applicationContext.xml

這樣,就可以了。
5.2、spring幫我們建立action,struts2什麼也不用做了。‘
前提:需要匯入struts-spring-plugin...jar

全部整合完後的applicationContext.xml
 1 <?xml version="1.0" encoding="UTF-8"?>
 2 <beans xmlns="http://www.springframework.org/schema/beans"
 3        xmlns:xsi="http://www.w3.org/2001/XMLSchema-instance"
 4        xmlns:aop="http://www.springframework.org/schema/aop"
 5        xmlns:tx="http://www.springframework.org/schema/tx"
 6        xsi:schemaLocation="http://www.springframework.org/schema/beans
 7                               http://www.springframework.org/schema/beans/spring-beans.xsd
 8                               http://www.springframework.org/schema/aop
 9                               http://www.springframework.org/schema/aop/spring-aop.xsd
10                               http://www.springframework.org/schema/tx
11                               http://www.springframework.org/schema/tx/spring-tx.xsd">
12 <!-- struts2自己建立Action的配置,就不需要21到24行的程式碼,如果是spring建立action,則需要 -->
13 <!--
14     action中的userService物件,在這裡配置就能夠獲取到。為什麼能夠直接配置就能夠得到,
15     需要匯入struts-spring-plugin...jar,因為有它和default.properties的結合所以才能夠直接配置得到
16  -->
17 <bean id="userService" class="com.wuhao.service.UserService">
18 <!-- userDao在hibernate整合時就已經建立了bean,所以就直接拿過來用 -->
19     <property name="userDao" ref="userDao"></property>
20 </bean>
21 <!-- 配置action -->
22 <bean id="userAction" class="com.wuhao.action.UserAction">
23     <property name="userService" ref="userService"></property>
24 </bean>
25
26 <!-- hibernate -->
27 <!-- 配置資料來源  c3p0,-->
28 <bean id="dataSource" class="com.mchange.v2.c3p0.ComboPooledDataSource">
29     <property name="driverClass" value="com.mysql.jdbc.Driver"></property>
30     <property name="jdbcUrl" value="jdbc:mysql://localhost:3306/test_1"></property>
31     <property name="user" value="root"></property>
32     <property name="password" value="root"></property>
33 </bean>
34
35 <!-- 獲取sessionFactory需要載入hibernate.cfg.xml獲取其中的配置的資訊,那麼直接將那些配置資訊在這裡配置 -->
36 <bean id="sessionFactory" class="org.springframework.orm.hibernate3.LocalSessionFactoryBean">
37     <property name="dataSource" ref="dataSource"></property>
38     <!-- 配置一些其他的資訊,方言等 -->
39     <property name="hibernateProperties">
40         <props>
41             <prop key="hibernate.dialect">
42                 org.hibernate.dialect.MySQLDialect
43             </prop>
44             <prop key="hibernate.show_sql">true</prop>
45             <prop key="hibernate.format_sql">true</prop>
46             <prop key="hibernate.hbm2ddl.auto">update</prop>
47         </props>
48     </property>
49     <!-- 新增對映檔案 -->
50     <property name="mappingLocations" value="classpath:com/wuhao/domain/User.hbm.xml"></property>
51 </bean>
52
53 <!-- hibernate中通過sessionFactory建立得session對物件進行操作,spring提供一個hibernateTemplate進行操作,跟spring中的jdbcTemplate一樣,
54     繼承HibernateDaoSupport後,注入SessionFactory即可,在dao層就不用在寫hibernateTemplate的set方法了。
55  -->
56  <bean id="userDao" class="com.wuhao.dao.UserDao">
57      <property name="sessionFactory" ref="sessionFactory"></property>
58  </bean>
59
60  <!-- hiberntae事務管理器,也需要將sessionFactory加進來,從hibernate中得程式碼就可以看出來,事務也是由sessionFactory獲取來的-->
61 <bean id="txManager" class="org.springframework.orm.hibernate3.HibernateTransactionManager">
62     <property name="sessionFactory" ref="sessionFactory"></property>
63 </bean>
64 <!-- 事務詳情 -->
65 <tx:advice id="txAdvice" transaction-manager="txManager">
66     <tx:attributes>
67         <tx:method name="add" propagation="REQUIRED"/>
68     </tx:attributes>
69 </tx:advice>
70
71 <!-- aop事務管理 ,要使用事務和aop,需要在上面匯入dtd。我這裡圖方便,沒寫介面,所以需要叫spring使用cglib-->
72 <aop:aspectj-autoproxy proxy-target-class="true"></aop:aspectj-autoproxy>
73 <aop:config>
74     <aop:advisor advice-ref="txAdvice" pointcut="execution(* com.wuhao.service.*.*(..))"/>
75 </aop:config>
76 </beans>
六、總結
那麼到這裡,手動整合ssh就結束了,其實非常簡單,一步步來,從導包到整合hibernate在整合struts的步驟進行,那麼就可以成功整合了,上面所有的我都沒有采用介面程式設計,為了方便,日後注意一下這點即可。非常簡單。
但是在整合hibernate時,我們的你domain都對映檔案都是自己手動編寫的,實際開發中肯定不需要一個個手動編寫,因為是先有資料庫,然後在來寫你domain,所以之後會說到通過反轉引擎根據資料庫中的表來建立domain和對映檔案。