單點登入實現(spring session+redis完成session共享
v一、前言
專案中用到的SSO,使用開源框架cas做的。簡單的瞭解了一下cas,並學習了一下 ,有興趣的同學也可以學習一下,寫個demo玩一玩。
v二、工程結構

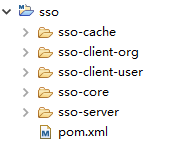
我模擬了 sso的客戶端和sso的服務端, sso-core中主要是一些sso需要的過濾器和工具類,快取和session共享的一些XML配置檔案,還有springmvc需要的一下jar包的管理。sso-cache中配置了redis快取策略。
v三、單點登入原理圖

簡單描述:
使用者訪問系統1的受保護資源,系統1發現使用者未登入,跳轉至sso認證中心,並將自己的地址作為引數
sso認證中心發現使用者未登入,將使用者引導至登入頁面
使用者輸入使用者名稱密碼提交登入申請
sso認證中心校驗使用者資訊,建立使用者與sso認證中心之間的會話,稱為全域性會話,同時建立授權令牌
sso認證中心帶著令牌跳轉會最初的請求地址(系統1)
系統1拿到令牌,去sso認證中心校驗令牌是否有效
sso認證中心校驗令牌,返回有效,註冊系統1
系統1使用該令牌建立與使用者的會話,稱為區域性會話,返回受保護資源
使用者訪問系統2的受保護資源
系統2發現使用者未登入,跳轉至sso認證中心,並將自己的地址作為引數
sso認證中心發現使用者已登入,跳轉回系統2的地址,並附上令牌
系統2拿到令牌,去sso認證中心校驗令牌是否有效
sso認證中心校驗令牌,返回有效,註冊系統2
系統2使用該令牌建立與使用者的區域性會話,返回受保護資源
v 四、單點登入實現
1.SSOFilter.java(sso client filter實現)


import java.io.IOException; import javax.servlet.Filter; import javax.servlet.FilterChain; import javax.servlet.FilterConfig; import javax.servlet.ServletException; import javax.servlet.ServletRequest;import javax.servlet.ServletResponse; import javax.servlet.http.HttpServletRequest; import javax.servlet.http.HttpServletResponse; import javax.servlet.http.HttpSession; import org.slf4j.Logger; import org.slf4j.LoggerFactory; import com.alibaba.fastjson.JSONObject; import com.hjz.sso.utils.RestTemplateUtil; public class SSOFilter implements Filter{ public static Logger logger = LoggerFactory.getLogger(SSOFilter.class); private String SSO_SERVER_URL; private String SSO_SERVER_VERIFY_URL; @Override public void init(FilterConfig filterConfig) throws ServletException { SSO_SERVER_URL = filterConfig.getInitParameter("SSO_SERVER_URL"); SSO_SERVER_VERIFY_URL = filterConfig.getInitParameter("SSO_SERVER_VERIFY_URL"); if(SSO_SERVER_URL == null) logger.error("SSO_SERVER_URL is null."); if(SSO_SERVER_VERIFY_URL == null) logger.error("SSO_SERVER_VERIFY_URL is null."); } @Override public void doFilter(ServletRequest req, ServletResponse res, FilterChain chain) throws IOException, ServletException { HttpServletRequest request = (HttpServletRequest) req; HttpServletResponse response = (HttpServletResponse) res; //請求中帶有token,去sso-server驗證token是否有效 String authority = null; if(request.getParameter("token") != null) { boolean verifyResult = this.verify(request, SSO_SERVER_VERIFY_URL, request.getParameter("token")); if (verifyResult) { chain.doFilter(req, res); return; } else { authority = "token->" + request.getParameter("token") + " is invalidate."; } } HttpSession session = request.getSession(); if (session.getAttribute("login") != null && (boolean)session.getAttribute("login") == true) { chain.doFilter(req, res); return; } //跳轉至sso認證中心 String callbackURL = request.getRequestURL().toString(); StringBuilder url = new StringBuilder(); url.append(SSO_SERVER_URL).append("?callbackURL=").append(callbackURL); if(authority != null) { url.append("&authority=").append(authority); } response.sendRedirect(url.toString()); } private boolean verify(HttpServletRequest request, String verifyUrl, String token) { String result = RestTemplateUtil.get(request, verifyUrl + "?token=" + token, null); JSONObject ret = JSONObject.parseObject(result); if("success".equals(ret.getString("code"))) { return true; } logger.error(request.getRequestURL().toString() + " : " + ret.getString("msg")); return false; } @Override public void destroy() { } }

2.LoginController.java(sso server登入controller)


import java.util.UUID;

import javax.servlet.http.HttpSession;

import org.slf4j.Logger;
import org.slf4j.LoggerFactory;
import org.springframework.stereotype.Controller;
import org.springframework.ui.Model;
import org.springframework.web.bind.annotation.RequestMapping;
import org.springframework.web.bind.annotation.RequestMethod;
import org.springframework.web.bind.annotation.RequestParam;

@Controller
@RequestMapping("sso")
public class LoginController {
    private Logger logger = LoggerFactory.getLogger(LoginController.class);

    @RequestMapping(value="login", method={RequestMethod.GET, RequestMethod.POST})
    public String login(HttpSession session, Model model,
            @RequestParam(value="name", required=false) String name,
            @RequestParam(value="password", required=false) String password) {
        if(name == null && password == null) return "login";
        if("admin".equals(name) && "admin".equals(password)) {
            String token = UUID.randomUUID().toString();
            session.setAttribute("login", true);
            session.setAttribute("token", token);
            return "index";
        } else {
            model.addAttribute("error", true);
            model.addAttribute("message", "使用者名稱或密碼錯誤。");
            return "login";
        }
    }
}

3.ValidateController.java(sso server驗證token controller)


import javax.servlet.http.HttpServletRequest;
import javax.servlet.http.HttpSession;

import org.springframework.stereotype.Controller;
import org.springframework.web.bind.annotation.RequestMapping;
import org.springframework.web.bind.annotation.RequestParam;
import org.springframework.web.bind.annotation.ResponseBody;

import com.alibaba.fastjson.JSONObject;

@Controller
@RequestMapping("sso")
public class ValidateController {

    @RequestMapping("verify")
    @ResponseBody
    public JSONObject verify(HttpServletRequest request, @RequestParam String token) {
        HttpSession session = request.getSession();
        JSONObject result = new JSONObject();
        if(session.getAttribute("token") != null && token.equals(session.getAttribute("token"))) {
            result.put("code", "success");
            result.put("msg", "認證成功");
        } else {
            result.put("code", "failure");
            result.put("msg", "token已失效,請重新登入!");
        }
        return result;
    }

}

4.在sso client工程中加上SSOFilter(web.xml部分配置)


<filter>
    <filter-name>ssoFilter</filter-name>
    <filter-class>com.hjz.sso.filter.SSOFilter</filter-class>
    <init-param>
        <param-name>SSO_SERVER_URL</param-name>
        <param-value>http://localhost:8088/sso-server/sso/login</param-value>
    </init-param>
    <init-param>
        <param-name>SSO_SERVER_VERIFY_URL</param-name>
        <param-value>http://localhost:8088/sso-server/sso/verify</param-value>
    </init-param>
</filter>

<filter-mapping>
    <filter-name>ssoFilter</filter-name>
    <url-pattern>/*</url-pattern>
</filter-mapping>

基本模型已經出來了,啟動sso-client 和 sso-server(本人都部署到了同一個tomcat下),試圖去驗證單點登入。測試的時候,從瀏覽器中的cookie中檢視,可以看到 localhost域下有多個JSESSIONID。這也難怪, Tomcat中的每一個application都會建立自己的session會話。那接下來的事情就是解決 session 共享的問題,這樣我們就可以完成我們的單點登陸了。
5.為每個工程的web.xml中增加spring session代理filter的配置

<!-- session 代理 -->
<filter>
    <filter-name>springSessionRepositoryFilter</filter-name>
    <filter-class>org.springframework.web.filter.DelegatingFilterProxy</filter-class>
</filter>

<filter-mapping>
    <filter-name>springSessionRepositoryFilter</filter-name>
    <url-pattern>/*</url-pattern>
</filter-mapping>

6.在sso-core中加入 快取和spring session的xml配置(cache-config.xml)

<?xml version="1.0" encoding="UTF-8"?>
<beans xmlns="http://www.springframework.org/schema/beans"
       xmlns:xsi="http://www.w3.org/2001/XMLSchema-instance"
       xmlns:context="http://www.springframework.org/schema/context"
       xsi:schemaLocation="http://www.springframework.org/schema/beans http://www.springframework.org/schema/beans/spring-beans-4.0.xsd
        http://www.springframework.org/schema/context http://www.springframework.org/schema/context/spring-context-4.0.xsd"
       default-lazy-init="false">

    <description>Cache公共配置</description>
    <bean id="cookieSerializer" class="org.springframework.session.web.http.DefaultCookieSerializer">
        <property name="cookiePath" value="/"></property>
    </bean>

    <bean class="com.sso.cache.config.CacheConfig"/>

    <bean class="org.springframework.session.data.redis.config.annotation.web.http.RedisHttpSessionConfiguration">
        <property name="maxInactiveIntervalInSeconds" value="1800"></property>
    </bean>
</beans>

這裡說一下為什麼有定義一個 cookieSerializer 這個bean。參看RedisHttpSessionConfiguration的原始碼,發現它繼承了SpringHttpSessionConfiguration,繼續檢視原始碼,發現SpringHttpSessionConfiguration中實現了我們配置的spring session代理filter,如下所示。

SpringHttpSessionConfiguration.java

@Bean
public <S extends ExpiringSession> SessionRepositoryFilter<? extends ExpiringSession> springSessionRepositoryFilter(
        SessionRepository<S> sessionRepository) {
    SessionRepositoryFilter sessionRepositoryFilter = new SessionRepositoryFilter(sessionRepository);

    sessionRepositoryFilter.setServletContext(this.servletContext);
    if (this.httpSessionStrategy instanceof MultiHttpSessionStrategy) {
        sessionRepositoryFilter.setHttpSessionStrategy((MultiHttpSessionStrategy) this.httpSessionStrategy);
    } else {
        sessionRepositoryFilter.setHttpSessionStrategy(this.httpSessionStrategy);
    }
    return sessionRepositoryFilter;
}

檢視原始碼,可以發現 SpringHttpSessionConfiguration使用的預設會話策略(httpSessionStrategy)是CookieHttpSessionStrategy。繼續檢視CookieHttpSessionStrategy的原始碼,如新建session寫入cookie。

public void onNewSession(Session session, HttpServletRequest request, HttpServletResponse response) {
    Set sessionIdsWritten = getSessionIdsWritten(request);
    if (sessionIdsWritten.contains(session.getId())) {
        return;
    }
    sessionIdsWritten.add(session.getId());

    Map sessionIds = getSessionIds(request);
    String sessionAlias = getCurrentSessionAlias(request);
    sessionIds.put(sessionAlias, session.getId());

    String cookieValue = createSessionCookieValue(sessionIds);
    this.cookieSerializer.writeCookieValue(new CookieSerializer.CookieValue(request, response, cookieValue));
}

cookieSerializer 預設是 DefaultCookieSerializer。檢視DefaultCookieSerializer 的 writeCookieValue方法如下。

public void writeCookieValue(CookieSerializer.CookieValue cookieValue) {
    HttpServletRequest request = cookieValue.getRequest();
    HttpServletResponse response = cookieValue.getResponse();

    String requestedCookieValue = cookieValue.getCookieValue();
    String actualCookieValue = requestedCookieValue + this.jvmRoute;

    Cookie sessionCookie = new Cookie(this.cookieName, actualCookieValue);
    sessionCookie.setSecure(isSecureCookie(request));
    sessionCookie.setPath(getCookiePath(request));
    String domainName = getDomainName(request);
    if (domainName != null) {
        sessionCookie.setDomain(domainName);
    }

    if (this.useHttpOnlyCookie) {
        sessionCookie.setHttpOnly(true);
    }

    if ("".equals(requestedCookieValue)) {
        sessionCookie.setMaxAge(0);
    } else {
        sessionCookie.setMaxAge(this.cookieMaxAge);
    }
    response.addCookie(sessionCookie);
}

sessionCookie.setPath(getCookiePath(request));這塊有一個問題,看一下getCookiePath方法的實現,如下。
private String getCookiePath(HttpServletRequest request) {
    if (this.cookiePath == null) {
        return request.getContextPath() + "/";
    }
    return this.cookiePath;
}
如果要實現單點登入,就不要使用預設的 cookiePath 的值。所以,我定義了一個 cookieSerializer 的bean,並指定了 cookiePath 的值。 SpringHttpSessionConfiguration中如下方法可以自動裝配 我們配置的cookieSerializer,而不是使用預設的。
@Autowired(required = false)
public void setCookieSerializer(CookieSerializer cookieSerializer) {
    this.defaultHttpSessionStrategy.setCookieSerializer(cookieSerializer);
}
7.在每個工程中的spring公共配置檔案中增加如下配置。
<import resource="classpath*:cache-config.xml"/>
8.後端之間rest請求傳遞 session ID。

private static ResponseEntity<String> request(ServletRequest req, String url, HttpMethod method, Map<String, ?> params) {
    HttpServletRequest request = (HttpServletRequest) req;
    //獲取header資訊
    HttpHeaders requestHeaders = new HttpHeaders();
    Enumeration<String> headerNames = request.getHeaderNames();
    while (headerNames.hasMoreElements()) {
      String key = (String) headerNames.nextElement();
      String value = request.getHeader(key);
      requestHeaders.add(key, value);
    }
    HttpEntity<String> requestEntity = new HttpEntity<String>(params != null ? JSONObject.toJSONString(params) : null, requestHeaders);
    ResponseEntity<String> rss = restTemplate.exchange(url, method, requestEntity, String.class);
    return rss;
}

使用RestTemplate傳送rest請求,傳送之前複製request中的header資訊,保證session ID可以傳遞。
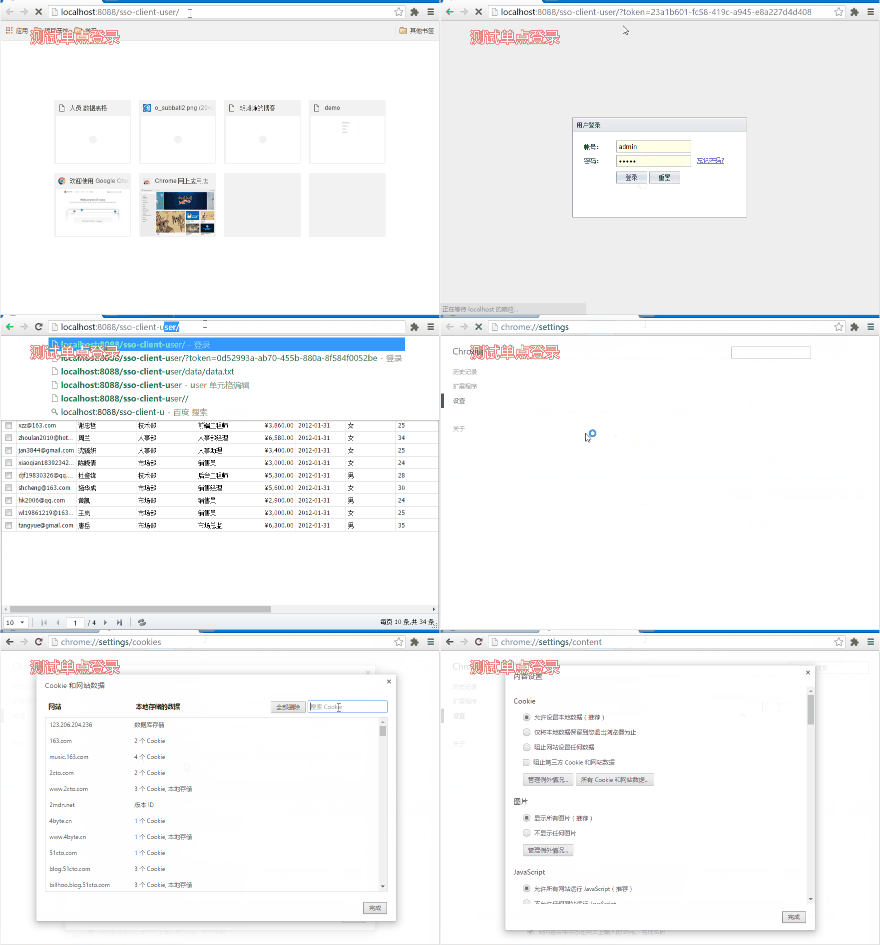
9.最後,啟動工程,測試結果如下。

http://study.hujunzheng.cn:8000/sso-client-user/ 和 http://study.hujunzheng.cn:8000/sso-client-org/ 切換訪問工程。
