
與WebRTC實時通訊
與WebRTC實時通訊
一、介紹
WebRTC是一個開源專案,可以在Web和本機應用程式中實現音訊,視訊和資料的實時通訊。WebRTC有幾個JavaScript API:
getUserMedia():捕獲音訊和視訊。
MediaRecorder:錄製音訊和視訊。
RTCPeerConnection:在使用者之間傳輸音訊和視訊。
RTCDataChannel:使用者之間的流資料。
在Firefox,Opera和桌面和Android上的Chrome中可以使用WebRTC。WebRTC也可用於iOS和Android上的本機應用程式。
什麼是signaling?
WebRTC使用RTCPeerConnection在瀏覽器之間傳遞流資料,但也需要一種協調通訊和傳送控制訊息的機制,這一過程稱為信令。WebRTC未指定信令方法和協議。本例將使用Socket.IO進行訊息傳遞。
什麼是STUN和TURN?
WebRTC旨在實現點對點工作,因此使用者可以通過最直接的路由進行連線。但是,WebRTC的構建是為了應對真實的網路:客戶端應用程式需要遍歷NAT閘道器和防火牆,並且在直接連線失敗的情況下,對等網路需要回退。作為此過程的一部分,WebRTC API使用STUN伺服器獲取計算機的IP地址,並使用TURN伺服器作為中繼伺服器,以防對等通訊失敗。
二、概述
構建應用程式以獲取視訊並使用網路攝像頭拍攝快照,並通過WebRTC進行點對點共享。在此過程中,將學習如何使用核心WebRTC API並使用Node.js設定訊息傳遞伺服器。
你將學到什麼
從網路攝像頭獲取視訊
使用RTCPeerConnection流式傳輸視訊
使用RTCDataChannel流式傳輸資料
建立信令服務以交換訊息
結合對等連線和信令
拍照並通過資料通道分享
你需要什麼
Chrome 47或以上
適用於Chrome的Web Server,或使用您自己選擇的Web伺服器。
示例程式碼
文字編輯器
HTML,CSS和JavaScript的基礎知識
三、獲取示例程式碼
下載程式碼
如果您熟悉git,可以通過克隆它從GitHub下載此codelab的程式碼:
git clone https://github.com/googlecodelabs/webrtc-web
或者單擊此處下載程式碼的.zip檔案。
開啟下載的zip檔案。這個專案資料夾包含每個步驟以及需要的所有資源。您將在名為work的目錄中完成所有編碼工作。
安裝並驗證Web伺服器
雖然您可以自由使用自己的Web伺服器,但此codelab可以與Chrome Web伺服器配合使用。如果您尚未安裝該應用,則可以從Chrome網上應用店安裝該應用。
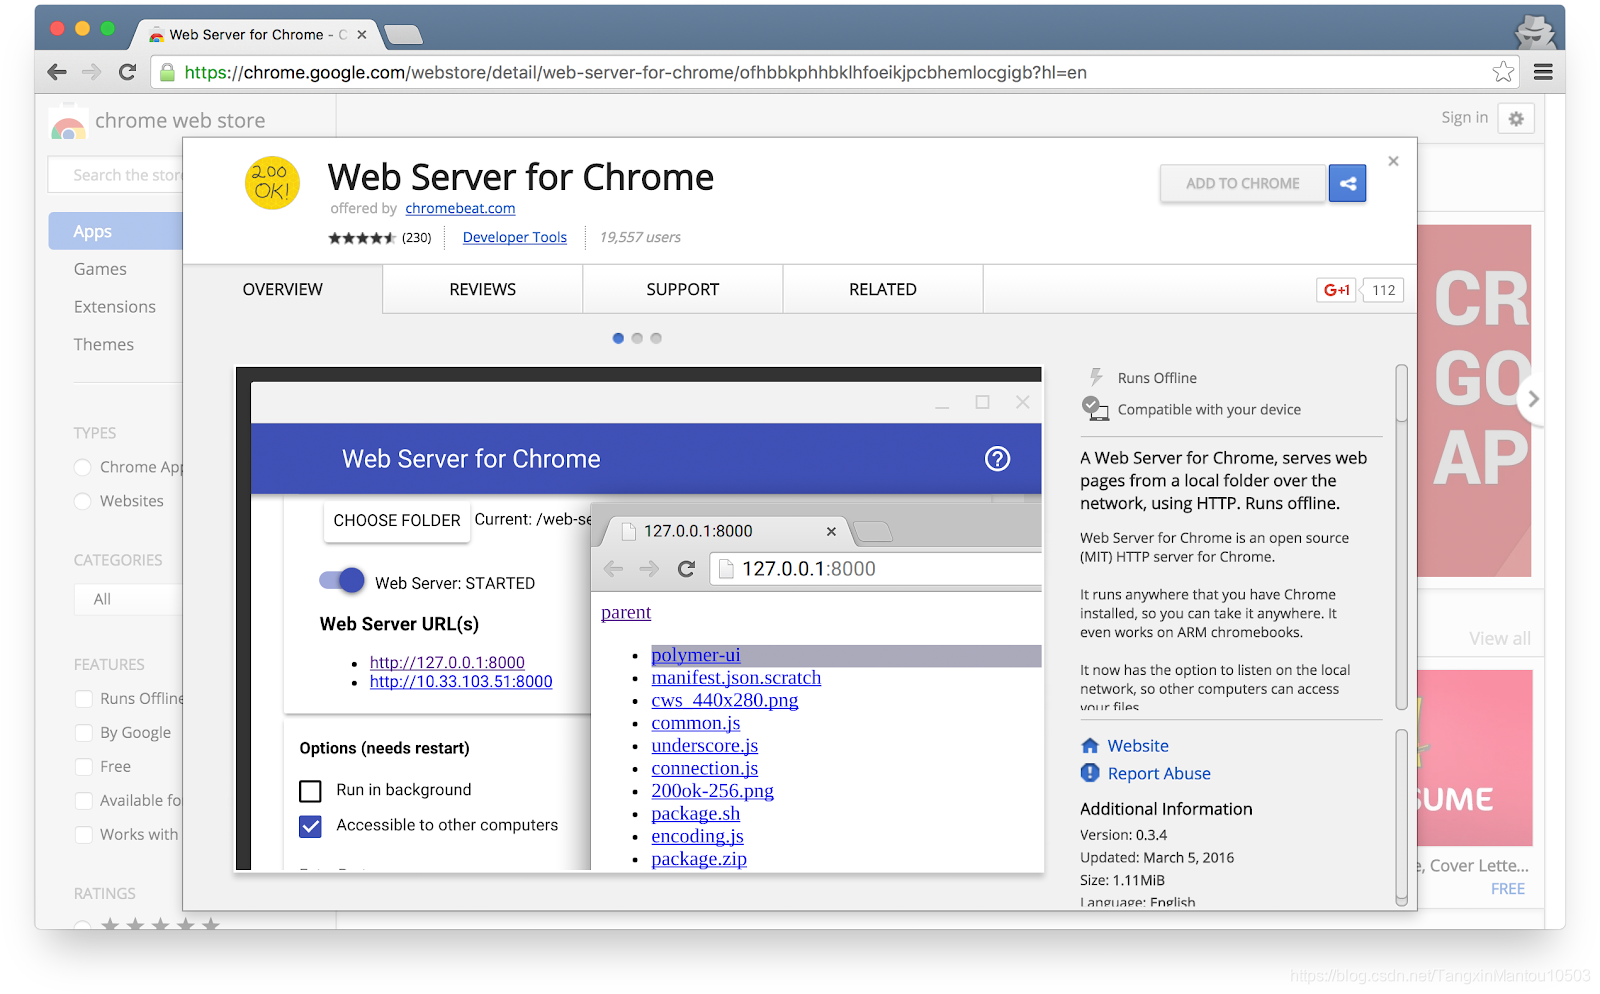
安裝Web Server for Chrome應用程式後,單擊書籤欄,新標籤頁或應用啟動器中的Chrome應用程式快捷方式:

單擊Web Server圖示:
接下來,您將看到此對話方塊,它允許您配置本地Web伺服器:
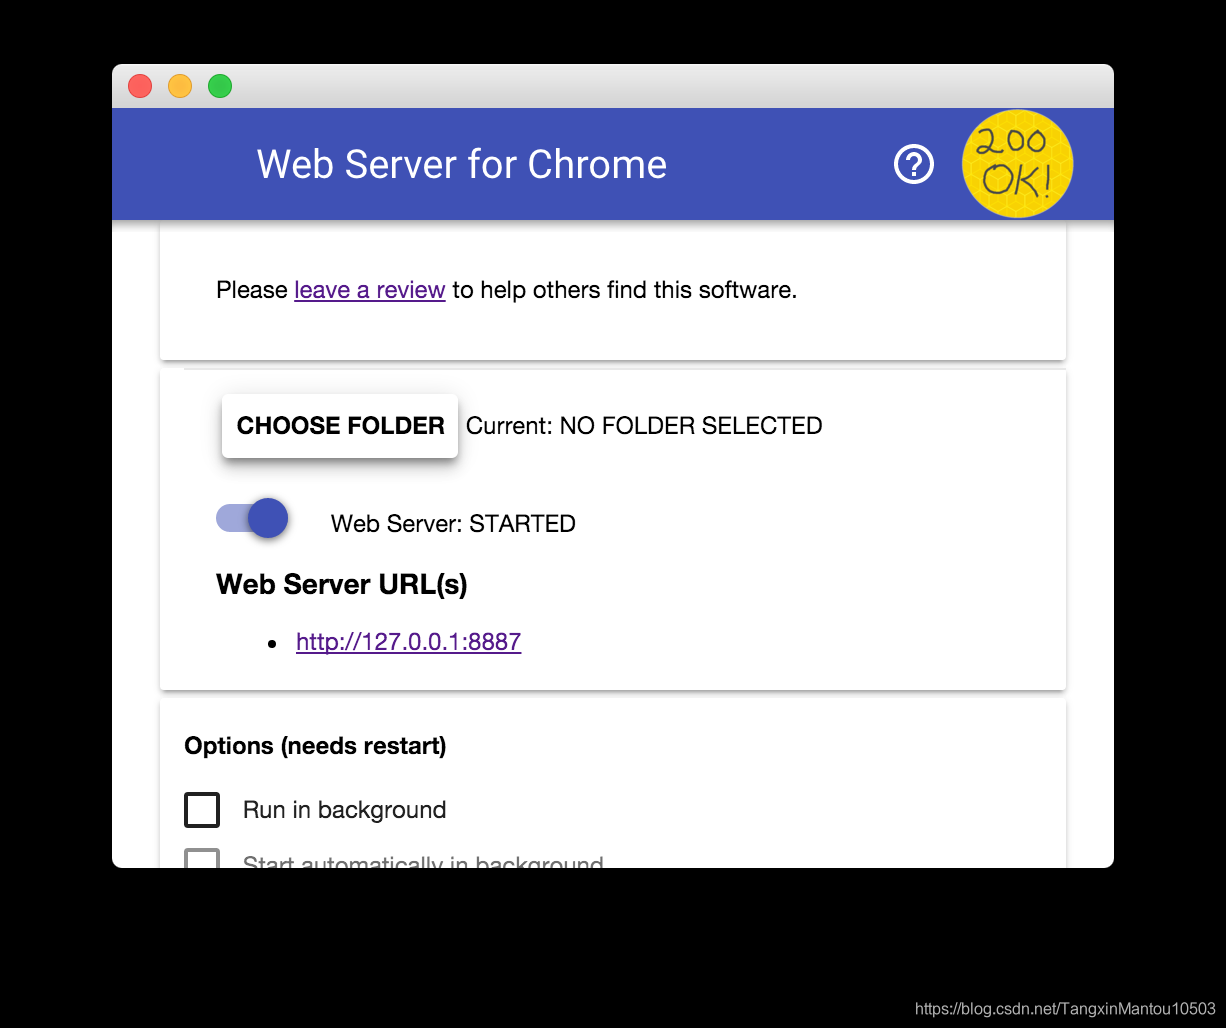
單擊“ 選擇資料夾”按鈕,然後選擇剛剛建立的工作資料夾。這樣,您就可以通過“ Web伺服器URL”部分的“Web伺服器”對話方塊中突出顯示的URL檢視Chrome中正在進行的工作。
在選項下,選中自動顯示index.html旁邊的框,如下所示:
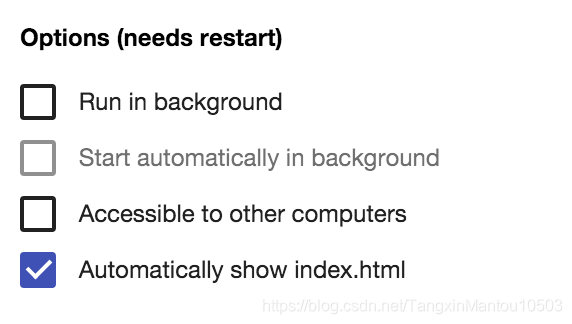
然後通過滑動標記為Web Server的切換來停止並重新啟動伺服器:STARTED向左,然後向右移動。

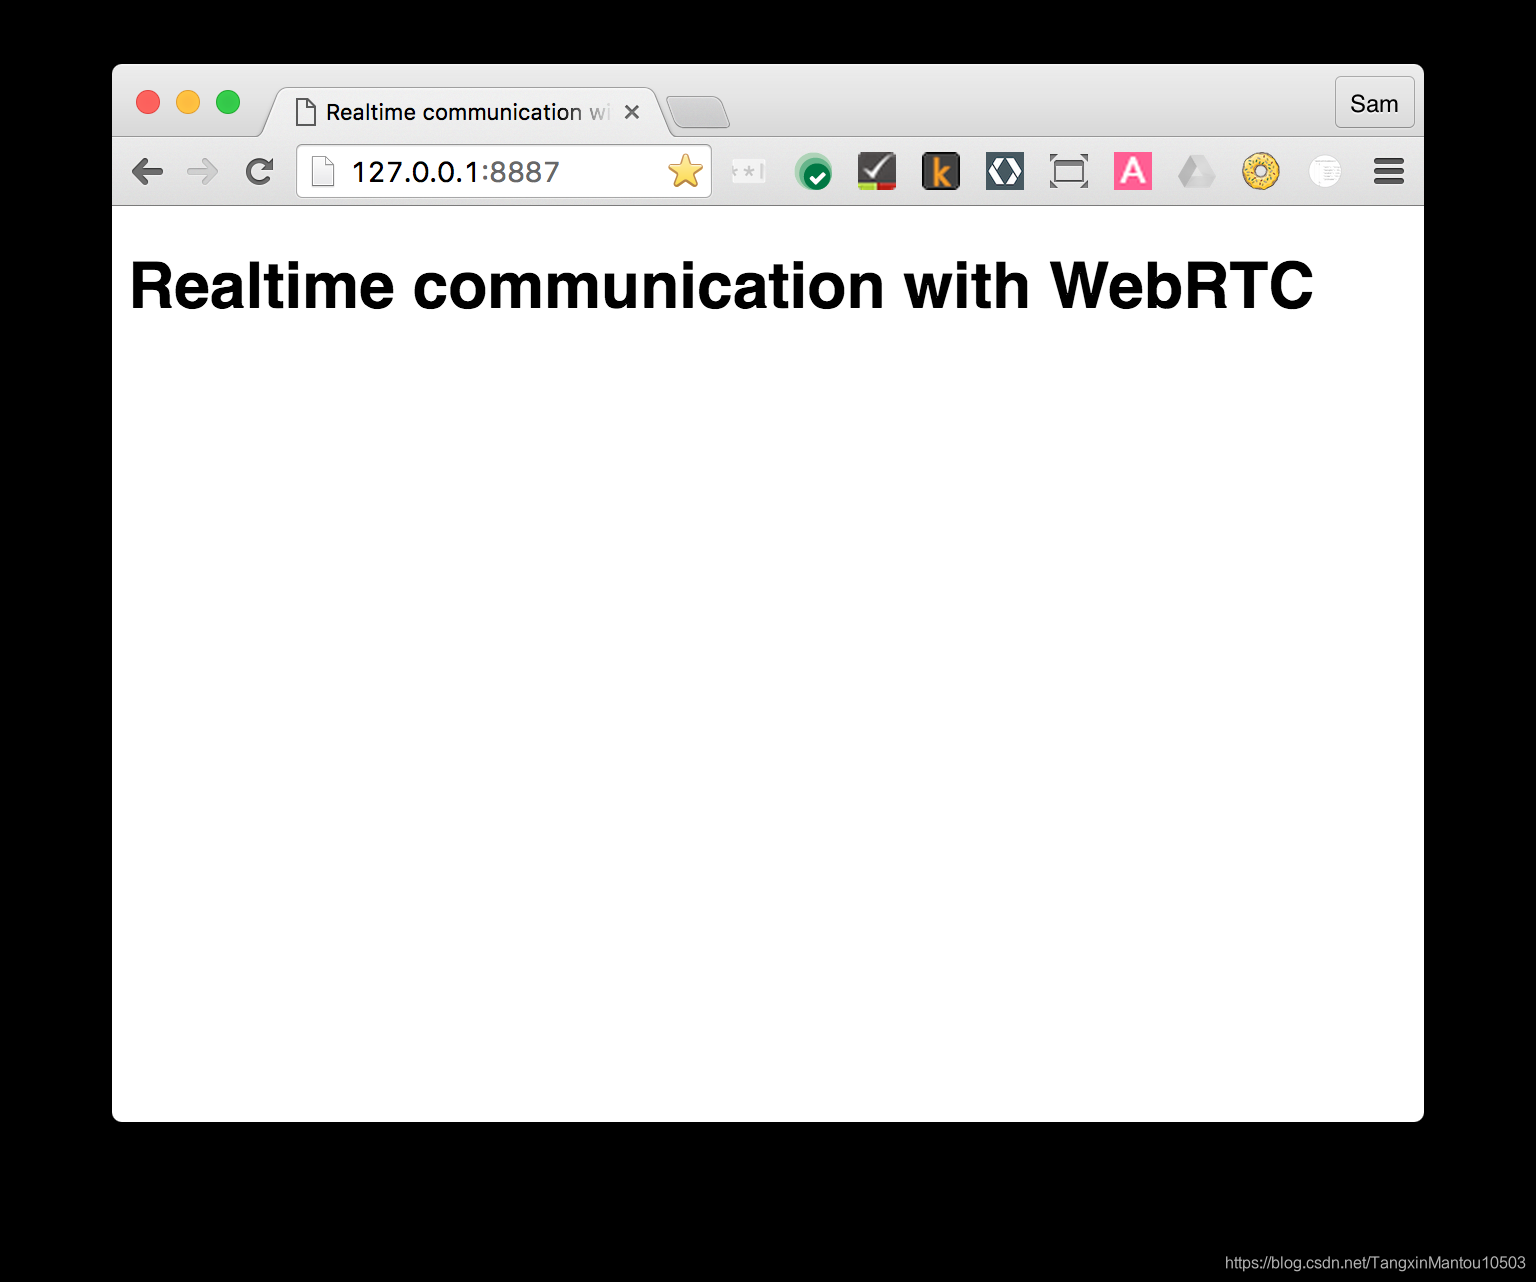
現在,通過單擊突出顯示的Web伺服器URL,在Web瀏覽器中訪問您的工作站點。你應該看到一個看起來像這樣的頁面,它對應於work / index.html:
從現在開始,應使用此Web伺服器設定執行所有測試和驗證,只需重新整理測試瀏覽器選項卡。
四、通過網路攝像頭流式傳輸視訊
在這一步中,您將瞭解如何:
從您的網路攝像頭獲取視訊流。
操縱流播放。
使用CSS和SVG來操縱視訊。
此步驟的完整版本位於step-01資料夾中。
在工作目錄中為index.html新增video元素和script元素:
<!DOCTYPE html>
<html>

<head>

  <title>Realtime communication with WebRTC</title>

  <link rel="stylesheet" href="css/main.css" />

</head>

<body>

  <h1>Realtime communication with WebRTC</h1>

  <video autoplay playsinline></video>

  <script src="js/main.js"></script>

</body>

</html>
以下內容新增到main.js在您的JS資料夾
'use strict';

// On this codelab, you will be streaming only video (video: true).
const mediaStreamConstraints = {
  video: true,
};

// Video element where stream will be placed.
const localVideo = document.querySelector('video');

// Local stream that will be reproduced on the video.
let localStream;

// Handles success by adding the MediaStream to the video element.
function gotLocalMediaStream(mediaStream) {
  localStream = mediaStream;
  localVideo.srcObject = mediaStream;
}

// Handles error by logging a message to the console with the error message.
function handleLocalMediaStreamError(error) {
  console.log('navigator.getUserMedia error: ', error);
}

// Initializes media stream.
navigator.mediaDevices.getUserMedia(mediaStreamConstraints)
  .then(gotLocalMediaStream).catch(handleLocalMediaStreamError);
這裡的所有JavaScript示例都用於’use strict’;避免常見的編碼問題。
在瀏覽器中開啟index.html,可以看到網路攝像頭的檢視。
在getUserMedia()響應之後,瀏覽器請求使用者訪問其攝像機的許可(如果這是第一次請求當前的攝像機訪問)。如果成功,則返回MediaStream,媒體元素可以通過該srcObject屬性使用它:
navigator.mediaDevices.getUserMedia(mediaStreamConstraints)
  .then(gotLocalMediaStream).catch(handleLocalMediaStreamError);
}
function gotLocalMediaStream(mediaStream) {
  localVideo.srcObject = mediaStream;
}
該constraints引數允許您指定要獲取的媒體。在此示例中,僅限視訊,因為預設情況下禁用音訊:
const mediaStreamConstraints = {
  video: true,
};
您可以使用約束來滿足其他要求,例如視訊解析度:
const hdConstraints = {
  video: {
    width: {
      min: 1280
    },
    height: {
      min: 720
    }
  }
}
如果getUserMedia()成功,則將來自網路攝像頭的視訊流設定為視訊元素的來源:
function gotLocalMediaStream(mediaStream) {
  localVideo.srcObject = mediaStream;
}
不要忘記元素的autoplay屬性video。沒有它,你只會看到一個幀!
五、使用RTCPeerConnection流式傳輸視訊
在這一步中,您將瞭解:
使用RTCPeerConnection API流式傳輸視訊。
控制媒體捕獲和流媒體。
此步驟的完整版本位於step-2資料夾中。
什麼是RTCPeerConnection?
RTCPeerConnection是用於進行WebRTC呼叫以流式傳輸視訊和音訊以及交換資料的API。
此示例在同一頁面上的兩個RTCPeerConnection物件(稱為對等方)之間建立連線。實用性不大,但有助於理解RTCPeerConnection的工作原理。
新增視訊元素和控制按鈕
在index.html中,用兩個視訊元素和三個按鈕替換單個視訊元素:
<video id="localVideo" autoplay playsinline></video>
<video id="remoteVideo" autoplay playsinline></video>


<div>
  <button id="startButton">Start</button>
  <button id="callButton">Call</button>
  <button id="hangupButton">Hang Up</button>
</div>
一個視訊元素將顯示getUserMedia()流,另一個將顯示通過RTCPeerconnection流傳輸的相同視訊。(在實際應用程式中,一個視訊元素將顯示本地流,另一個視訊元素將顯示遠端流。)
新增adapter.js填充程式
添加當前版本adapter.js 連結上面main.js:
<script src="https://webrtc.github.io/adapter/adapter-latest.js"></script>
adapter.js是一個填充程式,可以將應用程式與規範更改和字首差異隔離開來。
Index.html現在應該如下所示:
<!DOCTYPE html>
<html>

<head>
  <title>Realtime communication with WebRTC</title>
  <link rel="stylesheet" href="css/main.css" />
</head>

<body>
  <h1>Realtime communication with WebRTC</h1>

  <video id="localVideo" autoplay playsinline></video>
  <video id="remoteVideo" autoplay playsinline></video>

  <div>
    <button id="startButton">Start</button>
    <button id="callButton">Call</button>
    <button id="hangupButton">Hang Up</button>
  </div>

  <script src="https://webrtc.github.io/adapter/adapter-latest.js"></script>
  <script src="js/main.js"></script>
</body>
</html>
安裝RTCPeerConnection程式碼
將main.js替換為step-02資料夾中的版本。
在codelab中使用大塊程式碼進行剪下和貼上並不理想,但為了使RTCPeerConnection啟動並執行,除了整個替換之外別無選擇。
開啟index.html,單擊“ Start”按鈕以從網路攝像頭獲取視訊,然後單擊“ Call”以建立對等連線。您應該在兩個視訊元素中看到相同的視訊(來自您的網路攝像頭)。檢視瀏覽器控制檯以檢視WebRTC日誌記錄。
在WebRTC對等體之間建立呼叫涉及三個任務:
為呼叫的每一端建立一個RTCPeerConnection,並在每一端新增本地流getUserMedia()。
獲取和共享網路資訊:潛在的連線端點稱為ICE候選者。
獲取並共享本地和遠端描述:SDP格式的本地媒體元資料。
想象一下,Alice和Bob想要使用RTCPeerConnection來設定視訊聊天。
首先,Alice和Bob交換網路資訊。“查詢候選者”一詞是指使用ICE框架查詢網路介面和埠的過程。
Alice使用onicecandidate (addEventListener(‘icecandidate’))處理程式建立RTCPeerConnection物件。這對應於main.js中的以下程式碼:
let localPeerConnection;
localPeerConnection = new RTCPeerConnection(servers);
localPeerConnection.addEventListener('icecandidate', handleConnection);
localPeerConnection.addEventListener(
    'iceconnectionstatechange', handleConnectionChange);
Alice呼叫getUserMedia()並新增傳遞給它的流:
navigator.mediaDevices.getUserMedia(mediaStreamConstraints).
  then(gotLocalMediaStream).
  catch(handleLocalMediaStreamError);
function gotLocalMediaStream(mediaStream) {
  localVideo.srcObject = mediaStream;
  localStream = mediaStream;
  trace('Received local stream.');
  callButton.disabled = false;  // Enable call button.
}
localPeerConnection.addStream(localStream);
trace('Added local stream to localPeerConnection.');
當網路候選者可用時,步驟1中的處理程式onicecandidate被呼叫。
Alice將序列化的候選資料傳送給Bob。在實際應用程式中,此過程(信令)通過訊息傳遞服務進行。在此步驟中,兩個RTCPeerConnection物件位於同一頁面上,可以直接通訊,無需外部訊息傳遞。
當Bob從Alice獲取候選訊息時,他呼叫addIceCandidate(),將候選者新增到遠端對等描述中:
function handleConnection(event) {
  const peerConnection = event.target;
  const iceCandidate = event.candidate;

  if (iceCandidate) {
    const newIceCandidate = new RTCIceCandidate(iceCandidate);
    const otherPeer = getOtherPeer(peerConnection);

    otherPeer.addIceCandidate(newIceCandidate)
      .then(() => {
        handleConnectionSuccess(peerConnection);
      }).catch((error) => {
        handleConnectionFailure(peerConnection, error);
      });

    trace(`${getPeerName(peerConnection)} ICE candidate:\n` +
          `${event.candidate.candidate}.`);
  }
}
WebRTC對等體還需要找出並交換本地和遠端音訊和視訊媒體資訊,例如解析度和編解碼器功能。通過使用稱為SDP的會話描述協議格式交換元資料塊(稱為offer 和answer)來進行交換媒體配置資訊的信令:
1 Alice執行RTCPeerConnection createOffer()方法。返回的promise提供了一個RTCSessionDescription:Alice的本地會話描述:
trace('localPeerConnection createOffer start.');
localPeerConnection.createOffer(offerOptions)
  .then(createdOffer).catch(setSessionDescriptionError);
2 如果成功,Alice使用本地描述設定setLocalDescription(),然後通過其信令通道將此會話描述傳送給Bob。
3 Bob將Alice傳送給他的描述設定為使用的遠端描述setRemoteDescription()。
4 Bob執行RTCPeerConnection createAnswer()方法,向其傳遞從Alice獲得的遠端描述,因此可以生成與她相容的本地會話。createAnswer() promise 傳遞一個RTCSessionDescription:Bob設定為本地描述,並將其傳送給Alice。
5 當Alice獲得Bob的會話描述時,她將其設定為遠端描述setRemoteDescription()。
// Logs offer creation and sets peer connection session descriptions.
function createdOffer(description) {
  trace(`Offer from localPeerConnection:\n${description.sdp}`);

  trace('localPeerConnection setLocalDescription start.');
  localPeerConnection.setLocalDescription(description)
    .then(() => {
      setLocalDescriptionSuccess(localPeerConnection);
    }).catch(setSessionDescriptionError);

  trace('remotePeerConnection setRemoteDescription start.');
  remotePeerConnection.setRemoteDescription(description)
    .then(() => {
      setRemoteDescriptionSuccess(remotePeerConnection);
    }).catch(setSessionDescriptionError);

  trace('remotePeerConnection createAnswer start.');
  remotePeerConnection.createAnswer()
    .then(createdAnswer)
    .catch(setSessionDescriptionError);
}

// Logs answer to offer creation and sets peer connection session descriptions.
function createdAnswer(description) {
  trace(`Answer from remotePeerConnection:\n${description.sdp}.`);

  trace('remotePeerConnection setLocalDescription start.');
  remotePeerConnection.setLocalDescription(description)
    .then(() => {
      setLocalDescriptionSuccess(remotePeerConnection);
    }).catch(setSessionDescriptionError);

  trace('localPeerConnection setRemoteDescription start.');
  localPeerConnection.setRemoteDescription(description)
    .then(() => {
      setRemoteDescriptionSuccess(localPeerConnection);
    }).catch(setSessionDescriptionError);
}
六、使用RTCDataChannel交換資料
你將學到什麼
如何在WebRTC端點(對等方)之間交換資料。
此步驟的完整版本位於步驟03資料夾中。
更新您的HTML
對於此步驟,您將使用WebRTC資料通道textarea在同一頁面上的兩個元素之間傳送文字。這不是很有用,但確實演示了WebRTC如何用於共享資料以及流式視訊。
從index.html中刪除視訊和按鈕元素,並使用以下HTML替換它們:
<textarea id="dataChannelSend" disabled
    placeholder="Press Start, enter some text, then press Send."></textarea>
<textarea id="dataChannelReceive" disabled></textarea>

<div id="buttons">
  <button id="startButton">Start</button>
  <button id="sendButton">Send</button>
  <button id="closeButton">Stop</button>
</div>
更新您的JavaScript
將main.js替換為step-03 / js / main.js的內容。
在對等體之間嘗試流資料:開啟index.html,按 Start 設定對等連線,在左側textarea輸入一些文字,然後單擊Send以使用WebRTC資料通道傳輸文字。
此程式碼使用RTCPeerConnection和RTCDataChannel來啟用文字訊息的交換。此步驟中的大部分程式碼與RTCPeerConnection示例相同。
sendData()和createConnection()功能有大部分新程式碼:
function createConnection() {
  dataChannelSend.placeholder = '';
  var servers = null;
  pcConstraint = null;
  dataConstraint = null;
  trace('Using SCTP based data channels');
  // For SCTP, reliable and ordered delivery is true by default.
  // Add localConnection to global scope to make it visible
  // from the browser console.
  window.localConnection = localConnection =
      new RTCPeerConnection(servers, pcConstraint);
  trace('Created local peer connection object localConnection');

  sendChannel = localConnection.createDataChannel('sendDataChannel',
      dataConstraint);
  trace('Created send data channel');

  localConnection.onicecandidate = iceCallback1;
  sendChannel.onopen = onSendChannelStateChange;
  sendChannel.onclose = onSendChannelStateChange;

  // Add remoteConnection to global scope to make it visible
  // from the browser console.
  window.remoteConnection = remoteConnection =
      new RTCPeerConnection(servers, pcConstraint);
  trace('Created remote peer connection object remoteConnection');

  remoteConnection.onicecandidate = iceCallback2;
  remoteConnection.ondatachannel = receiveChannelCallback;

  localConnection.createOffer().then(
    gotDescription1,
    onCreateSessionDescriptionError
  );
  startButton.disabled = true;
  closeButton.disabled = false;
}

function sendData() {
  var data = dataChannelSend.value;
  sendChannel.send(data);
  trace('Sent Data: ' + data);
}
注意使用dataConstraint。可以配置資料通道以實現不同型別的資料共享 - 例如,優先考慮可靠的交付而不是效能。
七、建立信令服務以交換訊息
你將學到什麼
使用npm安裝專案依賴中規定的package.json
執行Node.js伺服器並使用node-static來提供靜態檔案。
使用Socket.IO在Node.js上設定訊息傳遞服務。
用它來建立“房間”並交換訊息。
此步驟的完整版本位於step-04資料夾中。
為了設定和維護WebRTC呼叫,WebRTC客戶端(對等方)需要交換元資料:候選人(網路)資訊。提供和回答提供有關媒體資訊的訊息,例如解析度和編解碼器。換句話說,在可以發生音訊,視訊或資料的對等流傳輸之前,需要交換元資料。此過程稱為信令。
在前面的步驟中,傳送方和接收方RTCPeerConnection物件位於同一頁面上,因此“信令”只是在物件之間傳遞元資料的問題。
在現實世界的應用程式中,傳送方和接收方RTCPeerConnections在不同裝置上的網頁中執行,您需要一種方式讓它們進行元資料通訊。
為此,您使用信令伺服器:可以在WebRTC客戶端(對等方)之間傳遞訊息的伺服器。實際的訊息是純文字:字串化的JavaScript物件。
先決條件:安裝Node.js.
為了執行此codelab的下一步(資料夾步驟04到步驟06),您需要使用Node.js在localhost上執行伺服器。
您可以下載並安裝由Node.js的這個連結。
安裝後,您將能夠匯入後續步驟(執行npm install)所需的依賴項,以及執行一個小型localhost伺服器來執行codelab(執行node index.js)。這些命令將在以後需要時顯示。
關於該應用程式
WebRTC使用客戶端JavaScript API,但對於實際使用,還需要信令(訊息)伺服器,以及STUN和TURN伺服器。
在這一步中,您將構建一個簡單的Node.js信令伺服器,使用Socket.IO Node.js模組和JavaScript庫進行訊息傳遞。使用Node.js和Socket.IO會很有用,但並不重要; 訊息傳遞元件非常簡單。
Socket.IO的設計使得構建交換訊息的服務變得簡單,Socket.IO因其內建的“房間”概念而適合學習WebRTC信令。
在此示例中,伺服器(Node.js應用程式)在index.js中實現,在其上執行的客戶端(Web應用程式)在index.html中實現。
此步驟中的Node.js應用程式有兩個任務。
首先,它充當訊息中繼:
socket.on('message', function (message) {
  log('Got message: ', message);
  socket.broadcast.emit('message', message);
});
其次,它管理WebRTC視訊聊天’房間’:
if (numClients === 0) {
  socket.join(room);
  socket.emit('created', room, socket.id);
} else if (numClients === 1) {
  socket.join(room);
  socket.emit('joined', room, socket.id);
  io.sockets.in(room).emit('ready');
} else { // max two clients
  socket.emit('full', room);
}
我們簡單的WebRTC應用程式將允許最多兩個對等方共享一個房間。
HTML和JavaScript
更新index.html所以它看起來像這樣:
    <!DOCTYPE html>
<html>

<head>

  <title>Realtime communication with WebRTC</title>

  <link rel="stylesheet" href="css/main.css" />

</head>

<body>

  <h1>Realtime communication with WebRTC</h1>

  <script src="/socket.io/socket.io.js"></script>
  <script src="js/main.js"></script>

</body>

</html>
在此步驟中,您不會在頁面上看到任何內容:所有日誌記錄都在瀏覽器控制檯上完成。(要在Chrome中檢視控制檯,請按Ctrl-Shift-J。如果您使用的是Mac,Command-Option-J。)
用以下內容替換js / main.js:
'use strict';

var isInitiator;

window.room = prompt("Enter room name:");

var socket = io.connect();

if (room !== "") {
  console.log('Message from client: Asking to join room ' + room);
  socket.emit('create or join', room);
}

socket.on('created', function(room, clientId) {
  isInitiator = true;
});

socket.on('full', function(room) {
  console.log('Message from client: Room ' + room + ' is full :^(');
});

socket.on('ipaddr', function(ipaddr) {
  console.log('Message from client: Server IP address is ' + ipaddr);
});

socket.on('joined', function(room, clientId) {
  isInitiator = false;
});

socket.on('log', function(array) {
  console.log.apply(console, array);
});
設定Socket.IO以在Node.js上執行
在HTML檔案中,您可能已經看到您正在使用Socket.IO檔案:
<script src =“/ socket.io/socket.io.js”> </ script>
在工作目錄的頂層建立一個名為package.json的檔案,其中包含以下內容:
{
  “name”:“webrtc-codelab”,
  “version”:“0.0.1”,
  “description”:“WebRTC codelab”,
  “dependencies”:{
    “node-static”:“^ 0.7.10”,
    “socket .io“:”^ 1.2.0“
  }
}
這是一個應用程式清單,它告訴Node Package Manager(npm)要安裝哪些專案依賴項。
要安裝依賴項(例如/socket.io/socket.io.js),請在工作目錄的命令列終端中執行以下命令:
npm install
您應該看到一個安裝日誌,結束如下所示:
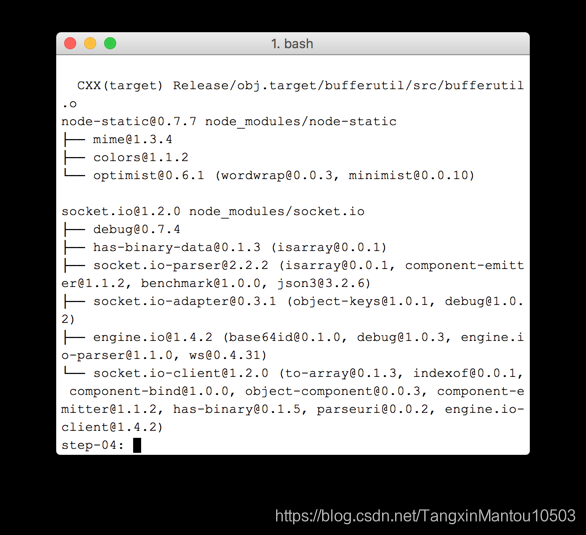
在工作目錄的頂層(而不是在js目錄中)建立一個新檔案index.js並新增以下程式碼:
'use strict';

var os = require('os');
var nodeStatic = require('node-static');
var http = require('http');
var socketIO = require('socket.io');

var fileServer = new(nodeStatic.Server)();
var app = http.createServer(function(req, res) {
  fileServer.serve(req, res);
}).listen(8080);

var io = socketIO.listen(app);
io.sockets.on('connection', function(socket) {

  // convenience function to log server messages on the client
  function log() {
    var array = ['Message from server:'];
    array.push.apply(array, arguments);
    socket.emit('log', array);
  }

  socket.on('message', function(message) {
    log('Client said: ', message);
    // for a real app, would be room-only (not broadcast)
    socket.broadcast.emit('message', message);
  });

  socket.on('create or join', function(room) {
    log('Received request to create or join room ' + room);

    var clientsInRoom = io.sockets.adapter.rooms[room];
    var numClients = clientsInRoom ? Object.keys(clientsInRoom.sockets).length : 0;

    log('Room ' + room + ' now has ' + numClients + ' client(s)');

    if (numClients === 0) {
      socket.join(room);
      log('Client ID ' + socket.id + ' created room ' + room);
      socket.emit('created', room, socket.id);

    } else if (numClients === 1) {
      log('Client ID ' + socket.id + ' joined room ' + room);
      io.sockets.in(room).emit('join', room);
      socket.join(room);
      socket.emit('joined', room, socket.id);
      io.sockets.in(room).emit('ready');
    } else { // max two clients
      socket.emit('full', room);
    }
  });

  socket.on('ipaddr', function() {
    var ifaces = os.networkInterfaces();
    for (var dev in ifaces) {
      ifaces[dev].forEach(function(details) {
        if (details.family === 'IPv4' && details.address !== '127.0.0.1') {
          socket.emit('ipaddr', details.address);
        }
      });
    }
  });

});
從命令列終端,在工作目錄中執行以下命令:
node index.js
在瀏覽器中,開啟localhost:8080。
每次開啟此URL時,系統都會提示您輸入房間名稱。要加入同一個房間,請每次選擇相同的房間名稱,例如“foo”。
開啟一個新標籤頁,然後再次開啟localhost:8080。選擇相同的房間名稱。
在第三個選項卡或視窗中開啟localhost:8080。再次選擇相同的房間名稱。
檢查每個選項卡中的控制檯:您應該從上面的JavaScript中看到日誌記錄。
八、結合對等連線和信令
你將學到什麼
使用在Node.js上執行的Socket.IO執行WebRTC信令服務
使用該服務在對等體之間交換WebRTC元資料。
此步驟的完整版本位於步驟05資料夾中。
替換HTML和JavaScript
用以下內容替換index.html的內容:
<!DOCTYPE html>
<html>

<head>

  <title>Realtime communication with WebRTC</title>

  <link rel="stylesheet" href="/css/main.css" />

</head>

<body>

  <h1>Realtime communication with WebRTC</h1>

  <div id="videos">
    <video id="localVideo" autoplay muted></video>
    <video id="remoteVideo" autoplay></video>
  </div>

  <script src="/socket.io/socket.io.js"></script>
  <script src="https://webrtc.github.io/adapter/adapter-latest.js"></script>
  <script src="js/main.js"></script>

</body>

</html>
將js / main.js替換為步驟05 / js / main.js的內容。
執行Node.js伺服器
node index.js
在瀏覽器中,開啟localhost:8080。
在新選項卡或視窗中再次開啟localhost:8080。一個視訊元素將顯示本地流getUserMedia(),另一個將顯示通過RTCPeerconnection流式傳輸的“遠端”視訊。
注意:每次關閉客戶端選項卡或視窗時,都需要重新啟動Node.js伺服器。
可在瀏覽器控制檯中檢視日誌記錄
如果您遇到奇怪的快取問題,請嘗試以下方法:
按住ctrl並單擊“ 重新載入”按鈕進行硬重新整理
重啟瀏覽器
執行npm cache clean命令列。
九、拍照並通過資料通道分享
你將學到什麼
拍攝照片並使用canvas元素從中獲取資料。
與遠端使用者交換影象資料。
此步驟的完整版本位於步驟06資料夾中。
以前,您學習瞭如何使用RTCDataChannel交換文字訊息。此步驟可以共享整個檔案:在此示例中,通過getUserMedia()拍攝照片。
該步驟的核心部分如下:
建立資料通道。請注意,在此步驟中不要向對等連線新增任何媒體流。
使用以下方法捕獲使用者的網路攝像頭視訊流getUserMedia():
var video = document.getElementById('video');

function grabWebCamVideo() {
  console.log('Getting user media (video) ...');
  navigator.mediaDevices.getUserMedia({
    video: true
  })
  .then(gotStream)
  .catch(function(e) {
    alert('getUserMedia() error: ' + e.name);
  });
}
當用戶單擊“ Snap”按鈕時,從視訊流中獲取快照(視訊幀)並將其顯示在canvas元素中:
var photo = document.getElementById('photo');
var photoContext = photo.getContext('2d');

function snapPhoto() {
  photoContext.drawImage(video, 0, 0, photo.width, photo.height);
  show(photo, sendBtn);
}
當用戶單擊“ Send”按鈕時,將影象轉換為位元組並通過資料通道傳送:
function sendPhoto() {
// Split data channel message in chunks of this byte length.
var CHUNK_LEN = 64000;
var img = photoContext.getImageData(0, 0, photoContextW, photoContextH),
len = img.data.byteLength,
n = len / CHUNK_LEN | 0;
console.log(‘Sending a total of ’ + len + ’ byte(s)’);
dataChannel.send(len);
// split the photo and send in chunks of about 64KB
for (var i = 0; i < n; i++) {
var start = i * CHUNK_LEN,
end = (i + 1) * CHUNK_LEN;
console.log(start + ’ - ’ + (end - 1));
dataChannel.send(img.data.subarray(start, end));
}
// send the reminder, if any
if (len % CHUNK_LEN) {
console.log(‘last ’ + len % CHUNK_LEN + ’ byte(s)’);
dataChannel.send(img.data.subarray(n * CHUNK_LEN));
}
}
接收方將資料通道訊息位元組轉換回影象並將影象顯示給使用者:
function receiveDataChromeFactory() {
  var buf, count;

  return function onmessage(event) {
    if (typeof event.data === 'string') {
      buf = window.buf = new Uint8ClampedArray(parseInt(event.data));
      count = 0;
      console.log('Expecting a total of ' + buf.byteLength + ' bytes');
      return;
    }

    var data = new Uint8ClampedArray(event.data);
    buf.set(data, count);

    count += data.byteLength;
    console.log('count: ' + count);

    if (count === buf.byteLength) {
      // we're done: all data chunks have been received
      console.log('Done. Rendering photo.');
      renderPhoto(buf);
    }
  };
}

function renderPhoto(data) {
  var canvas = document.createElement('canvas');
  canvas.width = photoContextW;
  canvas.height = photoContextH;
  canvas.classList.add('incomingPhoto');
  // trail is the element holding the incoming images
  trail.insertBefore(canvas, trail.firstChild);

  var context = canvas.getContext('2d');
  var img = context.createImageData(photoContextW, photoContextH);
  img.data.set(data);
  context.putImageData(img, 0, 0);
}
獲取程式碼
用步驟06的內容替換work資料夾的內容。你的index.html檔案的工作,現在應該是這樣的:
<!DOCTYPE html>
<html>
<head>
<title>Realtime communication with WebRTC</title>
<link rel="stylesheet" href="/css/main.css" />
</head>
<body>
<h1>Realtime communication with WebRTC</h1>
<h2>
<span>Room URL: </span><span id="url">...</span>
</h2>
<div id="videoCanvas">
<video id="camera" autoplay></video>
<canvas id="photo"></canvas>
</div>
<div id="buttons">
<button id="snap">Snap</button><span> then </span><button id="send">Send</button>
<span> or </span>
<button id="snapAndSend">Snap & Send</button>
</div>
<div id="incoming">
<h2>Incoming photos</h2>
<div id="trail"></div>
</div>
<script src="/socket.io/socket.io.js"></script>
<script src="https://webrtc.github.io/adapter/adapter-latest.js"></script>
<script src="js/main.js"></script>
</body>
</html>
該應用程式將建立一個隨機的房間ID,並將該ID新增到URL。在新的瀏覽器選項卡或視窗中開啟位址列中的URL。
單擊“ Snap & Send”按鈕,然後在頁面底部的另一個選項卡中檢視傳入區域。該應用在標籤之間傳輸照片。