
Crunching RxAndroid — Part 2
In the last episode, we started dividing our code into different Actions and Functions, abstracting ourselves from the callback hell we could have gotten into but (there’s always a catch) we can push this refactoring to a whole new level using a feature inherited directly from Java 8…
Lambdas!
Well, what are lambdas? Let’s see what Wikipedia says about them:
In computer programming, an anonymous function (also function literal or lambda abstraction) is a function definition that is not bound to an identifier.
So, we can say that lambdas are anonymous functions that RetroLambda converts into optimized anonymous inner classes, enhancing the readability of our code.
parameter -> functionThatWillReturnSomethingUsingThe(parameter)
Why are lambdas even mentioned?
While not really correlated to RxAndroid, lambdas are constructs that get along very well with functional programming: they reduce the amount of code we write and help us in further avoiding the callback hell
We now know what is a lambda and why we are using them, but we still need something in order to use it, like installing Java 8 and linking the dependency of the correct libraries.
Checking Java 8 installation
Chances are that, if you are using lambdas for the first time, you are running a Java 7 instance and you need to install the new release of the compiler from the Sun website or using Homebrew if you are on Mac OS X. Otherwise, just make sure you have the right version of Java on your computer by typing in a shell window the command
java -version

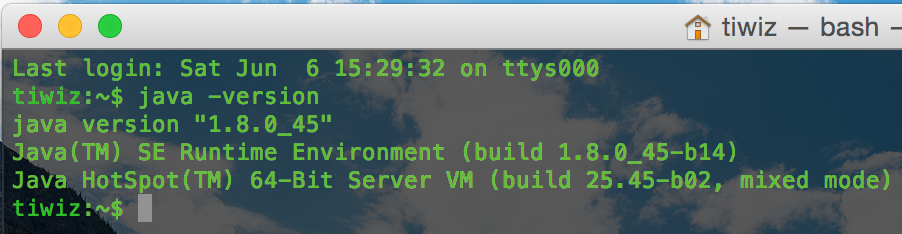
and checking you have as output something like this.
Introducing RetroLambda
The next step would be to add the Maven Central repository and classpath to the root build.gradle file of your project in order to start using RetroLambda, the library that will translate for us the lambda expressions into something Android can understand:
buildscript {
    repositories {
        ...
        mavenCentral()
    }
    dependencies {
        ...
        classpath 'me.tatarka:gradle-retrolambda:3.1.0'
    }
}
Now, we have to apply the RetroLambda plugin in the build.gradle file of the modules in which we want to use these features, right next to the Android one we previously declared:
apply plugin: 'me.tatarka.retrolambda'
Android Studio now has to understand we are going to use the new Java 8 syntax, and we will specify it by adding the proper compile options in the android section of the build script
android {
    ...
    compileOptions {
        sourceCompatibility JavaVersion.VERSION_1_8
        targetCompatibility JavaVersion.VERSION_1_8
    }
}
Finally, we just tell RetroLambda where are located the SDKs it needs to translate the Java 8 code we write in the Java 7/ Java 6 byte code Android understands:
retrolambda {
    jdk System.getenv('JAVA8_HOME')
    oldJdk System.getenv('JAVA7_HOME')
}
If you are on Mac OS X, though, this last step can give you quite a headache if you find yourself facing this message in the Gradle console:
Error:Execution failed for task ‘:app:compileDebugJava’.
 > When running gradle with java 6 or 7, you must set the path to jdk8, either with property retrolambda.jdk or environment variable JAVA8_HOME
Luckily, thanks to my friend and Gradle Guru Eugenio, we have a handy solution: in his Gist, he wrote a function that will query the Java installation, asking for the path of the version we submitted as a input parameter.
We are now up and running, ready to…
Refactor all the things!
Let’s start from the code we already wrote and let’s take the Action1 that sets a String s as a text in the given TextView:
Action1<String> textViewOnNextAction = new Action1<String>() {
    @Override
    public void call(String s) {
        txtPart1.setText(s);
    }
};
From this snippet, we will extract the only truly important line and refactor it as a lambda:
s -> txtPart1.setText(s)
Most probably, Android Studio will promptly suggest to you to transform this lambda expression into something else, using method references.
What are then these method references? We can say they are pretty much the same as lambdas, but method references add some readability when the lambda is doing nothing more than calling a known method of a given class or object with the same parameters the lambda has been invoked with.
Our code will then be transformed into:
txtPart1::setText
as we are just invoking the setText(String s) method of the txtPart1 object.
Can we do the same trick for something else? Sure thing! Let’s try with a function, and the one that will get the single words and emit them one by one looks like a valid candidate:
Func1<List<String>, Observable<String>> getUrls = new Func1<List<String>, Observable<String>>() {
    @Override
    public Observable<String> call (List<String> strings) {
        return Observable.from(strings);
    }
};
The important line here is the one we use to create an Observable from a list of String. Extracting it to a lambda will transform it into something way shorter and more readable:
strings -> Observable.from(strings)
But we can go even further!
Observable::from
With the same logic, we can extract all our functions to lambdas and convert them into method references, so that we have them going from these:
s -> showToastWith(s)
s -> s.toUpperCase()
to these:
this::showToastWith
String::toUpperCase
and all with the help of Android Studio!
TL;DR
We introduced RetroLambda, lamba expressions and method references, being able easily to make our code much shorter and more readable, resulting in something really as beautiful as:
Observable.just("Hello, World!")
        .observeOn(AndroidSchedulers.mainThread())
        .map(String::toUpperCase)
.subscribe(txtPart1::setText);Observable.from(manyWords)
.observeOn(AndroidSchedulers.mainThread())
.subscribe(message -> Toast.makeText(context, message, Toast.LENGTH_SHORT).show());
Observable.just(manyWordList)
        .observeOn(AndroidSchedulers.mainThread())
        .flatMap(Observable::from)
        .reduce((s, s1) -> String.format("%s %s", s, s1))
        .subscribe(message -> Snackbar.make(rootView, message, Snackbar.LENGTH_LONG).show());
As usual, you can find the code related to this article on GitHub.