
談談單元測試之(三):測試工具 JUnit 4
阿新 • • 發佈:2018-12-20
前言
上一篇文章《測試工具 JUnit 3》簡單的討論了 JUnit 3 的使用以及內部的方法。這篇文章將會在 JUnit 3 的基礎上,討論一下 JUnit 4 的新特性。同時,與 JUnit 3 做一個簡單的對比。那麼,廢話就不多說了,直接進入正題。
介紹
JUnit 4.x 是利用了 Java 5 的特性(Annotation)的優勢,使得測試比起 3.x 版本更加的方便簡單,JUnit 4.x 不是舊版本的簡單升級,它是一個全新的框架,整個框架的包結構已經徹底改變,但 4.x 版本仍然能夠很好的相容舊版本的測試用例。
使用
先來點實在的,看看程式碼中是怎麼使用的。其餘的待會再說。
下載
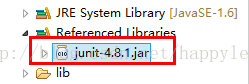
- 下載 JUnit4.8.1.jar 包(這裡提供了下載地址)

加入專案
- 把 junit4.8.1.jar 檔案,加入到專案的 classpath 中。
對比
在程式碼之前,先讓我們看一下 JUnit 4 和 JUnit 3 的區別,看看 JUnit 4 到底簡化了哪些東西。

演示程式碼
[java] view plain copy print ?
- <span style=“font-family:Microsoft YaHei;”>package com.tgb;
- import static org.junit.Assert.*;
- import org.junit.Ignore;
- import org.junit.Test;
- public class TestWordDealUtil {
- // 測試 wordFormat4DB 正常執行的情況
- @Test
- public void testWordFarmat4DBNormal() {
- String target = ”employeeInfo”;
- String result = WordDealUtil.wordFormat4DB(target);
- assertEquals(”employee_info”, result);
- }
- // 測試 null 時的處理情況
- @Test(expected=NullPointerException.class)
- public void testWordFormat4DBNull() {
- String target = null;
- String result = WordDealUtil.wordFormat4DB(target);
- assertNull(result);
- }
- // 測試空字串的處理情況
- @Test
- public void testWordFormat4DBEmpty() {
- String target = ”“;
- String result = WordDealUtil.wordFormat4DB(target);
- assertEquals(”“, result);
- }
- // 測試當首字母大寫時的情況
- //@Ignore
- @Test
- public void testWordFormat4DBBegin() {
- String target = ”EmployeeInfo”;
- String result = WordDealUtil.wordFormat4DB(target);
- assertEquals(”_employee_info”, result);
- }
- // 測試當尾字母大寫時的情況
- @Test
- public void testWordFormat4DBEnd() {
- String target = ”employeeInfoA”;
- String result = WordDealUtil.wordFormat4DB(target);
- assertEquals(”employee_info_a”, result);
- }
- // 測試多個相連字母字母大寫時的情況
- @Test
- public void testWordFormat4DBTogether() {
- String target = ”employeeAInfo”;
- String result = WordDealUtil.wordFormat4DB(target);
- assertEquals(”employee_a_info”, result);
- }
- }
- </span>
<span style="font-family:Microsoft YaHei;">package com.tgb;

import static org.junit.Assert.*;

import org.junit.Ignore;
import org.junit.Test;


public class TestWordDealUtil {
    // 測試 wordFormat4DB 正常執行的情況
    @Test
    public void testWordFarmat4DBNormal() {
        String target = "employeeInfo";
        String result = WordDealUtil.wordFormat4DB(target);

        assertEquals("employee_info", result);
    }

    // 測試 null 時的處理情況
    @Test(expected=NullPointerException.class)
    public void testWordFormat4DBNull() {
        String target = null;
        String result = WordDealUtil.wordFormat4DB(target);

        assertNull(result);
    }

    // 測試空字串的處理情況
    @Test
    public void testWordFormat4DBEmpty() {
        String target = "";
        String result = WordDealUtil.wordFormat4DB(target);

        assertEquals("", result);
    }

    // 測試當首字母大寫時的情況
    //@Ignore
    @Test
    public void testWordFormat4DBBegin() {
        String target = "EmployeeInfo";
        String result = WordDealUtil.wordFormat4DB(target);

        assertEquals("_employee_info", result);
    }

    // 測試當尾字母大寫時的情況
    @Test
    public void testWordFormat4DBEnd() {
        String target = "employeeInfoA";
        String result = WordDealUtil.wordFormat4DB(target);

        assertEquals("employee_info_a", result);
    }

    // 測試多個相連字母字母大寫時的情況
    @Test
    public void testWordFormat4DBTogether() {
        String target = "employeeAInfo";
        String result = WordDealUtil.wordFormat4DB(target);

        assertEquals("employee_a_info", result);
    }
}
</span>
JUnit 將測試失敗的情況分為兩種:Failure 和 Error 。 Failure 一般是由單元測試使用的斷言方法判斷失敗引起的,它表示在測試點發現了問題(程式中的 bug);而 Error 則是有程式碼異常引起的,這是測試目的之外的發現,它可能產生於測試程式碼本身的錯誤(也就是說,編寫的測試程式碼有問題),也可能是被測試程式碼中的一個隱藏 bug 。不過,一般情況下是第一種情況。
深入
常用註解
- @Before
- @After
- @Test
同時,該 Annotation(@Test) 還可以測試期望異常和超時時間,如 @Test(timeout=100),我們給測試函式設定一個執行時間,超過這個時間(100毫秒),他們就會被系統強行終止,並且系統還會向你彙報該函式結束的原因是因為超時,這樣你就可以發現這些 bug 了。而且,它還可以測試期望的異常,例如,我們剛剛的那個空指標異常就可以這樣:@Test(expected=NullPointerException.class)。再來看一下測試結果。

- @Ignore
- @BeforeClass
- @AfterClass
執行順序
所以,在 JUnit 4 中,單元測試用例的執行順序為:

每一個測試方法的呼叫順序為:

規範
最後,在來說說關於測試的規範,這些規範是從程式設計規則,以及日常的實踐中,由那些大牛們總結出來的。作為後人的我們,在大樹下乘涼的同時,更要遵守這些規則,使得大樹更加茁壯成長。
- 單元測試程式碼應位於單獨的 Source Folder 下

- 測試類應該與被測試類位於同一 package 下

- 選擇有意義的測試方法名
- 儲存測試的獨立性
- 為暫時未實現的測試程式碼忽略(@Ignore)或丟擲失敗(fail)
- 在呼叫斷言(assert)方法時給出失敗的原因
結束語
請牢記:測試任何可能的錯誤。單元測試不是用來證明您是對的,而是為了證明您沒有錯。
JUnit 4 到這裡就差不多了,如果文章中有什麼不對的地方,還希望各位大牛拍磚。說了這麼多,能真正用上才是王道,當然,希望以我這篇文章為契機,IT 界的精英們,之前沒有用單元測試的,能夠喚醒你們體內的小宇宙;之前已經在用的,也能夠再體會一番,提高開發的效率,寫出 漂亮 的程式碼。
資料:本文中的Demo(下載地址)
【原創】地址:http://blog.csdn.net/happylee6688/article/details/38069761這裡寫連結內容
前言
上一篇文章《測試工具 JUnit 3》簡單的討論了 JUnit 3 的使用以及內部的方法。這篇文章將會在 JUnit 3 的基礎上,討論一下 JUnit 4 的新特性。同時,與 JUnit 3 做一個簡單的對比。那麼,廢話就不多說了,直接進入正題。
介紹
JUnit 4.x 是利用了 Java 5 的特性(Annotation)的優勢,使得測試比起 3.x 版本更加的方便簡單,JUnit 4.x 不是舊版本的簡單升級,它是一個全新的框架,整個框架的包結構已經徹底改變,但 4.x 版本仍然能夠很好的相容舊版本的測試用例。
使用
先來點實在的,看看程式碼中是怎麼使用的。其餘的待會再說。
下載
- 下載 JUnit4.8.1.jar 包(這裡提供了下載地址)
加入專案
- 把 junit4.8.1.jar 檔案,加入到專案的 classpath 中。
對比
在程式碼之前,先讓我們看一下 JUnit 4 和 JUnit 3 的區別,看看 JUnit 4 到底簡化了哪些東西。
演示程式碼
[java] view plain copy print ?
- <span style=“font-family:Microsoft YaHei;”>package com.tgb;
- import static org.junit.Assert.*;
- import org.junit.Ignore;
- import org.junit.Test;
- public class TestWordDealUtil {
- // 測試 wordFormat4DB 正常執行的情況
- @Test
- public void testWordFarmat4DBNormal() {
- String target = ”employeeInfo”;
- String result = WordDealUtil.wordFormat4DB(target);
- assertEquals(”employee_info”, result);
- }
- // 測試 null 時的處理情況
- @Test(expected=NullPointerException.class)
- public void testWordFormat4DBNull() {
- String target = null;
- String result = WordDealUtil.wordFormat4DB(target);
- assertNull(result);
- }
- // 測試空字串的處理情況
- @Test
- public void testWordFormat4DBEmpty() {
- String target = ”“;
- String result = WordDealUtil.wordFormat4DB(target);
- assertEquals(”“, result);
- }
- // 測試當首字母大寫時的情況
- //@Ignore
- @Test
- public void testWordFormat4DBBegin() {
- String target = ”EmployeeInfo”;
- String result = WordDealUtil.wordFormat4DB(target);
- assertEquals(”_employee_info”, result);
- }
- // 測試當尾字母大寫時的情況
- @Test
- public void testWordFormat4DBEnd() {
- String target = ”employeeInfoA”;
- String result = WordDealUtil.wordFormat4DB(target);
- assertEquals(”employee_info_a”, result);
- }
- // 測試多個相連字母字母大寫時的情況
- @Test
- public void testWordFormat4DBTogether() {
- String target = ”employeeAInfo”;
- String result = WordDealUtil.wordFormat4DB(target);
- assertEquals(”employee_a_info”, result);
- }
- }
- </span>
<span style="font-family:Microsoft YaHei;">package com.tgb;

import static org.junit.Assert.*;

import org.junit.Ignore;
import org.junit.Test;


public class TestWordDealUtil {
    // 測試 wordFormat4DB 正常執行的情況
    @Test
    public void testWordFarmat4DBNormal() {
        String target = "employeeInfo";
        String result = WordDealUtil.wordFormat4DB(target);

        assertEquals("employee_info", result);
    }

    // 測試 null 時的處理情況
    @Test(expected=NullPointerException.class)
    public void testWordFormat4DBNull() {
        String target = null;
        String result = WordDealUtil.wordFormat4DB(target);

        assertNull(result);
    }

    // 測試空字串的處理情況
    @Test
    public void testWordFormat4DBEmpty() {
        String target = "";
        String result = WordDealUtil.wordFormat4DB(target);

        assertEquals("", result);
    }

    // 測試當首字母大寫時的情況
    //@Ignore
    @Test
    public void testWordFormat4DBBegin() {
        String target = "EmployeeInfo";
        String result = WordDealUtil.wordFormat4DB(target);

        assertEquals("_employee_info", result);
    }

    // 測試當尾字母大寫時的情況
    @Test
    public void testWordFormat4DBEnd() {
        String target = "employeeInfoA";
        String result = WordDealUtil.wordFormat4DB(target);

        assertEquals("employee_info_a", result);
    }

    // 測試多個相連字母字母大寫時的情況
    @Test
    public void testWordFormat4DBTogether() {
        String target = "employeeAInfo";
        String result = WordDealUtil.wordFormat4DB(target);

        assertEquals("employee_a_info", result);
    }
}
</span>JUnit 將測試失敗的情況分為兩種:Failure 和 Error 。 Failure 一般是由單元測試使用的斷言方法判斷失敗引起的,它表示在測試點發現了問題(程式中的 bug);而 Error 則是有程式碼異常引起的,這是測試目的之外的發現,它可能產生於測試程式碼本身的錯誤(也就是說,編寫的測試程式碼有問題),也可能是被測試程式碼中的一個隱藏 bug 。不過,一般情況下是第一種情況。
深入
常用註解
- @Before
- @After
- @Test
同時,該 Annotation(@Test) 還可以測試期望異常和超時時間,如 @Test(timeout=100),我們給測試函式設定一個執行時間,超過這個時間(100毫秒),他們就會被系統強行終止,並且系統還會向你彙報該函式結束的原因是因為超時,這樣你就可以發現這些 bug 了。而且,它還可以測試期望的異常,例如,我們剛剛的那個空指標異常就可以這樣:@Test(expected=NullPointerException.class)。再來看一下測試結果。
- @Ignore
- @BeforeClass
- @AfterClass
執行順序
所以,在 JUnit 4 中,單元測試用例的執行順序為:
每一個測試方法的呼叫順序為:
規範
最後,在來說說關於測試的規範,這些規範是從程式設計規則,以及日常的實踐中,由那些大牛們總結出來的。作為後人的我們,在大樹下乘涼的同時,更要遵守這些規則,使得大樹更加茁壯成長。
- 單元測試程式碼應位於單獨的 Source Folder 下
- 測試類應該與被測試類位於同一 package 下
- 選擇有意義的測試方法名
- 儲存測試的獨立性
- 為暫時未實現的測試程式碼忽略(@Ignore)或丟擲失敗(fail)
- 在呼叫斷言(assert)方法時給出失敗的原因
結束語
請牢記:測試任何可能的錯誤。單元測試不是用來證明您是對的,而是為了證明您沒有錯。
JUnit 4 到這裡就差不多了,如果文章中有什麼不對的地方,還希望各位大牛拍磚。說了這麼多,能真正用上才是王道,當然,希望以我這篇文章為契機,IT 界的精英們,之前沒有用單元測試的,能夠喚醒你們體內的小宇宙;之前已經在用的,也能夠再體會一番,提高開發的效率,寫出 漂亮 的程式碼。
資料:本文中的Demo(下載地址)
【原創】地址:http://blog.csdn.net/happylee6688/article/details/38069761這裡寫連結內容