
mybatis原始碼解析之Configuration載入(二)
概述
上一篇我們講了configuation.xml中幾個標籤的解析,例如<properties>,<typeAlises>,<settings>等,今天我們來介紹剩下的兩個比較重要的標籤之一,<environments>,這個標籤主要用於我們訪問資料庫的配置進行設定。
<environments>解析
我們先來看下configuation.xml中<environments>元素的配置:
 1     <environments default="development">
 2         <environment id="development">
 3             <transactionManager type="JDBC" />
 4             <dataSource type="POOLED">
 5                 <property name="driver" value="${driveClass}" />
 6                 <property name="url" value="${url}" />
 7                 <property name="username" value="${userName}" />
 8                 <property name="password" value="${password}" />
 9             </dataSource>
10         </environment>
11     </environments>
從上面的具體配置我們可以看出一些東西來:首先我們可以配置多個<environment>標籤,它的下面主要配置兩個東西,transactionManager和datasource,但是真正起作用的是<environments>標籤中default元素標出的那個。下面我們看下具體的解析流程:
 1   private void environmentsElement(XNode context) throws Exception {
 2     if (context != null) {
 3       if (environment == null) {
 4         environment = context.getStringAttribute("default");
 5       }
 6       for (XNode child : context.getChildren()) { 7 String id = child.getStringAttribute("id"); 8 if (isSpecifiedEnvironment(id)) { 9 TransactionFactory txFactory = transactionManagerElement(child.evalNode("transactionManager")); 10 DataSourceFactory dsFactory = dataSourceElement(child.evalNode("dataSource")); 11 DataSource dataSource = dsFactory.getDataSource(); 12 Environment.Builder environmentBuilder = new Environment.Builder(id) 13  .transactionFactory(txFactory) 14  .dataSource(dataSource); 15  configuration.setEnvironment(environmentBuilder.build()); 16  } 17  } 18  } 19 }
我們從程式碼中的for 迴圈遍歷可以看出,<environments>標籤下面是可以配置多個<environment>子標籤的,每個子標籤用id來區分,具體使用哪一個,看<environments>的default值,這也印證了我們一開始的分析。第3到5行程式碼,就是去獲取<environments>的default屬性,第7行程式碼,獲取子標籤<environment>的id屬性,判斷是不是上面default配置的那個,如果是,第9行程式碼,根據<transactionManager>標籤獲取事物管理器:
 1   private TransactionFactory transactionManagerElement(XNode context) throws Exception {
 2     if (context != null) {
 3       String type = context.getStringAttribute("type");
 4       Properties props = context.getChildrenAsProperties();
 5       TransactionFactory factory = (TransactionFactory) resolveClass(type).newInstance();
 6  factory.setProperties(props); 7 return factory; 8  } 9 throw new BuilderException("Environment declaration requires a TransactionFactory."); 10 }
這邊重點看下第5行程式碼,跟到最後可以發現,它其實是從typeAliasRegistry 這個map中根據type去獲取class,進而得到例項,程式碼如下:
1   protected Class<?> resolveAlias(String alias) {
2     return typeAliasRegistry.resolveAlias(alias);
3   }
那這麼的根據獲取到是哪個類呢?其實我們上面說到過,其實一些預設的typeAlias,我們再看下關於這邊的:
1     typeAliasRegistry.registerAlias("JDBC", JdbcTransactionFactory.class);
2     typeAliasRegistry.registerAlias("MANAGED", ManagedTransactionFactory.class);
3
4     typeAliasRegistry.registerAlias("JNDI", JndiDataSourceFactory.class);
5     typeAliasRegistry.registerAlias("POOLED", PooledDataSourceFactory.class);
6     typeAliasRegistry.registerAlias("UNPOOLED", UnpooledDataSourceFactory.class);
這部分是在configuation中的,類初始化的時候就會載入,我們可以看到,transactionManager有兩種配置,JDBC和MANAGED,分別對應於JdbcTransactionFactory和ManagedTransactionFactory。下面我們就來分析下這兩個類,首先看下這兩個類所在的目錄解結構:
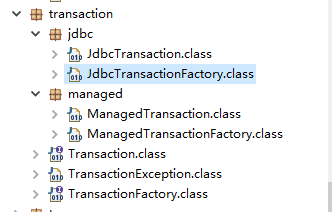
我們可以看出這邊使用了工廠模式,其中
Transaction是事物介面,主要定義瞭如下介面:
Connection getConnection() throws SQLException; // 獲取資料庫連線
void commit() throws SQLException; // 提交
void rollback() throws SQLException; // 回滾
void close() throws SQLException; // 關閉資料庫連線
Integer getTimeout() throws SQLException; // 獲取設定的事物超時時間
TransactionFactory是事物工廠介面,主要定義瞭如下介面:
void setProperties(Properties props); // 設定屬性
Transaction newTransaction(Connection conn); // 根據連線建立事物例項
Transaction newTransaction(DataSource dataSource, TransactionIsolationLevel level, boolean autoCommit); // 根據資料來源,事物隔離級別,是否自動提交建立事物例項。
這樣設計的目的就是為了便於擴充套件,以後要實現不同型別的事物只要實現這兩個介面就行了。
上面配置檔案中的JDBC和MANAGED其實就是對應於mybatis內建兩種事物型別,JDBCTransaction和ManagedTransaction,
二者的不同之處在於:前者是直接使用JDK提供的JDBC來管理事務的各個環節:提交、回滾、關閉等操作,而後者則什麼都不做,那麼後者有什麼意義呢,當然很重要。當我們單獨使用MyBatis來構建專案時,我們要在Configuration配置檔案中進行環境(environment)配置,在其中要設定事務型別為JDBC,意思是說MyBatis被單獨使用時就需要使用JDBC型別的事務模型,因為在這個模型中定義了事務的各個方面,使用它可以完成事務的各項操作。而MANAGED型別的事務模型其實是一個託管模型,也就是說它自身並不實現任何事務功能,而是託管出去由其他框架來實現,你可能還不明白,這個事務的具體實現就交由如Spring之類的框架來實現,而且在使用SSM整合框架後已經不再需要單獨配置環境資訊(包括事務配置與資料來源配置),因為在在整合jar包(mybatis-spring.jar)中擁有覆蓋mybatis裡面的這部分邏輯的程式碼,實際情況是即使你顯式設定了相關配置資訊,系統也會視而不見......託管的意義顯而易見,正是為整合而設。我們學習MyBatis的目的正是由於其靈活性和與Spring等框架的無縫整合的能力,所以有關JDBC事務模組的內容明顯不再是MyBatis功能中的重點,也許只有在單獨使用MyBatis的少量系統中才會使用到。
但是還是得去了解下,我們先看下JdbcTransactionFactory,這個實現了TransactionFactory,將獲取JDBCTransaction例項的過程隱藏了起來,其主要程式碼如下:
 1 public class JdbcTransactionFactory implements TransactionFactory {
 2
 3   @Override
 4   public void setProperties(Properties props) {
 5   }
 6
 7   @Override
 8   public Transaction newTransaction(Connection conn) {
 9     return new JdbcTransaction(conn);
10   }
11
12   @Override
13   public Transaction newTransaction(DataSource ds, TransactionIsolationLevel level, boolean autoCommit) {
14     return new JdbcTransaction(ds, level, autoCommit);
15   }
16 }
我們先看setProperties方法,引數是Properties,這個方法是在解析事物標籤的時候,如果有屬性設定,就要執行,用於覆蓋預設的配置,但是對於JdbcTransaction,即使你設定了,也不起作用,因為這邊是是一個空方法,當然,我們一般不會設定。
下面兩個方法名字一樣,只是引數不一樣,一個是根據連線去獲取JdbcTransaction的例項,一個是根據資料來源,事物隔離級別,是否自動提交來獲取,講這兩個方法之前,我們先來看下,JdbcTransaction中相關提交、回滾、關閉操作的實現:
提交:
1     if (connection != null && !connection.getAutoCommit()) {
2       if (log.isDebugEnabled()) {
3         log.debug("Committing JDBC Connection [" + connection + "]");
4       }
5       connection.commit();
6     }
7   }
回滾:
1   public void rollback() throws SQLException {
2     if (connection != null && !connection.getAutoCommit()) {
3       if (log.isDebugEnabled()) {
4         log.debug("Rolling back JDBC Connection [" + connection + "]");
5       }
6       connection.rollback();
7     }
8   }
關閉:
1   public void close() throws SQLException {
2     if (connection != null) {
3       resetAutoCommit();
4       if (log.isDebugEnabled()) {
5         log.debug("Closing JDBC Connection [" + connection + "]");
6       }
7       connection.close();
8     }
9   }
我們可以看到,執行這些方法的時候都是針對connection來操作的,首先我們就要獲取connection,
獲取連線:
1   public Connection getConnection() throws SQLException {
2     if (connection == null) {
3       openConnection();
4     }
5     return connection;
6   }
我們接著看openConnection方法:
 1   protected void openConnection() throws SQLException {
 2     if (log.isDebugEnabled()) {
 3       log.debug("Opening JDBC Connection");
 4     }
 5     connection = dataSource.getConnection();
 6     if (level != null) {
 7       connection.setTransactionIsolation(level.getLevel());
 8     }
 9     setDesiredAutoCommit(autoCommmit);
10   }
setDesiredAutoCommit的具體內容如下:
 1   protected void setDesiredAutoCommit(boolean desiredAutoCommit) {
 2     try {
 3       if (connection.getAutoCommit() != desiredAutoCommit) {
 4         if (log.isDebugEnabled()) {
 5           log.debug("Setting autocommit to " + desiredAutoCommit + " on JDBC Connection [" + connection + "]");
 6         }
 7         connection.setAutoCommit(desiredAutoCommit);
 8       }
 9     } catch (SQLException e) {
10       // Only a very poorly implemented driver would fail here,
11       // and there's not much we can do about that.
12       throw new TransactionException("Error configuring AutoCommit.  "
13           + "Your driver may not support getAutoCommit() or setAutoCommit(). "
14           + "Requested setting: " + desiredAutoCommit + ".  Cause: " + e, e);
15     }
16   }
從這個兩個方法我們可以看出,connection可以從datasource中獲取,並補充設定它的事物隔離級別,是否自動提交等屬性。現在我們再來看一下JdbcTransactionFactory中那兩個方法就不難理解了,說到底就是為了獲得connection,進而去操作事物。
最後,我們再來看一個JdbcTransaction中的方法,
 1   protected void resetAutoCommit() {
 2     try {
 3       if (!connection.getAutoCommit()) {
 4         // MyBatis does not call commit/rollback on a connection if just selects were performed.
 5         // Some databases start transactions with select statements
 6         // and they mandate a commit/rollback before closing the connection.
 7         // A workaround is setting the autocommit to true before closing the connection.
 8         // Sybase throws an exception here.
 9         if (log.isDebugEnabled()) {
10           log.debug("Resetting autocommit to true on JDBC Connection [" + connection + "]");
11         }
12         connection.setAutoCommit(true);
13       }
14     } catch (SQLException e) {
15       if (log.isDebugEnabled()) {
16         log.debug("Error resetting autocommit to true "
17           + "before closing the connection.  Cause: " + e);
18       }
19     }
20   }
這個方法是在關閉連線的時候呼叫的,mybatis預設的自動提交為true,如果將其設定為了false,就需要將其復位。那麼自動提交的初始值是在哪邊設定的呢?