vue所有生命週期函式/鉤子函式理解
阿新 • • 發佈:2018-12-17
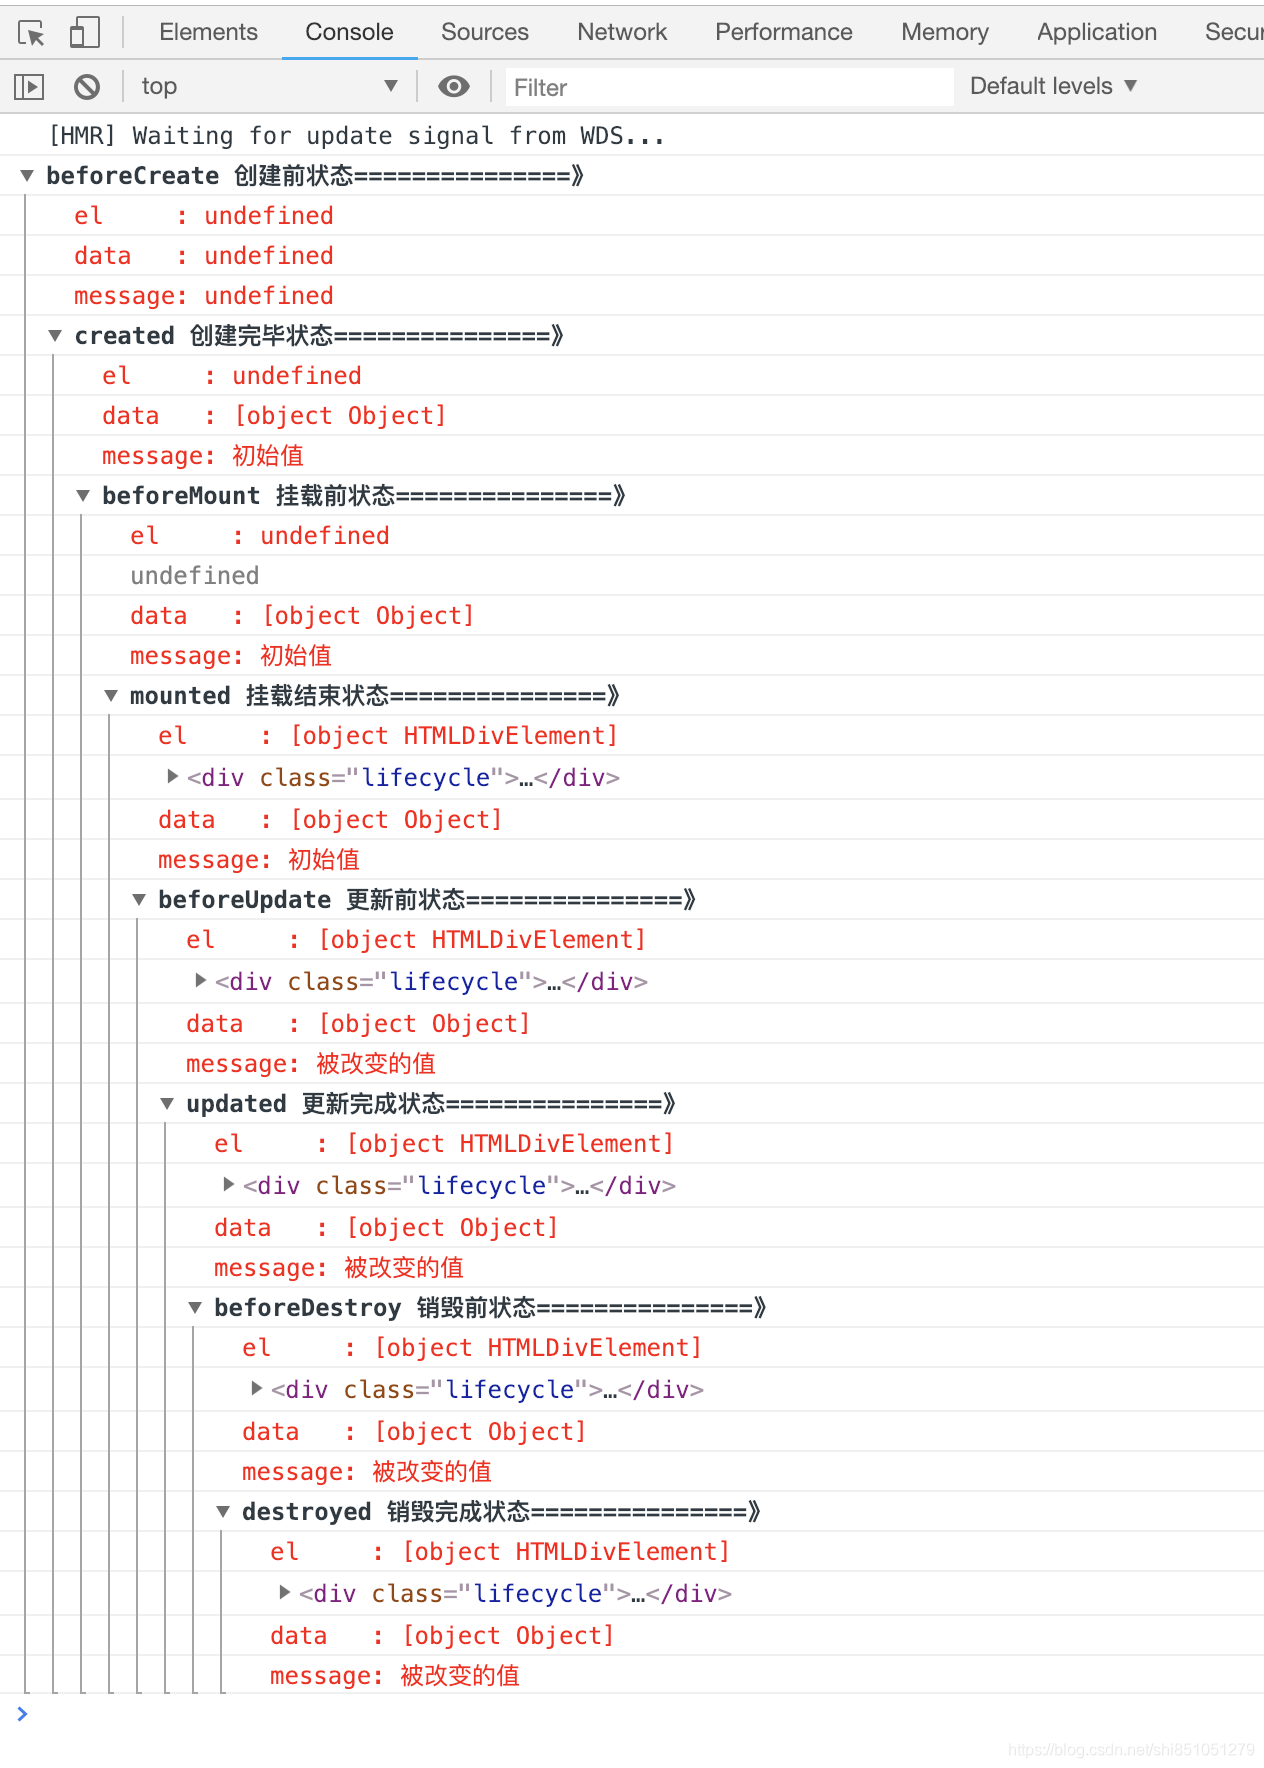
下邊是一個template 的程式碼,裡邊包含了所有vue 生命週期函式,我們可以vue-cli 專案中新建一個模板把下邊程式碼全都複製進去,然後F12開啟審查元素,觀察這些生命週期函式打印出來的log 裡的區別!
<template>
    <div class="lifecycle">
        <p>開啟審查元素檢視console.log 的值, 點選瀏覽器回退按鈕 檢視銷燬函式的執行狀態</p>
        <div>{{ message }}</div>
        <button @click="handleClick">點選按鈕改變狀態</button>
    </div>
</template>

<script>
export default {
    data(){
        return {
            message : "初始值"
        }
    },
    methods: {
        handleClick(){
            this.message = '被改變的值'
        }
    },

    beforeCreate: function () {
            console.group('beforeCreate 建立前狀態===============》');
            console.log("%c%s", "color:red" , "el     : " + this.$el); //undefined
            console.log("%c%s", "color:red","data   : " + this.$data); //undefined
            console.log("%c%s", "color:red","message: " + this.message)
    },
    created: function () {
        console.group('created 建立完畢狀態===============》');
        console.log("%c%s", "color:red","el     : " + this.$el); //undefined
        console.log("%c%s", "color:red","data   : " + this.$data); //已被初始化
        console.log("%c%s", "color:red","message: " + this.message); //已被初始化
    },
    beforeMount: function () {
        console.group('beforeMount 掛載前狀態===============》');
        console.log("%c%s", "color:red","el     : " + (this.$el)); //已被初始化
        console.log(this.$el);
        console.log("%c%s", "color:red","data   : " + this.$data); //已被初始化
        console.log("%c%s", "color:red","message: " + this.message); //已被初始化
    },
    mounted: function () {
        console.group('mounted 掛載結束狀態===============》');
        console.log("%c%s", "color:red","el     : " + this.$el); //已被初始化
        console.log(this.$el);
        console.log("%c%s", "color:red","data   : " + this.$data); //已被初始化
        console.log("%c%s", "color:red","message: " + this.message); //已被初始化
    },
    beforeUpdate: function () {
        console.group('beforeUpdate 更新前狀態===============》');
        console.log("%c%s", "color:red","el     : " + this.$el);
        console.log(this.$el);
        console.log("%c%s", "color:red","data   : " + this.$data);
        console.log("%c%s", "color:red","message: " + this.message);
    },
    updated: function () {
        console.group('updated 更新完成狀態===============》');
        console.log("%c%s", "color:red","el     : " + this.$el);
        console.log(this.$el);
        console.log("%c%s", "color:red","data   : " + this.$data);
        console.log("%c%s", "color:red","message: " + this.message);
    },
    beforeDestroy: function () {
        console.group('beforeDestroy 銷燬前狀態===============》');
        console.log("%c%s", "color:red","el     : " + this.$el);
        console.log(this.$el);
        console.log("%c%s", "color:red","data   : " + this.$data);
        console.log("%c%s", "color:red","message: " + this.message);
    },
    destroyed: function () {
        console.group('destroyed 銷燬完成狀態===============》');
        console.log("%c%s", "color:red","el     : " + this.$el);
        console.log(this.$el);
        console.log("%c%s", "color:red","data   : " + this.$data);
        console.log("%c%s", "color:red","message: " + this.message)
    }

}
</script>
列印結果如下圖,同學們可以自行操作一番看看