
微信開發之網頁授權取客戶資訊(微信測試號)
阿新 • • 發佈:2018-12-15
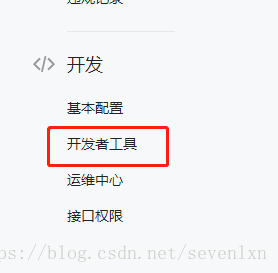
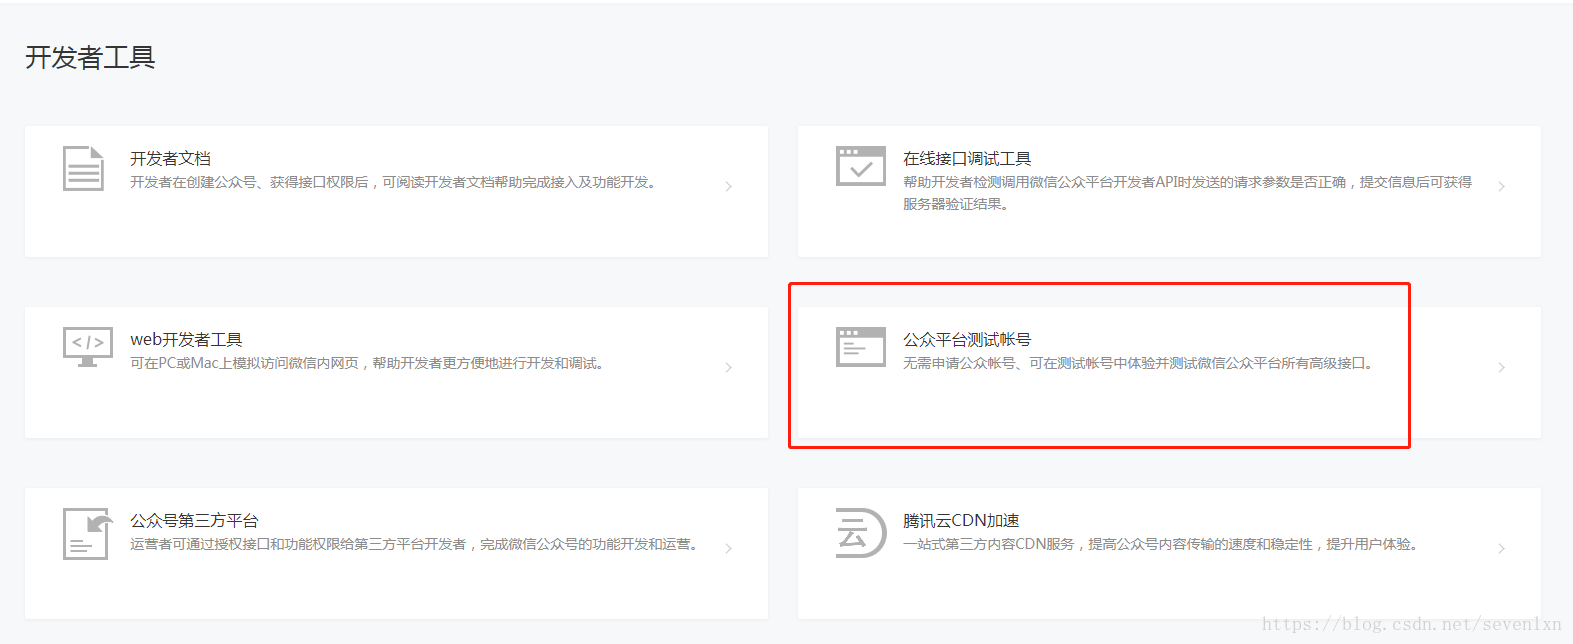
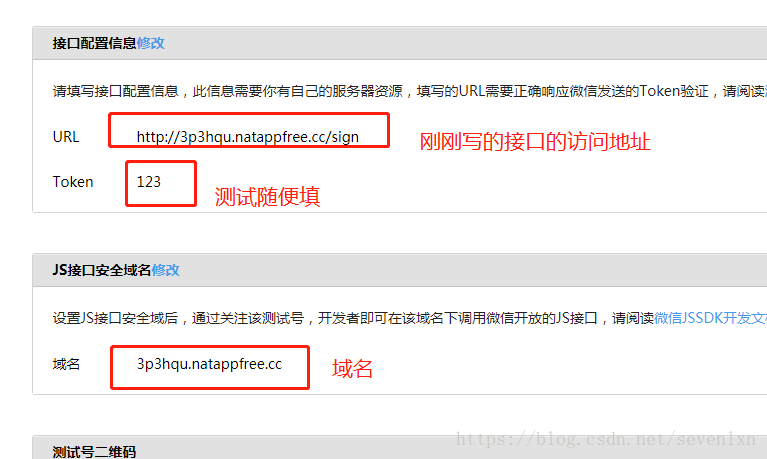
搞個賬號後 到開發者工具->公眾平臺測試賬號
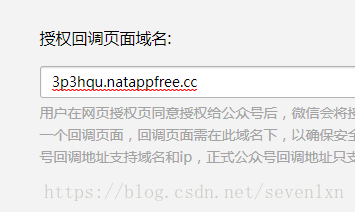
第一步 設定一個域名 這個域名要外網能訪問 如果是自己測試的話 不用伺服器 就用內網對映(這裡推薦netapp)
這裡注意不用加什麼http://
第二步 後臺寫一個介面 返回一個echostr給微信去認證這個域名就可以了
@GetMapping("/sign")
@ResponseBody
public String test(String echostr) {
return echostr;
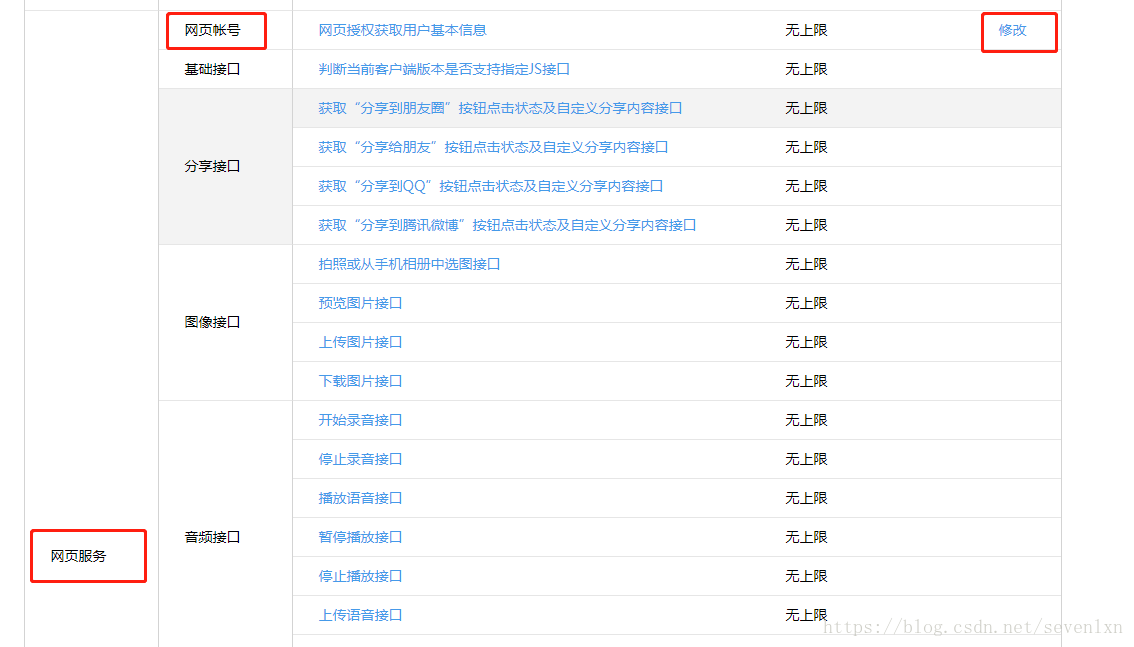
}第三步 配置另外2個重要資訊
第四步
就是授權認證了 注意 以下的appid secret是填自己微信測試號上的
userinfo就是拿到的微信使用者的資訊了 有頭像 暱稱 國家資訊等
@GetMapping("/sign/auth")
    public String auth(@RequestParam(value = "code",required = false) String code, Model model) {
        String codeUrl = "https://api.weixin.qq.com/sns/oauth2/access_token?appid="+appid+"&secret="+SECRET+"&code=" + code + "&grant_type=authorization_code";
        RestTemplate restTemplate = new RestTemplate();
        String codeResponse=restTemplate.getForObject(codeUrl,String.class);
        JSONObject tokenJson = JSONObject.parseObject(codeResponse);
        String reflushUrl = "https://api.weixin.qq.com/sns/oauth2/refresh_token?appid="+appid+"&grant_type=refresh_token&refresh_token="+tokenJson.get("refresh_token");
        String reflushUrlResponse=restTemplate.getForObject(reflushUrl,String.class);
        System.out.println(reflushUrlResponse+"========================================reflushUrlResponse");
        String userinfoUrl = "https://api.weixin.qq.com/sns/userinfo?access_token="+tokenJson.get("access_token")+"&openid="+tokenJson.get("openid")+"&lang=zh_CN";
        String userinfoUrlResponse = restTemplate.getForObject(userinfoUrl,String.class);
        System.out.println(userinfoUrlResponse+"============================================userinfoUrl");
        model.addAttribute("userinfo",JSONObject.parseObject(userinfoUrlResponse));
        return "test";//這裡是返回到自己的頁面當中
    }
然後就是拼接那條用來微信端點的連結了
這裡我用一個程式碼拼接了起來了 注意這裡的scope有兩種的樣子

@GetMapping("/test")
    @ResponseBody
    public String testDemo(){
        try {
            String url = "http://3p3hqu.natappfree.cc/sign/auth";
            String first = "https://open.weixin.qq.com/connect/oauth2/authorize?appid="+appid+"&redirect_uri="+ URLEncoder.encode(url,"UTF-8")+"&response_type=code&scope=snsapi_userinfo&state=STATE#wechat_redirect";
            return first;
        }catch(Exception e){
            return "";
        }
    }
那麼ojbk了 萬事大吉