
sts下使用maven 建立第一個springmvc
使用公司的框架(基於spring)久了,越來越覺得spring框架的強大。開始整理spring開發的一些細節。從建立到完成各種開發,從點滴記錄,也分享給各位觀眾老爺,希望能幫助到有需要的人,不足之處還望指教!
IDE使用的是sts(http://spring.io/tools/sts),第一次開啟它會建立一個預設的Server工程,建議不要把它刪掉。下面介紹maven和tomcat等一些基本的相關配置。
maven(官方地址) 的配置過程:
WINDOW-->Preference-->搜尋maven-->Installations-->Add
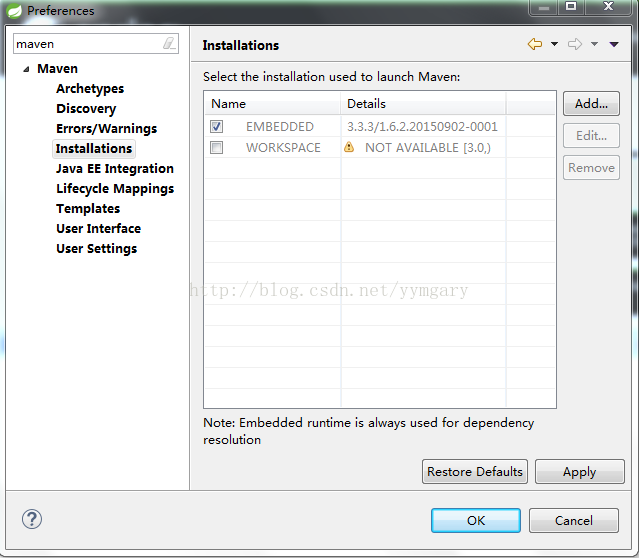
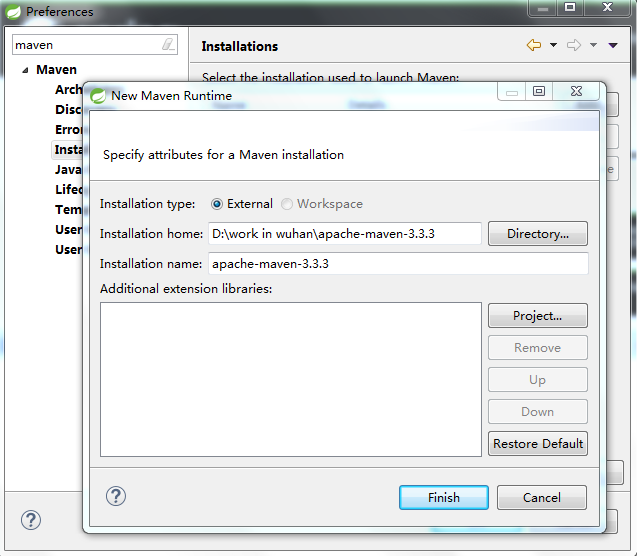
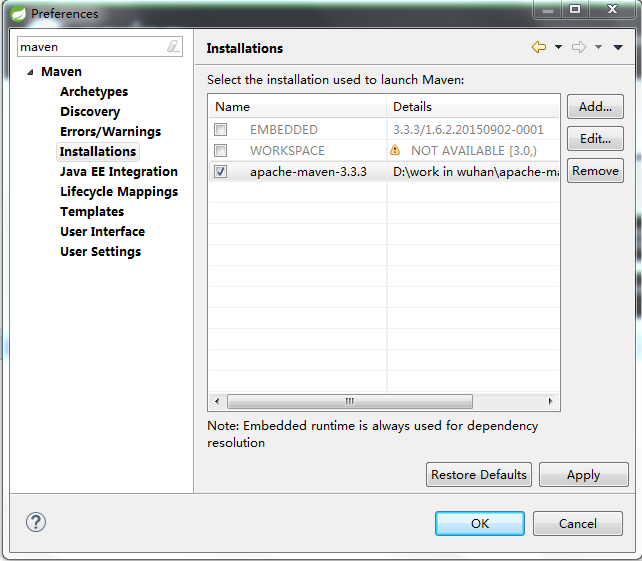
路徑指向為本地maven安裝路徑。接著配置User Settings。

使用預設的setting檔案,下載jar包的速度太慢,這裡我使用的是阿里巴巴搭建的倉庫映象。具體配置在附件裡,大家平時開發時可以使用這個配置提高開發效率。
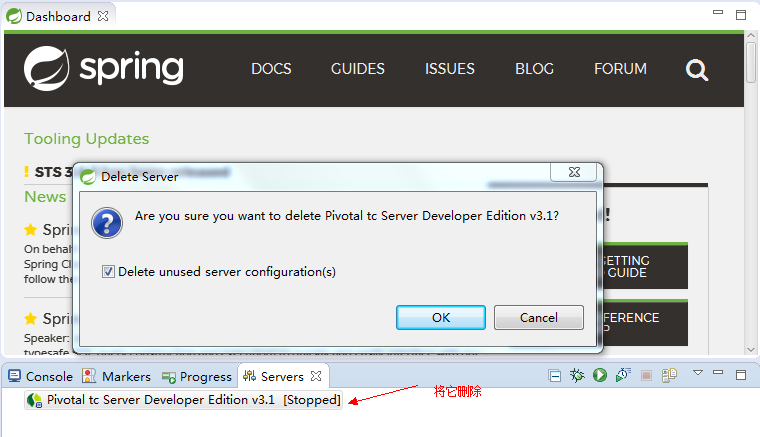
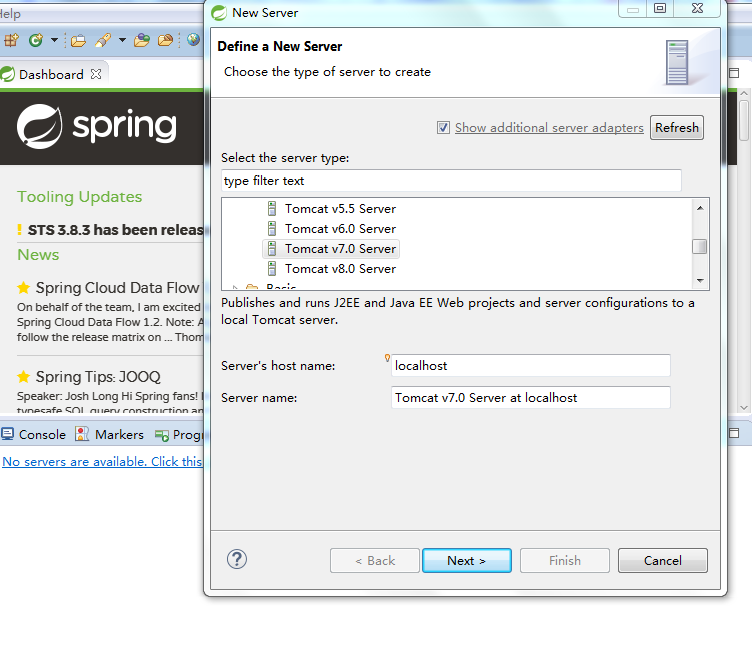
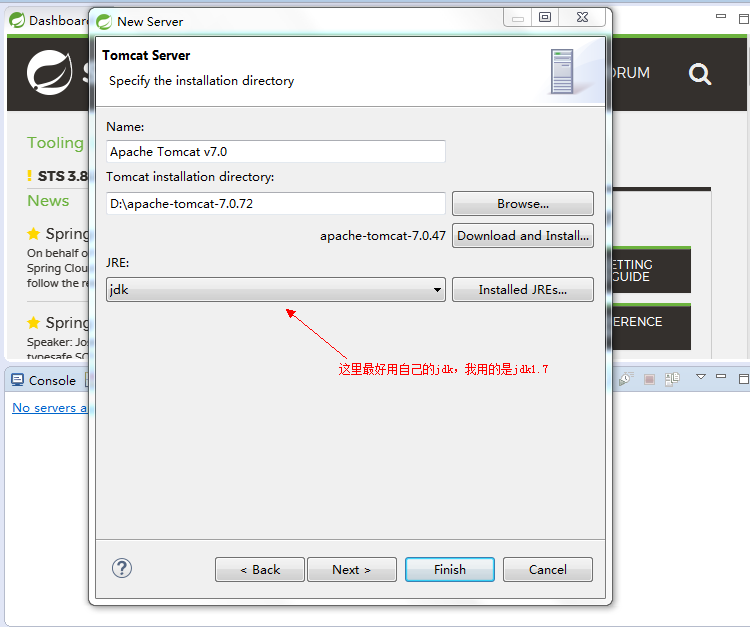
server的配置。首先先將預設的server刪除,再新增一個新的tomcat伺服器。
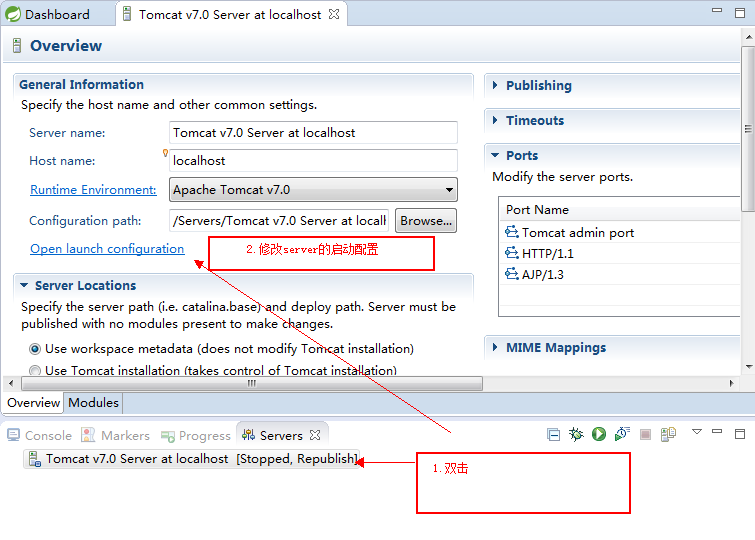
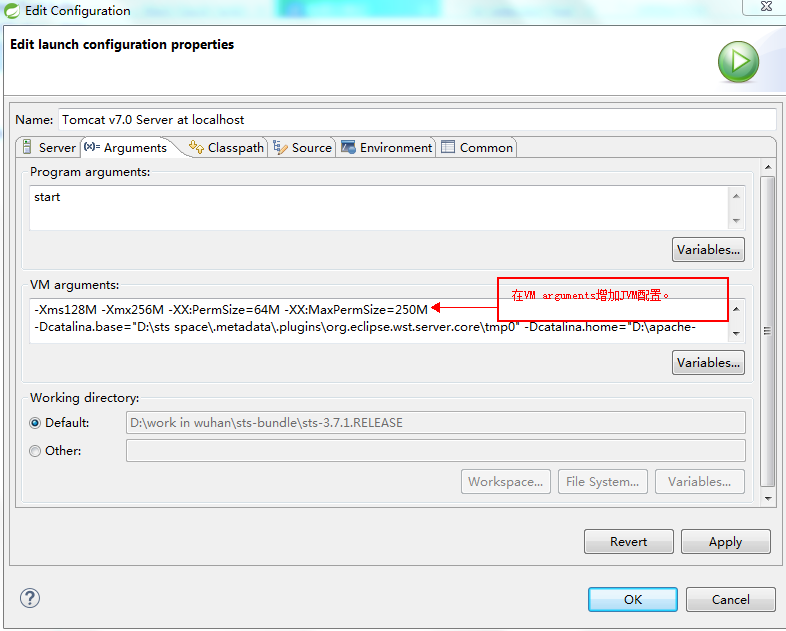
增加JVM的配置是為了防止tomcat出現啟動超時,記憶體溢位等現象。
至此,maven和server的配置完成。
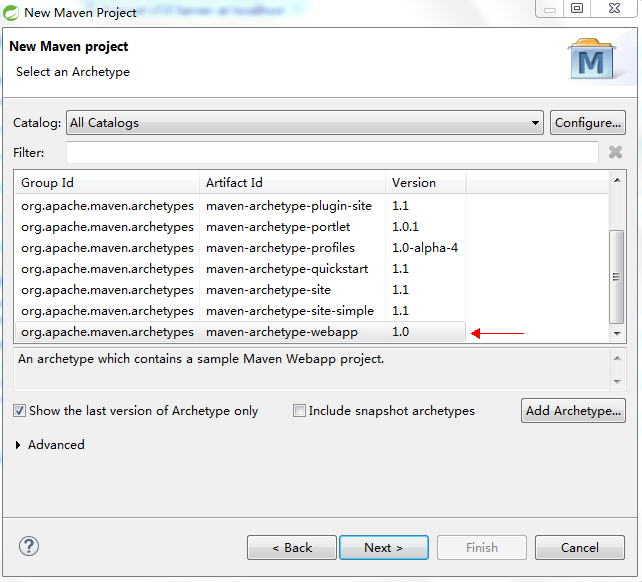
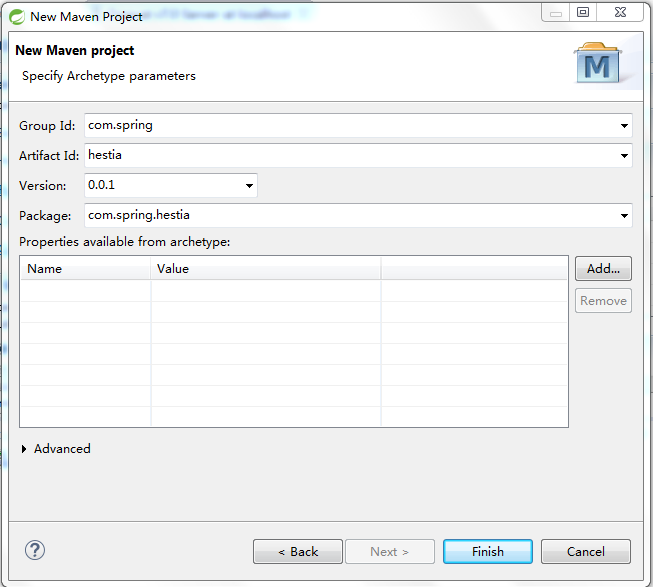
建立第一個spring-mvc工程
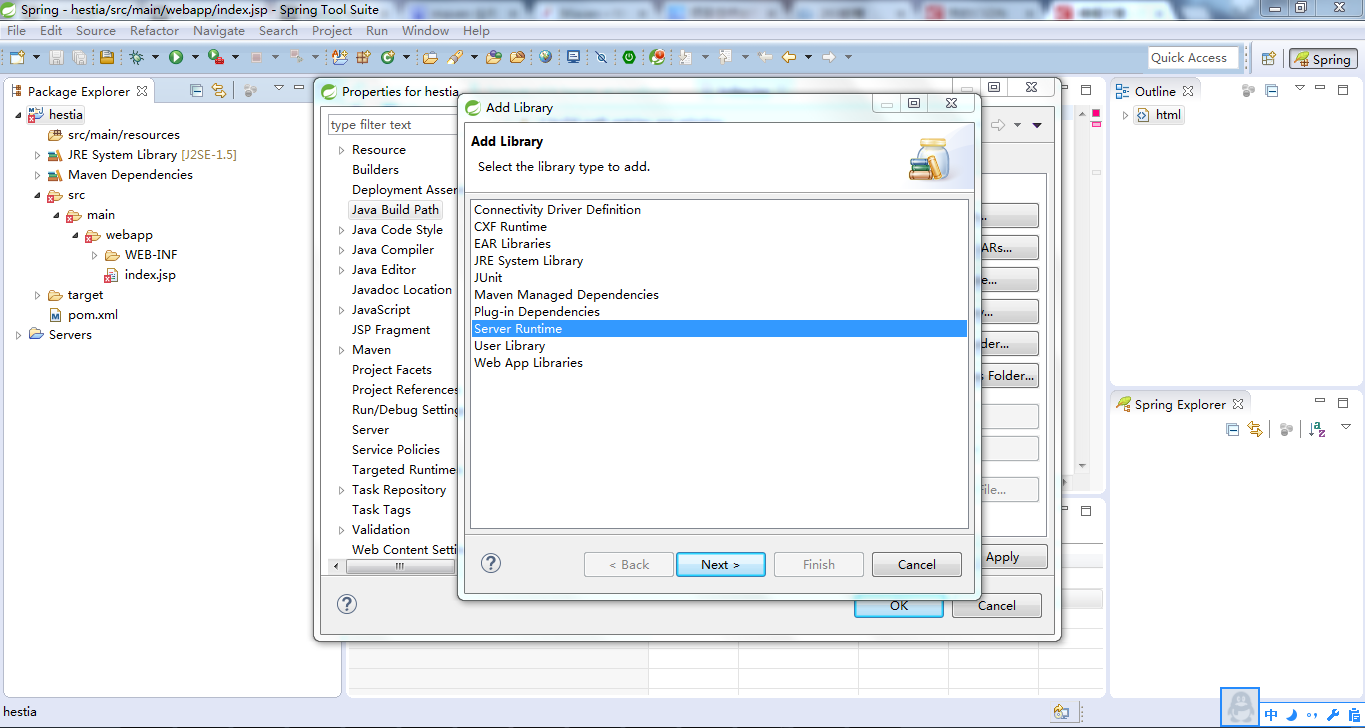
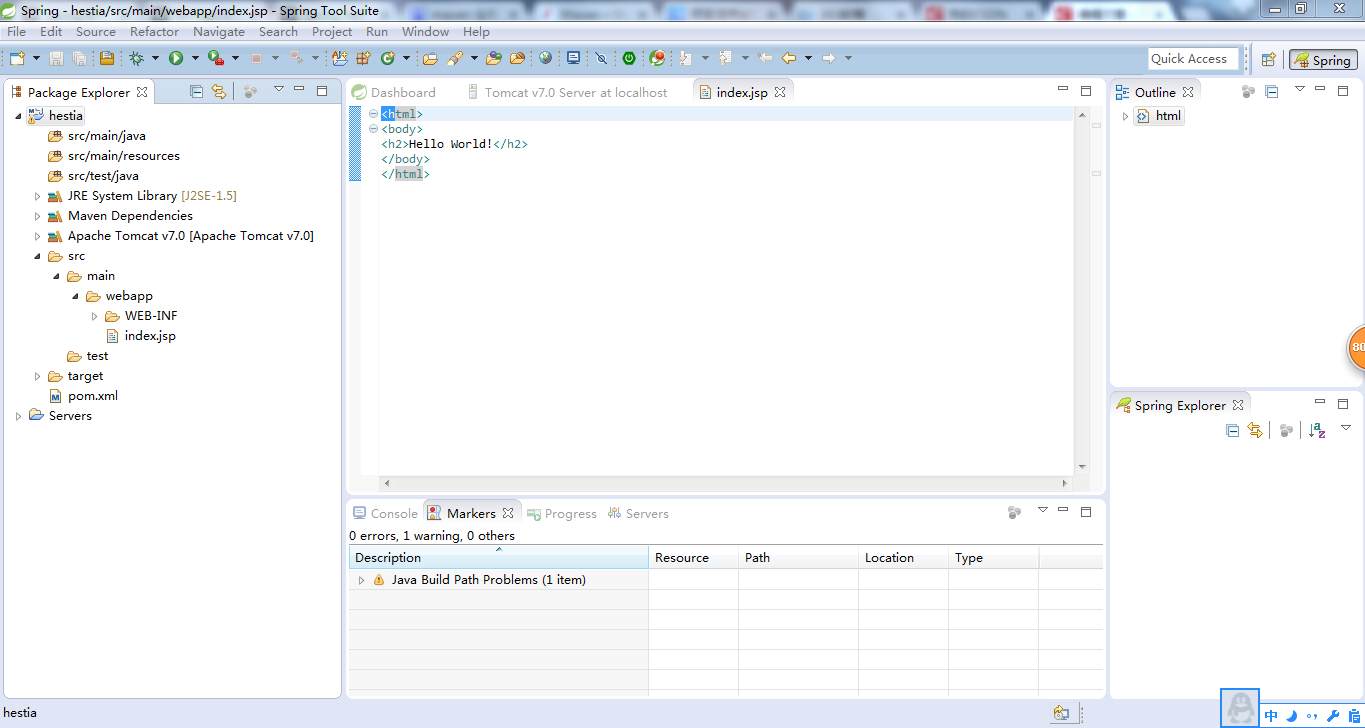
成功建立之後可能會有報錯:
The superclass "javax.servlet.http.HttpServlet" was not found on the Java Build Path
原因是未新增server runtime到java build path中去。
解決方法:
右鍵工程,選擇Build Path -->Config Build Path-->Libraries-->Add Library...
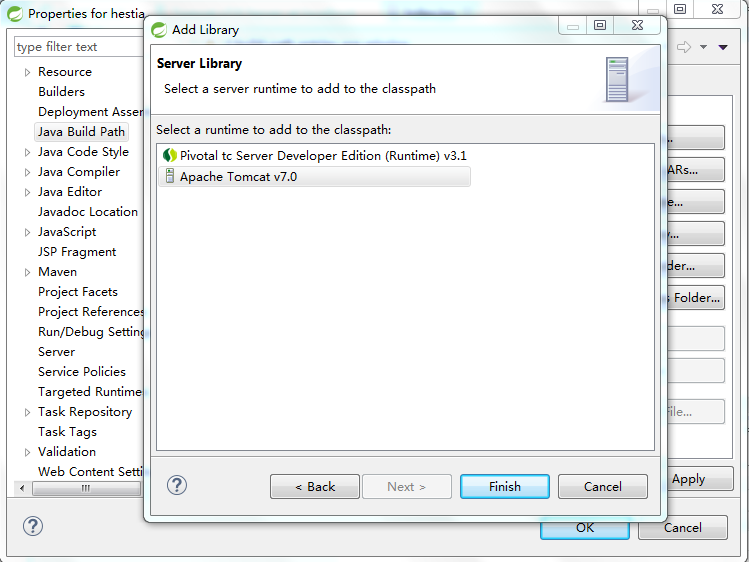
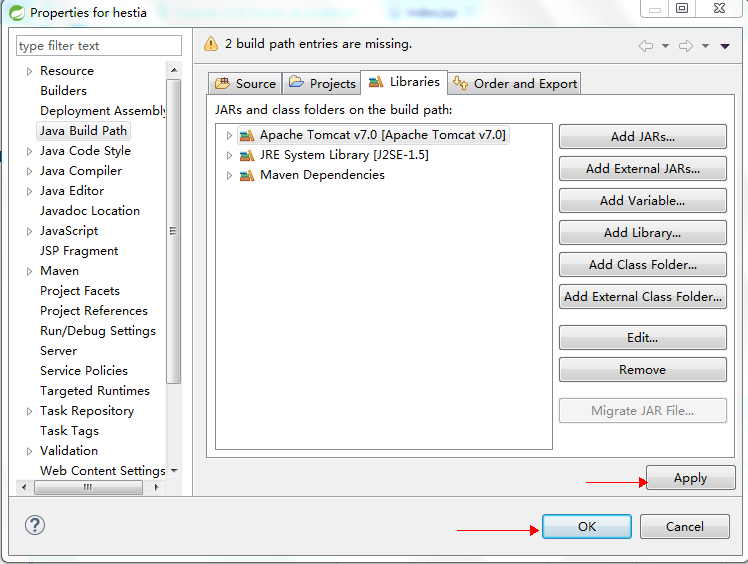
點選Apply-->OK之後發現錯誤不見了。
之後建立springMVC的一些相關配置檔案和修改pom.xml的配置。
配置 Maven 使用 Spring 庫.
- pom.xml
<project xmlns="http://maven.apache.org/POM/4.0.0" xmlns:xsi="http://www.w3.org/2001/XMLSchema-instance"
  xsi:schemaLocation="http://maven.apache.org/POM/4.0.0 http://maven.apache.org/maven-v4_0_0.xsd">
  <modelVersion>4.0.0</modelVersion>
  <groupId>com.im2</groupId>
  <artifactId>hestia</artifactId>
  <packaging>war</packaging>
  <version>1.0.1</version>
  <name>hestia Maven Webapp</name>
  <url>http://maven.apache.org</url>
  <dependencies>
    <dependency>
      <groupId>junit</groupId>
      <artifactId>junit</artifactId>
      <version>3.8.1</version>
      <scope>test</scope>
    </dependency>
     <dependency>
            <groupId>javax.servlet</groupId>
            <artifactId>javax.servlet-api</artifactId>
            <version>3.1.0</version>
            <scope>provided</scope>
        </dependency>

        <!-- Spring dependencies -->
        <!-- http://mvnrepository.com/artifact/org.springframework/spring-core -->
        <dependency>
            <groupId>org.springframework</groupId>
            <artifactId>spring-core</artifactId>
            <version>4.1.4.RELEASE</version>
        </dependency>

        <!-- http://mvnrepository.com/artifact/org.springframework/spring-web -->
        <dependency>
            <groupId>org.springframework</groupId>
            <artifactId>spring-web</artifactId>
            <version>4.1.4.RELEASE</version>
        </dependency>

        <!-- http://mvnrepository.com/artifact/org.springframework/spring-webmvc -->
        <dependency>
            <groupId>org.springframework</groupId>
            <artifactId>spring-webmvc</artifactId>
            <version>4.1.4.RELEASE</version>
        </dependency>
  </dependencies>
  <build>
    <finalName>hestia</finalName>
  </build>
</project>
配置 web.xml:
Spring MVC 的 DispatcherServlet將根據原則讀取XML配置檔案:
<web-app xmlns:xsi="http://www.w3.org/2001/XMLSchema-instance"
   xmlns="http://java.sun.com/xml/ns/javaee"
   xsi:schemaLocation="http://java.sun.com/xml/ns/javaeehttp://java.sun.com/xml/ns/javaee/web-app_3_0.xsd"
   id="WebApp_ID" version="3.0">

   <display-name>HelloWorldSpring</display-name>

   <servlet>
       <servlet-name>spring-mvc</servlet-name>
       <servlet-class>
           org.springframework.web.servlet.DispatcherServlet
       </servlet-class>
       <load-on-startup>1</load-on-startup>
   </servlet>

   <servlet-mapping>
       <servlet-name>spring-mvc</servlet-name>
       <url-pattern>/</url-pattern>
   </servlet-mapping>

    <!-- Other XML Configuration -->
   <!-- Load by Spring ContextLoaderListener -->
   <context-param>
       <param-name>contextConfigLocation</param-name>
       <param-value>/WEB-INF/root-context.xml</param-value>
   </context-param>


    <!-- Spring ContextLoaderListener -->
   <listener>
       <listener-class>org.springframework.web.context.ContextLoaderListener</listener-class>
   </listener>
    <!-- web.xml -->
	<!-- Spring ContextLoaderListener -->
	<listener>
		<listener-class>org.springframework.web.context.ContextLoaderListener</listener-class>
	</listener>

	<!-- Load by Spring ContextLoaderListener -->
	<context-param>
		<param-name>contextConfigLocation</param-name>
	<param-value>
       /WEB-INF/root-context.xml,

 	</param-value>
	</context-param>
</web-app>
Spring MVC 的 DispatcherServlet將根據原則讀取XML配置檔案:
- {servlet-name} ==> /WEB-INF/{servlet-name}-servlet.xml
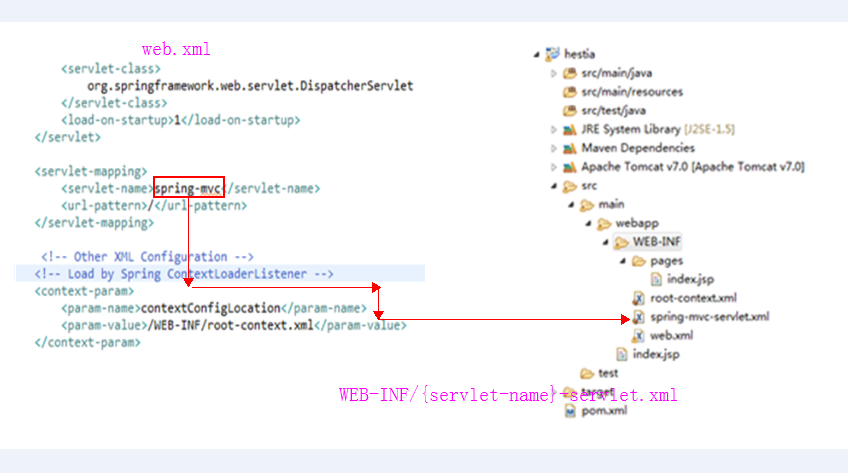
- spring-mvc-servlet.xml
<?xml version="1.0" encoding="UTF-8"?>
<beans xmlns="http://www.springframework.org/schema/beans"
xmlns:xsi="http://www.w3.org/2001/XMLSchema-instance"
xmlns:p="http://www.springframework.org/schema/p"
xmlns:context="http://www.springframework.org/schema/context"
xmlns:mvc="http://www.springframework.org/schema/mvc"
xsi:schemaLocation="http://www.springframework.org/schema/beans
http://www.springframework.org/schema/beans/spring-beans-4.1.xsd
http://www.springframework.org/schema/context
http://www.springframework.org/schema/context/spring-context-4.1.xsd
http://www.springframework.org/schema/mvc
http://www.springframework.org/schema/mvc/spring-mvc-4.1.xsd">
<context:component-scan base-package="com.hestia.controller"/>
<context:annotation-config/>
<bean
class="org.springframework.web.servlet.view.InternalResourceViewResolver">
<property name="prefix">
<value>/WEB-INF/pages/</value>
</property>
<property name="suffix">
<value>.jsp</value>
</property>
</bean>
</beans>
注:
在Spring應用程式 ContextLoaderListener 將讀取其他 XML 配置檔案(如下的 abc.xml 和 root-context.xml 兩個檔案)。 可能不需要配置 ContextLoaderListener,如果你的應用程式並不需要讀取其他XML配置檔案。
<!-- web.xml -->
<!-- Spring ContextLoaderListener -->
<listener>
<listener-class>org.springframework.web.context.ContextLoaderListener</listener-class>
</listener>
<!-- web.xml -->
<!-- Spring ContextLoaderListener -->
<listener>
<listener-class>org.springframework.web.context.ContextLoaderListener</listener-class>
</listener>
<!-- Load by Spring ContextLoaderListener -->
<context-param>
<param-name>contextConfigLocation</param-name>
<param-value>
/WEB-INF/root-context.xml,
</param-value>
</context-param>
- /WEB-INF/root-context.xml
<?xml version="1.0" encoding="UTF-8"?>
<beans xmlns="http://www.springframework.org/schema/beans"
xmlns:xsi="http://www.w3.org/2001/XMLSchema-instance"
xsi:schemaLocation="http://www.springframework.org/schema/beans
http://www.springframework.org/schema/beans/spring-beans.xsd">
<!-- Empty -->
</beans>
indexController.java
package com.hestia.controller;
import org.springframework.stereotype.Controller;
import org.springframework.ui.Model;
import org.springframework.web.bind.annotation.RequestMapping;
@Controller
public class indexController {
@RequestMapping("/hello")
public String hello(Model model) {
model.addAttribute("greeting", "Hello Spring MVC");
return"index";
}
}
WEB-INF/pages/index.jsp
<%@ page language="java" contentType="text/html; charset=UTF-8" pageEncoding="UTF-8"%>
<!DOCTYPE html PUBLIC "-//W3C//DTD HTML 4.01 Transitional//EN" "http://www.w3.org/TR/html4/loose.dtd">
<html>
<head>
<meta http-equiv="Content-Type" content="text/html; charset=UTF-8">
<title>Spring4 MVC -HelloWorld</title>
</head>
<body>
<h1>${greeting}</h1>
</body>
</html>
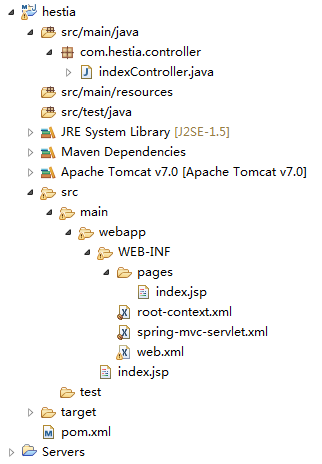
程式碼片已經全部貼完,再貼一張完整的工程目錄結構:
 至此,一個簡單的入門級別spring MVC程式碼建立完成。接下來執行程式碼:
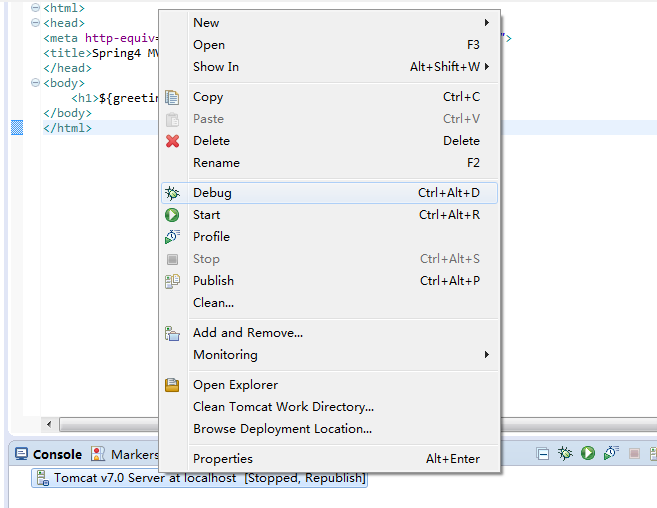
右鍵servers下的伺服器,選擇Add And Remove,,將hestia新增到configured中(相當於新增到tomcat的webapps中去)
至此,一個簡單的入門級別spring MVC程式碼建立完成。接下來執行程式碼:
右鍵servers下的伺服器,選擇Add And Remove,,將hestia新增到configured中(相當於新增到tomcat的webapps中去)

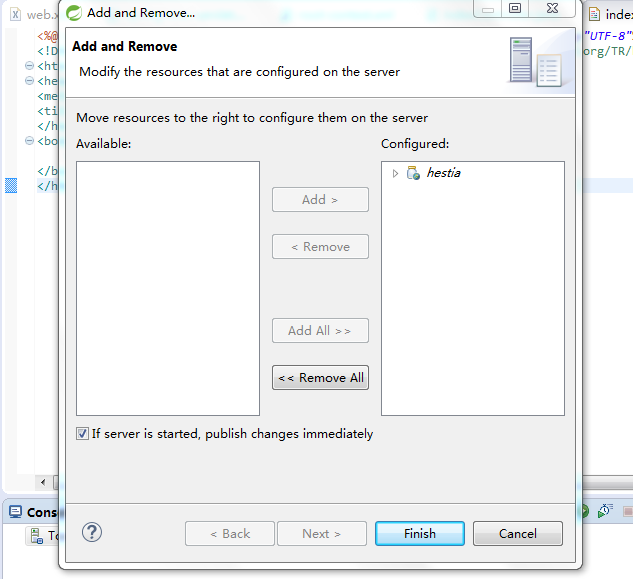
接著使用Debug模式執行tomcat。
 訪問對應url可看出springMVC已經可以成功執行。
 後續我還會繼續更新個人對springMVC的理解和運用事例,並結合一些其他框架(如Mybatis、freemarker等)的運用,儘可能的做到詳細以幫助到大家。第一次寫部落格,花了我好幾個小時,沒有介紹原理只是單純的上程式碼,個人覺得是一個很好的適合新手入門的demo。
程式碼下載連結
後續我還會繼續更新個人對springMVC的理解和運用事例,並結合一些其他框架(如Mybatis、freemarker等)的運用,儘可能的做到詳細以幫助到大家。第一次寫部落格,花了我好幾個小時,沒有介紹原理只是單純的上程式碼,個人覺得是一個很好的適合新手入門的demo。
程式碼下載連結