
docker入門基礎(一)
目錄
一、簡介
參考 https://www.cnblogs.com/linuxk/p/8984242.html
1、docker架構
Docker 使用客戶端-伺服器 (C/S) 架構模式,使用遠端API來管理和建立Docker容器。
Docker 容器通過 Docker 映象來建立。
容器與映象的關係類似於面向物件程式設計中的物件與類。
Docker 面向物件
容器 物件
映象 類

Docker 映象(Images) Docker 映象是用於建立 Docker 容器的模板。
Docker 容器(Container) 容器是獨立執行的一個或一組應用。
Docker 客戶端(Client) Docker 客戶端通過命令列或者其他工具使用 Docker API (https://docs.docker.com/reference/api/docker_remote_api) 與 Docker 的守護程序通訊。
Docker 主機(Host) 一個物理或者虛擬的機器用於執行 Docker 守護程序和容器。
Docker 倉庫(Registry) Docker 倉庫用來儲存映象,可以理解為程式碼控制中的程式碼倉庫。Docker Hub(https://hub.docker.com) 提供了龐大的映象集合供使用。
Docker Machine Docker Machine是一個簡化Docker安裝的命令列工具,通過一個簡單的命令列即可在相應的平臺上安裝Docker,比如VirtualBox、 Digital Ocean、Microsoft Azure。
Docker專案的目標是實現輕量級的作業系統虛擬化解決方案。Docker的基礎是linux容器(LXC)等技術。
2、docker的概念
映象:是一個只讀的模板,類似於安裝系統用到的那個iso檔案,我們通過映象來完成各種應用的部署。映象可以用來建立Docker容器
容器:映象類似於作業系統,而容器類似於虛擬機器本身。它可以被啟動、開始、停止、刪除等操作,每個容器都是相互隔離的。可以把容器看做是一個簡易版的linux環境(包括root使用者許可權、程序空間、使用者空間和網路空間等)和執行在其中的應用程式。
倉庫:存放映象的一個場所,倉庫分為公開倉庫和私有倉庫。 最大的公開倉庫是Docker hub(hub.docker.com),國內公開倉庫(dockerpool.com)
二、docker的安裝和管理
1、docker安裝
依賴環境 Centos 7 3.10核心
Docker EE
Docker EE由公司支援,可在經過認證的作業系統和雲提供商中使用,並可執行來自Docker Store的、經過認證的容器和外掛。
Docker EE提供三個服務層次:
Docker CE
Docker CE是免費的Docker產品的新名稱,Docker CE包含了完整的Docker平臺,非常適合開發人員和運維團隊構建容器APP。事實上,Docker CE 17.03,可理解為Docker 1.13.1的Bug修復版本。因此,從Docker 1.13升級到Docker CE 17.03風險相對是較小的。
大家可前往Docker的RELEASE log檢視詳情https://github.com/docker/docker/releases 。
Docker公司認為,Docker CE和EE版本的推出為Docker的生命週期、可維護性以及可升級性帶來了巨大的改進。
此處選擇docker-ce來學習。
#獲取阿里epel源
[[email protected] ~]# cd /etc/yum.repos.d/
[[email protected] yum.repos.d]# wget https://mirrors.aliyun.com/docker-ce/linux/centos/docker-ce.repo
--2018-12-03 21:39:41--  https://mirrors.aliyun.com/docker-ce/linux/centos/docker-ce.repo
Resolving mirrors.aliyun.com (mirrors.aliyun.com)... 157.255.30.119, 157.255.30.121, 157.255.30.120, ...
Connecting to mirrors.aliyun.com (mirrors.aliyun.com)|157.255.30.119|:443... connected.
HTTP request sent, awaiting response... 200 OK
Length: 2640 (2.6K) [application/octet-stream]
Saving to: ‘docker-ce.repo’

100%[===========================>] 2,640       --.-K/s   in 0s

2018-12-03 21:39:42 (21.0 MB/s) - ‘docker-ce.repo’ saved [2640/2640]

[[email protected] yum.repos.d]# yum makecache
[[email protected] yum.repos.d]# yum install docker-ce -y
#啟動docker
[[email protected] yum.repos.d]# systemctl start docker
[[email protected] yum.repos.d]# ps -ef|grep docker
root       1709      1  1 21:43 ?        00:00:00 /usr/bin/dockerd -H unix://
root       1723   1709  0 21:43 ?        00:00:00 containerd --config /var/run/docker/containerd/containerd.toml --log-level info
root       1866   1263  0 21:44 pts/0    00:00:00 grep --color=auto docker
注意:
官方軟體源預設啟用了最新的軟體,您可以通過編輯軟體源的方式獲取各個版本的軟體包。例如官方並沒有將測試版本的軟體源置為可用,你可以通過以下方式開啟。同理可以開啟各種測試版本等。
vim /etc/yum.repos.d/docker-ce.repo
將 [docker-ce-test] 下方的 enabled=0 修改為 enabled=1
安裝指定版本的Docker-CE:
Step 1: 查詢Docker-CE的版本:
yum list docker-ce.x86_64 --showduplicates | sort -r
Loading mirror speeds from cached hostfile
Loaded plugins: branch, fastestmirror, langpacks
docker-ce.x86_64 17.03.1.ce-1.el7.centos docker-ce-stable
docker-ce.x86_64 17.03.1.ce-1.el7.centos @docker-ce-stable
docker-ce.x86_64 17.03.0.ce-1.el7.centos docker-ce-stable
Available Packages
Step2 : 安裝指定版本的Docker-CE: (VERSION 例如上面的 17.03.0.ce.1-1.el7.centos)
2、docker配置阿里雲映象加速
預設配置檔案在/etc/docker/內,預設沒有需要自己建立
1)、登入阿里雲容器映象加速
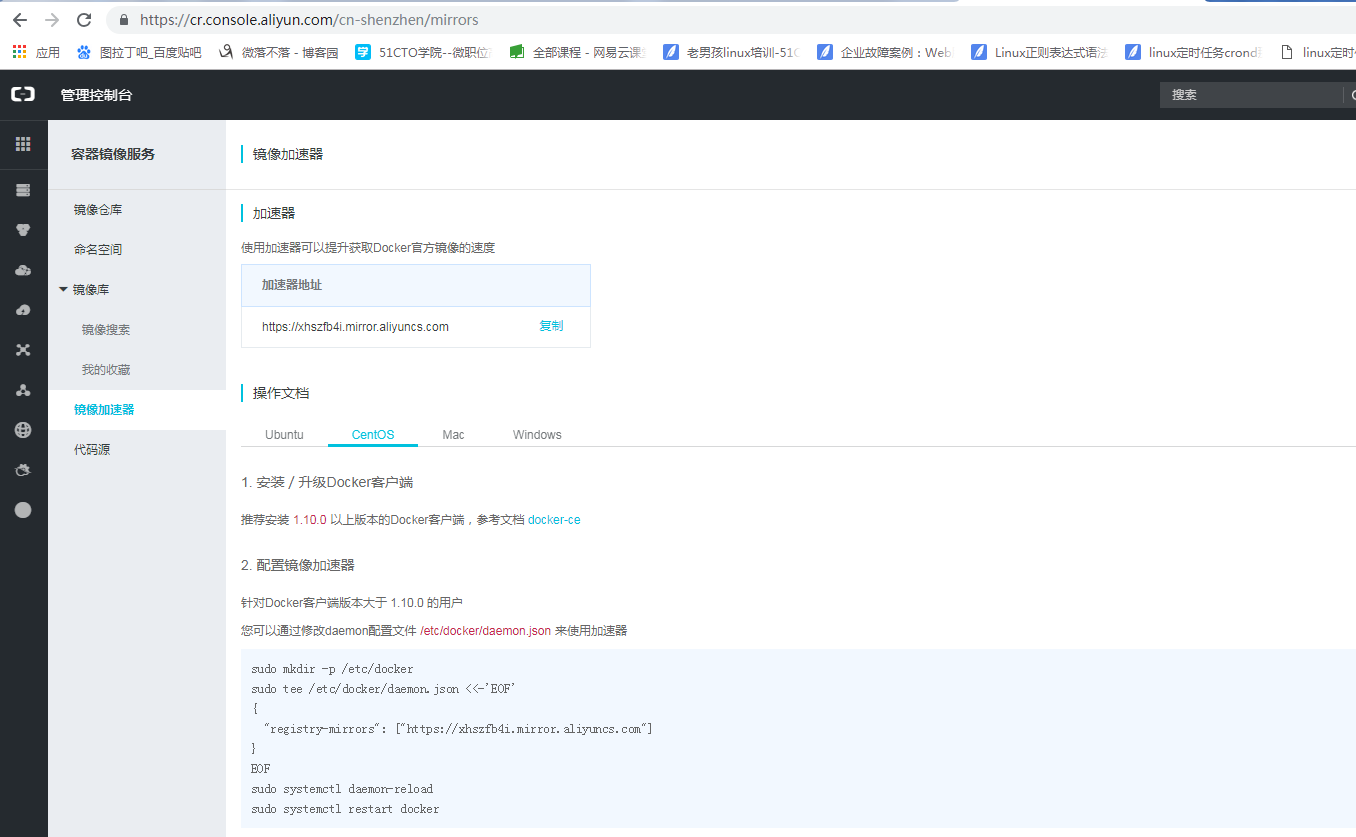
[[email protected] yum.repos.d]# vim /etc/docker/daemon.json

{
  "registry-mirrors": ["https://xhszfb4i.mirror.aliyuncs.com"]
  #每個人的不一樣
}
[[email protected] yum.repos.d]# systemctl restart docker
3、基礎命令
1)檢視版本和詳情
檢視版本
[[email protected] yum.repos.d]# docker version
Client:
 Version:           18.09.0
 API version:       1.39
 Go version:        go1.10.4
 Git commit:        4d60db4
 Built:             Wed Nov  7 00:48:22 2018
 OS/Arch:           linux/amd64
 Experimental:      false

Server: Docker Engine - Community
 Engine:
  Version:          18.09.0
  API version:      1.39 (minimum version 1.12)
  Go version:       go1.10.4
  Git commit:       4d60db4
  Built:            Wed Nov  7 00:19:08 2018
  OS/Arch:          linux/amd64
  Experimental:     false
檢視詳情
[[email protected] yum.repos.d]# docker info
Containers: 0
 Running: 0
 Paused: 0
 Stopped: 0
Images: 0
Server Version: 18.09.0
Storage Driver: overlay2
 Backing Filesystem: xfs
 Supports d_type: true
 Native Overlay Diff: true
Logging Driver: json-file
Cgroup Driver: cgroupfs
Plugins:
 Volume: local
 Network: bridge host macvlan null overlay
 Log: awslogs fluentd gcplogs gelf journald json-file local logentries splunk syslog
Swarm: inactive
Runtimes: runc
Default Runtime: runc
Init Binary: docker-init
containerd version: c4446665cb9c30056f4998ed953e6d4ff22c7c39
runc version: 4fc53a81fb7c994640722ac585fa9ca548971871
init version: fec3683
Security Options:
 seccomp
  Profile: default
Kernel Version: 3.10.0-862.el7.x86_64
Operating System: CentOS Linux 7 (Core)
OSType: linux
Architecture: x86_64
CPUs: 1
Total Memory: 1.779GiB
Name: node1
ID: YDLV:VFIA:6UIH:MHQE:PVYX:BSCR:4DCG:XSEF:NPSK:VSES:NM2D:YOD2
Docker Root Dir: /var/lib/docker
Debug Mode (client): false
Debug Mode (server): false
Registry: https://index.docker.io/v1/
Labels:
Experimental: false
Insecure Registries:
 127.0.0.0/8
Registry Mirrors:
 https://xhszfb4i.mirror.aliyuncs.com/
Live Restore Enabled: false
Product License: Community Engine
2)常用命令含義
docker search 搜尋映象
docker pull 拉取映象
docker images 檢視本地映象
docker create 建立容器
docker start 開啟多個停止的容器
docker run 在一個新容器裡面執行命令
docker attach 容器隔離後重新連線
docker ps 檢視容器列表
docker logs 檢視容器日誌
docker restart 重啟容器
docker stop 停止容器 相當於kill -15
docker kill kill容器 相當於kill -9
docker rm 刪除容器
docker rmi 刪除映象 docker image rm
3)docker pull
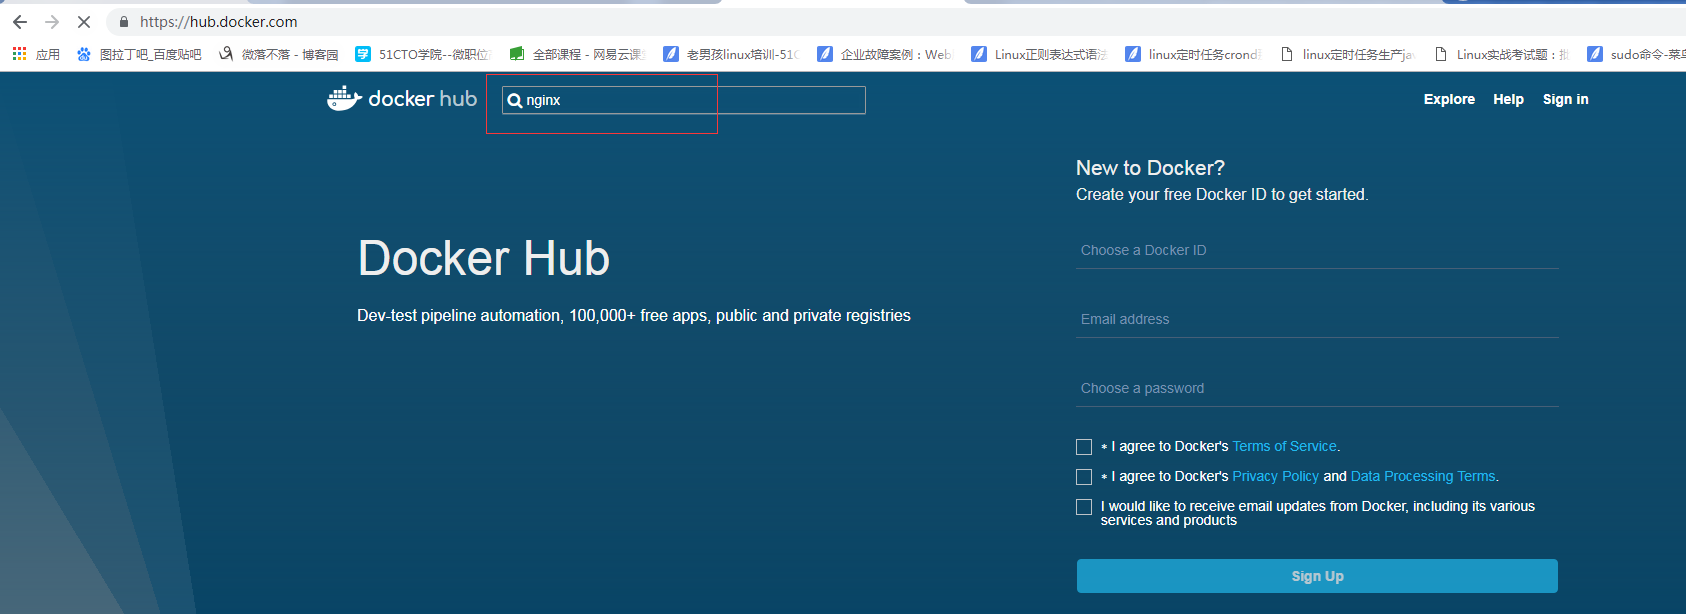
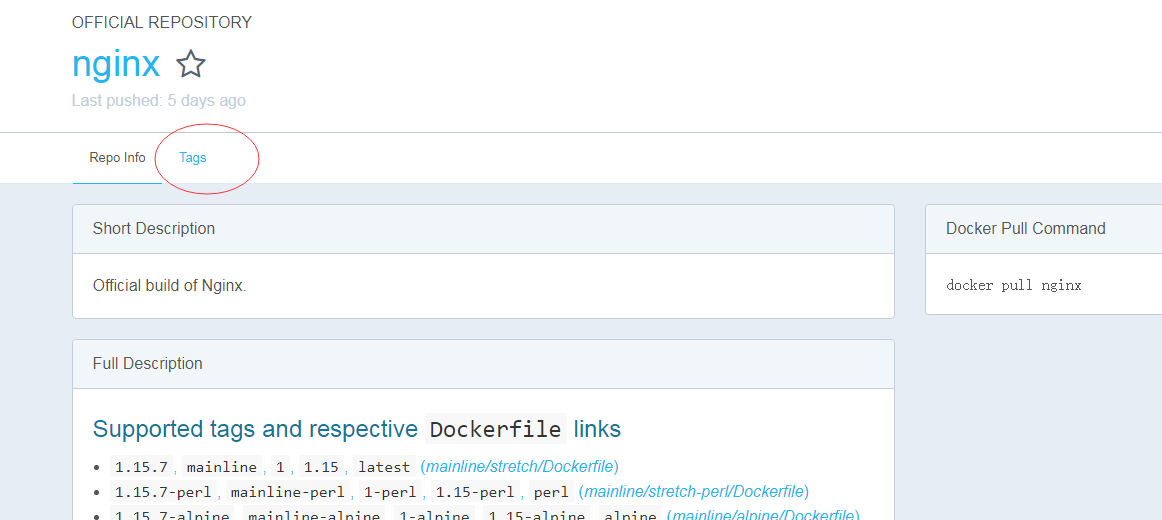
hub.docker.com 搜尋映象拉取,此處以nginx1.14.1-alpine版本為例


#拉取
[[email protected] ~]# docker pull nginx:1.14.1-alpine
1.14.1-alpine: Pulling from library/nginx
4fe2ade4980c: Pull complete
c691664ebb08: Pull complete
a6f6a50701b6: Pull complete
5980ba3b5a39: Pull complete
Digest: sha256:3c1380fd5f6f0e4c468a922ed6331831e60cea9db317b8ac4a8ad36335e53bbd
Status: Downloaded newer image for nginx:1.14.1-alpine
#檢視映象 使用docker images 或者  docker image ls
[[email protected] ~]# docker image ls
REPOSITORY          TAG                 IMAGE ID            CREATED             SIZE
nginx               1.14.1-alpine       77bae8d00654        3 weeks ago         17.7MB
#顯示完整的映象  ID預設是前12位
#[[email protected] ~]# docker image ls --no-trunc
REPOSITORY          TAG                 IMAGE ID                                                                  CREATED             SIZE
nginx               1.14.1-alpine       sha256:77bae8d0065423e2338884d3698ef5ff9de8dec05a55dc81cf48ae9e78008b3f   3 weeks ago         17.7MB
4)docker create
建立
docker container create 或者docker create
建立後直接啟動
docker run
容器的開始 停止 暫停
docker start stop pause
5)top
docker container top
列出所有容器(不顯示停止狀態的容器) docker ps -a 會顯示處於停止狀態的容器
docker ps /docker container ls
6)docker run
建立並啟動容器
#檢視docker run用法
[[email protected] ~]# docker run --help
Usage:  docker run [OPTIONS] IMAGE [COMMAND] [ARG...]
開啟一個busybox容器,如果本地沒有該映象預設會從dockerhub拉取,預設拉取最新版本,latest版本
busybox介紹
Busybox是一個開源專案,遵循GPL v2協議。Busybox將眾多的UNIX命令集合進一個很小的可執行程式中,可以用來替代GNU fileutils、shellutils等工具集。Busybox中各種命令與相應的GNU工具相比,所能提供的選項比較少,但是也足夠一般的應用了。Busybox主要用於嵌入式系統。
#建立並啟動容器
[[email protected] ~]# docker run --name b1 -it busybox:latest
Unable to find image 'busybox:latest' locally
latest: Pulling from library/busybox
90e01955edcd: Pull complete
Digest: sha256:2a03a6059f21e150ae84b0973863609494aad70f0a80eaeb64bddd8d92465812
Status: Downloaded newer image for busybox:latest
/ #
--name指定容器名稱 -i表示讓容器的標準輸入開啟,-t表示分配一個偽終端,要把-i -t 放到映象名字前面
#執行命令及驗證
#進入檢視httpd幫助命令
/ # httpd  -h
httpd: option requires an argument -- h
BusyBox v1.29.3 (2018-10-01 22:37:18 UTC) multi-call binary.

Usage: httpd [-ifv[v]] [-c CONFFILE] [-p [IP:]PORT] [-u USER[:GRP]] [-r REALM] [-h HOME]
or httpd -d/-e/-m STRING

Listen for incoming HTTP requests

    -i      Inetd mode
    -f      Don't daemonize
    -v[v]       Verbose
    -p [IP:]PORT    Bind to IP:PORT (default *:80)
    -u USER[:GRP]   Set uid/gid after binding to port
    -r REALM    Authentication Realm for Basic Authentication
    -h HOME     Home directory (default .)
    -c FILE     Configuration file (default {/etc,HOME}/httpd.conf)
    -m STRING   MD5 crypt STRING
    -e STRING   HTML encode STRING
    -d STRING   URL decode STRING
#建立首頁檔案,測試容器
/ # mkdir /data/html -p
/ # echo "who let the dogs out!!!">/data/html/index.html
/ # httpd -f -h /data/html
#複製一個終端,使用docker inspect 容器名 檢視容器詳情,找到IP地址
[[email protected] ~]# docker inspect b1
"Networks": {
                "bridge": {
                    "IPAMConfig": null,
                    "Links": null,
                    "Aliases": null,
                    "NetworkID": "df5b7970b3a8455e8f4c8067d5558fd3d12023950455c1106ec798db6fed9d66",
                    "EndpointID": "d8fd69764f7a1cffa3b023427178c6e4fd8712c56447897e784a5606c54e9e78",
                    "Gateway": "172.17.0.1",
                    "IPAddress": "172.17.0.2",
                    "IPPrefixLen": 16,
                    "IPv6Gateway": "",
                    "GlobalIPv6Address": "",
                    "GlobalIPv6PrefixLen": 0,
                    "MacAddress": "02:42:ac:11:00:02",
                    "DriverOpts": null
                }
            }
#在此刻知道該容器網路模式為bridge(預設),IP地址為172.17.0.2,閘道器為172.17.0.1
#測試該網路的httpd服務
[[email protected] ~]# curl 172.17.0.2
who let the dogs out!!!
#測試發現容器httpd服務正常開啟
#ps檢視系統程序為1的是sh命令  如果退出 容器就會終止執行  httpd也會停止
/ # ps
PID   USER     TIME  COMMAND
    1 root      0:00 sh
   10 root      0:00 ps
#停止
/ # exit
7)ocker container start
#開啟關閉的容器
[[email protected] ~]# docker container start -i -a b1
/ #
#另開一個終端檢視
[[email protected] ~]# docker ps
CONTAINER ID        IMAGE               COMMAND             CREATED             STATUS              PORTS               NAMES
c421b489234e        busybox:latest      "sh"                10 minutes ago      Up 15 seconds                           b1
啟動容器時 docker daemon先從本地獲取 本地不存在時 從Registry中下載並保持本地 預設是dockerhub 可以指定
獲取映象
docker pull
8)docker kill /stop
可以適用docker stop 和docker kill 來停止容器 區別就是 stop = kill -15 kill = kill -9
[[email protected] ~]# docker kill b1
b1
[[email protected] ~]# docker ps
CONTAINER ID        IMAGE               COMMAND             CREATED             STATUS              PORTS               NAMES
9)docker inspect
docker inspect 容器名 檢視容器詳情
docker image inspect 映象ID檢視映象詳情
10)docker logs
檢視容器日誌
[[email protected] ~]# docker logs b1
/ # httpd -h
httpd: option requires an argument -- h
BusyBox v1.29.3 (2018-10-01 22:37:18 UTC) multi-call binary.

Usage: httpd [-ifv[v]] [-c CONFFILE] [-p [IP:]PORT] [-u USER[:GRP]] [-r REALM] [-h HOME]
or httpd -d/-e/-m STRING

Listen for incoming HTTP requests

    -i      Inetd mode
    -f      Don't daemonize
    -v[v]       Verbose
    -p [IP:]PORT    Bind to IP:PORT (default *:80)
    -u USER[:GRP]   Set uid/gid after binding to port
    -r REALM    Authentication Realm for Basic Authentication
    -h HOME     Home directory (default .)
    -c FILE     Configuration file (default {/etc,HOME}/httpd.conf)
    -m STRING   MD5 crypt STRING
    -e STRING   HTML encode STRING
    -d STRING   URL decode STRING
/ # mkdir /data/html -p
/ # echo "who lte the dogs out!!!">/data/html/index.html
/ # httpd -f -h /data/html
^C
/ # ps
PID   USER     TIME  COMMAND
    1 root      0:00 sh
   10 root      0:00 ps
/ # exit
11)docker exec
進入容器(推薦 使用 exec)
#開啟redis容器
[[email protected] ~]# docker run --name redis -d redis:4-alpine3.8
Unable to find image 'redis:4-alpine3.8' locally
4-alpine3.8: Pulling from library/redis
4fe2ade4980c: Already exists
fb758dc2e038: Pull complete
989f7b0c858b: Pull complete
d5318f13abaa: Pull complete
3521559474dd: Pull complete
add04b113886: Pull complete
Digest: sha256:2953e537b8eaa5120855285497d4f936d9f02a16480a9d76e8ba014dc3998704
Status: Downloaded newer image for redis:4-alpine3.8
141343b29efa37b4fe1f17bd6b44b8ce0125b6aab1b4f0afc3b131ceddee6566
#進入容器
[[email protected] ~]# docker exec -it redis /bin/sh
/data # ps
PID   USER     TIME  COMMAND
    1 redis     0:00 redis-server
   12 root      0:00 /bin/sh
   17 root      0:00 ps
12)docker commit
映象的生成途徑
1、docker file(後續)
2、基於容器製作
啟動容器後部署需要的修改後 commit
Usage: docker commit [OPTIONS] CONTAINER [REPOSITORY[:TAG]]
Options:
  -a, --author string    Author (e.g., "John Hannibal Smith <[email protected]>")
  -c, --change list      Apply Dockerfile instruction to the created image
  -m, --message string   Commit message   #提交資訊
  -p, --pause            Pause container during commit (default true)   #暫停 防止資料異常
busybox舉例
[[email protected] ~]# docker run --name b2 -it busybox
/ # ls
bin   dev   etc   home  proc  root  sys   tmp   usr   var
/ # mkdir /data/html -p
/ # echo "commit test">/data/html/index.html
#複製一個終端
[[email protected] ~]# docker commit -p b2
sha256:8a3222f2654582298c41e7975b59bc36a059ff6bc344783dd7ebb6f84cb3a044
#此時製作的映象無標籤
[[email protected] ~]#  docker images
REPOSITORY          TAG                 IMAGE ID            CREATED              SIZE
<none>              <none>              8a3222f26545        About a minute ago   1.15MB
nginx               1.14.1-alpine       77bae8d00654        3 weeks ago          17.7MB
redis               4-alpine3.8         05097a3a0549        2 months ago         30MB
busybox             latest              59788edf1f3e        2 months ago         1.15MB
13)docker tag
給映象 打標籤
Usage: docker tag SOURCE_IMAGE[:TAG] TARGET_IMAGE[:TAG]
Create a tag TARGET_IMAGE that refers to SOURCE_IMAGE
#建議先建立dockerhub賬戶,倉庫 我的倉庫 名字是xiaobai20201   所以這樣命名
[[email protected] ~]# docker  tag  8a3222f26545 xiaobai20201/httpd:v0.1-1
[[email protected] ~]# docker image ls
REPOSITORY           TAG                 IMAGE ID            CREATED             SIZE
xiaobai20201/httpd   v0.1-1              8a3222f26545        3 minutes ago       1.15MB
nginx                1.14.1-alpine       77bae8d00654        3 weeks ago         17.7MB
redis                4-alpine3.8         05097a3a0549        2 months ago        30MB
busybox              latest              59788edf1f3e        2 months ago        1.15MB
#一個映象可以多個標籤
[[email protected] ~]# docker  tag  xiaobai20201/httpd:v0.1-1 xiaobai20201/httpd:latest
[[email protected] ~]# docker  image ls
REPOSITORY           TAG                 IMAGE ID            CREATED             SIZE
xiaobai20201/httpd   latest              8a3222f26545        6 minutes ago       1.15MB
xiaobai20201/httpd   v0.1-1              8a3222f26545        6 minutes ago       1.15MB
nginx                1.14.1-alpine       77bae8d00654        3 weeks ago         17.7MB
redis                4-alpine3.8         05097a3a0549        2 months ago        30MB
busybox              latest              59788edf1f3e        2 months ago        1.15MB
#刪除一個標籤 如果映象還有另外的標籤  映象不會被刪除  類似硬連結
#驗證剛才操作
[[email protected] ~]# docker run --name t1 -it xiaobai20201/httpd:latest
/ # ls
bin   data  dev   etc   home  proc  root  sys   tmp   usr   var
/ # ls /data/html/index.html  -l
-rw-r--r--    1 root     root            12 Dec  3 14:52 /data/html/index.html
#修改容器啟動映象預設命令
14)docker inspect
檢視詳情
#檢視映象配置情況 ,檢視預設啟動容器的命令
[[email protected] ~]# docker inspect b2
......
"Cmd": [
                "sh"
            ],
......
#檢視redis預設啟動命令
[[email protected] ~]# docker inspect redis
"Cmd": [
                "redis-server"
            ],
[[email protected] ~]# docker commit -h
Flag shorthand -h has been deprecated, please use --help

Usage:  docker commit [OPTIONS] CONTAINER [REPOSITORY[:TAG]]

Create a new image from a container's changes

Options:
  -a, --author string    Author (e.g., "John Hannibal Smith <[email protected]>")   #類似備註
  -c, --change list      Apply Dockerfile instruction to the created image   #修改CMD命令
  -m, --message string   Commit message   #提交資訊
  -p, --pause            Pause container during commit (default true)   #暫停,防止丟失  資料
 #根據b1  -c 修改預設命令   -p 暫停  基於b1 製作 製作後的標籤
 [[email protected] ~]# docker commit -a "white <[email protected]>" -c 'CMD ["/bin/httpd","-f","-h","/data/html"]' -p b1 xiaobai20201/httpd:v0.2
sha256:74606456efe3ef351549c8aae7a39f593faa96541e4158154c02d7b8c7b65ac4
[[email protected] ~]# docker images
REPOSITORY           TAG                 IMAGE ID            CREATED             SIZE
xiaobai20201/httpd   v0.2                74606456efe3        10 seconds ago      1.15MB
xiaobai20201/httpd   latest              8a3222f26545        15 minutes ago      1.15MB
xiaobai20201/httpd   v0.1-1              8a3222f26545        15 minutes ago      1.15MB
nginx                1.14.1-alpine       77bae8d00654        3 weeks ago         17.7MB
redis                4-alpine3.8         05097a3a0549        2 months ago        30MB
busybox              latest              59788edf1f3e        2 months ago        1.15MB
#執行並測試v0.2
[[email protected] ~]# docker run --name t2  xiaobai20201/httpd:v0.2
#由於是非互動式 且預設執行為httpd -f  在前臺執行  所以無資訊
#複製終端測試
[[email protected] ~]#  docker container ls
CONTAINER ID        IMAGE                     COMMAND                  CREATED             STATUS              PORTS               NAMES
5d05f54dfae0        xiaobai20201/httpd:v0.2   "/bin/httpd -f -h /d…"   44 seconds ago      Up 42 seconds                           t2
141343b29efa        redis:4-alpine3.8         "docker-entrypoint.s…"   37 minutes ago      Up 37 minutes       6379/tcp            redis
#使用docker inspect 檢視ip資訊 然後curl
[[email protected] ~]# docker inspect t2
......
 "Gateway": "172.17.0.1",
 "IPAddress": "172.17.0.3",
[[email protected] ~]# curl 172.17.0.3
who let the dogs out!!!
15)docker push
docker預設推拉的都是從 https://hub.docker.com/
進入dockerhub登入建立容器倉庫

推送映象 確保dockerhub 的倉庫名稱一樣
REPOSITORY           TAG                 IMAGE ID            CREATED             SIZE
xiaobai20201/httpd   v0.2                74606456efe3        7 minutes ago       1.15MB
xiaobai20201/httpd   latest              8a3222f26545        23 minutes ago      1.15MB
xiaobai20201/httpd   v0.1-1              8a3222f26545        23 minutes ago      1.15MB
nginx                1.14.1-alpine       77bae8d00654        3 weeks ago         17.7MB
redis                4-alpine3.8         05097a3a0549        2 months ago        30MB
busybox              latest              59788edf1f3e        2 months ago        1.15MB
先登入hub倉庫 否則沒有許可權
[[email protected] ~]# docker login -u xiaobai20201
Password:
WARNING! Your password will be stored unencrypted in /root/.docker/config.json.
Configure a credential helper to remove this warning. See
https://docs.docker.com/engine/reference/commandline/login/#credentials-store

Login Succeeded
#推送
[[email protected] ~]# dockr push  xiaobai20201/httpd
-bash: dockr: command not found
[[email protected] ~]# docker push  xiaobai20201/httpd
The push refers to repository [docker.io/xiaobai20201/httpd]
38dff1cc6640: Pushed
8a788232037e: Mounted from library/busybox
latest: digest: sha256:91134d63e1175bc725ddf4cc2ff88eda4972b0cb5b71a2e0e44f9c2dea2aa3de size: 734
38dff1cc6640: Layer already exists
8a788232037e: Layer already exists
v0.1-1: digest: sha256:91134d63e1175bc725ddf4cc2ff88eda4972b0cb5b71a2e0e44f9c2dea2aa3de size: 734
5149fd1bda4b: Pushed
8a788232037e: Layer already exists
v0.2: digest: sha256:c4d8fe04d29917daf378a1d4012294dd3e4cc0c280bba80726ca05c7c73b73c5 size: 734
回到dockerhub重新整理 檢視
16)docker save
打包映象
[[email protected] ~]# docker save -o httpd.tar.gz  xiaobai20201/httpd:v0.2 xiaobai20201/httpd:v0.1-1
[[email protected] ~]# ls -l
total 1372
-rw-------. 1 root root    1580 Dec  2 10:08 anaconda-ks.cfg
-rw-------. 1 root root 1399296 Dec  3 23:22 httpd.tar.gz
#-o 指定名稱
#傳送到node2主機
[[email protected] ~]# scp ./httpd.tar.gz [email protected]:/tmp
[email protected]'s password:
httpd.tar.gz                                                          100% 1367KB  62.4MB/s   00:00
17)docker load
匯入映象
#node2把從node1接收到的 映象還原到本機 (node2已經安裝了docker)
[[email protected] ~]# cp /tmp/httpd.tar.gz .
[[email protected] ~]# docker load -i httpd.tar.gz   #-i 指定檔案
8a788232037e: Loading layer   1.37MB/1.37MB
5149fd1bda4b: Loading layer   5.12kB/5.12kB
Loaded image: xiaobai20201/httpd:v0.2
38dff1cc6640: Loading layer   5.12kB/5.12kB
Loaded image: xiaobai20201/httpd:v0.1-1
[[email protected] ~]# docker images
REPOSITORY           TAG                 IMAGE ID            CREATED             SIZE
xiaobai20201/httpd   v0.2                74606456efe3        18 minutes ago      1.15MB
xiaobai20201/httpd   v0.1-1              8a3222f26545        33 minutes ago      1.15MB