nginx+tomcat+memcached構建session共享叢集
阿新 • • 發佈:2018-11-30
一、安裝配置tomcat
配置前說明:
系統為centos7
m1.xsllqs.com地址為192.168.1.107
c1.xsllqs.com地址為192.168.1.114
c2.xsllqs.com地址為192.168.1.113
安裝tomcat需要配合JDK使用,JDK有oracle JDK和open JDK兩種
oracle JDK8的下載地址:http://www.oracle.com/technetwork/cn/java/javase/downloads/jdk8-downloads-2133151-zhs.html
tomcat的下載地址:http://tomcat.apache.org/
c1.xsllqs.com(192.168.1.114)下載安裝jdk(建議載入到本地在傳上去)和tomcat
[[email protected] ~]# wget http://download.oracle.com/otn-pub/java/jdk/8u73-b02/jdk-8u73-linux-x64.rpm
[[email protected] ~]# wget http://mirror.bit.edu.cn/apache/tomcat/tomcat-8/v8.0.36/bin/apache-tomcat-8.0.36.tar.gz
[[email protected] ~]# ls
apache-tomcat-8.0.36.tar.gz  jdk-8u73-linux-x64.rpm
[[email protected] ~]# yum install jdk-8u73-linux-x64.rpm
[[email protected] ~]# vim /etc/profile.d/java.sh
export JAVA_HOME=/usr/java/latest
export PATH=$JAVA_HOME/bin:$PATH

[[email protected] ~]# . /etc/profile.d/java.sh
[[email protected] ~]# java -version
java version "1.8.0_73"

[[email protected] ~]# tar xf apache-tomcat-8.0.36.tar.gz -C /usr/local
[[email protected] ~]# cd /usr/local/
[[email protected] local]# ln -sv apache-tomcat-8.0.36 tomcat
"tomcat" -> "apache-tomcat-8.0.36"

[[email protected] tomcat]# vim /etc/profile.d/tomcat.sh
export CATALINA_HOME=/usr/local/tomcat
export PATH=$CATALINA_HOME/bin:$PATH

[[email protected] tomcat]# . /etc/profile.d/tomcat.sh
c2.xsllqs.com(192.168.1.113)下載安裝jdk和tomcat
[[email protected] ~]# wget http://download.oracle.com/otn-pub/java/jdk/8u73-b02/jdk-8u73-linux-x64.rpm [[email protected] ~]# wget http://mirror.bit.edu.cn/apache/tomcat/tomcat-8/v8.0.36/bin/apache-tomcat-8.0.36.tar.gz [[email protected] ~]# ls apache-tomcat-8.0.36.tar.gz jdk-8u73-linux-x64.rpm [[email protected] ~]# yum install jdk-8u73-linux-x64.rpm [[email protected] ~]# vim /etc/profile.d/java.sh export JAVA_HOME=/usr/java/latest export PATH=$JAVA_HOME/bin:$PATH [[email protected] ~]# . /etc/profile.d/java.sh [[email protected] ~]# java -version java version "1.8.0_73" [[email protected] ~]# tar xf apache-tomcat-8.0.36.tar.gz -C /usr/local [[email protected] ~]# cd /usr/local/ [[email protected] local]# ln -sv apache-tomcat-8.0.36 tomcat "tomcat" -> "apache-tomcat-8.0.36" [[email protected] tomcat]# vim /etc/profile.d/tomcat.sh export CATALINA_HOME=/usr/local/tomcat export PATH=$CATALINA_HOME/bin:$PATH [[email protected] tomcat]# . /etc/profile.d/tomcat.sh
二、修改tomcat配置檔案
[[email protected] tomcat]# cd /usr/local/tomcat/webapps/
[[email protected] webapps]# mkdir myapp/{lib,classes,WEB-INF,META-INF} -pv
[[email protected] webapps]# cd myapp/
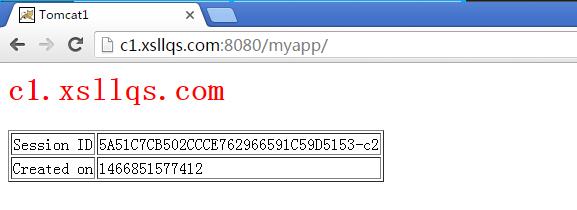
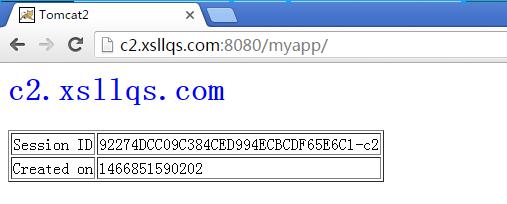
新增c1和c2的主頁檔案
[[email protected] myapp]# vim indix.jsp
<%@ page language="java" %>
<html>
  <head><title>Tomcat1</title></head>
  <body>
    <h1><font color="red">c1.xsllqs.com</font></h1>
    <table align="centre" border="1">
      <tr>
        <td>Session ID</td>
    <% session.setAttribute("xsllqs.com","xsllqs.com"); %>
        <td><%= session.getId() %></td>
      </tr>
      <tr>
        <td>Created on</td>
        <td><%= session.getCreationTime() %></td>
     </tr>
    </table>
  </body></html>[[email protected] myapp]# vim indix.jsp<%@ page language="java" %><html>
  <head><title>Tomcat2</title></head>
  <body>
    <h1><font color="blue">c2.xsllqs.com</font></h1>
    <table align="centre" border="1">
      <tr>
        <td>Session ID</td>
    <% session.setAttribute("xsllqs.com","xsllqs.com"); %>
        <td><%= session.getId() %></td>
      </tr>
      <tr>
        <td>Created on</td>
        <td><%= session.getCreationTime() %></td>
     </tr>
    </table>
  </body> </html>
修改tomcat-user.xml(c1和c2都要改)
[[email protected] conf]# vim /usr/local/tomcat/conf/tomcat-users.xml
#在</tomcat-users>中新增
  <role rolename="manager-gui"/>
  <role rolename="admin-gui"/>
  <user username="tomcat" password="<tomcat>" roles="manager-gui,admin-gui"/>
修改server.xml(c1和c2都要改)
[[email protected] conf]# vim /usr/local/tomcat/conf/server.xml #修改主配置檔案,appBase後面是應用的相對路徑也可以是絕對路徑 <Host name="localhost" appBase="webapps" unpackWARs="true" autoDeploy="true"> #這裡是訪問日誌的設定 <Valve className="org.apache.catalina.valves.AccessLogValve" directory="logs" prefix="localhost_access_log" suffix=".txt" pattern="%h %l %u %t "%r" %s %b" /> #這裡設定Context呼叫msm需要的元件,m1為主c2為備,因為我這裡只有3臺機器所以把c2作為備,正常情況是4臺,2臺memcached和2臺tomcat <Context path="/myapp" docBase="/usr/local/tomcat/webapps/myapp" reloadable="true"> <Manager className="de.javakaffee.web.msm.MemcachedBackupSessionManager" memcachedNodes="m1:192.168.1.107:11211,c2:192.168.1.113:11211" failoverNodes="m1" requestUriIgnorePattern=".*\.(ico|png|gif|jpg|css|js)$" transcoderFactoryClass="de.javakaffee.web.msm.serializer.javolution.JavolutionTranscoderFactory" /> </Context>
測試配置檔案
[[email protected] ~]# catalina.sh configtest
[[email protected] ~]# catalina.sh configtest
[[email protected] ~]# catalina.sh start
[[email protected] ~]# catalina.sh start
三、安裝msm
c1和c2上下載msm需要的jar包
[[email protected] ~]# wget http://repo1.maven.org/maven2/de/javakaffee/msm/memcached-session-manager/1.9.4/memcached-session-manager-1.9.4.jar
[[email protected] ~]# wget http://repo1.maven.org/maven2/de/javakaffee/msm/memcached-session-manager-tc8/1.9.4/memcached-session-manager-tc8-1.9.4.jar
[[email protected] ~]# wget http://repo1.maven.org/maven2/de/javakaffee/msm/msm-javolution-serializer/1.9.4/msm-javolution-serializer-1.9.4.jar
[[email protected] ~]# wget http://repo1.maven.org/maven2/net/spy/spymemcached/2.11.1/spymemcached-2.11.1.jar
[[email protected] ~]# wget http://www.java2s.com/Code/JarDownload/javolution/javolution-5.4.3.1.jar.zip

[[email protected] ~]# mv javolution-5.4.3.1.jar memcached-session-manager-1.9.4.jar memcached-session-manager-tc8-1.9.4.jar msm-javolution-serializer-1.9.4.jar spymemcached-2.11.1.jar /usr/local/tomcat/lib/
m1和c2上安裝memcached
[[email protected] ~]# yum install memcached
[[email protected] ~]# yum install memcached
m1上安裝nginx修改nginx的配置檔案
[[email protected] ~]# yum install nginx
[[email protected] ~]# vim /etc/nginx/nginx.conf
#server外加入
upstream tcsrvs {
    server 192.168.1.114:8080;
    server 192.168.1.113:8080;
}
#server內加入
    location ~* \.(jsp|do)$ {
        proxy_pass http://tcsrvs;
    }
[[email protected] ~]# nginx -t
啟動服務
[[email protected] ~]# systemctl start nginx.service
[[email protected] ~]# systemctl start memcached
[[email protected] ~]# systemctl start memcached
四、測試