
201771010112羅鬆《面向物件程式設計(java)》第十三週學習總結
一、實驗目的與要求
(1) 掌握事件處理的基本原理,理解其用途;
(2) 掌握AWT事件模型的工作機制;
(3) 掌握事件處理的基本程式設計模型;
(4) 瞭解GUI介面元件觀感設定方法;
(5) 掌握WindowAdapter類、AbstractAction類的用法;
(6) 掌握GUI程式中滑鼠事件處理技術。
二、實驗內容和步驟
實驗1: 匯入第11章示例程式,測試程式並進行程式碼註釋。
測試程式1:
l 在elipse IDE中除錯執行教材443頁-444頁程式11-1,結合程式執行結果理解程式;
l 在事件處理相關程式碼處添加註釋;
l 用lambda表示式簡化程式;
l 掌握JButton元件的基本API;
l 掌握Java中事件處理的基本程式設計模型。
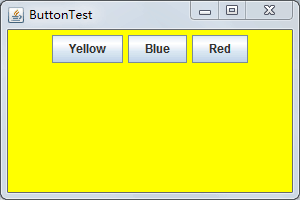
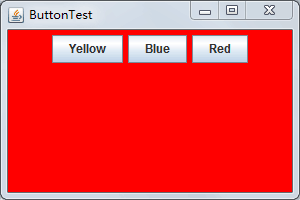
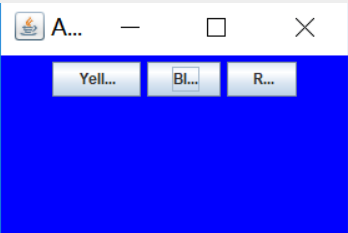
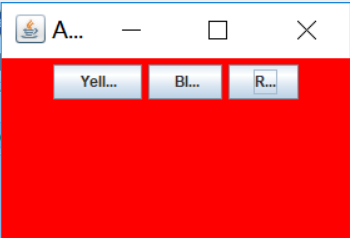
package button; import java.awt.*; import javax.swing.*; /** * @version 1.34 2015-06-12 * @author Cay Horstmann */ public class ButtonTest { public static void main(String[] args) { EventQueue.invokeLater(()-> { JFrame frame = new ButtonFrame(); frame.setTitle("ButtonTest");// 將窗體的標題設定為指定的字串。 frame.setDefaultCloseOperation(JFrame.EXIT_ON_CLOSE);// 設定使用者在窗體上發起 "close" 時預設執行的操作。 frame.setVisible(true);// 設定視窗可見 }); } }
package button; import java.awt.*; import java.awt.event.*; import javax.swing.*; /** * A frame with a button panel */ public class ButtonFrame extends JFrame { private JPanel buttonPanel; private static final int DEFAULT_WIDTH = 300; private static final int DEFAULT_HEIGHT = 200; public ButtonFrame() { setSize(DEFAULT_WIDTH, DEFAULT_HEIGHT);// 調整元件的大小. // 建立按鈕 JButton yellowButton = new JButton("Yellow"); JButton blueButton = new JButton("Blue"); JButton redButton = new JButton("Red"); buttonPanel = new JPanel(); // 將按鈕新增到面板中 buttonPanel.add(yellowButton); buttonPanel.add(blueButton); buttonPanel.add(redButton); add(buttonPanel); // 為每種顏色建立一個物件 ColorAction yellowAction = new ColorAction(Color.YELLOW); ColorAction blueAction = new ColorAction(Color.BLUE); ColorAction redAction = new ColorAction(Color.RED); // 將這些物件設定為按鈕監聽器 yellowButton.addActionListener(yellowAction); blueButton.addActionListener(blueAction); redButton.addActionListener(redAction); } /** * An action listener that sets the panel's background color. */ private class ColorAction implements ActionListener { private Color backgroundColor; public ColorAction(Color c) { backgroundColor = c; } public void actionPerformed(ActionEvent event) { buttonPanel.setBackground(backgroundColor); } } }

匿名類簡化:
package button;

import java.awt.*;
import java.awt.event.*;
import javax.swing.*;

/**
 * A frame with a button panel
 */
public class ButtonFrame extends JFrame {
    private JPanel buttonPanel;
    private static final int DEFAULT_WIDTH = 300;
    private static final int DEFAULT_HEIGHT = 200;

    public ButtonFrame() {
        setSize(DEFAULT_WIDTH, DEFAULT_HEIGHT);

        buttonPanel = new JPanel();
        add(buttonPanel);

        makeButton("Yellow", Color.yellow);
        makeButton("blue", Color.blue);
        makeButton("red", Color.red);
    }

    public void makeButton(String name, Color backgroundColor) {
        JButton button = new JButton(name);
        buttonPanel.add(button);
        button.addActionListener(new ActionListener() {
            public void actionPerformed(ActionEvent event) {
                buttonPanel.setBackground(backgroundColor);
            }
        });
    }
}
lambda表示式簡化:
package button;

import java.awt.*;
import java.awt.event.*;
import javax.swing.*;

/**
 * A frame with a button panel
 */
public class ButtonFrame extends JFrame {
    private JPanel buttonPanel;
    private static final int DEFAULT_WIDTH = 300;
    private static final int DEFAULT_HEIGHT = 200;

    public ButtonFrame() {
        setSize(DEFAULT_WIDTH, DEFAULT_HEIGHT);

        buttonPanel = new JPanel();

        add(buttonPanel);

        makeButton("黃色", Color.yellow);
        makeButton("藍色", Color.blue);
        makeButton("紅色", Color.red);
    }

    public void makeButton(String name, Color backgroundColor) {
        JButton button = new JButton(name);
        buttonPanel.add(button);
        button.addActionListener((e) -> {
            buttonPanel.setBackground(backgroundColor);
        });

    }

}
測試程式2:
l 在elipse IDE中除錯執行教材449頁程式11-2,結合程式執行結果理解程式;
l 在元件觀感設定程式碼處添加註釋;
l 瞭解GUI程式中觀感的設定方法。
程式碼:
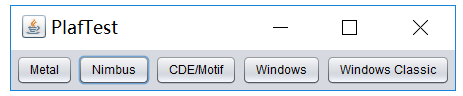
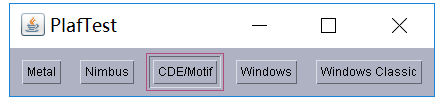
package Second;

import java.awt.*;
import javax.swing.*;

/**
 * @version 1.32 2015-06-12
 * @author Cay Horstmann
 */
public class PlafTest
{
   public static void main(String[] args)
   {
      EventQueue.invokeLater(() -> {
         JFrame frame = new PlafFrame();
         frame.setTitle("PlafTest");
         frame.setDefaultCloseOperation(JFrame.EXIT_ON_CLOSE);
         frame.setVisible(true);
      });
   }
}
package Second;

import javax.swing.JButton;
import javax.swing.JFrame;
import javax.swing.JPanel;
import javax.swing.SwingUtilities;
import javax.swing.UIManager;

/**
 * A frame with a button panel for changing look-and-feel
 */
public class PlafFrame extends JFrame
{
   private JPanel buttonPanel;

   public PlafFrame()
   {
      buttonPanel = new JPanel();
      //獲取所有安裝的觀感實現

      UIManager.LookAndFeelInfo[] infos = UIManager.getInstalledLookAndFeels();
      for (UIManager.LookAndFeelInfo info : infos)
         makeButton(info.getName(), info.getClassName());

      add(buttonPanel);
      pack();
   }

   /**
    * Makes a button to change the pluggable look-and-feel.
    * @param name the button name
    * @param className the name of the look-and-feel class
    */
   private void makeButton(String name, String className)
   {
      // 向面板新增按鈕;

      JButton button = new JButton(name);
      buttonPanel.add(button);

      // 設定按鈕動作;

      button.addActionListener(event -> {
         // 按鈕動作:切換到新的外觀和感覺
         try
         {
            UIManager.setLookAndFeel(className);
            //呼叫靜態方法,重新整理全部的元件集。這裡需要向方法提供一個元件,並由此找到其他的所有元件
            //外部物件的this引用必須將外部類名作為字首

            SwingUtilities.updateComponentTreeUI(this);
            pack();
         }
         catch (Exception e)
         {
            e.printStackTrace();
         }
      });
   }
}


測試程式3:
l 在elipse IDE中除錯執行教材457頁-458頁程式11-3,結合程式執行結果理解程式;
l 掌握AbstractAction類及其動作物件;
掌握GUI程式中按鈕、鍵盤動作對映到動作物件的方法。
程式碼:
package three;

import java.awt.*;
import javax.swing.*;

/**
 * @version 1.34 2015-06-12
 * @author Cay Horstmann
 */
public class ActionTest
{
   public static void main(String[] args)
   {
      EventQueue.invokeLater(() -> {
         JFrame frame = new ActionFrame();
         frame.setTitle("ActionTest");
         frame.setDefaultCloseOperation(JFrame.EXIT_ON_CLOSE);
         frame.setVisible(true);
      });
   }
}
package three;

import java.awt.*;
import java.awt.event.*;
import javax.swing.*;

/**
 * A frame with a panel that demonstrates color change actions.
 */
public class ActionFrame extends JFrame
{
   private JPanel buttonPanel;
   private static final int DEFAULT_WIDTH = 300;
   private static final int DEFAULT_HEIGHT = 200;

   public ActionFrame()
   {
      setSize(DEFAULT_WIDTH, DEFAULT_HEIGHT);

      buttonPanel = new JPanel();

      // define actions
      Action yellowAction = new ColorAction("Yellow", new ImageIcon("yellow-ball.gif"),
            Color.YELLOW);
      Action blueAction = new ColorAction("Blue", new ImageIcon("blue-ball.gif"), Color.BLUE);
      Action redAction = new ColorAction("Red", new ImageIcon("red-ball.gif"), Color.RED);

    //用Action物件構造按鈕,把動作和按鈕關聯起來

      buttonPanel.add(new JButton(yellowAction));
      buttonPanel.add(new JButton(blueAction));
      buttonPanel.add(new JButton(redAction));

      // add panel to frame
      add(buttonPanel);

    //得到頂層元件的WHEN_ANCESTOR_OF_FOCUSED_COMPONENT輸入對映

      // associate the Y, B, and R keys with names
      InputMap imap = buttonPanel.getInputMap(JComponent.WHEN_ANCESTOR_OF_FOCUSED_COMPONENT);
     //將(按鍵,動作鍵)新增到輸入對映中
      imap.put(KeyStroke.getKeyStroke("ctrl Y"), "panel.yellow");
      imap.put(KeyStroke.getKeyStroke("ctrl B"), "panel.blue");
      imap.put(KeyStroke.getKeyStroke("ctrl R"), "panel.red");

      // associate the names with actions、
      //得到頂層元件的動作對映
      ActionMap amap = buttonPanel.getActionMap();
    //將(動作鍵,動作物件)新增到對映中

      amap.put("panel.yellow", yellowAction);
      amap.put("panel.blue", blueAction);
      amap.put("panel.red", redAction);
   }

   public class ColorAction extends AbstractAction
   {
      /**
       * Constructs a color action.
       * @param name the name to show on the button
       * @param icon the icon to display on the button
       * @param c the background color
       */
      public ColorAction(String name, Icon icon, Color c)
      {
        //儲存命令的名稱、圖示、簡要說明和需要的顏色
         putValue(Action.NAME, name);
         putValue(Action.SMALL_ICON, icon);
         putValue(Action.SHORT_DESCRIPTION, "Set panel color to " + name.toLowerCase());//顯示在工具提示裡

         putValue("color", c);
      }

      public void actionPerformed(ActionEvent event)
      {
         Color c = (Color) getValue("color");
         buttonPanel.setBackground(c);
      }
   }
}

測試程式4:
l 在elipse IDE中除錯執行教材462頁程式11-4、11-5,結合程式執行結果理解程式;
l 掌握GUI程式中滑鼠事件處理技術。
package mouse;

import java.awt.*;
import javax.swing.*;

/**
 * @version 1.34 2015-06-12
 * @author Cay Horstmann
 */
public class MouseTest
{
   public static void main(String[] args)
   {
      EventQueue.invokeLater(() -> {
         JFrame frame = new MouseFrame();
         frame.setTitle("MouseTest");
         frame.setDefaultCloseOperation(JFrame.EXIT_ON_CLOSE);
         frame.setVisible(true);
      });
   }
}

MouseTest
package mouse;

import javax.swing.*;

/**
 * A frame containing a panel for testing mouse operations
 */
public class MouseFrame extends JFrame
{
   public MouseFrame()
   {
      add(new MouseComponent());
      pack();
   }
}

MouseFrame
package mouse;

import java.awt.*;
import java.awt.event.*;
import java.awt.geom.*;
import java.util.*;
import javax.swing.*;

/**
 * A component with mouse operations for adding and removing squares.
 */
public class MouseComponent extends JComponent
{
   private static final int DEFAULT_WIDTH = 300;
   private static final int DEFAULT_HEIGHT = 200;

   private static final int SIDELENGTH = 10;
   private ArrayList<Rectangle2D> squares;
   private Rectangle2D current; // the square containing the mouse cursor

   public MouseComponent()
   {
      squares = new ArrayList<>();
      current = null;

      addMouseListener(new MouseHandler());
      addMouseMotionListener(new MouseMotionHandler());
   }

   public Dimension getPreferredSize() { return new Dimension(DEFAULT_WIDTH, DEFAULT_HEIGHT); }

   public void paintComponent(Graphics g)
   {
      Graphics2D g2 = (Graphics2D) g;

      // draw all squares
      for (Rectangle2D r : squares)
         g2.draw(r);
   }

   /**
    * Finds the first square containing a point.
    * @param p a point
    * @return the first square that contains p
    */
   public Rectangle2D find(Point2D p)
   {
      for (Rectangle2D r : squares)
      {
         if (r.contains(p)) return r;
      }
      return null;
   }

   /**
    * Adds a square to the collection.
    * @param p the center of the square
    */
   public void add(Point2D p)
   {
      double x = p.getX();
      double y = p.getY();

      current = new Rectangle2D.Double(x - SIDELENGTH / 2, y - SIDELENGTH / 2, SIDELENGTH,
            SIDELENGTH);
      squares.add(current);
      repaint();
   }

   /**
    * Removes a square from the collection.
    * @param s the square to remove
    */
   public void remove(Rectangle2D s)
   {
      if (s == null) return;
      if (s == current) current = null;
      squares.remove(s);
      repaint();
   }

   private class MouseHandler extends MouseAdapter
   {
      public void mousePressed(MouseEvent event)
      {
         // add a new square if the cursor isn't inside a square
         current = find(event.getPoint());
         if (current == null) add(event.getPoint());
      }

      public void mouseClicked(MouseEvent event)
      {
         // remove the current square if double clicked
         current = find(event.getPoint());
         if (current != null && event.getClickCount() >= 2) remove(current);
      }
   }

   private class MouseMotionHandler implements MouseMotionListener
   {
      public void mouseMoved(MouseEvent event)
      {
         // set the mouse cursor to cross hairs if it is inside
         // a rectangle

         if (find(event.getPoint()) == null) setCursor(Cursor.getDefaultCursor());
         else setCursor(Cursor.getPredefinedCursor(Cursor.CROSSHAIR_CURSOR));
      }

      public void mouseDragged(MouseEvent event)
      {
         if (current != null)
         {
            int x = event.getX();
            int y = event.getY();

            // drag the current rectangle to center it at (x, y)
            current.setFrame(x - SIDELENGTH / 2, y - SIDELENGTH / 2, SIDELENGTH, SIDELENGTH);
            repaint();
         }
      }
   }
}

MouseComponent

實驗2:結對程式設計練習
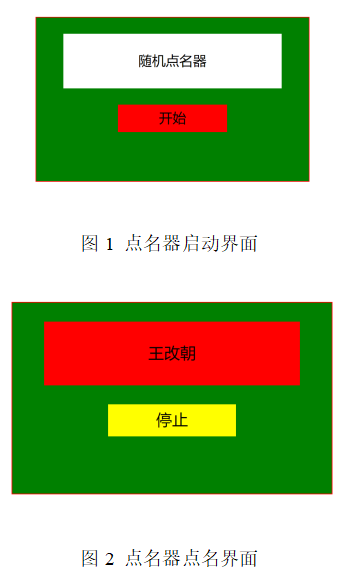
利用班級名單檔案、文字框和按鈕元件,設計一個有如下介面(圖1)的點名器,要求使用者點選開始按鈕後在文字輸入框隨機顯示2017級網路與資訊安全班同學姓名,如圖2所示,點選停止按鈕後,文字輸入框不再變換同學姓名,此同學則是被點到的同學姓名。
圖1 點名器啟動介面
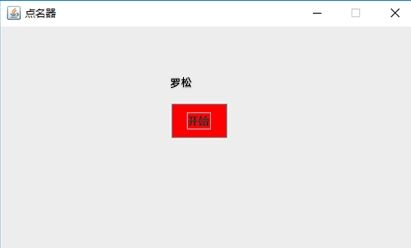
package 點名器;

import java.awt.EventQueue;
import javax.swing.JFrame;

public class test {
    public static void main(String[] args) {
        EventQueue.invokeLater(() -> {
            ButtonFrame frame = new ButtonFrame();
            frame.setTitle("點名器");
            frame.setDefaultCloseOperation(JFrame.EXIT_ON_CLOSE);
            frame.setVisible(true);
            frame.setResizable(false);
        });
    }
}
package 點名器;

import java.awt.Color;
import java.awt.event.*;
import java.io.*;
import java.util.*;
import java.util.Timer;

import javax.swing.*;

public class ButtonFrame extends JFrame {
    JButton pausecontBtn;
    private ArrayList arrayList;

    {
        arrayList = new ArrayList<>();
        File file = new File("studentnamelist.txt");
        FileInputStream fis;
        try {
            fis = new FileInputStream(file);
            InputStreamReader in = new InputStreamReader(fis);
            BufferedReader bf = new BufferedReader(in);
            String readLine;
            while ((readLine = bf.readLine()) != null) {
                arrayList.add(readLine);
            }
        } catch (FileNotFoundException e1) {
            // TODO Auto-generated catch block
            e1.printStackTrace();
        } catch (IOException e1) {
            // TODO Auto-generated catch block
            e1.printStackTrace();
        }
    }
    private JPanel buttonPanel;
    private static final int DEFAULT_WIDTH = 500;
    private static final int DEFAULT_HEIGHT = 300;
    protected static final String ture = null;

    public ButtonFrame() {
        setSize(DEFAULT_WIDTH, DEFAULT_HEIGHT);
        buttonPanel = new JPanel();
        buttonPanel.setLayout(null);
        JLabel jLabel = new JLabel("隨機點名器");
        JButton jButton = new JButton("開始");
        jLabel.setBounds(200, 40, 65, 40);
        jButton.setBounds(200, 90, 65, 40);
        jButton.addActionListener(new ActionListener() {
            Timer timer;

            public void actionPerformed(ActionEvent e) {
                if (jButton.getText().equals("開始")) {
                    timer = new Timer();
                    TimerTask timerTask = new TimerTask() {
                        public void run() {
                            jButton.setText("停止");
                            jButton.setBackground(Color.yellow);
                            jLabel.setText((String) arrayList.get((int) (Math.random() * 42)));
                        }
                    };
                    timer.schedule(timerTask, 0, 5);
                }
                if (jButton.getText().equals("停止")) {
                    timer.cancel();
                    jButton.setText("開始");
                    jButton.setBackground(Color.red);
                }
            }
        });
        buttonPanel.add(jLabel);
        buttonPanel.add(jButton);
        add(buttonPanel);
    }
}
三、實驗總結:
通過這次實驗我瞭解了事件處理的基本原理,知道了它的用途,瞭解了AWT事件模型的工作機制,事件處理的基本程式設計模型,還了解了GUI介面元件觀感設定方法,掌握了WindowAdapter類、AbstractAction類的用法以及GUI程式中滑鼠事件處理技術。並且在這次實驗中通過結對程式設計知道了如何去互相學習,收穫很大。