
ZYBOZ7從入門到進階-4 zyboz7PS端通過MIO點亮LED
版權宣告:本文為博主原創文章,未經博主允許不得轉載。https://blog.csdn.net/a646123070
上一節,我們學會了使用zyboz7 7020裸機實現hello world。下面,我們將進一步研究ps端的應用---ps端通過MIO點亮LED燈。
由於我們點亮的是ps端的MIO7口的ld4,沒用用到pl端的外設。所以,在vivado中設計的硬體部分和上一篇文章的一樣,這裡我們不在進行建立,直接複製上一篇的工程,然後修改軟體部分。
複製的工程包含如下檔案,為了避免後續不必要的麻煩,我們先把hello_1.sdk資料夾刪除,然後我們也可以把剩餘各個資料夾的名字改為ps_led.xx。

之後,我們開啟工程。(雙擊hello_1.xpr或者改名字之後的ps_led.xpr)
因為上一步我們把sdk檔案刪除了,所以,我們需要重新生成。(在vivado軟體中點選file-->export-->export hardware,之後點選file-->launch SDK)
在開啟的SDK軟體中,新建應用程式。(file-->new-->application project)在彈出的頁面填寫好工程名稱和BSP名稱之後點選NEXT,進入下一步,之後選擇新建空工程,點選finish結束。


完成上述工作之後,在project explorer下會有三個資料夾顯示出來。(沒有的可以在file-->open projects from file system中開啟)

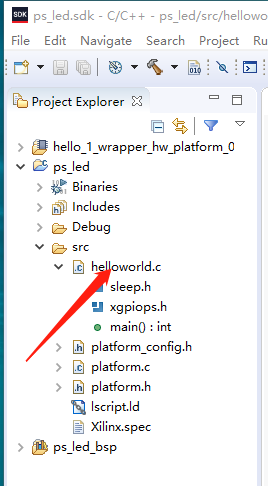
之後,雙擊開啟 ps-led-->src-->helloworld.c(上面填寫的名稱的時候,你填寫的可能不是這個名字),把以下程式碼複製貼上到裡邊,然後儲存。
/******************************************************************************
*
* Copyright (C) 2009 - 2014 Xilinx, Inc.  All rights reserved.
*
* Permission is hereby granted, free of charge, to any person obtaining a copy
* of this software and associated documentation files (the "Software"), to deal
* in the Software without restriction, including without limitation the rights
* to use, copy, modify, merge, publish, distribute, sublicense, and/or sell
* copies of the Software, and to permit persons to whom the Software is
* furnished to do so, subject to the following conditions:
*
* The above copyright notice and this permission notice shall be included in
* all copies or substantial portions of the Software.
*
* Use of the Software is limited solely to applications:
* (a) running on a Xilinx device, or
* (b) that interact with a Xilinx device through a bus or interconnect.
*
* THE SOFTWARE IS PROVIDED "AS IS", WITHOUT WARRANTY OF ANY KIND, EXPRESS OR
* IMPLIED, INCLUDING BUT NOT LIMITED TO THE WARRANTIES OF MERCHANTABILITY,
* FITNESS FOR A PARTICULAR PURPOSE AND NONINFRINGEMENT. IN NO EVENT SHALL
* XILINX  BE LIABLE FOR ANY CLAIM, DAMAGES OR OTHER LIABILITY,
* WHETHER IN AN ACTION OF CONTRACT, TORT OR OTHERWISE, ARISING FROM, OUT OF
* OR IN CONNECTION WITH THE SOFTWARE OR THE USE OR OTHER DEALINGS IN THE
* SOFTWARE.
*
* Except as contained in this notice, the name of the Xilinx shall not be used
* in advertising or otherwise to promote the sale, use or other dealings in
* this Software without prior written authorization from Xilinx.
*
******************************************************************************/

/*
 * helloworld.c: simple test application
 *
 * This application configures UART 16550 to baud rate 9600.
 * PS7 UART (Zynq) is not initialized by this application, since
 * bootrom/bsp configures it to baud rate 115200
 *
 * ------------------------------------------------
 * | UART TYPE   BAUD RATE                        |
 * ------------------------------------------------
 *   uartns550   9600
 *   uartlite    Configurable only in HW design
 *   ps7_uart    115200 (configured by bootrom/bsp)
 */

/*#include <stdio.h>
#include "platform.h"
#include "xil_printf.h"


int main()
{
    init_platform();

    print("Hello World\n\r");

    cleanup_platform();
    return 0;
}*/
#include "xgpiops.h"
#include "sleep.h"
int main()
{
static XGpioPs psGpioInstancePtr;
XGpioPs_Config* GpioConfigPtr;
int iPinNumber= 7; //DS23 連線的是 MIO10
u32 uPinDirection = 0x1; //1 表示輸出, 0 表示輸入
int xStatus;
//--MIO 的初始化
GpioConfigPtr = XGpioPs_LookupConfig(XPAR_PS7_GPIO_0_DEVICE_ID);
//XPAR_PS7_GPIO_0_DEVICE_ID在XParameter.c檔案中,表示了GPIO的id,以此來得到該裝置
if(GpioConfigPtr == NULL)
return XST_FAILURE;
xStatus = XGpioPs_CfgInitialize(&psGpioInstancePtr,GpioConfigPtr,
GpioConfigPtr->BaseAddr);
if(XST_SUCCESS != xStatus)
print(" PS GPIO INIT FAILED \n\r");
//--MIO 的輸入輸出操作
XGpioPs_SetDirectionPin(&psGpioInstancePtr, iPinNumber,uPinDirection);// 配 置MIO 輸出方向
XGpioPs_SetOutputEnablePin(&psGpioInstancePtr, iPinNumber,1);//配置 MIO 的第 7位輸出
while(1)
{
XGpioPs_WritePin(&psGpioInstancePtr, iPinNumber, 1);
//點亮 MIO 的第 7 位輸出1
sleep(1);//延時
XGpioPs_WritePin(&psGpioInstancePtr, iPinNumber, 0);
//熄滅 MIO 的第 7 位輸出0
sleep(1);//延時
}
return 0;
}
之後,我們把開發板連線到主機,供電隨意選擇,啟動選擇JTAG啟動(jp5的跳帽選擇JTAG)。
接著點選SDK軟體中的RUN-->run configurations

在彈出的頁面中雙擊 xilinx c/c++ application (system debugger),然後點選run,

如果彈出以下頁面,點選yes即可。

稍等片刻你就會看到開發板的ld4一亮一滅(迴圈)。
至此,PS端通過MIO點燈就結束了,文中步驟描述不詳細的請參考我之前寫過的ZYBO從入門到進階1 2 3,待大家清楚操作流程之後,後續文章配圖會有所減少。
文中使用到的資源、工程我已打包上傳到csdn資源中心。
作者學生一枚,文中難免有錯誤,指教、改錯請→[email protected]