
SpringBoot+mybatis實現增刪改查
阿新 • • 發佈:2018-11-19
SpringBoot+mybatis實現增刪改查
1.建立一個專案。
2.用mybatis逆向工程建立,還不會逆向工程的看我上一篇文章
Mybatis逆向工程建立方法
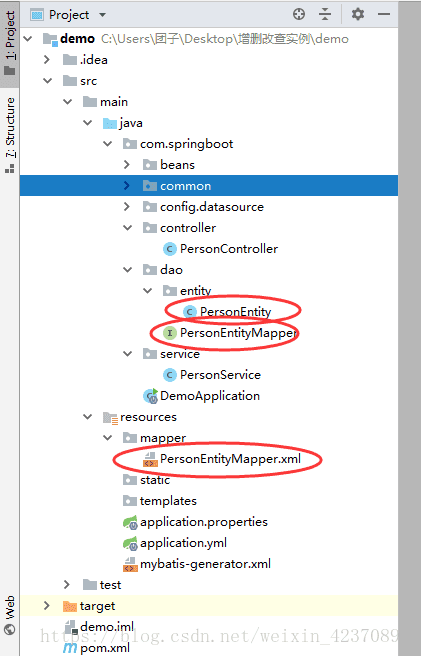
3.建立好會有如下圖的三個檔案
4.新建一個controller資料夾在裡面新建一個PersonController類。
5.編寫如下程式碼:
package com.springboot.controller;


import com.springboot.beans.HttpResponseEntity;
import com.springboot.common.Constans;
import com.springboot.dao.entity.PersonEntity;
import com.springboot.service.PersonService;
import org.springframework.beans.factory.annotation.Autowired;
import org.springframework.web.bind.annotation.RequestBody;
import org.springframework.web.bind.annotation.RequestMapping;
import org.springframework.web.bind.annotation.RequestMethod;
import org.springframework.web.bind.annotation.RestController;

@RestController
public class PersonController {
    @Autowired//注入(自動找Service)
    /**
     * 例項化Service
     */
    private PersonService personService;
    //查詢資料操作
    @RequestMapping(value = "/selectPerson",method = RequestMethod.POST,headers = "Accept=application/json")
    public HttpResponseEntity selectPerson(@RequestBody PersonEntity personEntity){
        HttpResponseEntity httpResponseEntity = new HttpResponseEntity ();
        try {
            PersonEntity selectPerson = personService.selectPerson(personEntity);
            httpResponseEntity.setData ( selectPerson );
            httpResponseEntity.setCode(Constans.SUCCESS_CODE);//自定義成功狀態碼
            httpResponseEntity.setMessage(Constans.SELECT_SUCCESS_MESSAGE);//自定義成功狀態訊息

        } catch (Exception e) {
            httpResponseEntity.setCode(Constans.ADD_EXIST_CODE);//自定義失敗狀態碼
            httpResponseEntity.setMessage(Constans.SELECT_EXIST_MESSAGE);//自定義失敗狀態訊息
        }
        return httpResponseEntity;
    }
    //----------------同理下面程式碼----------------
    //增加資料操作
    @RequestMapping(value = "/addPerson",method = RequestMethod.POST,headers = "Accept=application/json")
    public HttpResponseEntity addPerson(@RequestBody PersonEntity personEntity){
        HttpResponseEntity httpResponseEntity = new HttpResponseEntity ();
        try{
            int addInfoPerson = personService.addPerson(personEntity);
            httpResponseEntity.setData ( addInfoPerson );
            httpResponseEntity.setCode(Constans.SUCCESS_CODE);
            httpResponseEntity.setMessage(Constans.ADD_SUCCESS_MESSAGE);

        }catch (Exception e){
            httpResponseEntity.setCode(Constans.ADD_EXIST_CODE);
            httpResponseEntity.setMessage(Constans.ADD_EXIST_MESSAGE);
        }

        return httpResponseEntity;
    }
    //刪除資料操作
    @RequestMapping(value = "/deletePerson",method = RequestMethod.POST,headers = "Accept=application/json")
    public HttpResponseEntity deletePerson(@RequestBody PersonEntity personEntity){
        HttpResponseEntity httpResponseEntity = new HttpResponseEntity ();
        try{
            int deleteInfoPerson = personService.deletePerson(personEntity);
            httpResponseEntity.setData ( deleteInfoPerson );
            httpResponseEntity.setCode(Constans.SUCCESS_CODE);
            httpResponseEntity.setMessage(Constans.DELETE_SUCCESS_MESSAGE);
        }catch (Exception e){
            httpResponseEntity.setCode(Constans.ADD_EXIST_CODE);
            httpResponseEntity.setMessage(Constans.DELETE_EXIST_MESSAGE);
        }

        return httpResponseEntity;
    }
    //修改資料操作
    @RequestMapping(value = "/updatePerson",method = RequestMethod.POST,headers = "Accept=application/json")
    public HttpResponseEntity updatePerson(@RequestBody PersonEntity personEntity){
        HttpResponseEntity httpResponseEntity = new HttpResponseEntity();
        try{
            int updateInfoPerson = personService.updatePerson(personEntity);
            httpResponseEntity.setData(updateInfoPerson);
            httpResponseEntity.setCode(Constans.SUCCESS_CODE);
            httpResponseEntity.setMessage(Constans.UPDATE_SUCCESS_MESSAGE);
        }catch (Exception e){
            httpResponseEntity.setCode(Constans.ADD_EXIST_CODE);
            httpResponseEntity.setMessage(Constans.UPDATE_EXIST_MESSAGE);
        }

        return httpResponseEntity;
    }
}
6.新建一個service資料夾,在裡面新建一個PersonService類
程式碼如下:
package com.springboot.service;

import com.springboot.dao.PersonEntityMapper;
import com.springboot.dao.entity.PersonEntity;
import org.springframework.beans.factory.annotation.Autowired;
import org.springframework.stereotype.Service;
import org.springframework.transaction.annotation.Transactional;

@Service
public class PersonService {
    @Autowired
    private PersonEntityMapper personEntityMapper;
    @Transactional
    /*
    根據ID查詢資訊
     */
    public PersonEntity selectPerson(PersonEntity personEntity){
        PersonEntity personInfoEntity = personEntityMapper.selectPerson(personEntity.getId () );
        return personInfoEntity;
    }
    /*
    新增資訊
     */
    public int addPerson(PersonEntity personEntity) {
        int personInfoEntity = personEntityMapper.addPerson(personEntity);
        return personInfoEntity;
    }
    /*
    根據ID刪除資訊
     */
    public int deletePerson(PersonEntity personEntity) {
        int personInfoEntity = personEntityMapper.deletePerson(personEntity.getId ());
        return personInfoEntity;
    }
    /*
    修改資訊
     */
    public int updatePerson(PersonEntity personEntity) {
        int personInfoEntity = personEntityMapper.updatePerson(personEntity);
        return personInfoEntity;
    }
}
7.我們在PersonEntityMapper接口裡面寫上
如下程式碼:
package com.springboot.dao;

import com.springboot.dao.entity.PersonEntity;
import org.springframework.stereotype.Repository;

@Repository
public interface PersonEntityMapper {
    /**
     * This method was generated by MyBatis Generator.
     * This method corresponds to the database table person
     *
     * @mbg.generated
     */
    int deleteByPrimaryKey(String id);

    /**
     * This method was generated by MyBatis Generator.
     * This method corresponds to the database table person
     *
     * @mbg.generated
     */
    int insert(PersonEntity record);

    /**
     * This method was generated by MyBatis Generator.
     * This method corresponds to the database table person
     *
     * @mbg.generated
     */
    int insertSelective(PersonEntity record);

    /**
     * This method was generated by MyBatis Generator.
     * This method corresponds to the database table person
     *
     * @mbg.generated
     */
    PersonEntity selectByPrimaryKey(String id);

    /**
     * This method was generated by MyBatis Generator.
     * This method corresponds to the database table person
     *
     * @mbg.generated
     */
    int updateByPrimaryKeySelective(PersonEntity record);

    /**
     * This method was generated by MyBatis Generator.
     * This method corresponds to the database table person
     *
     * @mbg.generated
     */
    int updateByPrimaryKey(PersonEntity record);
//----------------------------下面四句需要我們來自己寫--------------------------------------------------
    PersonEntity selectPerson(String id);


    int addPerson(PersonEntity personEntity);

    int deletePerson(String id);

    int updatePerson(PersonEntity personEntity);
}
8.下面我們需要在PersonEntityMapper.xml裡面進行配置
因為PersonEntityMapper.xml檔案用逆向工程可以自動建立,我們只需要修改id就行。也可以根據自己的實際情況修改SQL語句。
這裡我們以查詢為例,刪除,增加,修改都類似。
<select id="selectPerson" parameterType="java.lang.String" resultMap="BaseResultMap">
    <!--
      WARNING - @mbg.generated
      This element is automatically generated by MyBatis Generator, do not modify.
    -->
    select
    <include refid="Base_Column_List" />
    from person
    where id = #{id,jdbcType=VARCHAR}
  </select>
說明:id="selectPerson"裡面的selectPerson為PersonController類裡面
value = “/selectPerson” 這個。
這樣就算全部完成了
9.附贈自定義狀態碼類
package com.springboot.common;

public class Constans {

    /**
     * Descriptions:公用成功失敗狀態碼
     */
    public static final String SUCCESS_CODE = "666"; //成功狀態碼
    public static final String ADD_EXIST_CODE = "20001"; //失敗狀態碼
    public static final String ADD_EXIST_MESSAGE = "新增失敗"; //新增失敗
    public static final String SELECT_EXIST_MESSAGE ="查詢失敗";
    public static final String SELECT_SUCCESS_MESSAGE ="查詢成功";
    public static final String ADD_SUCCESS_MESSAGE ="新增成功";
    public static final String UPDATE_EXIST_MESSAGE ="修改失敗";
    public static final String UPDATE_SUCCESS_MESSAGE ="修改成功";
    public static final String DELETE_EXIST_MESSAGE ="刪除失敗";
    public static final String DELETE_SUCCESS_MESSAGE ="刪除成功";

}
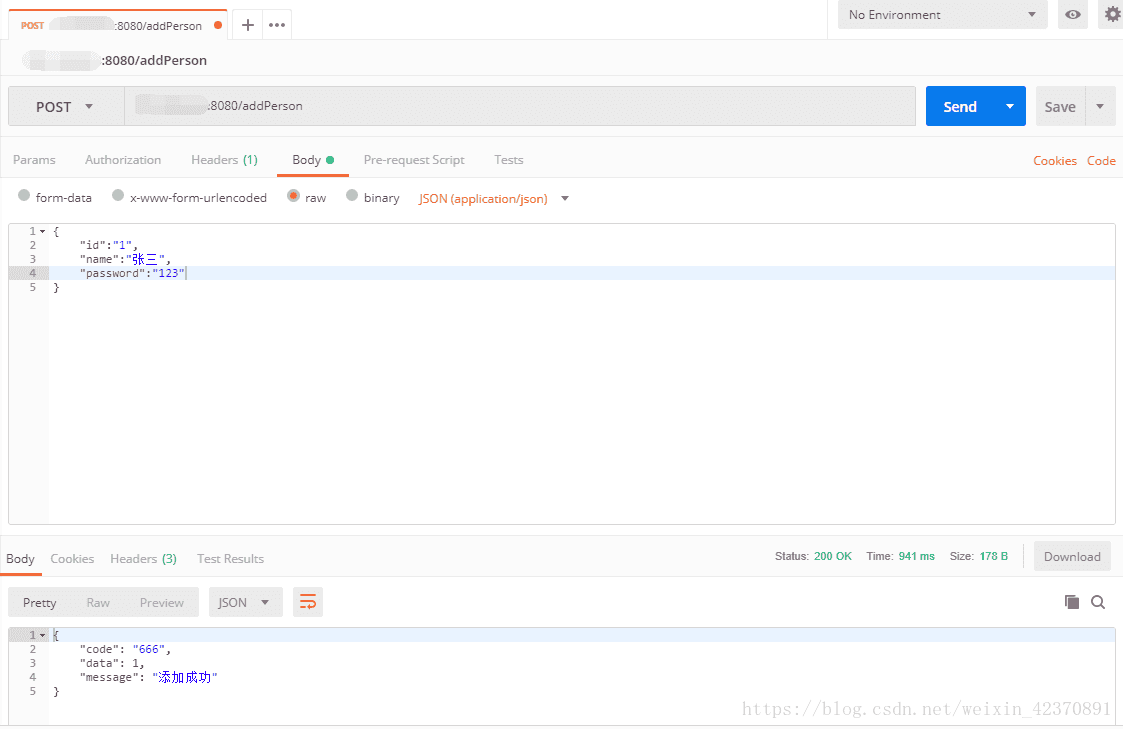
10.接下來我們用Postman進行測試
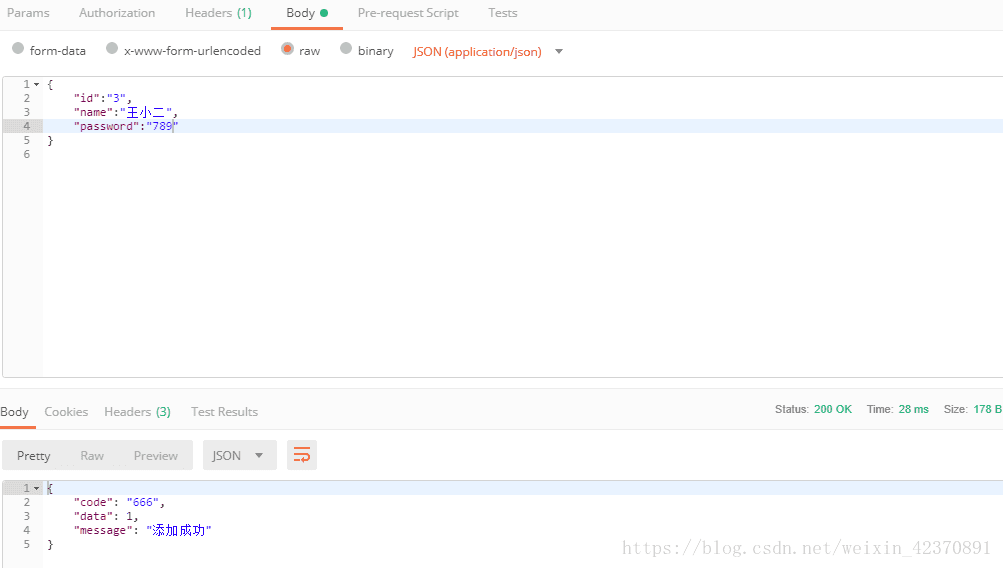
首先我們先增加3條資料
說明:本機IP地址+:8080+/+介面名(如:查詢介面selectPerson,修改介面updatePerson,刪除介面deletePerson,增加介面addPerson)

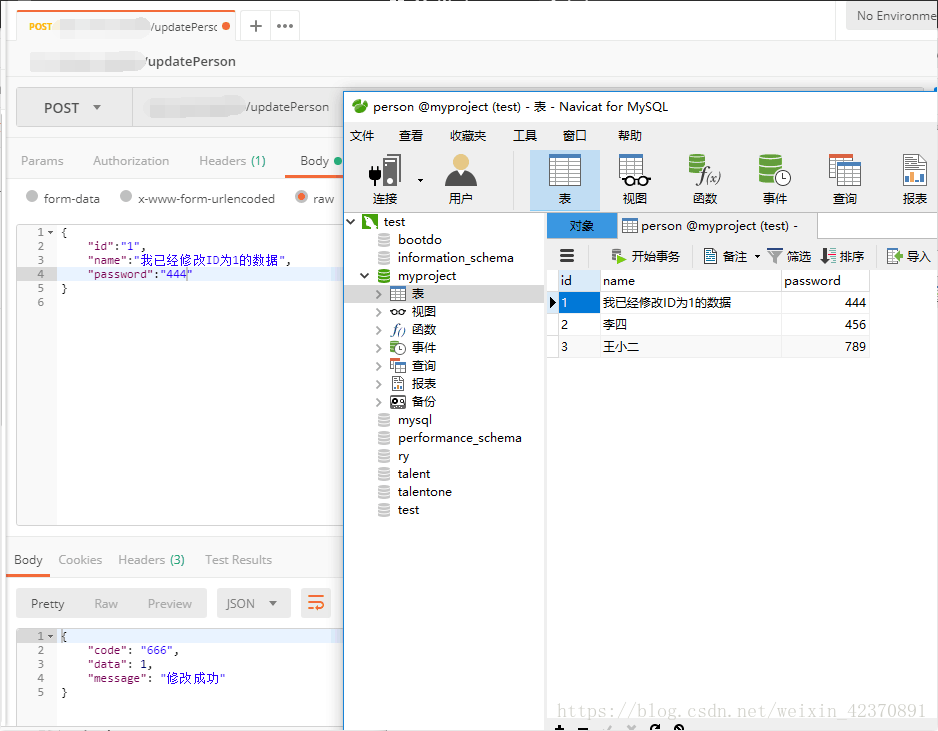
這樣資料庫中也可以看到
接下來我們進行修改

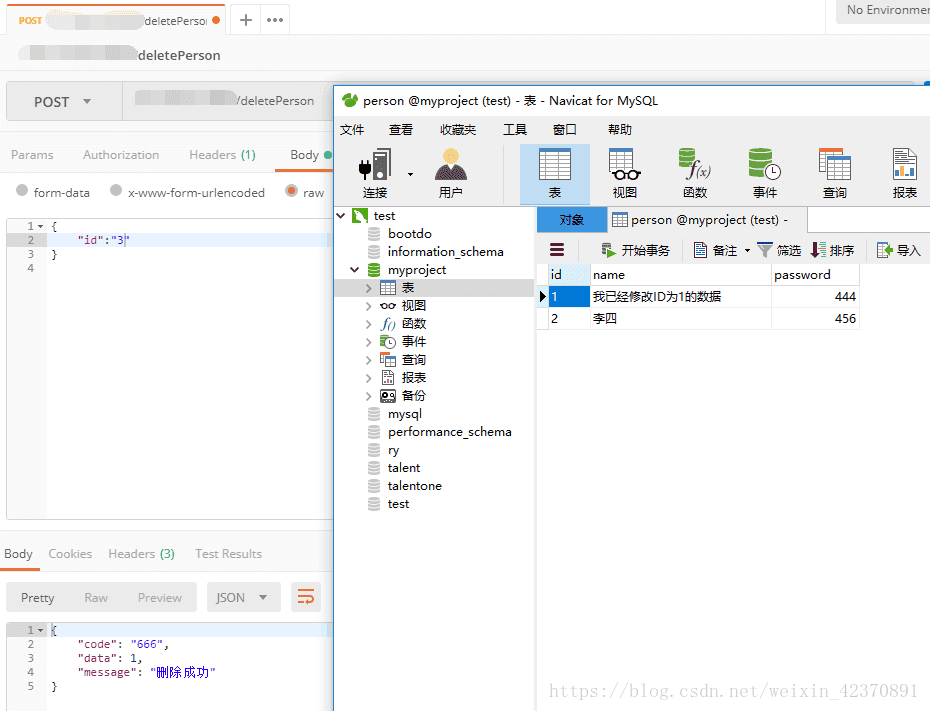
下面進行刪除操作
刪除ID為3的資料
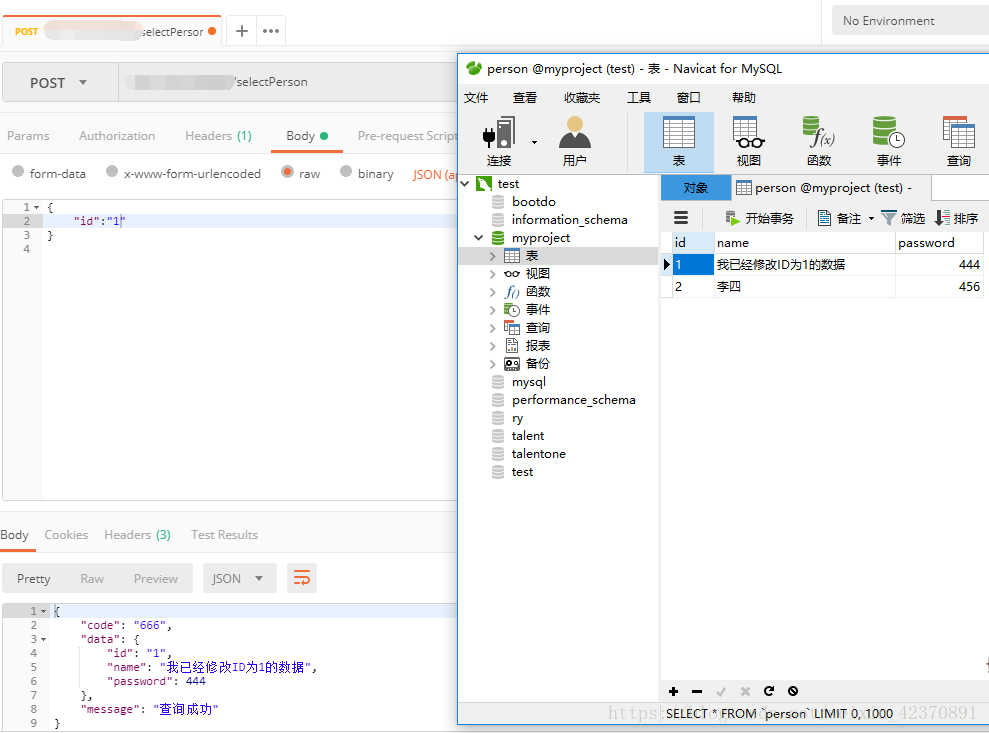
進行查詢操作
查詢ID為1的資料
表演完事
。。。。。。。。。。。。。。開溜。。。