
CentOS6 5下Nginx1 7 4安裝記錄
分享一下我老師大神的人工智慧教程!零基礎,通俗易懂!http://blog.csdn.net/jiangjunshow
也歡迎大家轉載本篇文章。分享知識,造福人民,實現我們中華民族偉大復興!
1.環境準備
yum -y install gcc gcc-c++ autoconf automake make
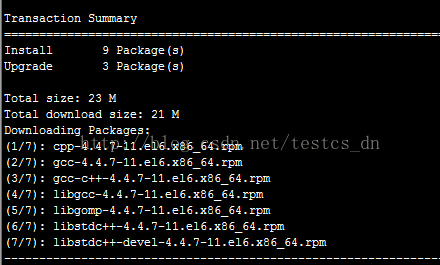
yum -y install zlib zlib-devel openssl openssl--devel pcre pcre-devel
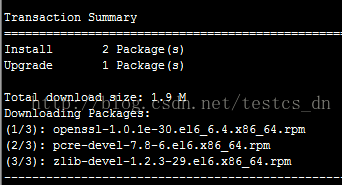
不執行以上兩項安裝的話,就可能會遇到下面我的安裝過程中遇到的情況:
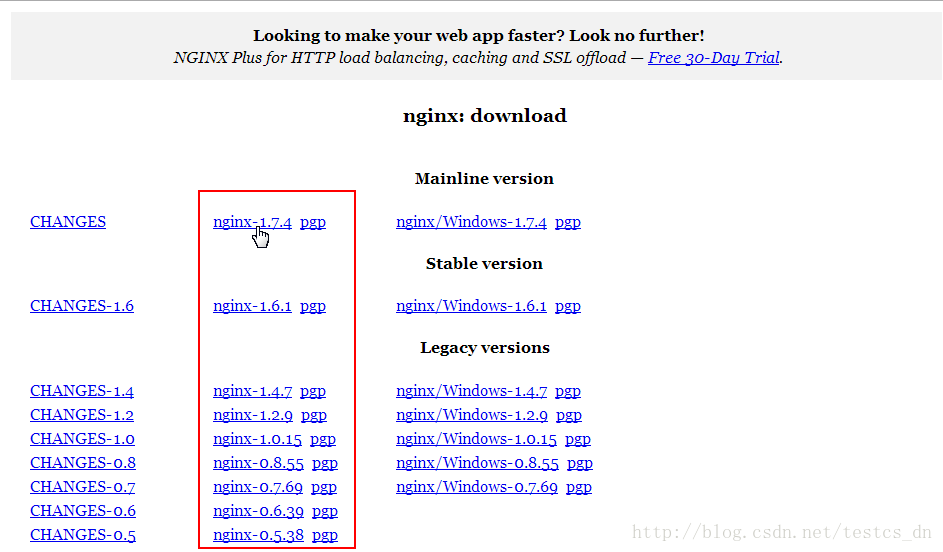
到此頁面下載自己想要的版本:
http://nginx.org/en/download.html
左側為Linux版本,右側為Windows版本
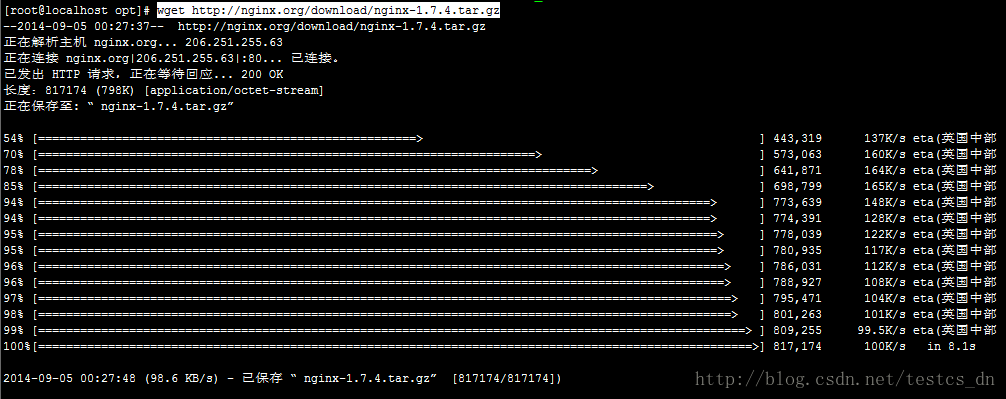
使用以下命令下載檔案:wget http://nginx.org/download/nginx-1.7.4.tar.gz
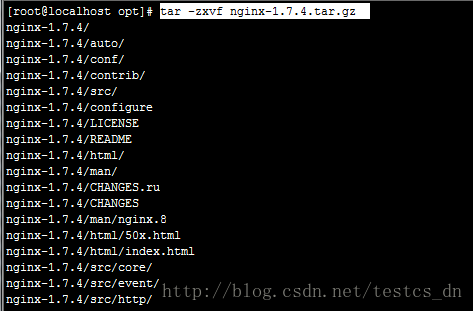
解壓檔案:tar -zxvf nginx-1.7.4.tar.gz
切換目錄:cd nginx-1.7.4
配置:./configure

提示以下資訊:./configure: error: the HTTP rewrite module requires the PCRE library.
You can either disable the module by using --without-http_rewrite_module
option, or install the PCRE library into the system, or build the PCRE library
statically from the source with nginx by using --with-pcre=<path> option.
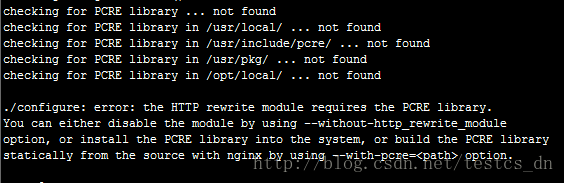
需要安裝pcre ,他作用是讓ngnix支援rewrite功能
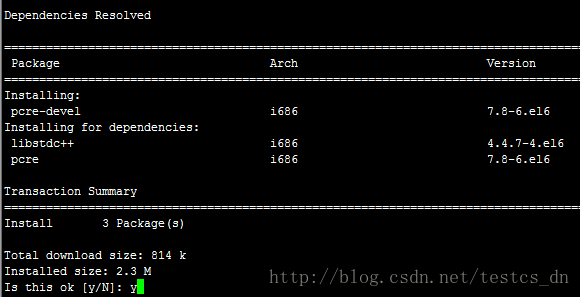
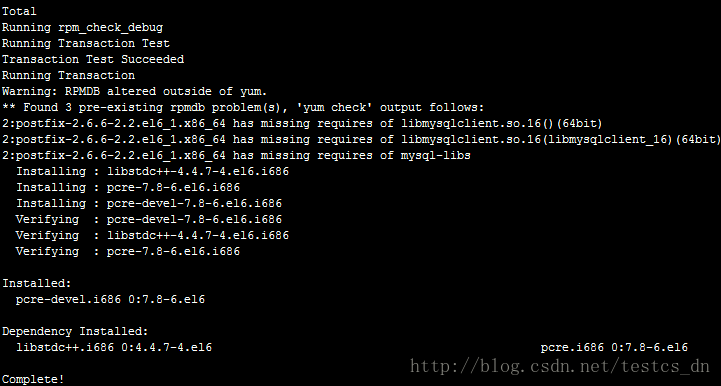
使用命令安裝:yum install pcre-devel.i686
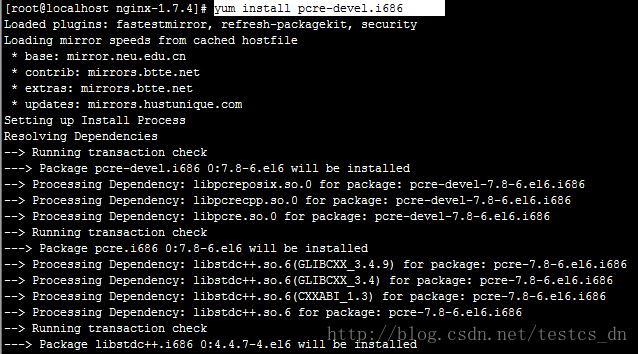
輸入y,回車
最後提示Complete,說明安裝成功:
再執行./configure
還是提示同樣的錯誤;
執行命令查詢PCRE的安裝位置:file -name pcre
得到的是:./auto/lib/pcre

根據提示在後面新增引數指定Path
執行命令:./configure --with-pcre=./auto/lib/pcre
提示如下資訊:
./configure: error: the HTTP gzip module requires the zlib library.
You can either disable the module by using --without-http_gzip_module
option, or install the zlib library into the system, or build the zlib library
statically from the source with nginx by using --with-zlib=<path> option.
還缺少zlib library資訊!
執行以下命令安裝:yum -y install make zlib zlib-devel gcc-c++ libtool
安裝成功之後,再執行命令:./configure --with-pcre=./auto/lib/pcre
最後的提示資訊如下:
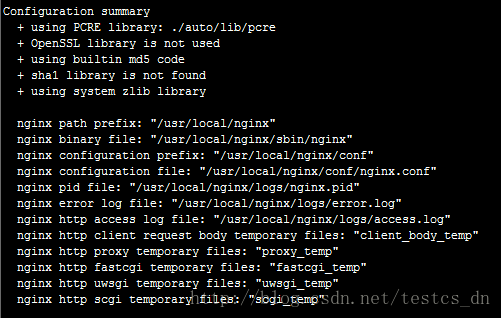
應該是配置成功了,執行以下命令安裝:
make && make install
提示以下錯誤:
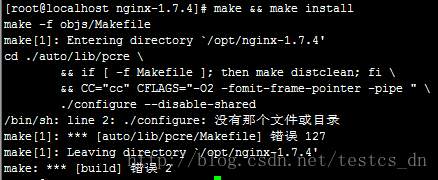
該裝的都裝了,還是無法安裝,最後執行以下命令解決問題:
yum -y install zlib zlib-devel openssl openssl--devel pcre pcre-devel
執行之後再執行:./configure
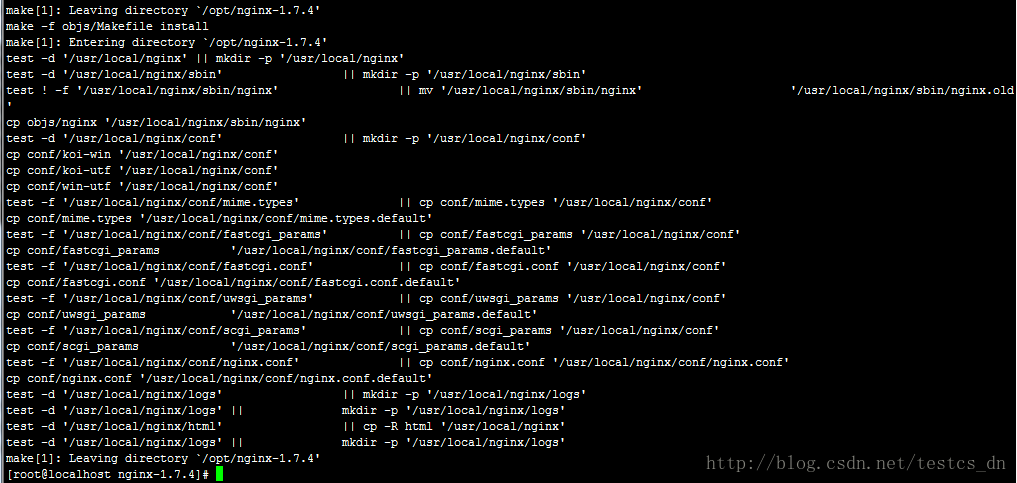
再執行:make && make install
安裝完成!
記住上圖中的一些目錄位置!
修改配置檔案:
切換目錄:cd /usr/local/nginx/conf
修改檔案:vi nginx.conf
主要是修改server配置節的內容,按字母i進入編輯模式
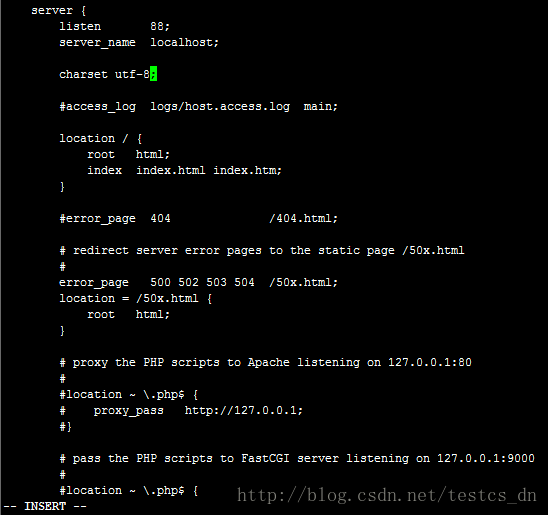
按ESC鍵,退出編輯模式,按冒號鍵“:”進入命令模式,輸入“wq”然後回車,儲存並退出;
切換到sbin目錄:cd /usr/local/nginx/sbin
啟動Nginx:./nginx
開放防火牆埠:
/sbin/iptables -I INPUT -p tcp --dport 88 -j ACCEPT
/etc/init.d/iptables save
開啟瀏覽器,輸入以下地址訪問吧:
看到以下資訊了嗎?
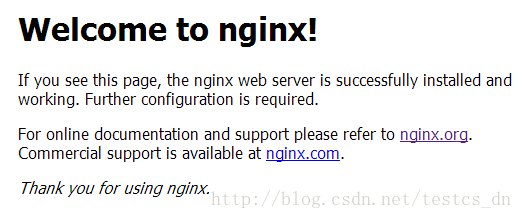
我是看到了,看不到的朋友繼續努力吧!
注意:我在虛擬機器中安裝的時候遇到了類似以下錯誤:
./configure auto/unix: No such file or directory
當我使用“mkdir auto/unix”之後,還是提示類似的錯誤,但目錄名又變了。
糾結了好久,後來發現是解壓的時候就有好多檔案沒有解壓出來,判斷應該是安裝包壓縮檔案壞了,
所以解壓的時候就少了好多的檔案或目錄,重新下載一個解壓安裝問題就解決了。
配置Nginx開機啟動,vi /etc/rc.d/rc.local
在檔案末尾新增“/usr/local/nginx/sbin/nginx”
Nginx常用命令:
重新載入配置檔案:/usr/local/nginx/sbin/nginx -s reload
停止Nginx服務:/usr/local/nginx/sbin/nginx -s stop
其它Nginx命令:
/usr/local/nginx/sbin/nginx -hnginx version: nginx/1.7.5Usage: nginx [-?hvVtq] [-s signal] [-c filename] [-p prefix] [-g directives]Options: -?,-h : this help -v : show version and exit -V : show version and configure options then exit -t : test configuration and exit -q : suppress non-error messages during configuration testing -s signal : send signal to a master process: stop, quit, reopen, reload -p prefix : set prefix path (default: /usr/local/nginx/) -c filename : set configuration file (default: conf/nginx.conf) -g directives : set global directives out of configuration file檔案許可權問題:
有可能因為目錄、檔案許可權過高,導致Nginx無權訪問檔案,可以通過以下命令修改許可權:
chmod -R 777 ./uploadfile
給我老師的人工智慧教程打call!http://blog.csdn.net/jiangjunshow
