
bootstrap fileinput 檔案上傳工具
這是我上傳的第二個plugin 首先第一點就是因為這個好看 符合bootstrap的介面風格 第二是可以拖拽(雖然我不常用這個功能 但是這樣介面看起來就豐滿了很多) 最後不得不吐槽這個的回發事件 我百度了很久才找到 CSDN上面也問了 不知道是自己百度的方式不正確還是別的什麼原因..好吧 我蠢
地址
http://plugins.krajee.com/file-input
https://github.com/kartik-v/bootstrap-fileinput
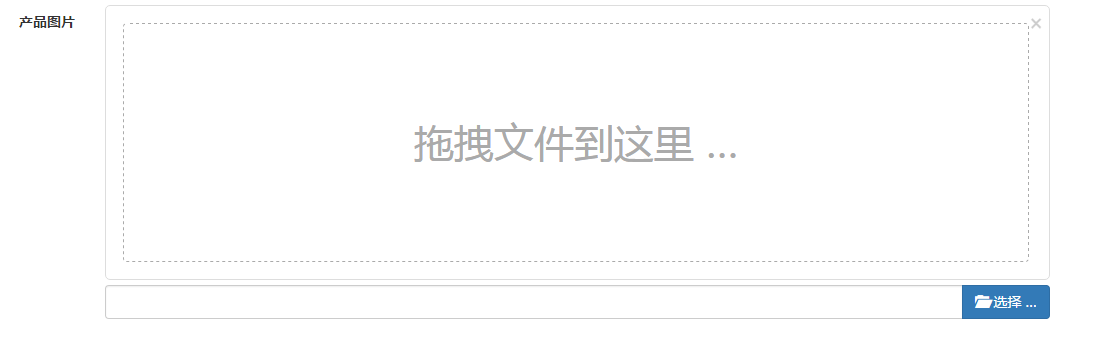
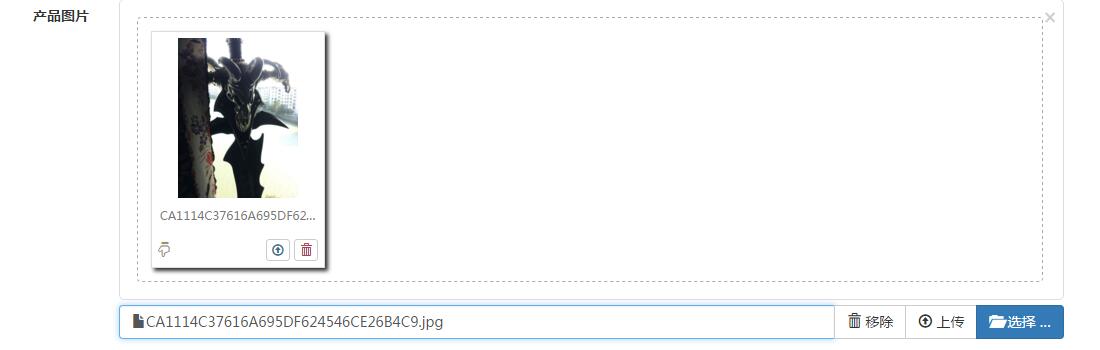
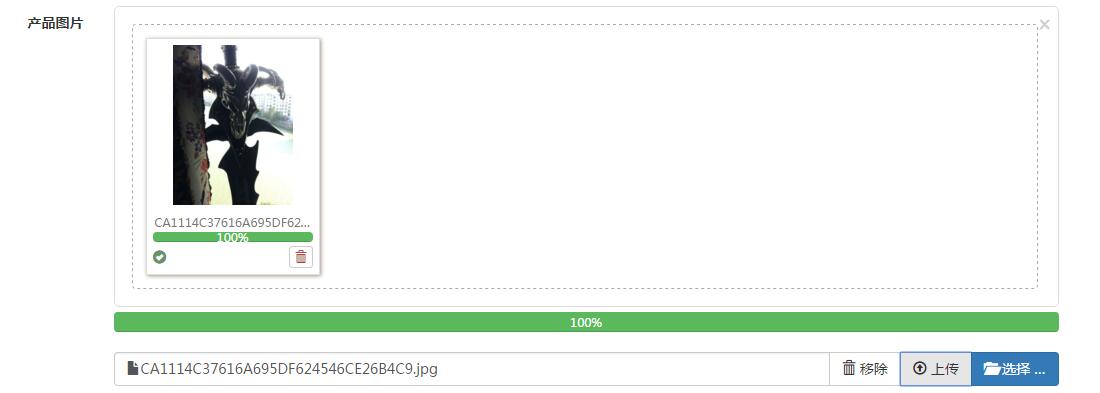
效果圖
這裡以我一個專案的新建產品為例 是基於MVC框架的 樣子是不是很好看
上傳之前
選中圖片的效果
上傳完成之後
如何使用
引入檔案
css fileinput.cs
js fileinput.js、fileinput_locale_zh.js(漢化包)
程式碼
html:
accept為需要控制的檔案格式
1 <input id="imgUpload" type="file" class="file-loading" accept="image/*">
js:
language: 'zh'完成漢化 預設為英文,autoReplace允許替換 maxFileCount:1 這裡說明一下 我做的是上傳單個的 如果需要批量上傳的 可以修改這兩個引數 allowedFileExtensions: ["jpg", "png", "gif"]就是驗證你上傳檔案的格式 這裡是圖片檔案 previewFileIcon 是設定按鈕樣式 bootstrap提供了幾種按鈕顏色 以及大量的ICON
.on("fileuploaded", function (e, data) {...} }) 這個就是我卡很久的地方了 先是不知道通過fileuploaded接收 然後是controller裡的json不知道哪裡取 這裡是在data.response中有你return的json


$("#imgUpload")
.fileinput({
language: 'zh',
uploadUrl: "/Product/imgDeal",
autoReplace: true
Controller:
這裡沒什麼可說的 寫的都很明確了
[HttpPost]
        public ActionResult imgDeal()
        {
            uploadImages img = new uploadImages();
            var image = Request.Files;
            if (image != null && image.Count > 0)
            {
                string savePath = "../Uploads/";
                var _image = image[0];
                string _imageExt = System.IO.Path.GetExtension(_image.FileName).ToLower();
                string _imageName = DateTime.Now.ToString("yyyyMMddhhmmss") + _imageExt;
                //儲存
                _image.SaveAs(Server.MapPath(savePath + _imageName));

                img.state = 1;
                img.name = _imageName;
                img.path = savePath + _imageName;
            }
            else
            {
                img.state = 0;
            }

            return Json(img);
        }
這樣就OK了
轉載請註明地址:http://www.cnblogs.com/CoffeeEddy/p/5167666.html
分類: JavaScript