
Spring Cloud構建微服務架構:服務註冊與發現 Eureka
Spring Cloud構建微服務架構:服務註冊與發現Eureka
【Dalston版】
原創 2018-04-10 宗野 Spring Cloud已經有非常長的時間沒有更新《Spring Cloud構建微服務架構》系列文章了,自從開始寫Spring Cloud的專題內容開始就獲得了不少的閱讀量和認可,當然也有一些批評,其中也不乏一些很中肯的意見和深度的問題,對我來說也是進一步提高的契機,在此感謝所有關注我部落格的讀者們。
由於之前主要精力都花在的編寫《Spring Cloud微服務實戰》一書上,所以該系列文章就沒有得到持續的維護和更新。由於漫長的寫書過程和繁瑣的出版流程,在本書一面世的時候,在版本上已經落後於當前的最新版本。雖然在書中前前後後加入了一些版本更新的注意事項,但是認識過程不是一蹴而就的,總是隨著實踐的深入慢慢發現的。所以,決定重寫一下該系列文章,一方面將Spring Cloud的版本更新到Dalston,另一方面重新組織內容並增加一些之前沒有寫過的重要元件。希望通過這個系列,來幫助準備使用Spring Cloud的朋友們快速入門。同時,也是作為《Spring Cloud微服務實戰》一書對最新版本做一些不同內容的補充。
Spring Cloud簡介
Spring Cloud是一個基於Spring Boot實現的雲應用開發工具,它為基於JVM的雲應用開發中涉及的配置管理、服務發現、斷路器、智慧路由、微代理、控制匯流排、全域性鎖、決策競選、分散式會話和叢集狀態管理等操作提供了一種簡單的開發方式。
Spring Cloud包含了多個子專案(針對分散式系統中涉及的多個不同開源產品),比如:Spring Cloud Config、Spring Cloud Netflix、Spring Cloud0 CloudFoundry、Spring Cloud AWS、Spring Cloud Security、Spring Cloud Commons、Spring Cloud Zookeeper、Spring Cloud CLI等專案。
微服務架構
“微服務架構”在這幾年非常的火熱,以至於關於微服務架構相關的開源產品被反覆的提及(比如:netflix、dubbo),Spring Cloud也因Spring社群的強大知名度和影響力也被廣大架構師與開發者備受關注。
那麼什麼是“微服務架構”呢?簡單的說,微服務架構就是將一個完整的應用從資料儲存開始垂直拆分成多個不同的服務,每個服務都能獨立部署、獨立維護、獨立擴充套件,服務與服務間通過諸如RESTful API的方式互相呼叫。
對於“微服務架構”,大家在網際網路可以搜尋到很多相關的介紹和研究文章來進行學習和了解。也可以閱讀始祖Martin Fowler的《Microservices》(中文版翻譯
服務治理
在簡單介紹了Spring Cloud和微服務架構之後,下面迴歸本文的主旨內容,如何使用Spring Cloud來實現服務治理。
由於Spring Cloud為服務治理做了一層抽象介面,所以在Spring Cloud應用中可以支援多種不同的服務治理框架,比如:Netflix Eureka、Consul、Zookeeper。在Spring Cloud服務治理抽象層的作用下,我們可以無縫地切換服務治理實現,並且不影響任何其他的服務註冊、服務發現、服務呼叫等邏輯。
所以,下面我們通過介紹兩種服務治理的實現來體會Spring Cloud這一層抽象所帶來的好處。
Spring Cloud Eureka
首先,我們來嘗試使用Spring Cloud Eureka來實現服務治理。
Spring Cloud Eureka是Spring Cloud Netflix專案下的服務治理模組。而Spring Cloud Netflix專案是Spring Cloud的子專案之一,主要內容是對Netflix公司一系列開源產品的包裝,它為Spring Boot應用提供了自配置的Netflix OSS整合。通過一些簡單的註解,開發者就可以快速的在應用中配置一下常用模組並構建龐大的分散式系統。它主要提供的模組包括:服務發現(Eureka),斷路器(Hystrix),智慧路由(Zuul),客戶端負載均衡(Ribbon)等。
下面,就來具體看看如何使用Spring Cloud Eureka實現服務治理。
建立“服務註冊中心”
建立一個基礎的Spring Boot工程,命名為eureka-server,並在pom.xml中引入需要的依賴內容:
<parent>
    <groupId>org.springframework.boot</groupId>
    <artifactId>spring-boot-starter-parent</artifactId>
    <version>1.5.13.BUILD-SNAPSHOT</version>
    <relativePath/> <!-- lookup parent from repository -->
</parent>

<properties>
    <project.build.sourceEncoding>UTF-8</project.build.sourceEncoding>
    <project.reporting.outputEncoding>UTF-8</project.reporting.outputEncoding>
    <java.version>1.7</java.version>
    <spring-cloud.version>Edgware.BUILD-SNAPSHOT</spring-cloud.version>
</properties>

<dependencies>
    <dependency>
        <groupId>org.springframework.cloud</groupId>
        <artifactId>spring-cloud-starter-netflix-eureka-server</artifactId>
    </dependency>

    <dependency>
        <groupId>org.springframework.boot</groupId>
        <artifactId>spring-boot-starter-test</artifactId>
        <scope>test</scope>
    </dependency>
</dependencies>

<dependencyManagement>
    <dependencies>
        <dependency>
            <groupId>org.springframework.cloud</groupId>
            <artifactId>spring-cloud-dependencies</artifactId>
            <version>${spring-cloud.version}</version>
            <type>pom</type>
            <scope>import</scope>
        </dependency>
通過@EnableEurekaServer註解啟動一個服務註冊中心提供給其他應用進行對話。這一步非常的簡單,只需要在一個普通的Spring Boot應用中新增這個註解就能開啟此功能,比如下面的例子:
package com.example.demo;
import org.springframework.boot.autoconfigure.SpringBootApplication;
import org.springframework.boot.builder.SpringApplicationBuilder;
import org.springframework.cloud.netflix.eureka.server.EnableEurekaServer;
@EnableEurekaServer
@SpringBootApplication
public class Application {

    public static void main(String[] args) {
        new SpringApplicationBuilder(Application.class)
                .web(true).run(args);
    }
}
在預設設定下,該服務註冊中心也會將自己作為客戶端來嘗試註冊它自己,所以我們需要禁用它的客戶端註冊行為,只需要在application.properties配置檔案中增加如下資訊:
spring.application.name=eureka-server
server.port=1001

eureka.instance.hostname=localhost
eureka.client.register-with-eureka=false
eureka.client.fetch-registry=false
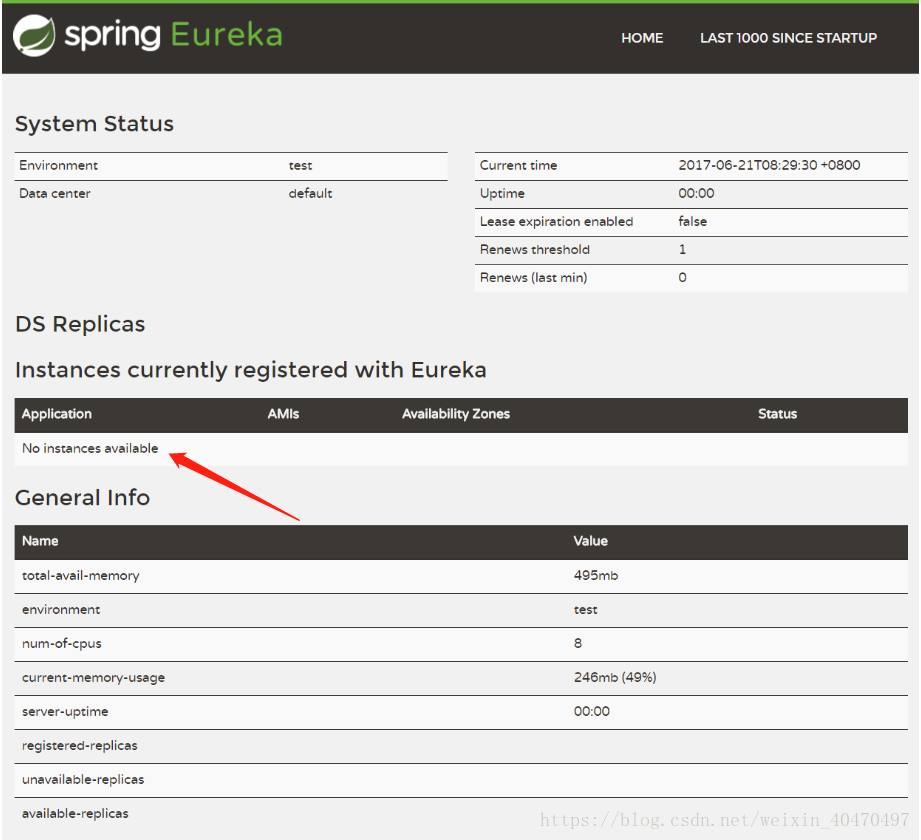
為了與後續要進行註冊的服務區分,這裡將服務註冊中心的埠通過server.port屬性設定為1001。啟動工程後,訪問:http://localhost:1001/,可以看到下面的頁面,其中還沒有發現任何服務。
建立“服務提供方”
下面我們建立提供服務的客戶端,並向服務註冊中心註冊自己。本文我們主要介紹服務的註冊與發現,所以我們不妨在服務提供方中嘗試著提供一個介面來獲取當前所有的服務資訊。
首先,建立一個基本的Spring Boot應用。命名為eureka-client,在pom.xml中,加入如下配置:
<parent>
    <groupId>org.springframework.boot</groupId>
    <artifactId>spring-boot-starter-parent</artifactId>
    <version>1.5.13.BUILD-SNAPSHOT</version>
    <relativePath/> <!-- lookup parent from repository -->
</parent>

<properties>
    <project.build.sourceEncoding>UTF-8</project.build.sourceEncoding>
    <project.reporting.outputEncoding>UTF-8</project.reporting.outputEncoding>
    <java.version>1.7</java.version>
    <spring-cloud.version>Edgware.BUILD-SNAPSHOT</spring-cloud.version>
</properties>

<dependencies>
    <dependency>
        <groupId>org.springframework.cloud</groupId>
        <artifactId>spring-cloud-starter-eureka</artifactId>
    </dependency>
    <dependency>
        <groupId>org.springframework.boot</groupId>
        <artifactId>spring-boot-starter-web</artifactId>
    </dependency>

    <dependency>
        <groupId>org.springframework.boot</groupId>
        <artifactId>spring-boot-starter-test</artifactId>
        <scope>test</scope>
    </dependency>
</dependencies>

<dependencyManagement>
    <dependencies>
        <dependency>
            <groupId>org.springframework.cloud</groupId>
            <artifactId>spring-cloud-dependencies</artifactId>
            <version>${spring-cloud.version}</version>
            <type>pom</type>
            <scope>import</scope>
        </dependency>
    </dependencies>
</dependencyManagement>
最後在應用主類中通過加上@EnableDiscoveryClient註解,該註解能啟用Eureka中的DiscoveryClient實現,這樣才能實現Controller中對服務資訊的輸出。
spring.application.name=eureka-client
server.port=2001
eureka.client.serviceUrl.defaultZone=http://localhost:1001/eureka/
#   1.spring.application.name屬性,我們可以指定微服務的名稱後續在呼叫的時候只需要使用該名稱就可以進行服務的訪問。
#   2.eureka.client.serviceUrl.defaultZone屬性對應服務註冊中心的配置內容,指定服務註冊中心的位置。為了在本機上測試區分服務提供方和服務註冊中心,
#     使用server.port屬性設定不同的埠。
通過spring.application.name屬性,我們可以指定微服務的名稱後續在呼叫的時候只需要使用該名稱就可以進行服務的訪問。eureka.client.serviceUrl.defaultZone屬性對應服務註冊中心的配置內容,指定服務註冊中心的位置。為了在本機上測試區分服務提供方和服務註冊中心,使用server.port屬性設定不同的埠。
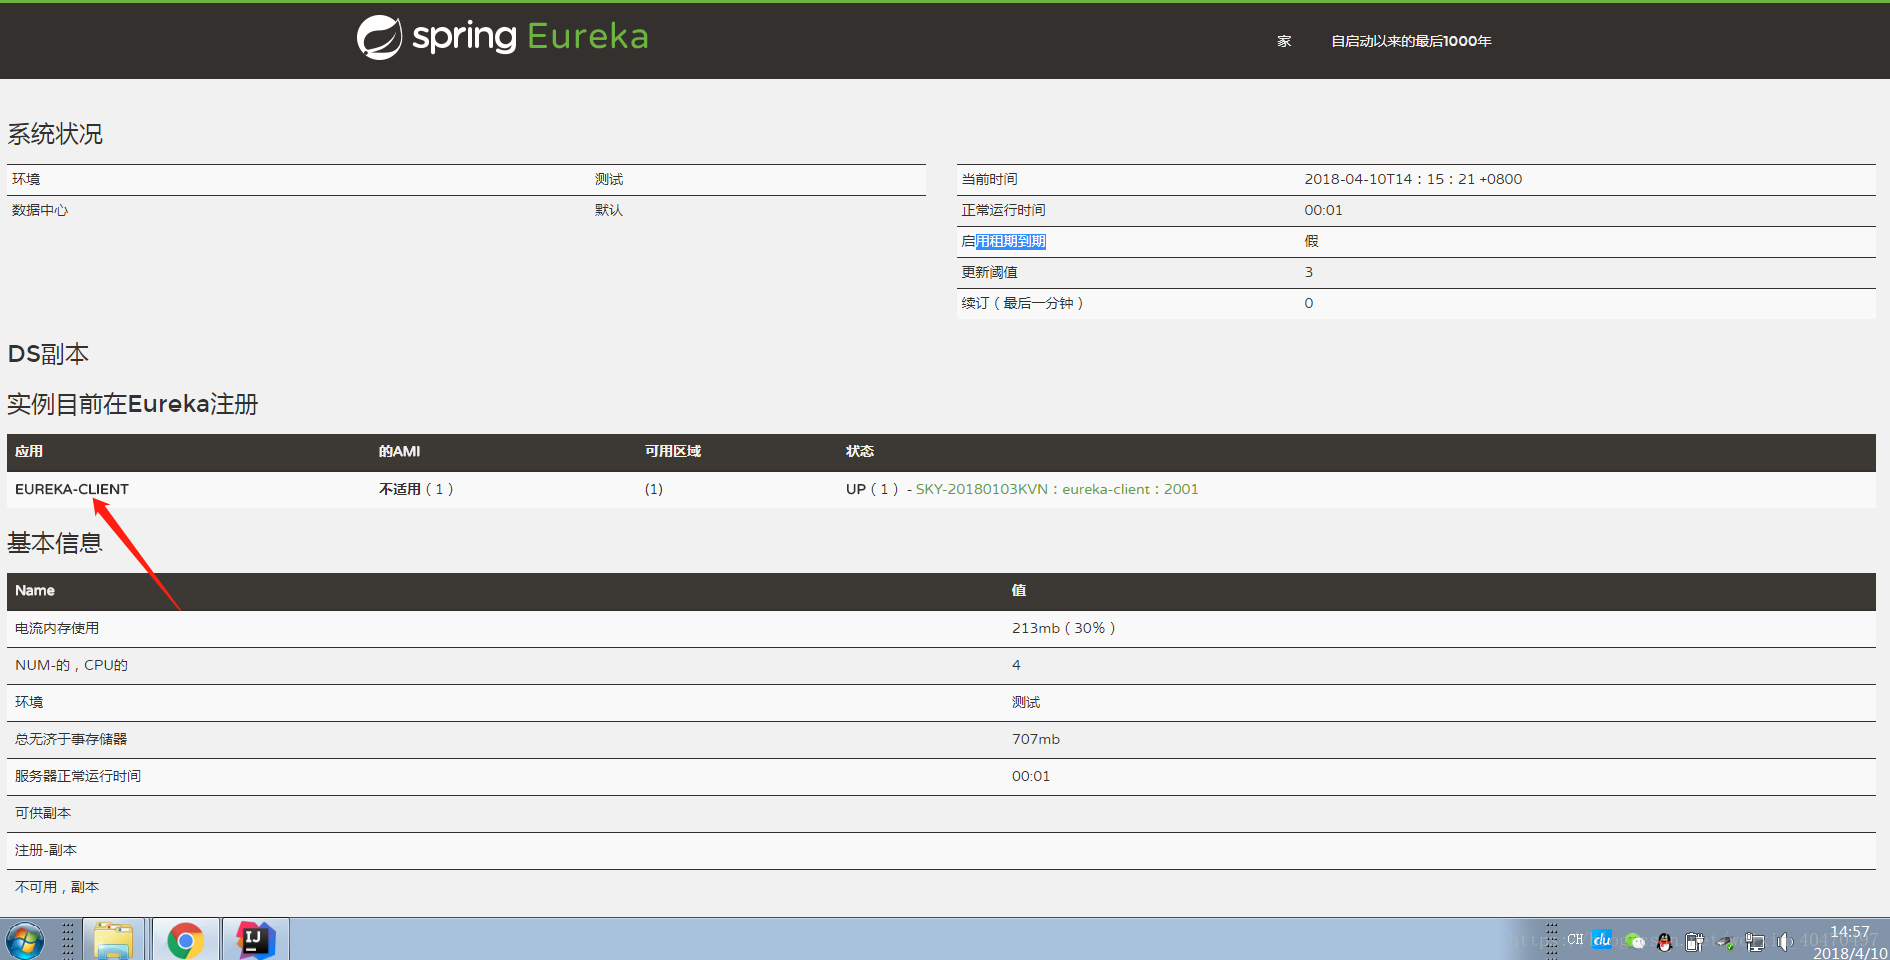
啟動該工程後,再次訪問:http://localhost:1001/。可以如下圖內容,我們定義的服務被成功註冊了。
當然,我們也可以通過直接訪問eureka-client服務提供的/dc介面來獲取當前的服務清單,只需要訪問:http://localhost:2001/dc,我們可以得到如下輸出返回:

其中,方括號中的eureka-client就是通過Spring Cloud定義的DiscoveryClient介面在eureka的實現中獲取到的所有服務清單。由於Spring Cloud在服務發現這一層做了非常好的抽象,所以,對於上面的程式,我們可以無縫的從eureka的服務治理體系切換到consul的服務治理體系中區。