
搭建ELK日誌分析平臺(下)—— 搭建kibana和logstash伺服器
轉:http://blog.51cto.com/zero01/2082794
筆記內容:搭建ELK日誌分析平臺——搭建kibana和logstash伺服器
筆記日期:2018-03-03
- 27.6 安裝kibana
- 27.7 安裝logstash
- 27.8 配置logstash
- 27.9 kibana上檢視日誌
- 27.10 收集nginx日誌
- 27.11 使用beats採集日誌
本文是上一篇 搭建ELK日誌分析平臺(上)—— ELK介紹及搭建 Elasticsearch 分散式叢集 的後續。
安裝kibana
由於上一篇中我們已經配置過yum源,這裡就不用再配置了,直接yum安裝即可,安裝命令如下,在主節點上安裝:
[[email protected] ~]# yum -y install kibana 若yum安裝的速度太慢,可以直接下載rpm包來進行安裝:
[[email protected] ~]# wget https://artifacts.elastic.co/downloads/kibana/kibana-6.0.0-x86_64.rpm
[[email protected] ~]# rpm -ivh kibana-6.0.0-x86_64.rpm
安裝完成後,對kibana進行配置:
[[email protected] ~]# vim /etc/kibana/kibana.yml  # 增加以下內容
server.port: 5601  # 配置kibana的埠
server.host: 192.168.77.128  # 配置監聽ip
elasticsearch.url: "http://192.168.77.128:9200"  # 配置es伺服器的ip,如果是叢集則配置該叢集中主節點的ip
logging.dest: /var/log/kibana.log  # 配置kibana的日誌檔案路徑,不然預設是messages裡記錄日誌
建立日誌檔案:
[[email protected] ~]# touch /var/log/kibana.log; chmod 777 /var/log/kibana.log啟動kibana服務,並檢查程序和監聽埠:
[[email protected] ~]# systemctl start kibana
[[email protected] ~]# ps aux |grep kibana
kibana 3083 36.8 2.9 1118668 112352 ? Ssl 17:14 0:03 /usr/share/kibana/bin/../node/bin/node --no-warnings /usr/share/kibana/bin/../src/cli -c /etc/kibana/kibana.yml
root 3095 0.0 0.0 112660 964 pts/0 S+ 17:14 0:00 grep --color=auto kibana
[ 注:由於kibana是使用node.js開發的,所以程序名稱為node
然後在瀏覽器裡進行訪問,如:http://192.168.77.128:5601/ ,由於我們並沒有安裝x-pack,所以此時是沒有使用者名稱和密碼的,可以直接訪問的: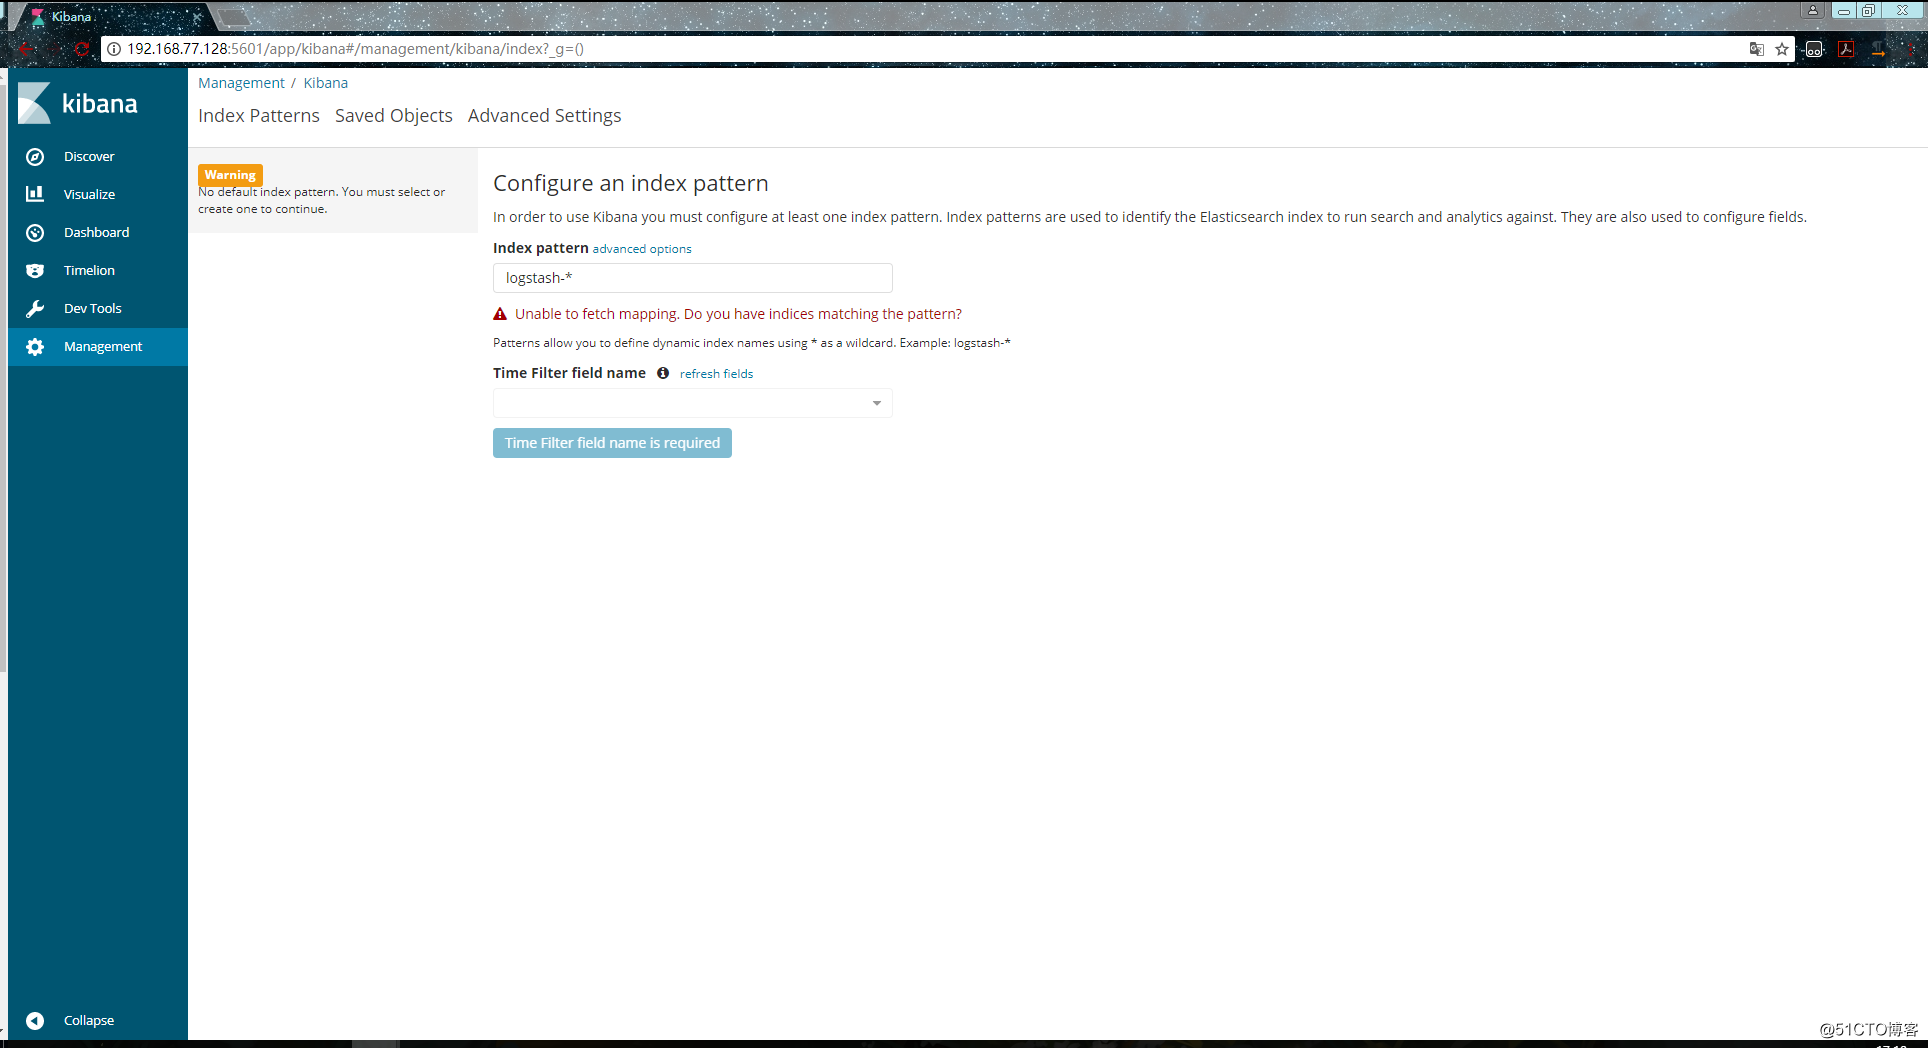
到此我們的kibana就安裝完成了,很簡單,接下來就是安裝logstash,不然kibana是沒法用的。
安裝logstash
在192.168.77.130上安裝logstash,但是要注意的是目前logstash不支援JDK1.9。
直接yum安裝,安裝命令如下:
[[email protected] ~]# yum install -y logstash如果yum源的速度太慢的話就下載rpm包來進行安裝:
[[email protected] ~]# wget https://artifacts.elastic.co/downloads/logstash/logstash-6.0.0.rpm
[[email protected] ~]# rpm -ivh logstash-6.0.0.rpm
安裝完之後,先不要啟動服務,先配置logstash收集syslog日誌:
[[email protected] ~]# vim /etc/logstash/conf.d/syslog.conf  # 加入如下內容
input {  # 定義日誌源
  syslog {
    type => "system-syslog"  # 定義型別
    port => 10514    # 定義監聽埠
  }
}
output {  # 定義日誌輸出
  stdout {
    codec => rubydebug  # 將日誌輸出到當前的終端上顯示
  }
}
檢測配置檔案是否有錯:
[[email protected] ~]# cd /usr/share/logstash/bin
[[email protected] /usr/share/logstash/bin]# ./logstash --path.settings /etc/logstash/ -f /etc/logstash/conf.d/syslog.conf --config.test_and_exit
Sending Logstash's logs to /var/log/logstash which is now configured via log4j2.properties
Configuration OK  # 為ok則代表配置檔案沒有問題
[[email protected] /usr/share/logstash/bin]#
命令說明:
- --path.settings 用於指定logstash的配置檔案所在的目錄
- -f 指定需要被檢測的配置檔案的路徑
- --config.test_and_exit 指定檢測完之後就退出,不然就會直接啟動了
配置kibana伺服器的ip以及配置的監聽埠:
[[email protected] ~]# vim /etc/rsyslog.conf
#### RULES ####

*.* @@192.168.77.130:10514
重啟rsyslog,讓配置生效:
[[email protected] ~]# systemctl restart rsyslog指定配置檔案,啟動logstash:
[[email protected] ~]# cd /usr/share/logstash/bin
[[email protected] /usr/share/logstash/bin]# ./logstash --path.settings /etc/logstash/ -f /etc/logstash/conf.d/syslog.conf
Sending Logstash's logs to /var/log/logstash which is now configured via log4j2.properties
# 這時終端會停留在這裡,因為我們在配置檔案中定義的是將資訊輸出到當前終端
開啟新終端檢查一下10514埠是否已被監聽:
[[email protected] ~]# netstat -lntp |grep 10514
tcp6       0      0 :::10514                :::*                    LISTEN      4312/java
[[email protected]-node1 ~]#
然後在別的機器ssh登入到這臺機器上,測試一下有沒有日誌輸出:
[[email protected] /usr/share/logstash/bin]# ./logstash --path.settings /etc/logstash/ -f /etc/logstash/conf.d/syslog.conf
Sending Logstash's logs to /var/log/logstash which is now configured via log4j2.properties
{
          "severity" => 6,
               "pid" => "4575",
           "program" => "sshd",
           "message" => "Accepted password for root from 192.168.77.128 port 58336 ssh2\n",
              "type" => "system-syslog",
          "priority" => 86,
         "logsource" => "data-node1",
        "@timestamp" => 2018-03-03T18:12:27.000Z,
          "@version" => "1",
              "host" => "192.168.77.130",
          "facility" => 10,
    "severity_label" => "Informational",
         "timestamp" => "Mar  4 02:12:27",
    "facility_label" => "security/authorization"
}
{
          "severity" => 6,
           "program" => "systemd",
           "message" => "Started Session 42 of user root.\n",
              "type" => "system-syslog",
          "priority" => 30,
         "logsource" => "data-node1",
        "@timestamp" => 2018-03-03T18:12:27.000Z,
          "@version" => "1",
              "host" => "192.168.77.130",
          "facility" => 3,
    "severity_label" => "Informational",
         "timestamp" => "Mar  4 02:12:27",
    "facility_label" => "system"
}
{
          "severity" => 6,
           "program" => "systemd-logind",
           "message" => "New session 42 of user root.\n",
              "type" => "system-syslog",
          "priority" => 38,
         "logsource" => "data-node1",
        "@timestamp" => 2018-03-03T18:12:27.000Z,
          "@version" => "1",
              "host" => "192.168.77.130",
          "facility" => 4,
    "severity_label" => "Informational",
         "timestamp" => "Mar  4 02:12:27",
    "facility_label" => "security/authorization"
}
{
          "severity" => 6,
               "pid" => "4575",
           "program" => "sshd",
           "message" => "pam_unix(sshd:session): session opened for user root by (uid=0)\n",
              "type" => "system-syslog",
          "priority" => 86,
         "logsource" => "data-node1",
        "@timestamp" => 2018-03-03T18:12:27.000Z,
          "@version" => "1",
              "host" => "192.168.77.130",
          "facility" => 10,
    "severity_label" => "Informational",
         "timestamp" => "Mar  4 02:12:27",
    "facility_label" => "security/authorization"
}
{
          "severity" => 6,
           "program" => "systemd",
           "message" => "Starting Session 42 of user root.\n",
              "type" => "system-syslog",
          "priority" => 30,
         "logsource" => "data-node1",
        "@timestamp" => 2018-03-03T18:12:27.000Z,
          "@version" => "1",
              "host" => "192.168.77.130",
          "facility" => 3,
    "severity_label" => "Informational",
         "timestamp" => "Mar  4 02:12:27",
    "facility_label" => "system"
}
{
          "severity" => 6,
               "pid" => "4575",
           "program" => "sshd",
           "message" => "Received disconnect from 192.168.77.128: 11: disconnected by user\n",
              "type" => "system-syslog",
          "priority" => 86,
         "logsource" => "data-node1",
        "@timestamp" => 2018-03-03T18:12:35.000Z,
          "@version" => "1",
              "host" => "192.168.77.130",
          "facility" => 10,
    "severity_label" => "Informational",
         "timestamp" => "Mar  4 02:12:35",
    "facility_label" => "security/authorization"
}
{
          "severity" => 6,
               "pid" => "4575",
           "program" => "sshd",
           "message" => "pam_unix(sshd:session): session closed for user root\n",
              "type" => "system-syslog",
          "priority" => 86,
         "logsource" => "data-node1",
        "@timestamp" => 2018-03-03T18:12:35.000Z,
          "@version" => "1",
              "host" => "192.168.77.130",
          "facility" => 10,
    "severity_label" => "Informational",
         "timestamp" => "Mar  4 02:12:35",
    "facility_label" => "security/authorization"
}
{
          "severity" => 6,
           "program" => "systemd-logind",
           "message" => "Removed session 42.\n",
              "type" => "system-syslog",
          "priority" => 38,
         "logsource" => "data-node1",
        "@timestamp" => 2018-03-03T18:12:35.000Z,
          "@version" => "1",
              "host" => "192.168.77.130",
          "facility" => 4,
    "severity_label" => "Informational",
         "timestamp" => "Mar  4 02:12:35",
    "facility_label" => "security/authorization"
}
如上,可以看到,終端中以JSON的格式列印了收集到的日誌,測試成功。
配置logstash
以上只是測試的配置,這一步我們需要重新改一下配置檔案,讓收集的日誌資訊輸出到es伺服器中,而不是當前終端:
[[email protected] ~]# vim /etc/logstash/conf.d/syslog.conf # 更改為如下內容
input {
  syslog {
    type => "system-syslog"
    port => 10514
  }
}
output {
  elasticsearch {
    hosts => ["192.168.77.128:9200"]  # 定義es伺服器的ip
    index => "system-syslog-%{+YYYY.MM}" # 定義索引
  }
}
同樣的需要檢測配置檔案有沒有錯:
[[email protected] ~]# cd /usr/share/logstash/bin
[[email protected] /usr/share/logstash/bin]# ./logstash --path.settings /etc/logstash/ -f /etc/logstash/conf.d/syslog.conf --config.test_and_exit
Sending Logstash's logs to /var/log/logstash which is now configured via log4j2.properties
Configuration OK
[[email protected] /usr/share/logstash/bin]#
沒問題後,啟動logstash服務,並檢查程序以及監聽埠:
[[email protected] ~]# systemctl start logstash
[[email protected] ~]# ps aux |grep logstash
logstash   5364  285 20.1 3757012 376260 ?      SNsl 04:36   0:34 /bin/java -XX:+UseParNewGC -XX:+UseConcMarkSweepGC -XX:CMSInitiatingOccupancyFraction=75 -XX:+UseCMSInitiatingOccupancyOnly -XX:+DisableExplicitGC -Djava.awt.headless=true -Dfile.encoding=UTF-8 -XX:+HeapDumpOnOutOfMemoryError -Xmx1g -Xms256m -Xss2048k -Djffi.boot.library.path=/usr/share/logstash/vendor/jruby/lib/jni -Xbootclasspath/a:/usr/share/logstash/vendor/jruby/lib/jruby.jar -classpath : -Djruby.home=/usr/share/logstash/vendor/jruby -Djruby.lib=/usr/share/logstash/vendor/jruby/lib -Djruby.script=jruby -Djruby.shell=/bin/sh org.jruby.Main /usr/share/logstash/lib/bootstrap/environment.rb logstas/runner.rb --path.settings /etc/logstash
root       5400  0.0  0.0 112652   964 pts/0    S+   04:36   0:00 grep --color=auto logstash
錯誤解決:
我這裡啟動logstash後,程序是正常存在的,但是9600以及10514埠卻沒有被監聽。於是檢視logstash的日誌看看有沒有錯誤資訊的輸出,但是發現沒有記錄日誌資訊,那就只能轉而去檢視messages的日誌,發現錯誤資訊如下:
這是因為許可權不夠,既然是許可權不夠,那就設定許可權即可:
[[email protected] ~]# chown logstash /var/log/logstash/logstash-plain.log
[[email protected] ~]# ll !$
ll /var/log/logstash/logstash-plain.log
-rw-r--r-- 1 logstash root 7597 Mar  4 04:35 /var/log/logstash/logstash-plain.log
[[email protected] ~]# systemctl restart logstash
設定完許可權重啟服務之後,發現還是沒有監聽埠,檢視logstash-plain.log檔案記錄的錯誤日誌資訊如下:
可以看到,依舊是許可權的問題,這是因為之前我們以root的身份在終端啟動過logstash,所以產生的相關檔案的屬組屬主都是root,同樣的,也是設定一下許可權即可:
[[email protected] ~]# ll /var/lib/logstash/
total 4
drwxr-xr-x 2 root root  6 Mar  4 01:50 dead_letter_queue
drwxr-xr-x 2 root root  6 Mar  4 01:50 queue
-rw-r--r-- 1 root root 36 Mar  4 01:58 uuid
[[email protected] ~]# chown -R logstash /var/lib/logstash/
[[email protected] ~]# systemctl restart logstash
這次就沒問題了,埠正常監聽了,這樣我們的logstash服務就啟動成功了:
[[email protected] ~]# netstat -lntp |grep 9600
tcp6       0      0 127.0.0.1:9600          :::*                    LISTEN      9905/java
[[email protected] ~]# netstat -lntp |grep 10514
tcp6       0      0 :::10514                :::*                    LISTEN      9905/java
[[email protected] ~]#
但是可以看到,logstash的監聽ip是127.0.0.1這個本地ip,本地ip無法遠端通訊,所以需要修改一下配置檔案,配置一下監聽的ip:
[[email protected] ~]# vim /etc/logstash/logstash.yml
http.host: "192.168.77.130"
[[email protected] ~]# systemctl restart logstash
[[email protected] ~]# netstat -lntp |grep 9600
tcp6       0      0 192.168.77.130:9600     :::*                    LISTEN      10091/java
[[email protected] ~]#
kibana上檢視日誌
完成了logstash伺服器的搭建之後,回到kibana伺服器上檢視日誌,執行以下命令可以獲取索引資訊:
[[email protected] ~]# curl '192.168.77.128:9200/_cat/indices?v'
health status index                 uuid                   pri rep docs.count docs.deleted store.size pri.store.size
green  open   .kibana               6JfXc0gFSPOWq9gJI1ZX2g   1   1          1            0      6.9kb          3.4kb
green  open   system-syslog-2018.03 bUXmEDskTh6fjGD3JgyHcA   5   1         61            0    591.7kb        296.7kb
[[email protected] ~]#
如上,可以看到,在logstash配置檔案中定義的system-syslog索引成功獲取到了,證明配置沒問題,logstash與es通訊正常。
獲取指定索引詳細資訊:
[[email protected] ~]# curl -XGET '192.168.77.128:9200/system-syslog-2018.03?pretty'
{
  "system-syslog-2018.03" : {
    "aliases" : { },
    "mappings" : {
      "system-syslog" : {
        "properties" : {
          "@timestamp" : {
            "type" : "date"
          },
          "@version" : {
            "type" : "text",
            "fields" : {
              "keyword" : {
                "type" : "keyword",
                "ignore_above" : 256
              }
            }
          },
          "facility" : {
            "type" : "long"
          },
          "facility_label" : {
            "type" : "text",
            "fields" : {
              "keyword" : {
                "type" : "keyword",
                "ignore_above" : 256
              }
            }
          },
          "host" : {
            "type" : "text",
            "fields" : {
              "keyword" : {
                "type" : "keyword",
                "ignore_above" : 256
              }
            }
          },
          "logsource" : {
            "type" : "text",
            "fields" : {
              "keyword" : {
                "type" : "keyword",
                "ignore_above" : 256
              }
            }
          },
          "message" : {
            "type" : "text",
            "fields" : {
              "keyword" : {
                "type" : "keyword",
                "ignore_above" : 256
              }
            }
          },
          "pid" : {
            "type" : "text",
            "fields" : {
              "keyword" : {
                "type" : "keyword",
                "ignore_above" : 256
              }
            }
          },
          "priority" : {
            "type" : "long"
          },
          "program" : {
            "type" : "text",
            "fields" : {
              "keyword" : {
                "type" : "keyword",
                "ignore_above" : 256
              }
            }
          },
          "severity" : {
            "type" : "long"
          },
          "severity_label" : {
            "type" : "text",
            "fields" : {
              "keyword" : {
                "type" : "keyword",
                "ignore_above" : 256
              }
            }
          },
          "timestamp" : {
            "type" : "text",
            "fields" : {
              "keyword" : {
                "type" : "keyword",
                "ignore_above" : 256
              }
            }
          },
          "type" : {
            "type" : "text",
            "fields" : {
              "keyword" : {
                "type" : "keyword",
                "ignore_above" : 256
              }
            }
          }
        }
      }
    },
    "settings" : {
      "index" : {
        "creation_date" : "1520082481446",
        "number_of_shards" : "5",
        "number_of_replicas" : "1",
        "uuid" : "bUXmEDskTh6fjGD3JgyHcA",
        "version" : {
          "created" : "6020299"
        },
        "provided_name" : "system-syslog-2018.03"
      }
    }
  }
}
[[email protected] ~]#
如果日後需要刪除索引的話,使用以下命令可以刪除指定索引:
curl -XDELETE 'localhost:9200/system-syslog-2018.03'es與logstash能夠正常通訊後就可以去配置kibana了,瀏覽器訪問192.168.77.128:5601,到kibana頁面上配置索引: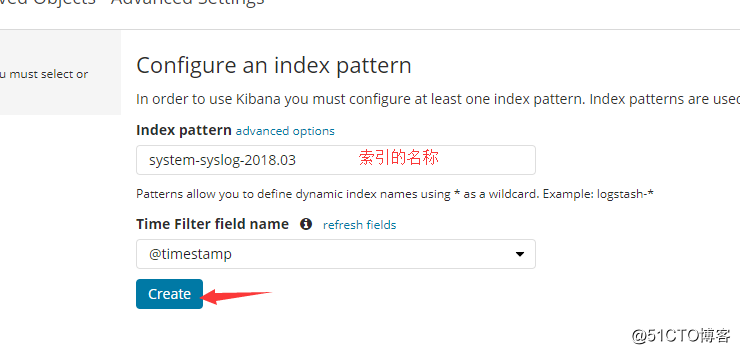
我們也可以使用萬用字元,進行批量匹配: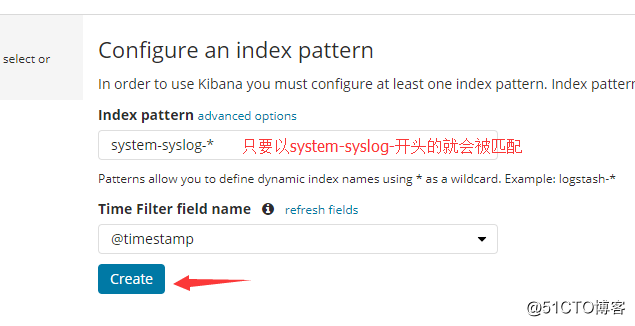
配置成功後點擊 “Discover” :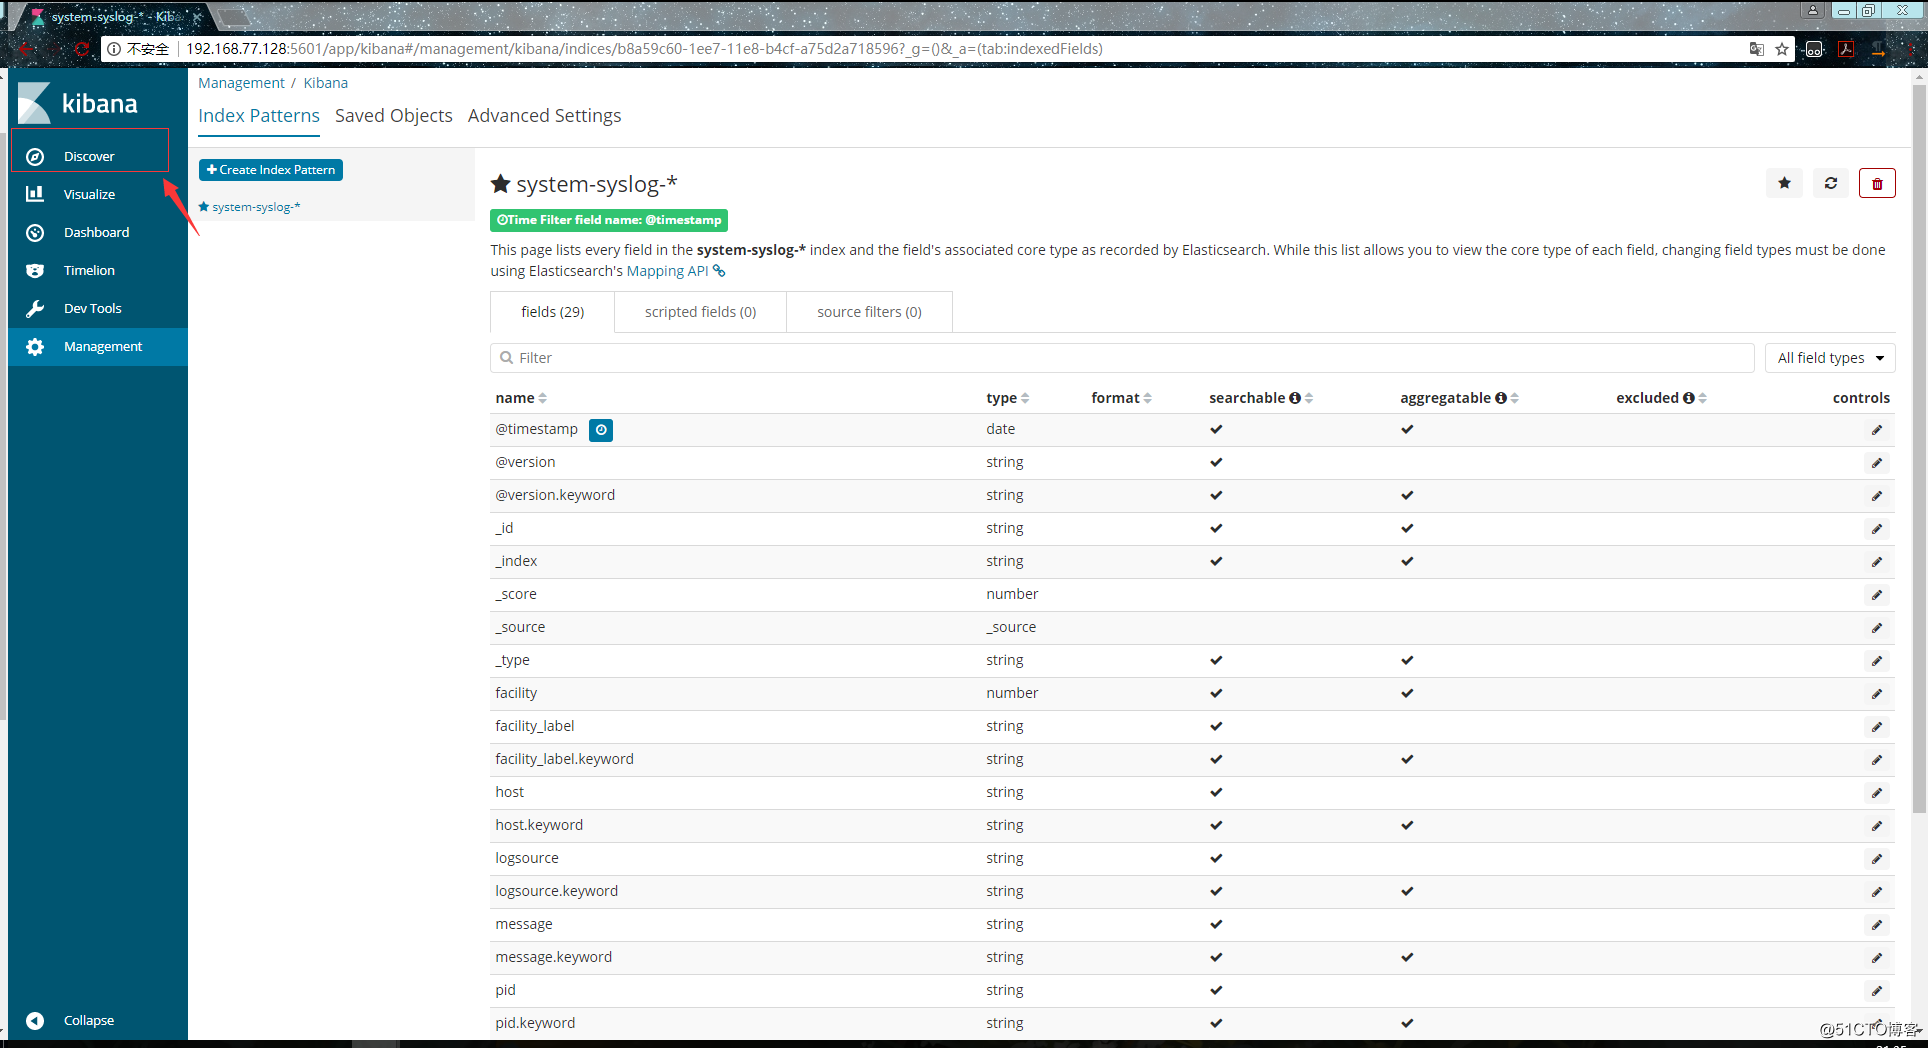
進入 “Discover” 頁面後如果出現以下提示,則是代表無法查詢到日誌資訊: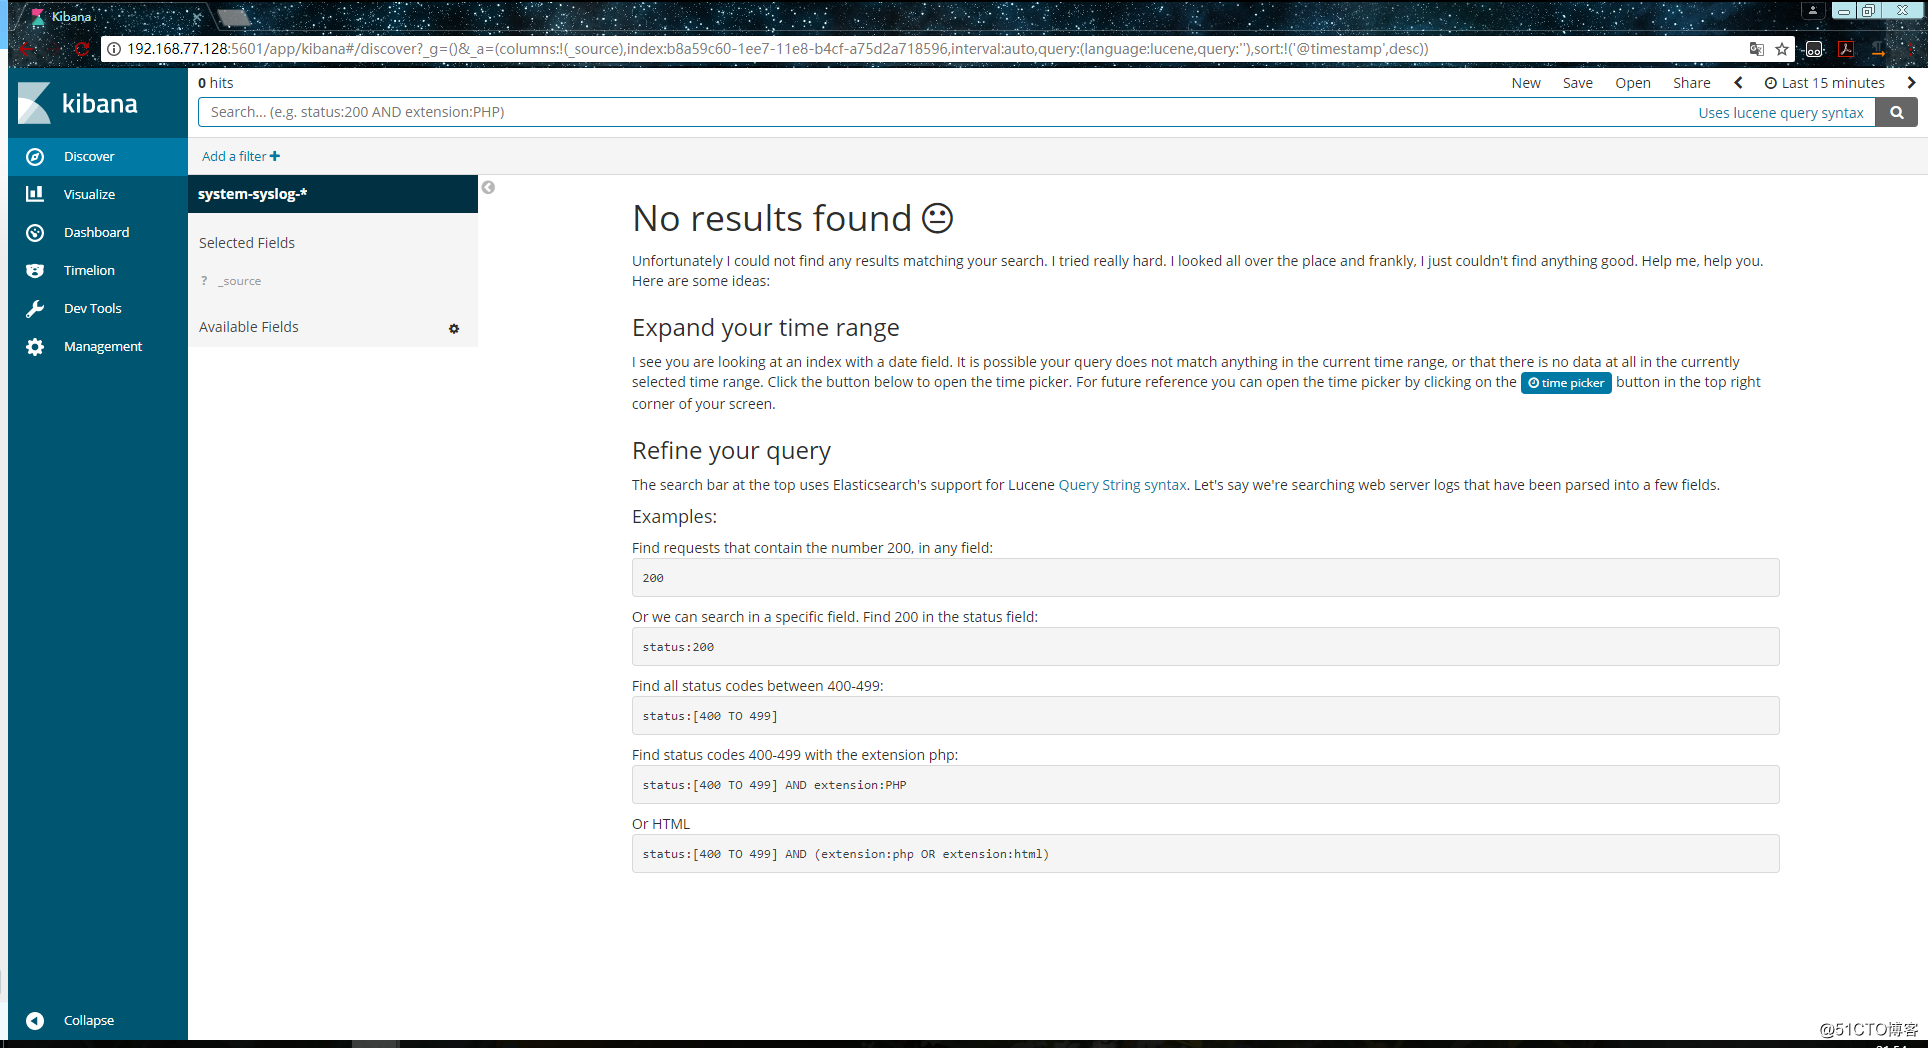
這種情況一般是時間的問題,點選右上角切換成檢視當天的日誌資訊: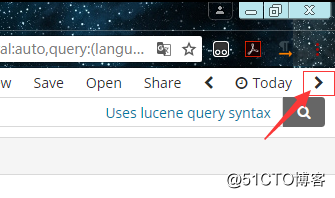
這時應該就能夠正常查看了: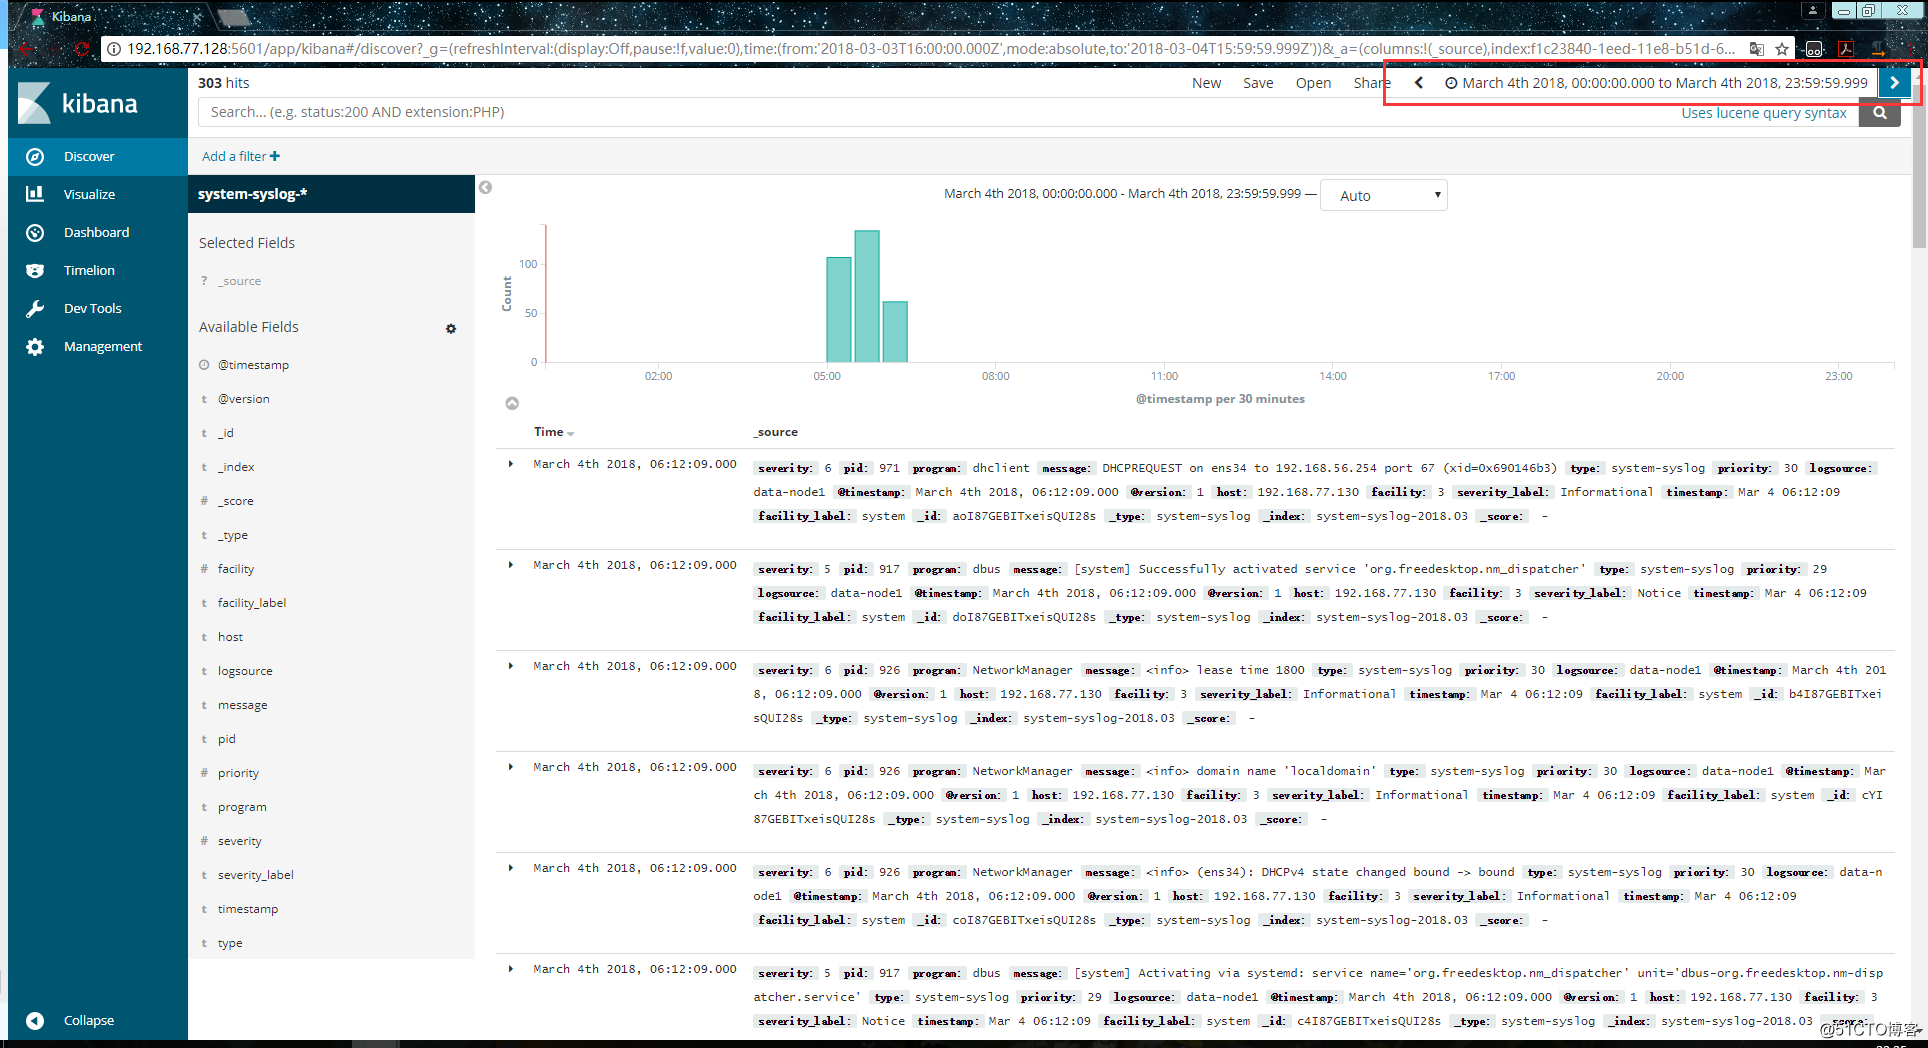
如果還是不行的話,就換幾個時間試試,換了幾個時間都不行的話,就在瀏覽器中直接訪問es伺服器看看是否有反饋出資訊:
http://192.168.77.128:9200/system-syslog-2018.03/_search?q=*
如下,這是正常返回資訊的情況,如果有問題的話是會返回error的: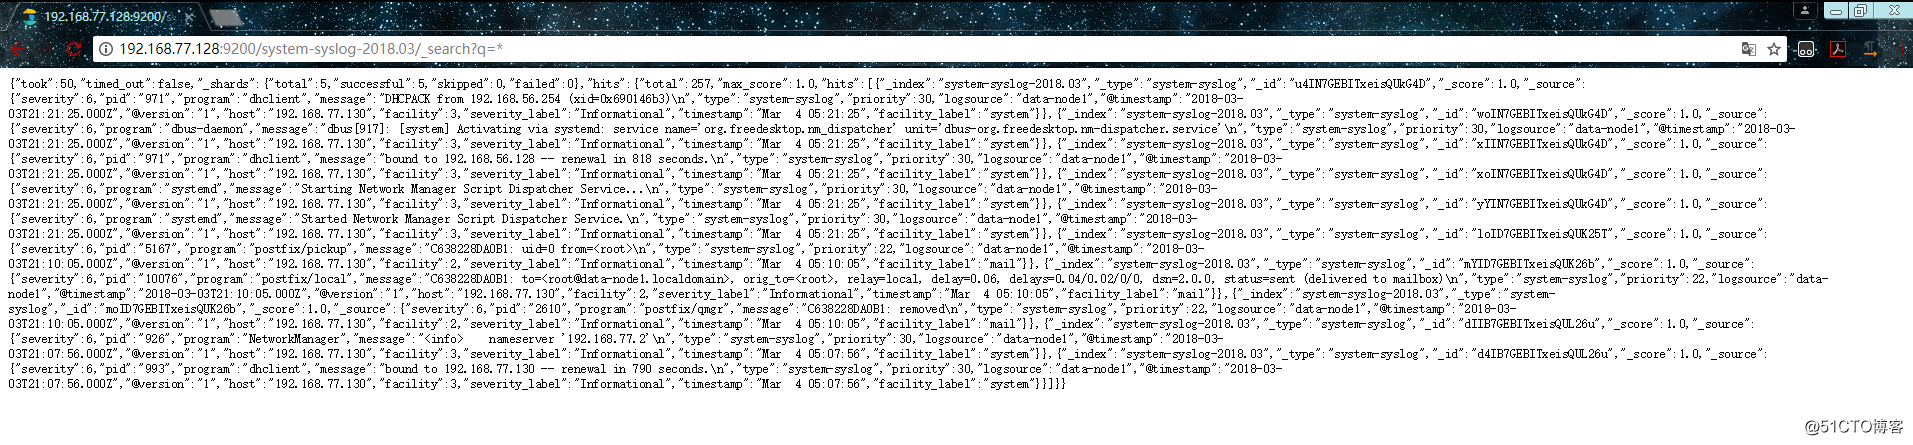
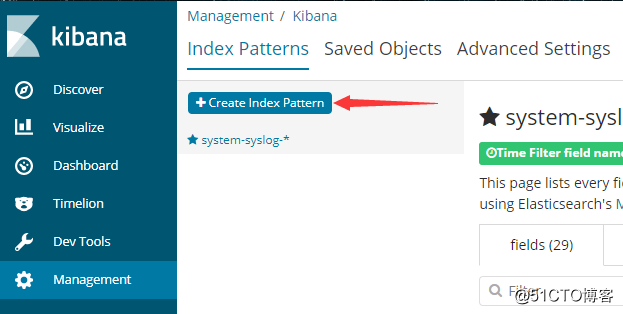
如果es伺服器正常返回資訊,但是 “Discover” 頁面卻依舊顯示無法查詢到日誌資訊的話,就使用另一種方式,進入設定刪除掉索引:
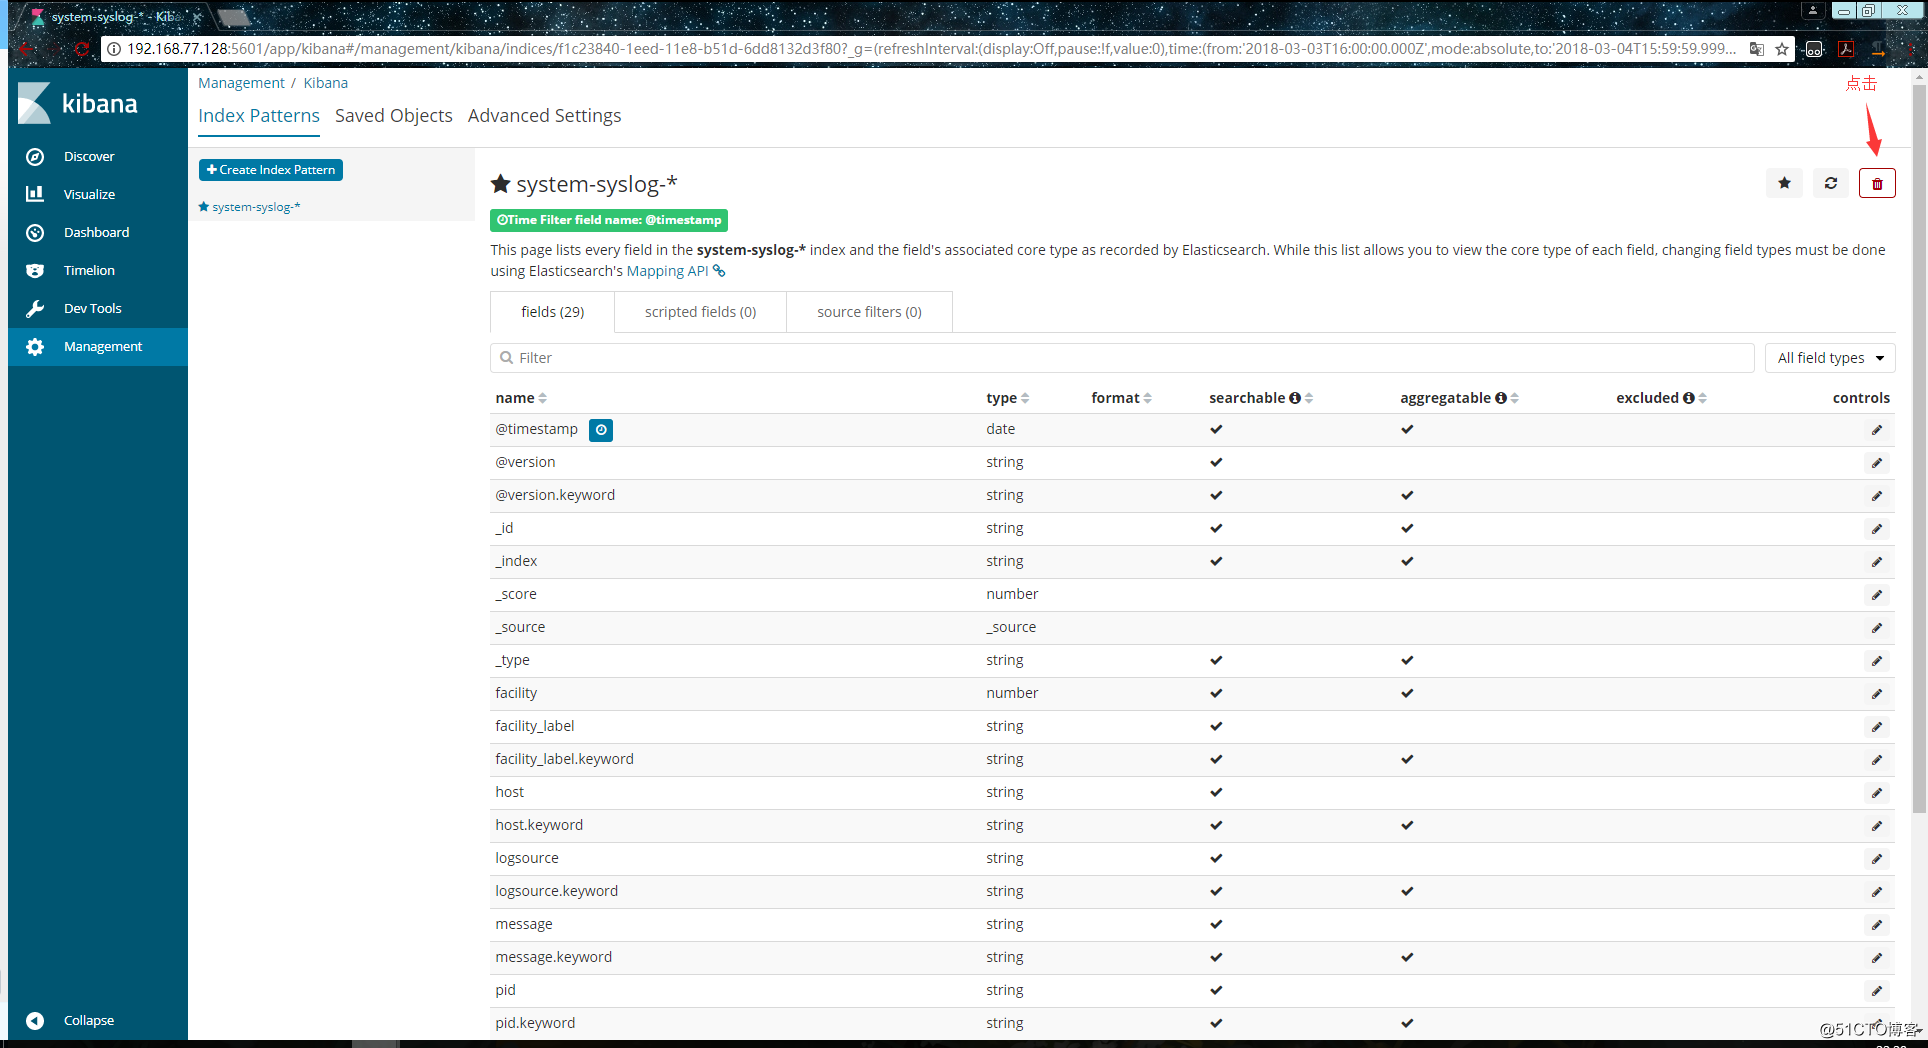
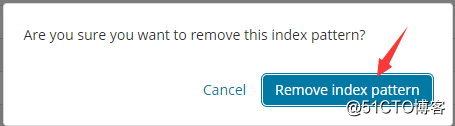
重新新增索引,但是這次不要選擇 @timestampe 了: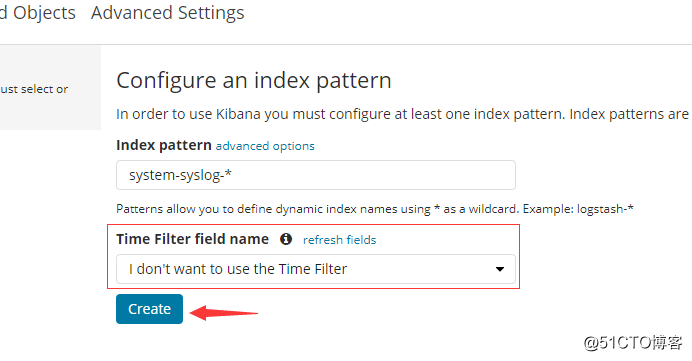
但是這種方式只能看到資料,沒有視覺化的柱狀圖: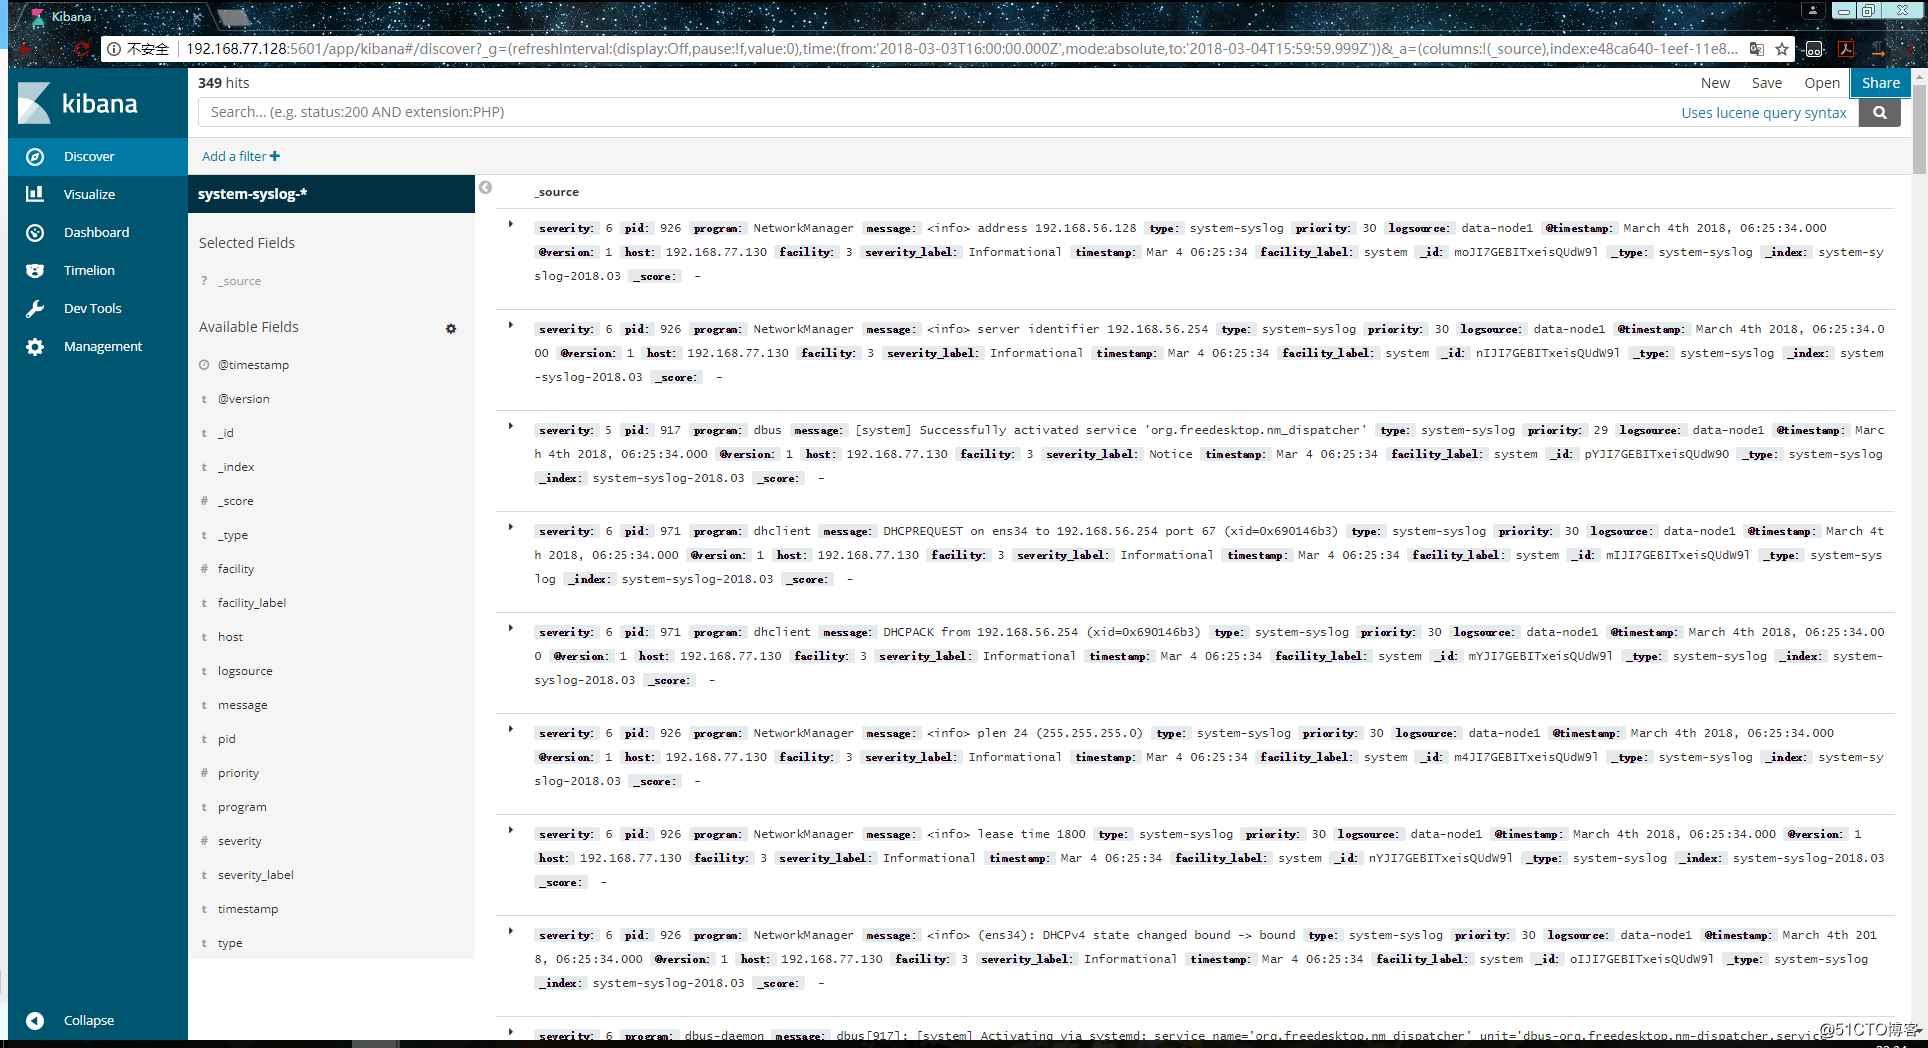
其實這裡顯示的日誌資料就是 /var/log/messages 檔案裡的資料,因為logstash裡配置的就是收集messages 檔案裡的資料。
以上這就是如何使用logstash收集系統日誌,輸出到es伺服器上,並在kibana的頁面上進行檢視。
27.10 logstash收集nginx日誌
和收集syslog一樣,首先需要編輯配置檔案,這一步在logstash伺服器上完成:
[[email protected] ~]# vim /etc/logstash/conf.d/nginx.conf  # 增加如下內容
input {
  file {  # 指定一個檔案作為輸入源
    path => "/tmp/elk_access.log"  # 指定檔案的路徑
    start_position => "beginning"  # 指定何時開始收集
    type => "nginx"  # 定義日誌型別,可自定義
  }
}
filter {  # 配置過濾器
    grok {
        match => { "message" => "%{IPORHOST:http_host} %{IPORHOST:clientip} - %{USERNAME:remote_user} \[%{HTTPDATE:timestamp}\] \"(?:%{WORD:http_verb} %{NOTSPACE:http_request}(?: HTTP/%{NUMBER:http_version})?|%{DATA:raw_http_request})\" %{NUMBER:response} (?:%{NUMBER:bytes_read}|-) %{QS:referrer} %{QS:agent} %{QS:xforwardedfor} %{NUMBER:request_time:float}"}  # 定義日誌的輸出格式
    }
    geoip {
        source => "clientip"
    }
}
output {
    stdout { codec => rubydebug }
    elasticsearch {
        hosts => ["192.168.77.128:9200"]
        index => "nginx-test-%{+YYYY.MM.dd}"
  }
}
同樣的編輯完配置檔案之後,還需要檢測配置檔案是否有錯:
[[email protected] ~]# cd /usr/share/logstash/bin
[[email protected] /usr/share/logstash/bin]# ./logstash --path.settings /etc/logstash/ -f /etc/logstash/conf.d/nginx.conf --config.test_and_exit
Sending Logstash's logs to /var/log/logstash which is now configured via log4j2.properties
Configuration OK
[[email protected] /usr/share/logstash/bin]#
檢查完畢之後,進入你的nginx虛擬主機配置檔案所在的目錄中,新建一個虛擬主機配置檔案:
[[email protected] ~]# cd /usr/local/nginx/conf/vhost/
[[email protected] /usr/local/nginx/conf/vhost]# vim elk.conf
server {
      listen 80;
      server_name elk.test.com;

      location / {
          proxy_pass      http://192.168.77.128:5601;
          proxy_set_header Host   $host;
          proxy_set_header X-Real-IP      $remote_addr;
          proxy_set_header X-Forwarded-For $proxy_add_x_forwarded_for;
      }

      access_log  /tmp/elk_access.log main2;
}
配置nginx的主配置檔案,因為需要配置日誌格式,在 log_format combined_realip 那一行的下面增加以下內容:
[[email protected] ~]# vim /usr/local/nginx/conf/nginx.conf
log_format main2 '$http_host $remote_addr - $remote_user [$time_local] "$request" '
                      '$status $body_bytes_sent "$http_referer" '
                      '"$http_user_agent" "$upstream_addr" $request_time';
完成以上配置檔案的編輯之後,檢測配置檔案有沒有錯誤,沒有的話就reload重新載入:
[[email protected] ~]# /usr/local/nginx/sbin/nginx -t
nginx: [warn] conflicting server name "aaa.com" on 0.0.0.0:80, ignored
nginx: the configuration file /usr/local/nginx/conf/nginx.conf syntax is ok
nginx: configuration file /usr/local/nginx/conf/nginx.conf test is successful
[[email protected] ~]# /usr/local/nginx/sbin/nginx -s reload
[[email protected] ~]#
由於我們需要在windows下通過瀏覽器訪問我們配置的 elk.test.com 這個域名,所以需要在windows下編輯它的hosts檔案增加以下內容:
192.168.77.130 elk.test.com這時在瀏覽器上就可以通過這個域名進行訪問了: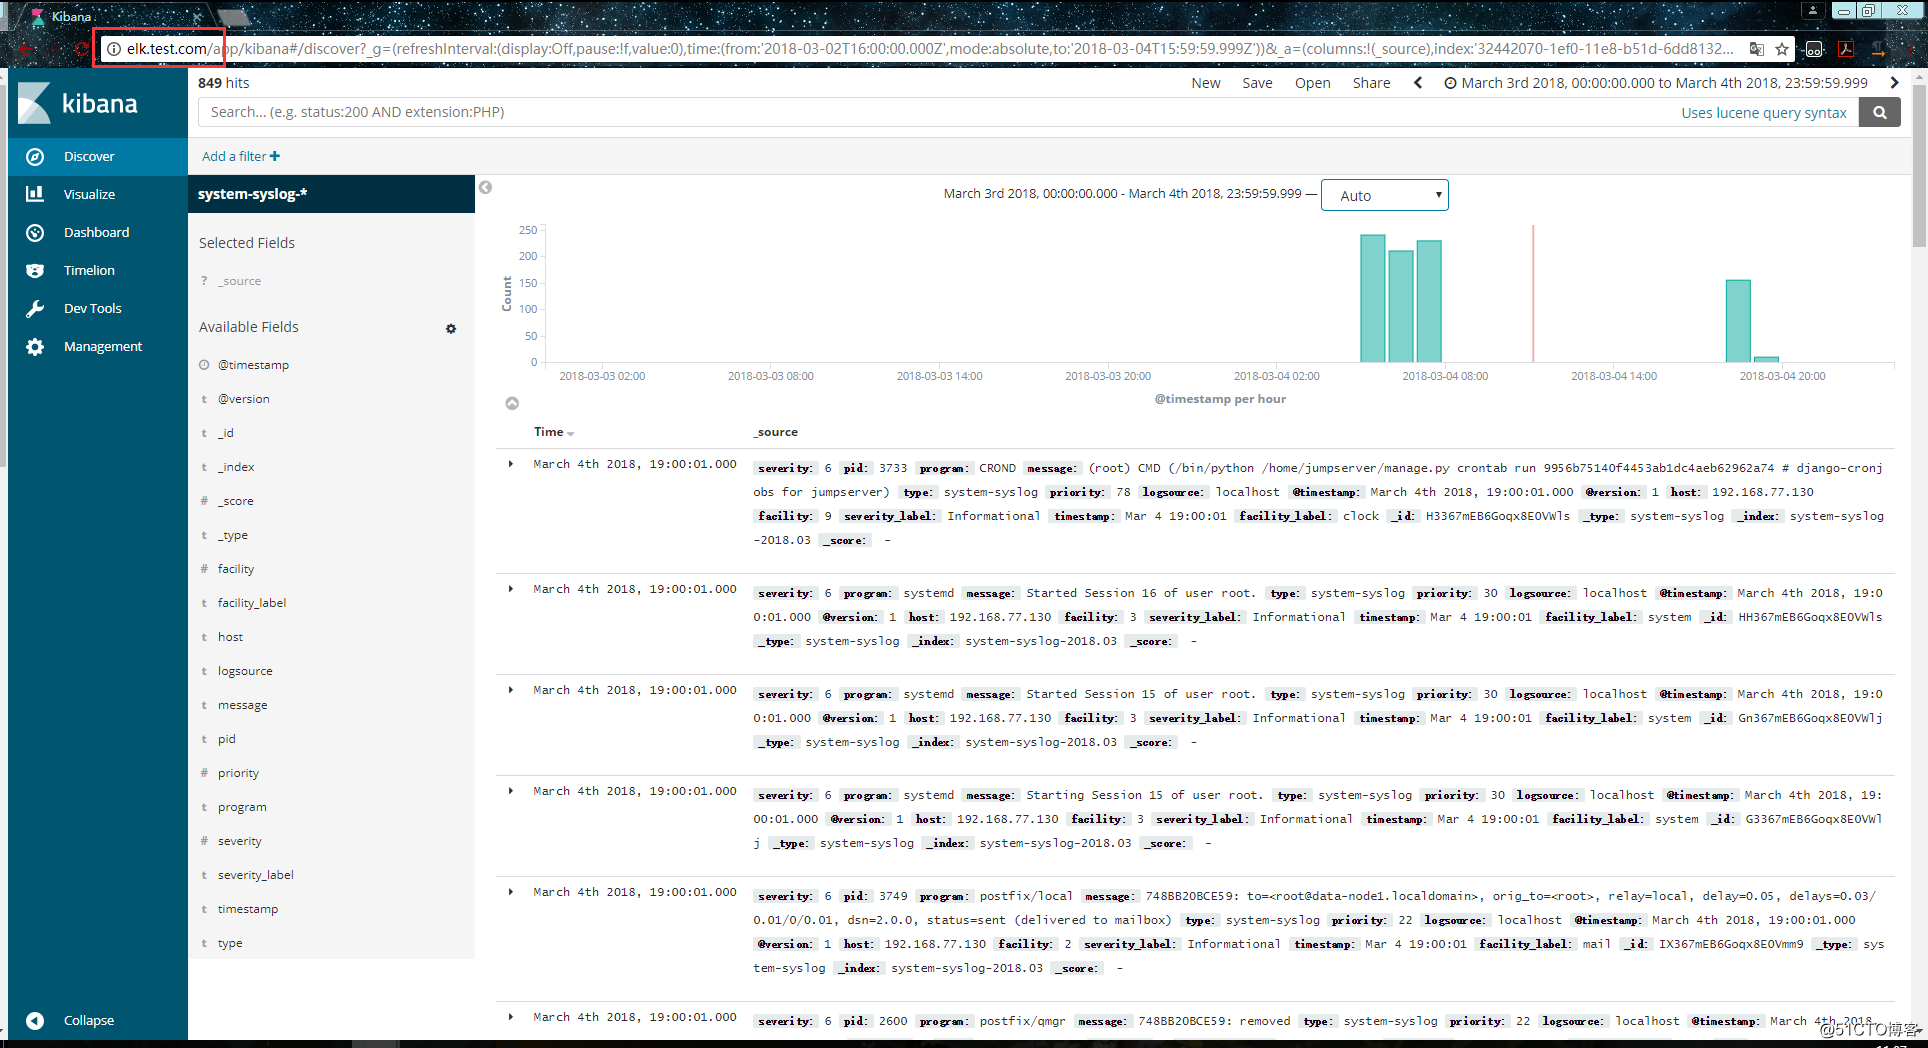
訪問成功後,檢視生成的日誌檔案:
[[email protected] ~]# ls /tmp/elk_access.log
/tmp/elk_access.log
[[email protected] ~]# wc -l !$
wc -l /tmp/elk_access.log
45 /tmp/elk_access.log
[[email protected] ~]#
如上,可以看到,nginx的訪問日誌已經生成了。
重啟logstash服務,生成日誌的索引:
systemctl restart logstash
重啟完成後,在es伺服器上檢查是否有nginx-test開頭的索引生成:
[[email protected] ~]# curl '192.168.77.128:9200/_cat/indices?v'
health status index                 uuid                   pri rep docs.count docs.deleted store.size pri.store.size
green  open   .kibana               6JfXc0gFSPOWq9gJI1ZX2g   1   1          2            0     14.4kb          7.2kb
green  open   system-syslog-2018.03 bUXmEDskTh6fjGD3JgyHcA   5   1        902            0      1.1mb        608.9kb
green  open   nginx-test-2018.03.04 GdKYa6gBRke7mNgrh2PBUA   5   1         45            0      199kb         99.5kb
[[email protected] ~]#
可以看到,nginx-test索引已經生成了,那麼這時就可以到kibana上配置該索引: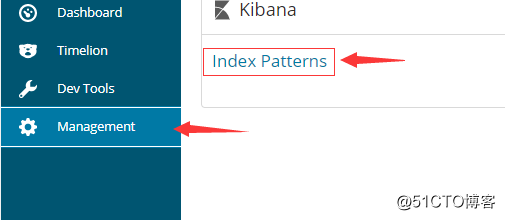
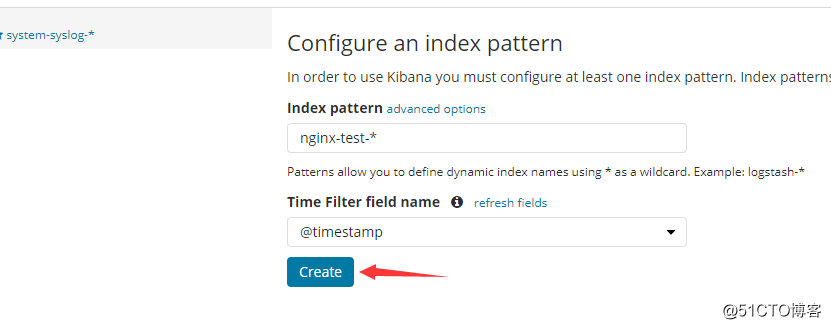
配置完成之後就可以在 “Discover” 裡進行檢視nginx的訪問日誌資料了: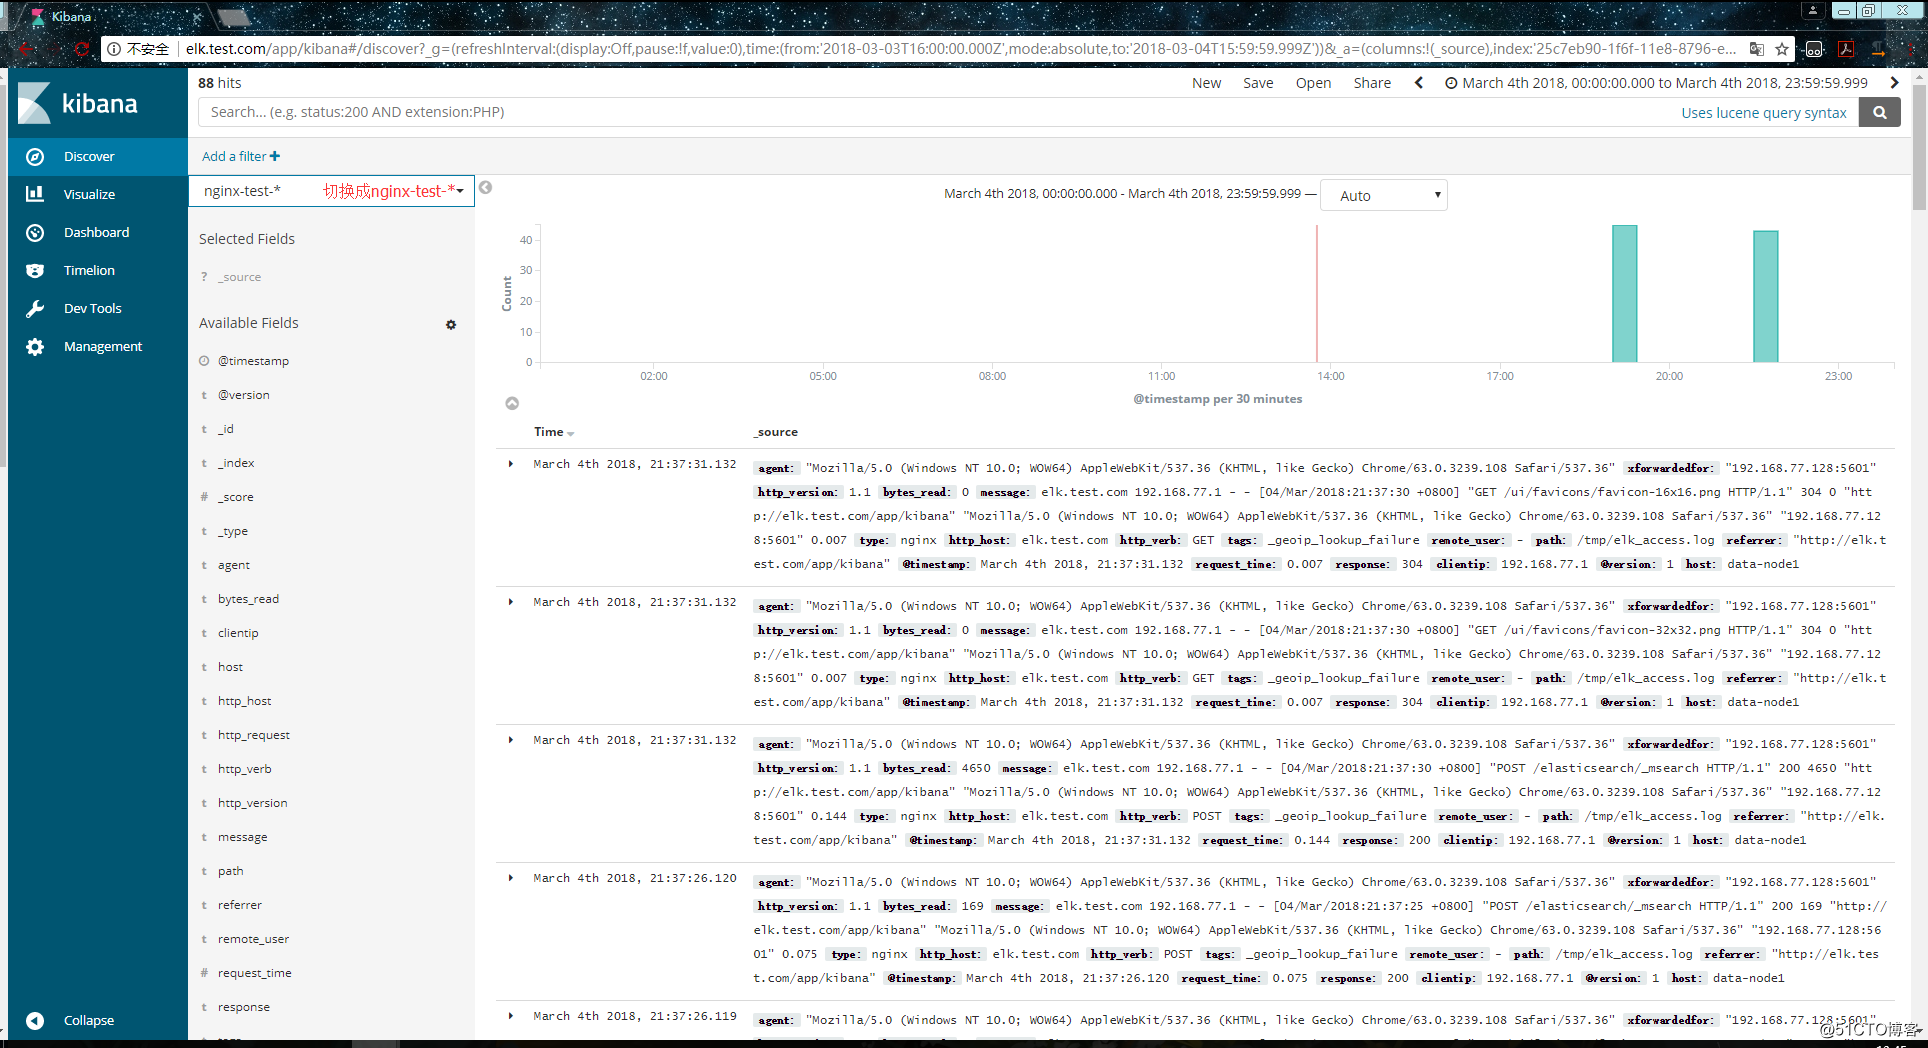
使用beats採集日誌
之前也介紹過beats是ELK體系中新增的一個工具,它屬於一個輕量的日誌採集器,以上我們使用的日誌採集工具是logstash,但是logstash佔用的資源比較大,沒有beats輕量,所以官方也推薦使用beats來作為日誌採集工具。而且beats可擴充套件,支援自定義構建。
官方介紹:
在 192.168.77.134 上安裝filebeat,filebeat是beats體系中用於收集日誌資訊的工具:
[[email protected] ~]# wget https://artifacts.elastic.co/downloads/beats/filebeat/filebeat-6.0.0-x86_64.rpm
[[email protected] ~]# rpm -ivh  filebeat-6.0.0-x86_64.rpm
安裝完成之後編輯配置檔案:
[[email protected] ~]# vim /etc/filebeat/filebeat.yml  # 增加或者更改為以下內容
filebeat.prospectors:
- type: log
   #enabled: false 這一句要註釋掉
   paths:
      - /var/log/messages  # 指定需要收集的日誌檔案的路徑

#output.elasticsearch:  # 先將這幾句註釋掉
  # Array of hosts to connect to.
#  hosts: ["localhost:9200"]

output.console:  # 指定在終端上輸出日誌資訊
  enable: true
配置完成之後,執行以下命令,看看是否有在終端中列印日誌資料,有列印則代表filebeat能夠正常收集日誌資料:
[[email protected] ~]# /usr/share/filebeat/bin/filebeat -c /etc/filebeat/filebeat.yml以上的配置只是為了測試filebeat能否正常收集日誌資料,接下來我們需要再次修改配置檔案,將filebeat作為一個服務啟動:
[[email protected] ~]# vim /etc/filebeat/filebeat.yml
#output.console:  把這兩句註釋掉
#  enable: true

# 把這兩句的註釋去掉
output.elasticsearch:
  # Array of hosts to connect to.
  hosts: ["192.168.77.128:9200"]  # 並配置es伺服器的ip地址
修改完成後就可以啟動filebeat服務了:
[[email protected] ~]# systemctl start filebeat
[[email protected] ~]# ps axu |grep filebeat
root       3021  0.3  2.3 296360 11288 ?        Ssl  22:27   0:00 /usr/share/filebeat/bin/filebeat -c /etc/filebeat/filebeat.yml -path.home /usr/share/filebeat -path.config /etc/filebeat -path.data /var/lib/filebeat -path.logs /var/log/filebeat
root       3030  0.0  0.1 112660   960 pts/0    S+   22:27   0:00 grep --color=auto filebeat
啟動成功後,到es伺服器上檢視索引,可以看到新增了一個以filebeat-6.0.0開頭的索引,這就代表filesbeat和es能夠正常通訊了:
[[email protected] ~]# curl '192.168.77.128:9200/_cat/indices?v'
health status index                     uuid                   pri rep docs.count docs.deleted store.size pri.store.size
green  open   system-syslog-2018.03     bUXmEDskTh6fjGD3JgyHcA   5   1      73076            0     24.8mb         11.6mb
green  open   nginx-test-2018.03.04     GdKYa6gBRke7mNgrh2PBUA   5   1         91            0        1mb        544.8kb
green  open   .kibana                   6JfXc0gFSPOWq9gJI1ZX2g   1   1          3            0     26.9kb         13.4kb
green  open   filebeat-6.0.0-2018.03.04 MqQJMUNHS_OiVmO26NEWTw   3   1         66            0     64.5kb         39.1kb
[[email protected] ~]#
es伺服器能夠正常獲取到索引後,就可以到kibana上配置這個索引了: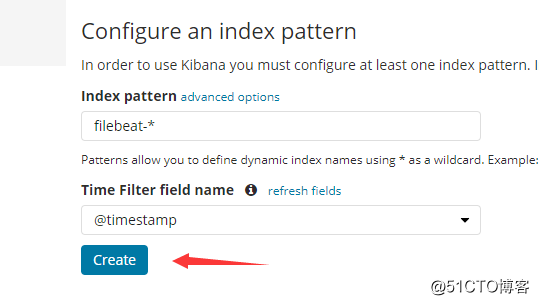
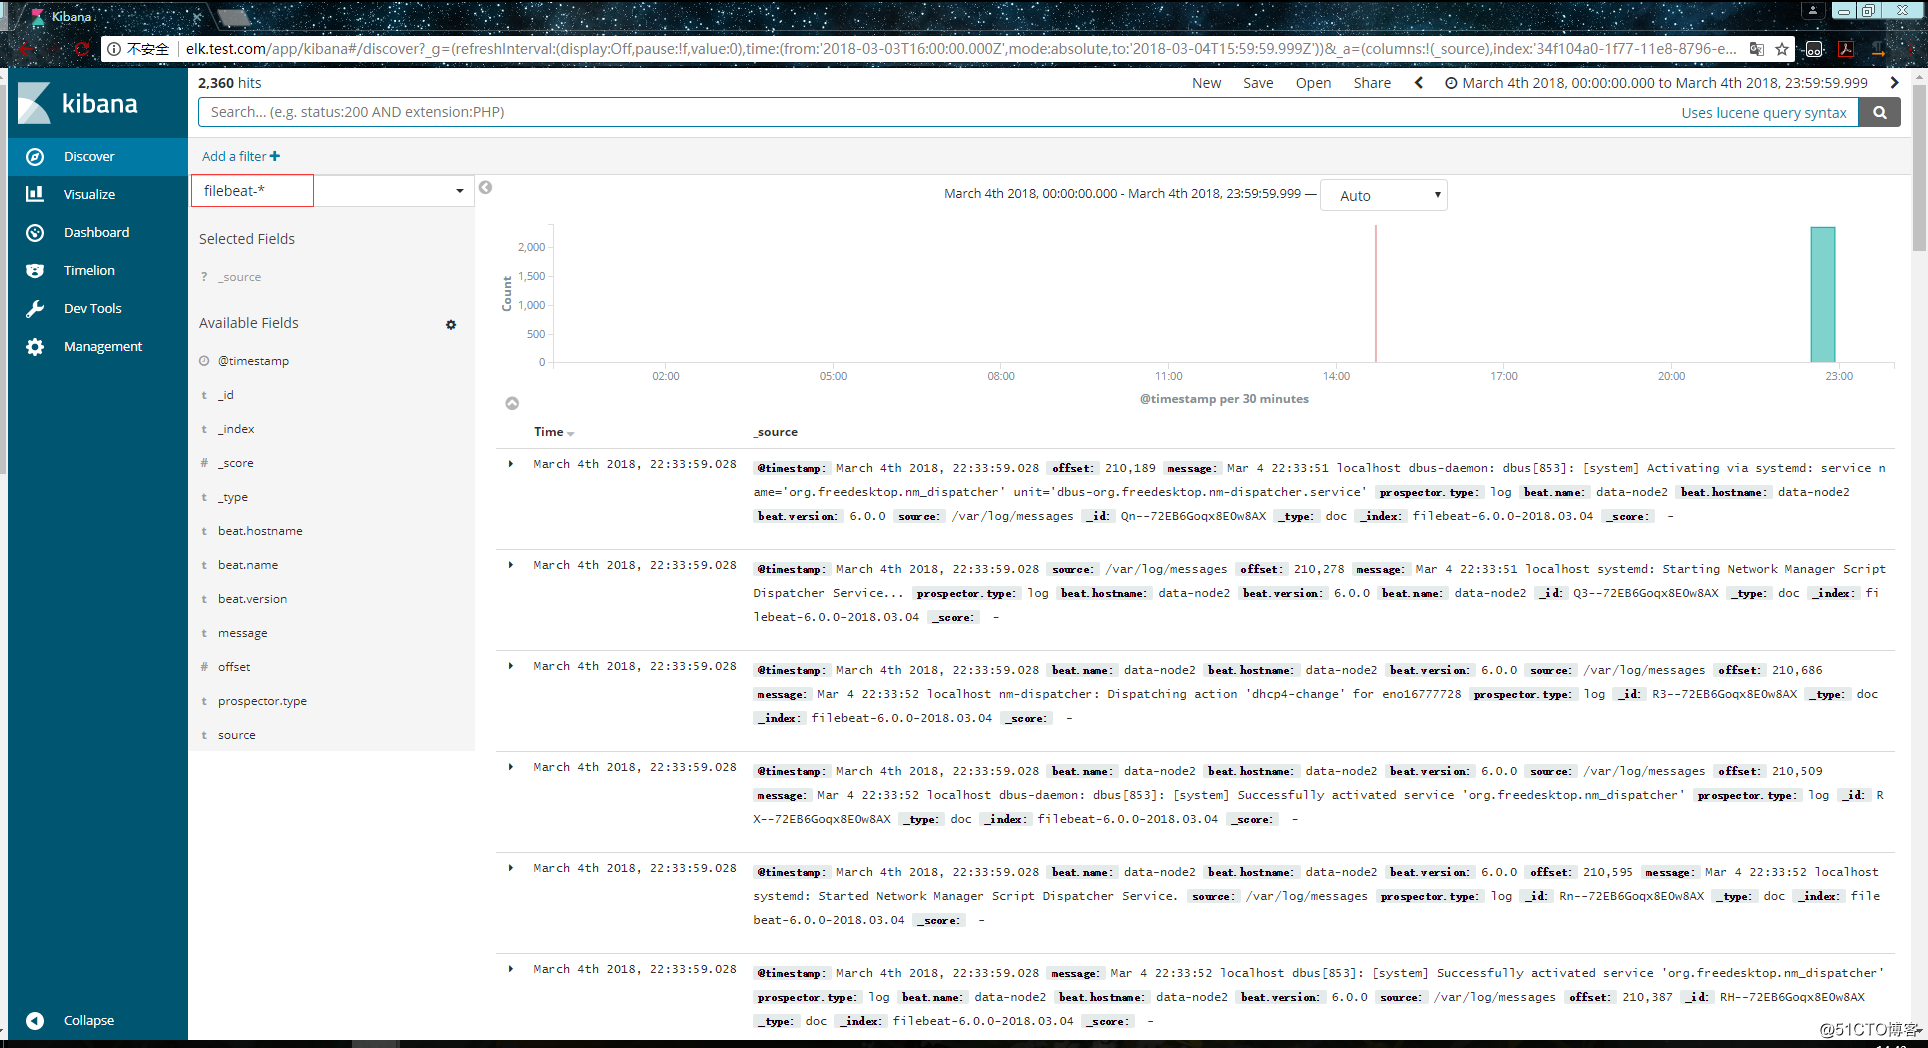
以上這就是如何使用filebeat進行日誌的資料收集,可以看到配置起來比logstash要簡單,而且佔用資源還少。
擴充套件部分
集中式日誌分析平臺 - ELK Stack - 安全解決方案 X-Pack:
http://www.jianshu.com/p/a49d93212eca
https://www.elastic.co/subscriptions
Elastic stack演進:
基於kafka和elasticsearch,linkedin構建實時日誌分析系統:
elastic stack 使用redis作為日誌緩衝:
ELK+Filebeat+Kafka+ZooKeeper 構建海量日誌分析平臺:
關於elk+zookeeper+kafka 運維集中日誌管理: