
thymeleaf的靜態html頁面熱載入以及idea中springboot的熱載入
阿新 • • 發佈:2018-11-05
首先說一下thymeleaf的html頁面熱載入
1.加入thymeleaf依賴
<dependency>
	<groupId>org.springframework.boot</groupId>
	<artifactId>spring-boot-starter-thymeleaf</artifactId>
</dependency>
2.修改thymleaf模板配置
#thymelea模板配置
spring.thymeleaf.prefix=classpath:/templates/
spring.thymeleaf.suffix=.html
spring.thymeleaf.mode=HTML5
spring.thymeleaf.encoding=UTF-8
spring.thymeleaf.servlet.content-type=text/html
spring.thymeleaf.cache=false #主要是這裡,設定預設不快取頁面
spring.resources.chain.strategy.content.enabled=true
spring.resources.chain.strategy.content.paths=/**
3.最後在每次修改靜態內容時按Ctrl+Shift+F9即可重新載入
其次說一下idea中springboot的熱載入設定
1.首先加入開發工具依賴
<dependency>
	<groupId>org.springframework.boot</groupId>
	<artifactId>spring-boot-devtools</artifactId>
	<optional>true</optional>
</dependency>
2.其次在build maven外掛中開啟熱部署
<build>
	<plugins>
		<plugin>
			<groupId>org.springframework.boot</groupId>
			<artifactId>spring-boot-maven-plugin</artifactId>
			<configuration>
				<fork>true</fork> #主要是這裡,開啟
			</configuration>
		</plugin>
	</plugins>
</build>
3.idea開啟自動
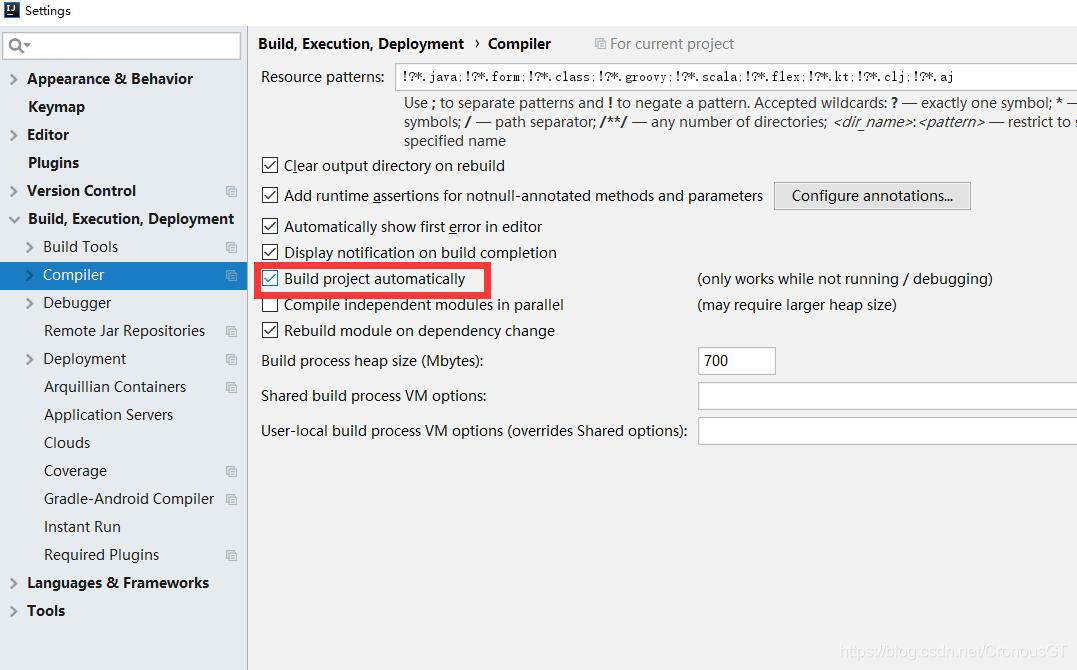
我這裡用的是idea2018,老的版本都在這個位置,只是名字不一樣,大家自己修改
4.Shift+ALT+Ctrl+/找到進入 registry並勾選compiler.automake.allow.when.app.running

5.禁用瀏覽器快取 按F12(更多工具—->開發者工具),找到network,勾選Disable Cache

至此就可以完成整個專案的熱載入了