
在服務器上搭建多個WordPress博客網站教程(超級詳細)
一臺阿裏雲服務器
二個域名(IP與域名已經建立解析關系)
Linux關於web架構的知識
實驗步驟
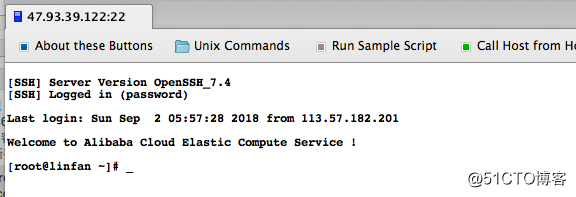
1.用crt遠程登錄阿裏雲服務器
2.安裝nginx,mysql,php
建議使用lnmp一鍵安裝包安裝,方便快捷
獲取lnmp一鍵安裝包鏈接
lnpm官網鏈接
找到下載頁面選擇最新的復制其鏈接。
寫此文時最新版本信息如下:
LNMP 1.4 測試版
http://soft.vpser.net/lnmp/lnmp1.4beta.tar.gz  (131KB)
安裝 163源
[root@linfan ~]# cd /etc/yum.repos.d/
[root@linfan yum.repos.d]# mv * /tmp/
[root@linfan yum.repos.d]# curl -o 163.repo   http://mirrors.163.com/.help/CentOS7-Base-163.repo
  % Total    % Received % Xferd  Average Speed   Time    Time     Time  Current
                                 Dload  Upload   Total   Spent    Left  Speed
100  1572  100  1572    0     0  13343      0 --:--:-- --:--:-- --:--:-- 13435
[root@linfan yum.repos.d]# sed -i ‘s/\$releasever/7/g‘ 163.repo
[root@linfan yum.repos.d]# sed -i ‘s/^enabled=.*/enabled=1/g‘ 163.repo
[root@linfan yum.repos.d]# yum clean all
Loaded plugins: fastestmirror
Cleaning repos: base centosplus extras updates
Cleaning up everything
Maybe you want: rm -rf /var/cache/yum, to also free up space taken by orphaned data from disabled or removed repos
[root@linfan yum.repos.d]# yum -y install epel-release
Loaded plugins: fastestmirror
base                                                                                               | 3.6 kB  00:00:00
centosplus                                                                                         | 3.4 kB  00:00:00
extras                                                                                             | 3.4 kB  00:00:00
updates                                                                                            | 3.4 kB  00:00:00
(1/5): base/x86_64/group_gz                                                                        | 166 kB  00:00:00
(2/5): extras/x86_64/primary_db                                                                    | 187 kB  00:00:00
(3/5): centosplus/x86_64/primary_db                                                                | 2.9 MB  00:00:01
(4/5): updates/x86_64/primary_db                                                                   | 5.2 MB  00:00:02
(5/5): base/x86_64/primary_db                                                                      | 5.9 MB  00:00:02
Determining fastest mirrors
Resolving Dependencies
--> Running transaction check
---> Package epel-release.noarch 0:7-11 will be installed
--> Finished Dependency Resolution

Dependencies Resolved

==========================================================================================================================
 Package                          Arch                       Version                     Repository                  Size
==========================================================================================================================
Installing:
 epel-release                     noarch                     7-11                        extras                      15 k

Transaction Summary
==========================================================================================================================
Install  1 Package

Total download size: 15 k
Installed size: 24 k
Downloading packages:
warning: /var/cache/yum/x86_64/7/extras/packages/epel-release-7-11.noarch.rpm: Header V3 RSA/SHA256 Signature, key ID f4a80eb5: NOKEY
Public key for epel-release-7-11.noarch.rpm is not installed
epel-release-7-11.noarch.rpm                                                                       |  15 kB  00:00:00
Retrieving key from http://mirrors.163.com/centos/RPM-GPG-KEY-CentOS-7
Importing GPG key 0xF4A80EB5:
 Userid     : "CentOS-7 Key (CentOS 7 Official Signing Key) <[email protected]>"
 Fingerprint: 6341 ab27 53d7 8a78 a7c2 7bb1 24c6 a8a7 f4a8 0eb5
 From       : http://mirrors.163.com/centos/RPM-GPG-KEY-CentOS-7
Running transaction check
Running transaction test
Transaction test succeeded
Running transaction
  Installing : epel-release-7-11.noarch                                                                               1/1
  Verifying  : epel-release-7-11.noarch                                                                               1/1

Installed:
  epel-release.noarch 0:7-11

Complete!
[root@linfan ~]# yum -y install wget
上傳腳本並執行
// 腳本執行過程中 有需要選擇的直接敲回車鍵即可 有選擇版本的需要根據自己的需求來選擇即可
[root@linfan ~]# wget http://soft.vpser.net/lnmp/lnmp1.4beta.tar.gz

[root@linfan ~]# tar -zxvf lnmp1.4beta.tar.gz
[root@linfan ~]# cd lnmp1.4
[root@linfan lnmp1.4]# ./install.sh

+------------------------------------------------------------------------+
|          LNMP V1.4 for CentOS Linux Server, Written by Licess          |
+------------------------------------------------------------------------+
|        A tool to auto-compile & install LNMP/LNMPA/LAMP on Linux       |
+------------------------------------------------------------------------+
|           For more information please visit https://lnmp.org           |
+------------------------------------------------------------------------+
You have 5 options for your DataBase install.
1: Install MySQL 5.1.73
2: Install MySQL 5.5.56 (Default)
3: Install MySQL 5.6.36
4: Install MySQL 5.7.18
5: Install MariaDB 5.5.56
6: Install MariaDB 10.0.30
7: Install MariaDB 10.1.23
0: DO NOT Install MySQL/MariaDB
Enter your choice (1, 2, 3, 4, 5, 6, 7 or 0):
Enter your choice (1, 2, 3, 4, 5, 6, 7 or 0):
No input,You will install MySQL 5.5.56
===========================
Please setup root password of MySQL.(Default password: root)
Please enter:
MySQL root password: root
===========================
Do you want to enable or disable the InnoDB Storage Engine?
Default enable,Enter your choice [Y/n]:
No input,The InnoDB Storage Engine will enable.
===========================
You have 6 options for your PHP install.
1: Install PHP 5.2.17
2: Install PHP 5.3.29
3: Install PHP 5.4.45
4: Install PHP 5.5.38 (Default)
5: Install PHP 5.6.31
6: Install PHP 7.0.21
7: Install PHP 7.1.7
Enter your choice (1, 2, 3, 4, 5, 6 or 7):
No input,You will install PHP 5.5.38
===========================
You have 3 options for your Memory Allocator install.
1: Don‘t install Memory Allocator. (Default)
2: Install Jemalloc
3: Install TCMalloc
Enter your choice (1, 2 or 3):
No input,You will not install Memory Allocator.

Press any key to install...or Press Ctrl+c to cancel
//後續執行的過程有些漫長大概三十到四十分鐘左右,可以先看看電視聽聽音樂放松下 哈哈
看到這個界面說明腳本執行成功了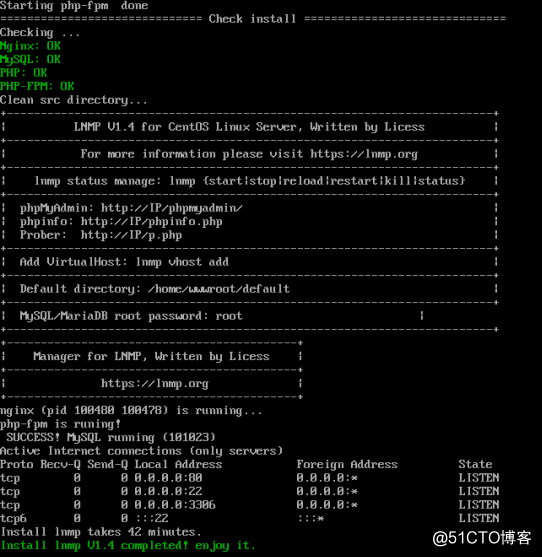
簡單說明一下,此安裝過程安裝完成便也啟動了nginx,mysql,php-fpm並加入了開機啟動項。如果重啟服務器,不需要再單獨手動開啟相關的服務了。總的來說相當方便的。
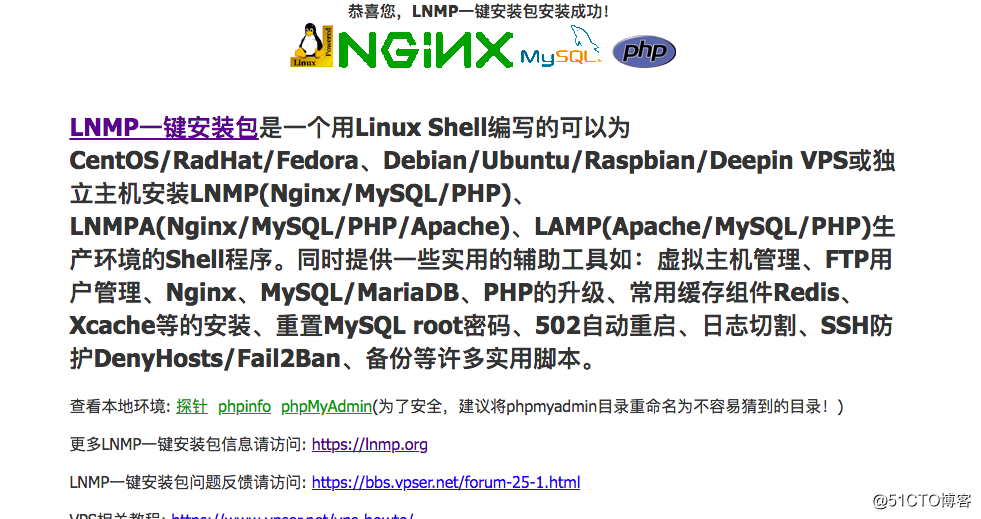
此時 在瀏覽器輸入IP即可訪問到如下頁面
網站根目錄路徑/home/wwwroot/default,如果只用來放一些靜態頁面,那麽,現在就足夠了,直接將你的html,js,css等文件丟進去即可。
退出使用ctrl+c
IP與網站的映射關系
 [root@linfan ~]# vi /usr/local/nginx/conf/nginx.conf
 ...
 ...
  server
    {
        listen 80 default_server;
        #listen [::]:80 default_server ipv6only=on;
        server_name lin.kjsc366.com; //編輯此處
        index index.html index.htm index.php;
        root  /home/wwwroot/default;
檢測nginx配置文件語法並重新加載nginx
[root@linfan ~]# nginx -t
nginx: the configuration file /usr/local/nginx/conf/nginx.conf syntax is ok
nginx: configuration file /usr/local/nginx/conf/nginx.conf test is successful
[root@linfan ~]# nginx -s reload
安裝WordPress
中文官方站點 英文官方站點具體的根據自己的需求選擇。下面以中文版為例。當前最新版本是4.7.2
為了方便,我們還是在用站點默認的路徑
[root@linfan ~]# cd /home/wwwroot/  //進入網站根目錄上一級目錄
[root@linfan wwwroot]# mv default old  //將default重命名為old
[root@linfan wwwroot]# wget https://cn.wordpress.org/wordpress-4.7.2-zh_CN.tar.gz  //下載WordPress包中文版
[root@linfan wwwroot]# tar -zxvf wordpress-4.7.2-zh_CN.tar.gz  //解壓WordPress包
[root@linfan wwwroot]# ls
old  wordpress  wordpress-4.7.2-zh_CN.tar.gz
[root@linfan wwwroot]# mv wordpress default  //將wordpress重命名為default
[root@linfan wwwroot]# ls
default  old  wordpress-4.7.2-zh_CN.tar.gz
給予相應權限
[root@linfan default]# chown -R 755 /home/wwwroot //目錄以及目錄下的文件授權
chown: changing ownership of ‘/home/wwwroot/old/.user.ini’: Operation not permitted
[root@linfan default]#  chown -R www:www /home/wwwroot/ //將目錄的所有者分給www組下的www用戶。
chown: changing ownership of ‘/home/wwwroot/old/.user.ini’: Operation not permitted
出現的提示大概是說有一個文件無法更改用戶分組和權限。不會影響你的wordpress,忽略就好
創建一個數據庫wordpress
[root@linfan default]# mysql -u root -p
Enter password:  密碼默認是root
Welcome to the MySQL monitor.  Commands end with ; or \g.
Your MySQL connection id is 24
Server version: 5.5.56-log Source distribution

Copyright (c) 2000, 2017, Oracle and/or its affiliates. All rights reserved.

Oracle is a registered trademark of Oracle Corporation and/or its
affiliates. Other names may be trademarks of their respective
owners.

Type ‘help;‘ or ‘\h‘ for help. Type ‘\c‘ to clear the current input statement.

mysql> create database wordpress;
Query OK, 1 row affected (0.00 sec)

mysql> show databases;
+--------------------+
| Database           |
+--------------------+
| information_schema |
| mysql              |
| performance_schema |
| wordpress          |
+--------------------+
4 rows in set (0.00 sec)

mysql> quit
配置WordPress
在瀏覽器輸入域名地址進行訪問
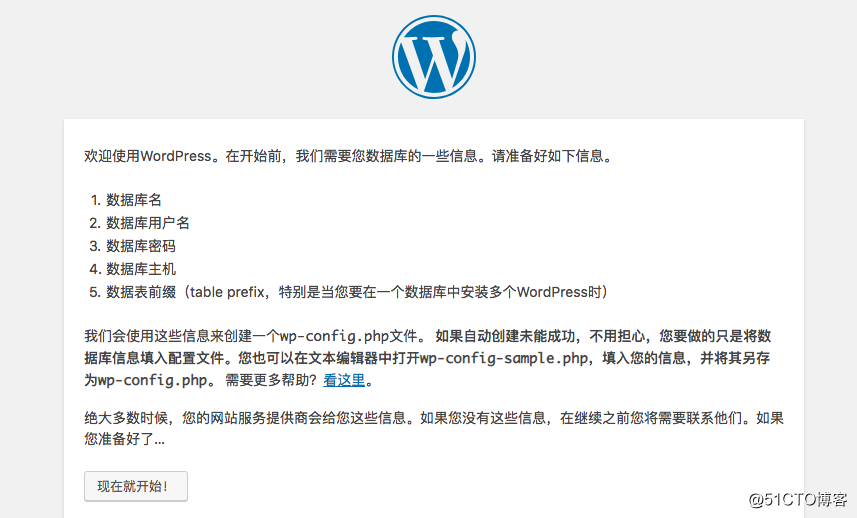
點擊現在就開始。這時候我們看到如下頁面:

按照之前設置的,輸入如下信息:
數據庫名:wordpress
用戶名:root
密碼:root
數據庫主機:localhost
表前綴:wp_
點擊提交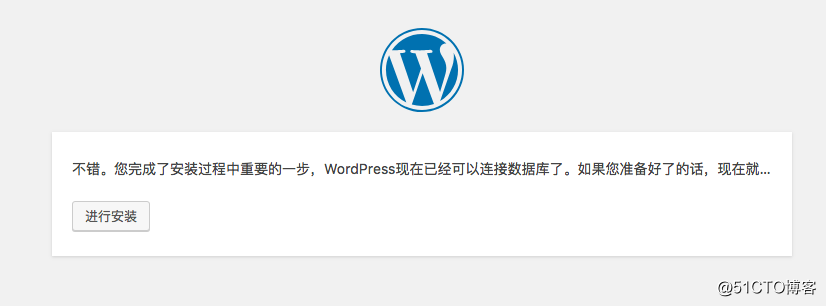
到這一步,基本上就意味著大功告成了,因為後邊基本不會出錯啦。
點擊進行安裝按鈕。出現下圖: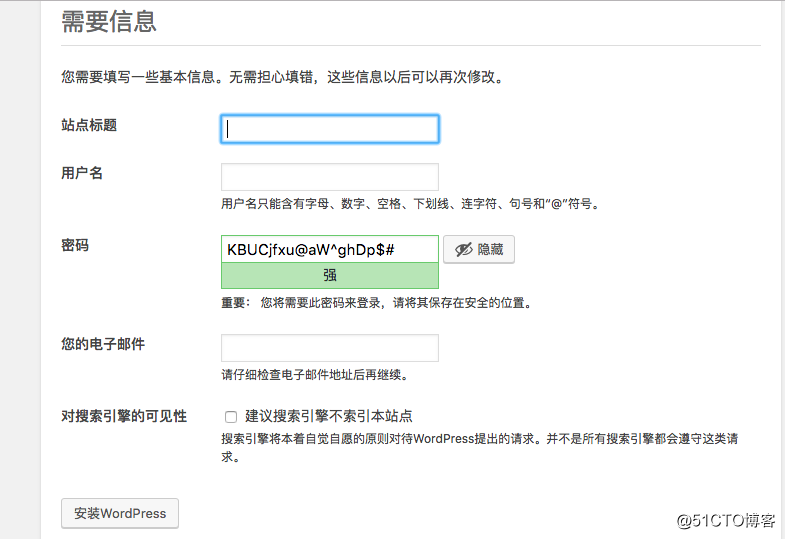
按照自己的需求填寫,比如我這裏填寫如下: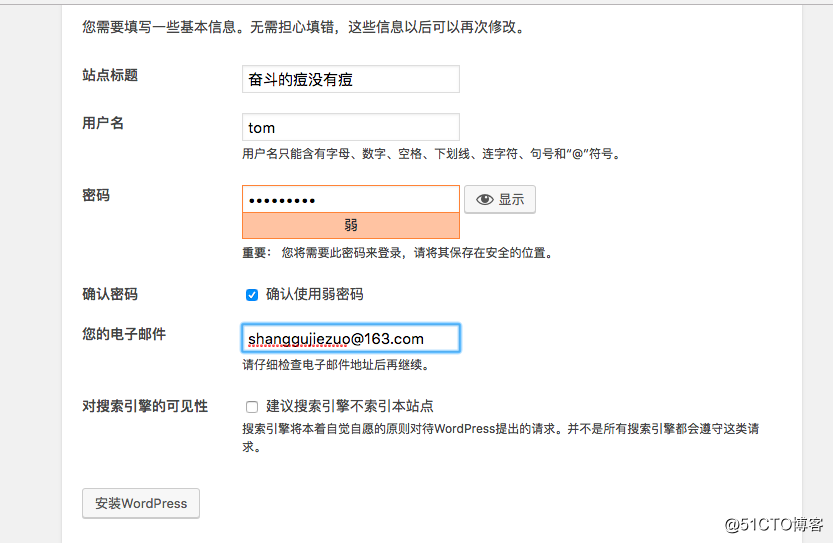
點擊安裝WordPress按鈕,然後登錄設置啥的純頁面操作就不在這裏過多介紹
再建一個WordPress
在網站根網頁目錄下創建一個新的目錄/home/wwwroot/default/doudou
[root@linfan wwwroot]# tar xf wordpress-4.7.2-zh_CN.tar.gz
[root@linfan wwwroot]# ls
default  old  wordpress  wordpress-4.7.2-zh_CN.tar.gz
[root@linfan wwwroot]# mv wordpress default/doudou
[root@linfan wwwroot]# cd default/doudou
[root@linfan doudou]# ls
index.php    wp-activate.php     wp-comments-post.php  wp-cron.php        wp-load.php   wp-settings.php   xmlrpc.php
license.txt  wp-admin            wp-config-sample.php  wp-includes        wp-login.php  wp-signup.php
readme.html  wp-blog-header.php  wp-content            wp-links-opml.php  wp-mail.php   wp-trackback.php
復制配置文件裏面的server內容 在後面添加復制的內容
[root@linfan ~]# vi /usr/local/nginx/conf/nginx.conf
...
...
   server
    {
        listen 80 default_server;
        #listen [::]:80 default_server ipv6only=on;
        server_name fan.kjsc366.com; //編輯此處
        index index.html index.htm index.php;
        root  /home/wwwroot/default/doudou; //編輯此處添加上一步創建的目錄doudou

        #error_page   404   /404.html;

        # Deny access to PHP files in specific directory
        #location ~ /(wp-content|uploads|wp-includes|images)/.*\.php$ { deny all; }

        include enable-php.conf;

        location /nginx_status
        {
            stub_status on;
            access_log   off;
        }

        location ~ .*\.(gif|jpg|jpeg|png|bmp|swf)$
        {
            expires      30d;
        location ~ .*\.(js|css)?$
        {
            expires      12h;
        }

        location ~ /.well-known {
            allow all;
        }

        location ~ /\.
        {
            deny all;
        }

        access_log  /home/wwwlogs/access.log;
    }
  include vhost/*.conf;
} 新建一個同名的vhost/doudou.conf與include vhost/*.conf建立對應關系
[root@linfan ~]mkdir -p /vhost/doudou.conf
再建立一個數據庫doudou
[root@linfan ~]# mysql -uroot -p
Enter password:
Welcome to the MySQL monitor.  Commands end with ; or \g.
Your MySQL connection id is 37
Server version: 5.5.56-log Source distribution

Copyright (c) 2000, 2017, Oracle and/or its affiliates. All rights reserved.

Oracle is a registered trademark of Oracle Corporation and/or its
affiliates. Other names may be trademarks of their respective
owners.

Type ‘help;‘ or ‘\h‘ for help. Type ‘\c‘ to clear the current input statement.

mysql> create database doudou;
Query OK, 1 row affected (0.00 sec)

mysql> show databases;
+--------------------+
| Database           |
+--------------------+
| information_schema |
| doudou             |
| mysql              |
| performance_schema |
| wordpress          |
+--------------------+
5 rows in set (0.00 sec)

mysql> quit
Bye
輸入fan.kjsc366.com
重新出來一個wordpress頁面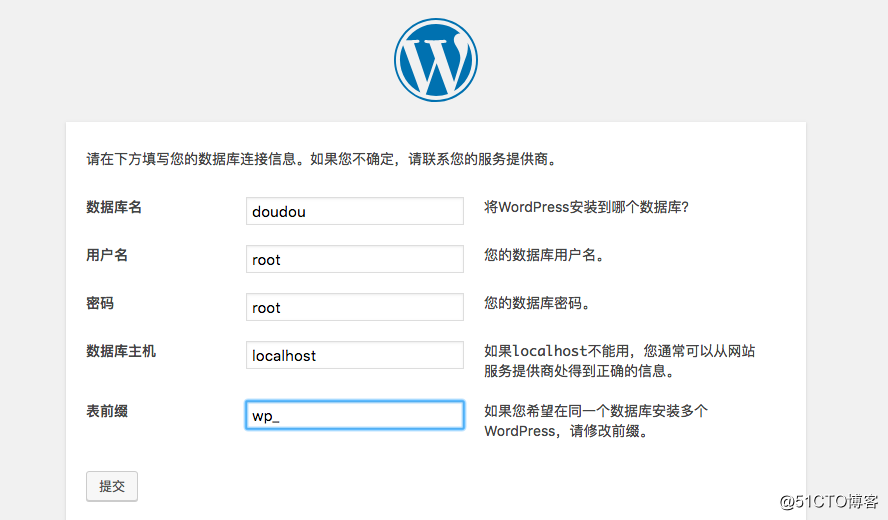
此時 我使用新建的數據庫doudou 進行配置WordPress
上面有詳細配置過程,在此不再贅述
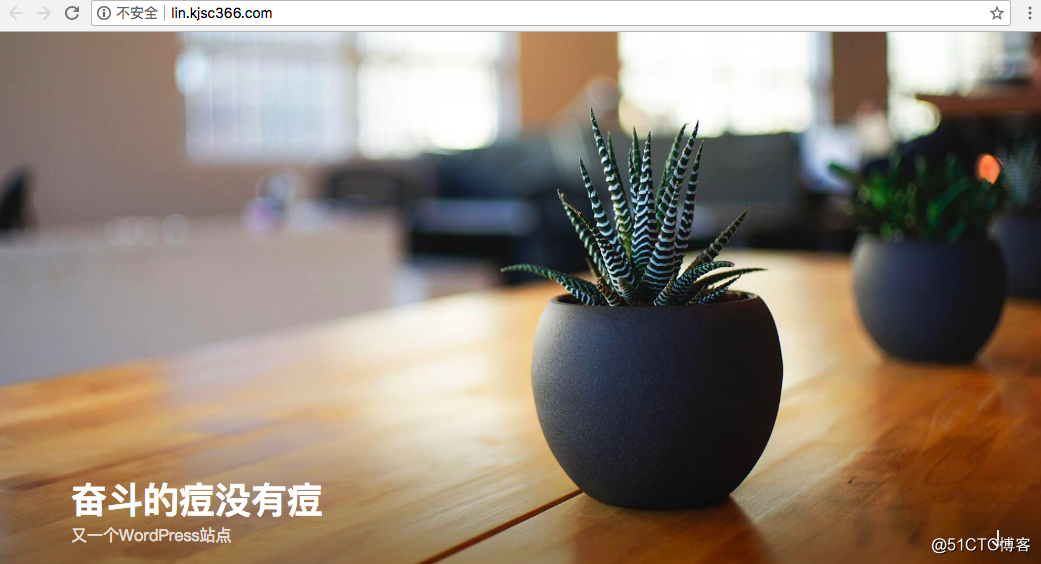
我們來直接看效果:
輸入域名lin.kjsc366.com 效果如下:
輸入域名fan.kjsc366.com 效果如下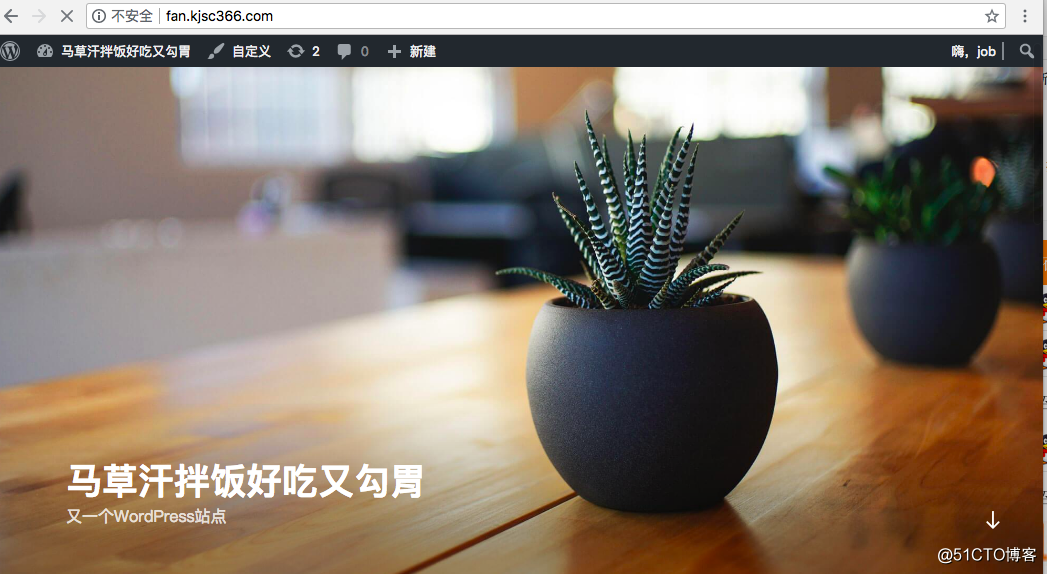
PS:
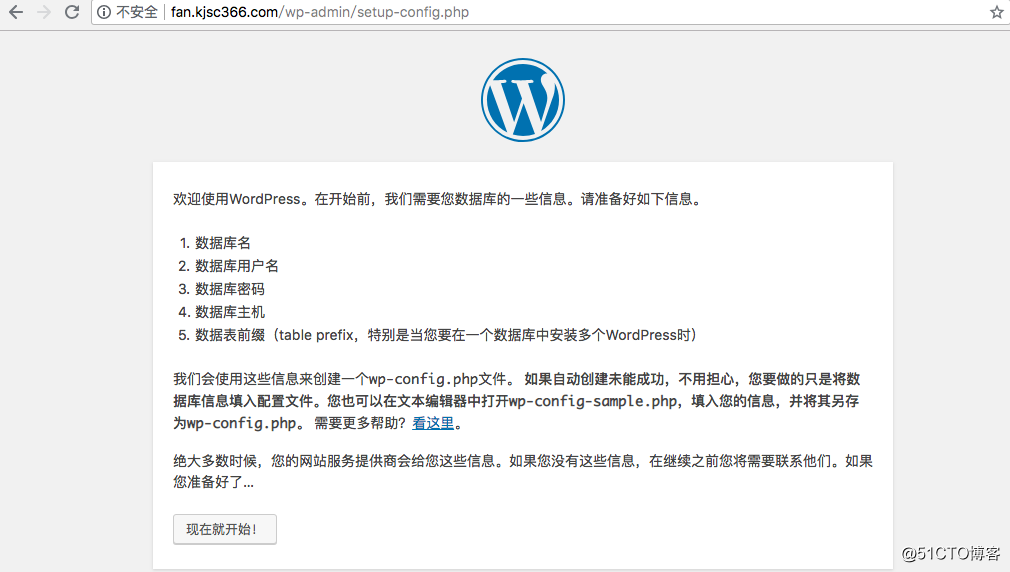
後期如果需要配置WordPress 則需要在瀏覽器輸入域名/wp-admin/setup-config.php
例如我的是
lin.kjsc366.com/wp-admin/setup-config.php後期問題解決
有問題的反饋在此,我會進行補充。
在服務器上搭建多個WordPress博客網站教程(超級詳細)