
linux環境手動編譯安裝Nginx實踐過程 附異常解決
1、下載nginx源碼包並解壓
可在http://nginx.org/en/download.html下載.tar.gz的源碼包,如(nginx-1.4.7.tar.gz)
或者使用雲盤下載 http://url.cn/5kRqr3n (密碼:f72dcD)
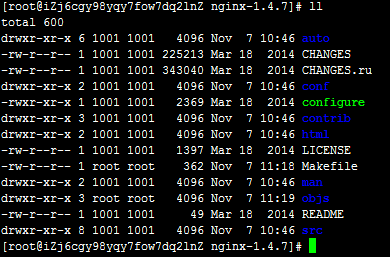
下載後通過tar -xvzf 進行解壓,解壓後的nginx目錄結構如下:
2、為nginx設置安裝目錄和啟用的模塊
切換到解壓後的nginx目錄中執行:
./configure --prefix=/opt/demo/nginx --add-module=/home/fastdfs-nginx-module/src --with-http_stub_status_module --with-http_ssl_module
參數說明:
--prefix 用於指定nginx編譯後的安裝目錄
--add-module 為添加的第三方模塊,此次添加了fdfs的nginx模塊
--with..._module 表示啟用的nginx模塊,如此處啟用了http_ssl_module模塊
安裝說明:
--add-module=/home/fastdfs-nginx-module/src 指定安裝fastdfs文件服務器模塊,所以安裝先需先安裝好fastdfs並指向對應的目錄,否則會提示fastdfs安裝目錄不存在。也可以不安裝fastdfs模塊,只需要刪除這塊命令 --prefix=/opt/demo/nginx --add-module=/home/fastdfs-nginx-module/src
--with-http_stub_status_module --with-http_ssl_module 需要啟動https模塊,所以安裝前需要檢查是否已經安裝好ssl模塊,如果尚未安裝請執行以下命令:yum install mod_ssl
安裝完mod_ssl會創建一個默認的SSL證書,路徑位於/etc/pki/tls,安裝完成不代表已經配置並生成對應的key,只是表示本地環境支持ssl了.但是這裏的安裝Nginx命令只需要配置好ssl即可。也可以不安裝這個模塊,即刪除 --with-http_stub_status_module --with-http_ssl_module
可能出現的錯誤:
出現:./configure: error: the HTTP rewrite module requires the PCRE library.
解決方法:安裝pcre-devel解決問題 yum -y install pcre-devel
出現:SSL modules require the OpenSSL library
解決方法:yum install openssl-devel
出現:./configure: error: the HTTP cache module requires md5 functions
from OpenSSL library. You can either disable the module by using
--without-http-cache option, or install the OpenSSL library into the system,
or build the OpenSSL library statically from the source with nginx by using
--with-http_ssl_module --with-openssl=<path> options.
解決方法:yum -y install openssl openssl-devel
當無異常並能正常解壓後的正常反饋是
Configuration summary
  + using system PCRE library
  + using system OpenSSL library
  + md5: using OpenSSL library
  + sha1: using OpenSSL library
  + using system zlib library
  + jemalloc library is disabled

  nginx path prefix: "/usr/local/nginx"
  nginx binary file: "/usr/local/nginx/sbin/nginx"
  nginx configuration prefix: "/usr/local/nginx/conf"
  nginx configuration file: "/usr/local/nginx/conf/nginx.conf"
  nginx pid file: "/usr/local/nginx/logs/nginx.pid"
  nginx error log file: "/usr/local/nginx/logs/error.log"
  nginx http access log file: "/usr/local/nginx/logs/access.log"
  nginx http client request body temporary files: "client_body_temp"
  nginx dso module path: "/usr/local/nginx/modules/"
  nginx http proxy temporary files: "proxy_temp"
  nginx http fastcgi temporary files: "fastcgi_temp"
  nginx http uwsgi temporary files: "uwsgi_temp"
  nginx http scgi temporary files: "scgi_temp"
3、編譯
執行make 進行編譯,如果編譯成功的話會在第一步中objs中出現一個nginx文件
特別註意:
在已安裝的nginx上進行添加模塊的話執行到這裏就行了,把objs中的nginx替換掉之前的安裝的nginx/sbin/中的nginx文件,然後重啟nginx就行了,如果執行下一步的install,會導致之前安裝的nginx被覆蓋,比如之前配置好的nginx.conf文件)
4、安裝
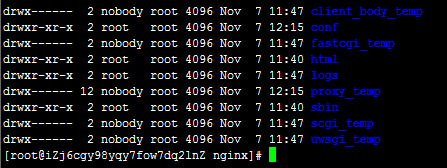
執行make install 進行安裝,安裝後--prefix 中指定的安裝目錄下回出現如下目錄結構
5、啟動nginx
切入到第四步中的sbin目錄或是創建一個nginx軟鏈接
ln -s /opt/demo/nginx/sbin/nginx /usr/bin/nginx
完成後執行:
nginx start(如需開機自啟,可在/etc/rc.d/rc.local 文件中添此命令)
如出現:nginx: [error] invalid PID number "" in "/usr/local/nginx/logs/nginx.pid"
則需通過nginx –c ../conf/nginx.conf 命令指定nginx的配置
nginx的一些常用管理命令
重啟:nginx -s reload
停止:nginx -s stop或者是通過kill nginx進程號
檢測配置文件是否合法:nginx -t
查看版本:nginx –V
關於nginx.conf配置文件
在安裝完nginx後會在conf目錄中產生一個nginx.conf的配置文件
裏面有些默認配置,可根據自己的需求進行更改
示例1:
server {
        listen       80;
        server_name  localhost;

        #charset koi8-r;

        #access_log  logs/host.access.log  main;

        location / {
          proxy_pass http://www.baidu.com; #當Nginx監控到80端口有請求過來時進行調整到百度首頁去
        }

        #error_page  404              /404.html;

        # redirect server error pages to the static page /50x.html
        #
        error_page   500 502 503 504  /50x.html;
        location = /50x.html {
            root   html;
        }
示例2:
#user  nobody;
worker_processes  1;
events {
     use epoll;
        worker_connections  51200;
}

http {
    include       mime.types;
    default_type  application/octet-stream;
    sendfile        on;
    keepalive_timeout  65;
    proxy_connect_timeout 600s;
    proxy_read_timeout 600s;
    proxy_send_timeout 600s;
    proxy_buffer_size 64k;
    proxy_buffers 4 32k;
    proxy_busy_buffers_size 64k;
    proxy_temp_file_write_size 64k;
    proxy_ignore_client_abort on;
    client_max_body_size 200m;  #此參數在使用fdfs上傳可控制上傳文件的大小
   #日誌的輸出格式,如需打印請求的body參數信息,可在$body_bytes_sent後添加 $request_body
   log_format  main  ‘$remote_addr - $remote_user [$time_local] "$request" ‘
                 ‘$status $body_bytes_sent "$http_referer" ‘
                ‘"$http_user_agent" "$http_x_forwarded_for"‘;

  access_log  logs/access.log  main; #設置日誌輸出的位置
  access_log on;  #是否開啟日誌,開啟on,關閉off
  #負載均衡配置
  upstream test.com {
    ip_hash;
    server 192.168.68.9:8080;
    server 192.168.68.72:8080;
   }
    server {
        listen       80; #監聽的端口,http默認監聽端口為80
        server_name  localhost; #監聽的主機名
        location / {
        #設置請求的頭部中主機名為請求的主機名,而不是代理的nginx的主機名
        proxy_set_header Host $host:$server_port;
        #代理的目標地址,如果要進行負載均衡,目標地址可添test.com
         proxy_pass http://192.168.68.9:8080;
        }
        error_page   500 502 503 504  /50x.html;
        location = /50x.html {
            root   html;
        }
    }
   #https配置,https默認監聽端口為443
    server {
        listen  443;
        server_name system.test.com;
        ssl on;
        ssl_certificate_key cert/system.key; #ssl key文件的位置,此處使用配置文件的相對路徑
        ssl_certificate cert/system.pem; #證書文件,此處為阿裏雲雲盾證書生成的.pem也可修改擴展名為熟悉的.crt
        ssl_session_timeout 5m;
        ssl_ciphers ECDHE-RSA-AES128-GCM-SHA256:ECDHE:ECDH:AES:HIGH:!NULL:!aNULL:!MD5:!ADH:!RC4;
        ssl_protocols TLSv1 TLSv1.1 TLSv1.2;
        ssl_prefer_server_ciphers on;
        location / {
             proxy_pass http://192.168.68.9:8080;
        }
    }
    #以下為我的fdfs文件配置,沒有使用fdfs可以不用配置
    server {
        listen       9300;
        server_name  localhost;
    #location /group1/M01 {
         #   root   /home/fdfs/storage2/data;
          #  ngx_fastdfs_module;
        #}

        location /group1/M00 {
           root   /home/fdfs/storage1/data;
           ngx_fastdfs_module;
        }
        error_page   500 502 503 504  /50x.html;
        location = /50x.html {
            root   html;
        }
    }
#include vhost/*.conf;
}
關於https配置ssl
如果在安裝nginx的時候沒有安裝 --with-http_ssl_module模塊要先安裝該模塊
nginx –V 可查看已經安裝的模塊
如果沒有安裝,只需執行以上步驟中的2、3步進行手動添加ssl模塊
添加一個https的server大概如下面這個樣子
server {
         listen 443;   ##默認的監聽端口為443
         server_name  localhost;
         ssl on;
         ssl_certificate_key  xxx.key; ##私鑰
         ssl_certificate  xxx.crt; ##證書,證書中包含公鑰和私鑰加密後的簽名信息

        location / {
            root   html;
            index  index.html index.htm;
             proxy_pass http://xxx.xxx.xxx.xxx:xxx;
        }

    }
私鑰和公鑰為非對稱加密方式加密內容,即公鑰加密後的內容只有私鑰可解,私鑰加密後的內容只有公鑰可解;
大概原理:
證書中包含公鑰和用私鑰加密後的簽名信息,瀏覽器請求發出tcp三次握手成功後服務器會將該證書發送給瀏覽器,瀏覽器通過證書中的公鑰解密私鑰加密後的簽名,再通過解密後的簽名來匹配瀏覽器中內置的權威簽名證書來判斷該簽名是否權威,不是權威簽名會中斷訪問,並顯示警告提示;如果判斷為權威機構的簽名後會產生一個隨機字符串並用證書中的公鑰加密發送給服務器端,服務器再通過自己的私鑰解密那個隨機字符串,將這個字符串作為加密的密碼來進行對稱加密之後與瀏覽器交互的數據;
linux環境手動編譯安裝Nginx實踐過程 附異常解決