使用angular4和asp.net core 2 web api做個練習項目(三)
第一部分: http://www.cnblogs.com/cgzl/p/7755801.html
第二部分: http://www.cnblogs.com/cgzl/p/7763397.html
後臺代碼: https://github.com/solenovex/asp.net-core-2.0-web-api-boilerplate
前臺代碼: https://github.com/solenovex/angular-4-client-panel-app
下面將開發登陸和授權的部分, 這裏要用到identity server 4.
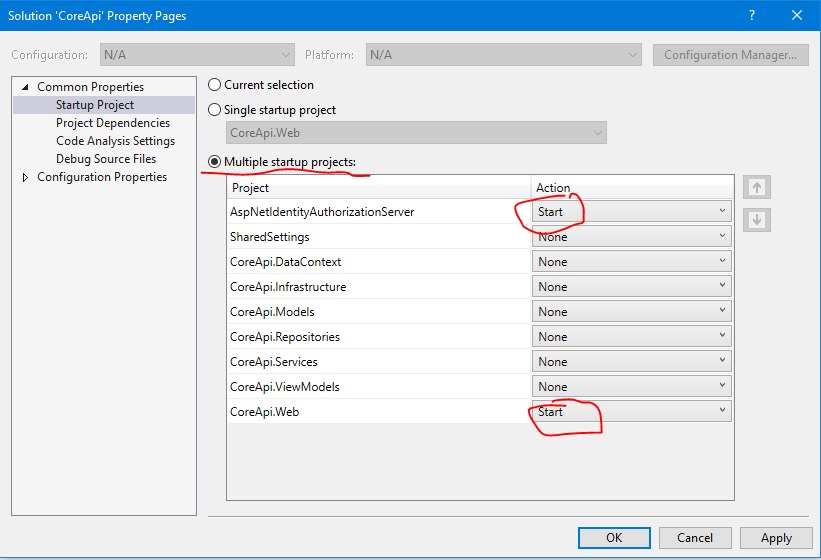
在VS解決方案中設置多個項目同時啟動:

AspNetIdentityAuthorizationServer就是authorization server. 它的地址是 http://localhost:5000
CoreApi.Web作為api, 都已經配置好了.它的地址是 http://localhost:5001
Login 登陸
由於我們使用的是Identity Server 4的登錄頁面, 所以angular項目裏面無需登錄頁面, 把login相關的文件刪除...........
登陸需要使用到oidc-client.js所以通過npm安裝:
npm install --save oidc-client
Auth Service
需要登陸服務 auth.service:
ng g s services/auth
打開auth.services.ts:
import { Injectable, OnInit, EventEmitter } from ‘@angular/core‘;
import { Observable } from
config是針對identity server 4服務器的配置, authorization server的地址是 http://localhost:5000, 登陸成功後跳轉後來的地址是: http://localhost:4200/login-callback
其中的UserManager就是oidc-client裏面的東西, 它負責處理登錄登出和獲取當前登錄用戶等操作.
這裏login()方法被調用後會直接跳轉到 authorization server的登錄頁面.
登錄成功後會跳轉到一個callback頁面, 裏面需要調用一個callback方法, 這就是loginCallback()方法.
loginStatusChanged是一個EventEmitter, 任何訂閱了這個事件的component, 都會在登錄用戶變化時(登錄/退出)觸發component裏面自定義的事件.
logout()是退出, 調用方法後也會跳轉到authorization server的頁面.
最後別忘了在app.module裏面註冊:
  providers: [
    ClientService,
    AuthService
  ],
登陸成功後跳轉回掉頁面
建立一個跳轉回掉的component和路由:
ng g c components/loginCallback
修改app.module的路由:
const appRoutes: Routes = [
  { path: ‘‘, component: DashboardComponent },
  { path: ‘login-callback‘, component: LoginCallbackComponent },
  { path: ‘register‘, component: RegisterComponent },
  { path: ‘add-client‘, component: AddClientComponent },
  { path: ‘client/:id‘, component: ClientDetailsComponent },
  { path: ‘edit-client/:id‘, component: EditClientComponent }
];
打開login-callback.component.ts:
import { Component, OnInit } from ‘@angular/core‘;
import { AuthService } from ‘../../services/auth.service‘;
import { Router } from ‘@angular/router‘;
import { User } from ‘oidc-client‘;

@Component({
  selector: ‘app-login-callback‘,
  templateUrl: ‘./login-callback.component.html‘,
  styleUrls: [‘./login-callback.component.css‘]
})
export class LoginCallbackComponent implements OnInit {

  constructor(
    private authService: AuthService,
    private router: Router
  ) { }

  ngOnInit() {
    this.authService.loginCallBack().subscribe(
      (user: User) => {
        console.log(‘login callback user:‘, user);
        if (user) {
          this.router.navigate([‘/‘]);
        }
      }
    );
  }

}
這裏主要是調用oidc的回掉函數. 然後跳轉到主頁.
html:
<p>
  登錄成功!
</p>
這個html, 基本是看不見的.
修改Navbar
navbar.component.html:
<nav class="navbar navbar-expand-md navbar-light bg-light">
  <div class="container">
    <a class="navbar-brand" href="#">Client Panel</a>
    <button class="navbar-toggler" type="button" data-toggle="collapse" data-target="#navbarsExampleDefault" aria-controls="navbarsExampleDefault"
      aria-expanded="false" aria-label="Toggle navigation">
      <span class="navbar-toggler-icon"></span>
    </button>

    <div class="collapse navbar-collapse" id="navbarsExampleDefault">
      <ul class="navbar-nav mr-auto">
        <li *ngIf="isLoggedIn" class="nav-item">
          <a class="nav-link" href="#" routerLink="/">Dashboard </a>
        </li>
      </ul>
      <ul class="navbar-nav ml-auto">
        <li *ngIf="!isLoggedIn" class="nav-item">
          <a class="nav-link" href="#" routerLink="/register">Register </a>
        </li>
        <li *ngIf="!isLoggedIn" class="nav-item">
          <a class="nav-link" href="#" (click)="login()">Login </a>
        </li>
        <li *ngIf="isLoggedIn" class="nav-item">
          <a class="nav-link" href="#" (click)="logout()">Logout </a>
        </li>
      </ul>
    </div>
  </div>
</nav>
<br>
主要是檢查是否有用戶登陸了, 有的話不顯示註冊和登陸鏈接, 並且顯示退出鏈接按鈕. 沒有的話, 則顯示註冊和登錄.
navbar.component.ts:
import { Component, OnInit } from ‘@angular/core‘;
import { Router } from ‘@angular/router‘;
import { AuthService } from ‘../../services/auth.service‘;
import ‘rxjs/add/operator/map‘;
import { User } from ‘oidc-client‘;
import { FlashMessagesService } from ‘angular2-flash-messages‘;

@Component({
  selector: ‘app-navbar‘,
  templateUrl: ‘./navbar.component.html‘,
  styleUrls: [‘./navbar.component.css‘]
})
export class NavbarComponent implements OnInit {

  public isLoggedIn: boolean;
  public loggedInUser: User;

  constructor(
    private authService: AuthService,
    private router: Router,
    private flashMessagesService: FlashMessagesService
  ) { }

  ngOnInit() {
    this.authService.loginStatusChanged.subscribe((user: User) => {
      this.loggedInUser = user;
      this.isLoggedIn = !!user;
      if (user) {
        this.flashMessagesService.show(‘登陸成功‘, { cssClass: ‘alert alert-success‘, timeout: 4000 });
      }
    });
    this.authService.checkUser();
  }

  login() {
    this.authService.login();
  }

  logout() {
    this.authService.logout();
  }

}
在ngOnInit裏面訂閱authservice的那個登錄狀態變化的事件. 以便切換導航欄的按鈕顯示情況.
angular的部分先到這, 然後要
修改一個identity server的配置:
在VS2017打開AspNetIdentityAuthorizationServer這個項目的Config.cs文件, 看GetClients()那部分, 裏面有一個Client是js client, 我們就用這個....
// JavaScript Client
                new Client
                {
                    ClientId = CoreApiSettings.Client.ClientId,
                    ClientName = CoreApiSettings.Client.ClientName,
                    AllowedGrantTypes = GrantTypes.Implicit,
                    AllowAccessTokensViaBrowser = true,

                    RedirectUris =           { CoreApiSettings.Client.RedirectUris },
                    PostLogoutRedirectUris = { CoreApiSettings.Client.PostLogoutRedirectUris },
                    AllowedCorsOrigins =     { CoreApiSettings.Client.AllowedCorsOrigins },

                    AllowedScopes =
                    {
                        IdentityServerConstants.StandardScopes.OpenId,
                        IdentityServerConstants.StandardScopes.Profile,
                        CoreApiSettings.CoreApiResource.Name
                    }
                }
打開CoreApiSettings, 它在SharedSettings這個項目裏面:
namespace SharedSettings.Settings
{
    public class CoreApiSettings
    {
        #region CoreApi

        public static string AuthorizationServerBase = "http://localhost:5000";
        public static string CorsPolicyName = "default";
        public static string CorsOrigin = "http://localhost:4200";
        public static (string Name, string DisplayName) CoreApiResource = ("coreapi", "Core APIs");
        public static (string ClientId, string ClientName, string RedirectUris, string PostLogoutRedirectUris, string AllowedCorsOrigins) Client =
            ("corejs", "Core Javascript Client", "http://localhost:4200/login-callback", "http://localhost:4200/index.html", "http://localhost:4200");

        #endregion
    }
}
把相應的地址改成和angular auth.service裏面config一樣的地址才能工作.
這裏面使用了C# 7的命名Tuple, 非常好用.
差不多可以了, 運行VS. 同時運行angular項目:
1. 首次瀏覽:

2. 點擊登陸:

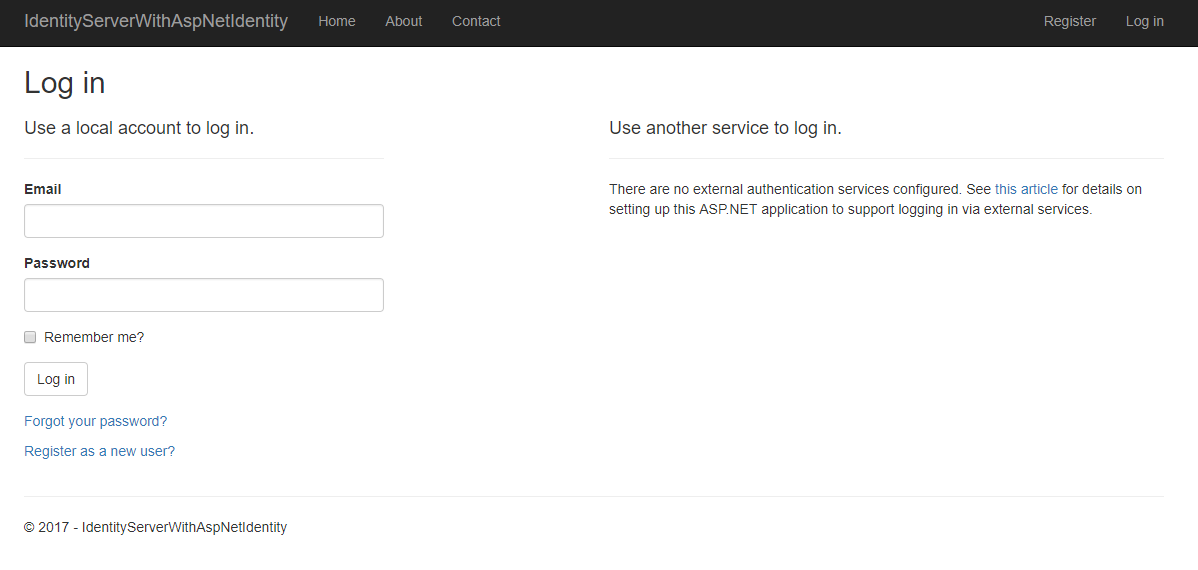
點擊登陸就跳轉到authorization server的登錄頁面了, 你在這裏需要註冊一個用戶.....
然後輸入用戶名密碼登陸.
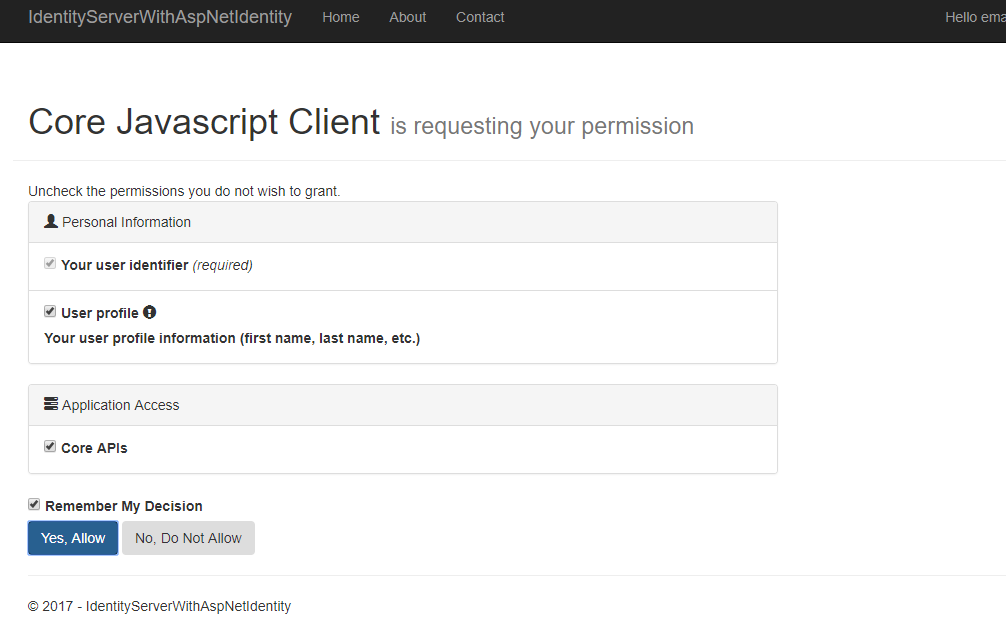
3.同意授權

點擊yes 同意授權.
4.跳轉回angular頁面:
首先跳轉回的是angular的login-callback路由, 然後瞬間回到了主頁:

5. 刷新, 還是可以取得到登錄的用戶.
但是如果再打開一個瀏覽器實例就無法取得到登陸用戶了, oidc應該是把登陸信息存到了session storage裏面.
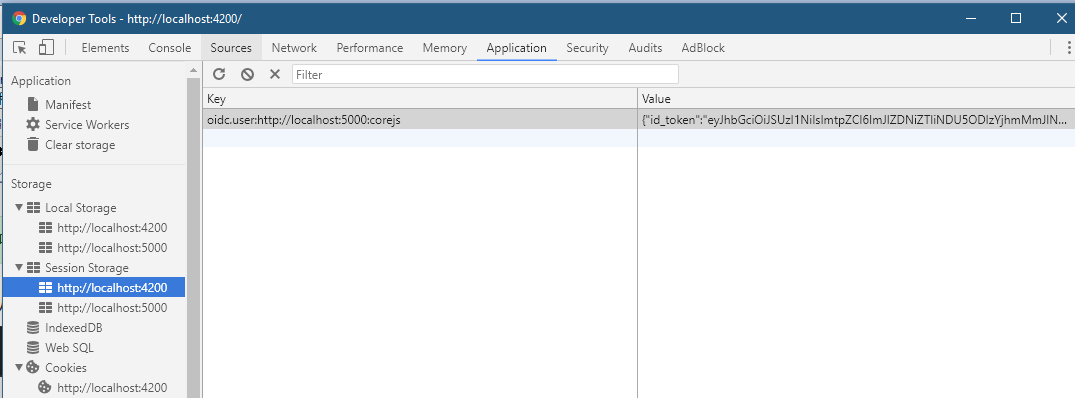
打開瀏覽器F12--Application:

可以看到在session storage裏面確實有東西, 而 localstorage裏面卻沒有.
今天比較忙, 先寫到這... 估計還得寫一篇....
使用angular4和asp.net core 2 web api做個練習項目(三)
