
Photoshop腳本 > 設置前景色和背景色
阿新 • • 發佈:2017-05-27
photoshop腳本 ps腳本
源自:http://coolketang.com/tutorials/menu1lesson8.php
本節將演示如何使用腳本,設置Photoshop的前景色和背景色。首先創建一個空白的腳本文檔,並保存在硬盤上某個位置。
並輸入腳本代碼:
var answer = confirm("您需要隨機設置前景色和背景色嗎?");[confirm]命令會彈出一個包含[是/否]的確認框,由用戶決定是否執行某一個操作。
選擇的結果[是/否]將保存在[answer]變量裏。
if(answer)
{
    app.foregroundColor.rgb.red   = Math.random() * 255;
    app.foregroundColor.rgb.green = Math.random() * 255;
    app.foregroundColor.rgb.blue  = Math.random() * 255;
    app.backgroundColor.rgb.red   = Math.random() * 255;
    app.backgroundColor.rgb.green = Math.random() * 255;
    app.backgroundColor.rgb.blue  = Math.random() * 255;
}
判斷用戶的選擇,如果用戶選擇[是],則執行接下來的動作。
然後就可以設置Photoshop前景色和背景色了。
[Math.random]命令會生成一個0至1之間的隨機值,隨機值乘以255則生成0-255之間的隨機值。
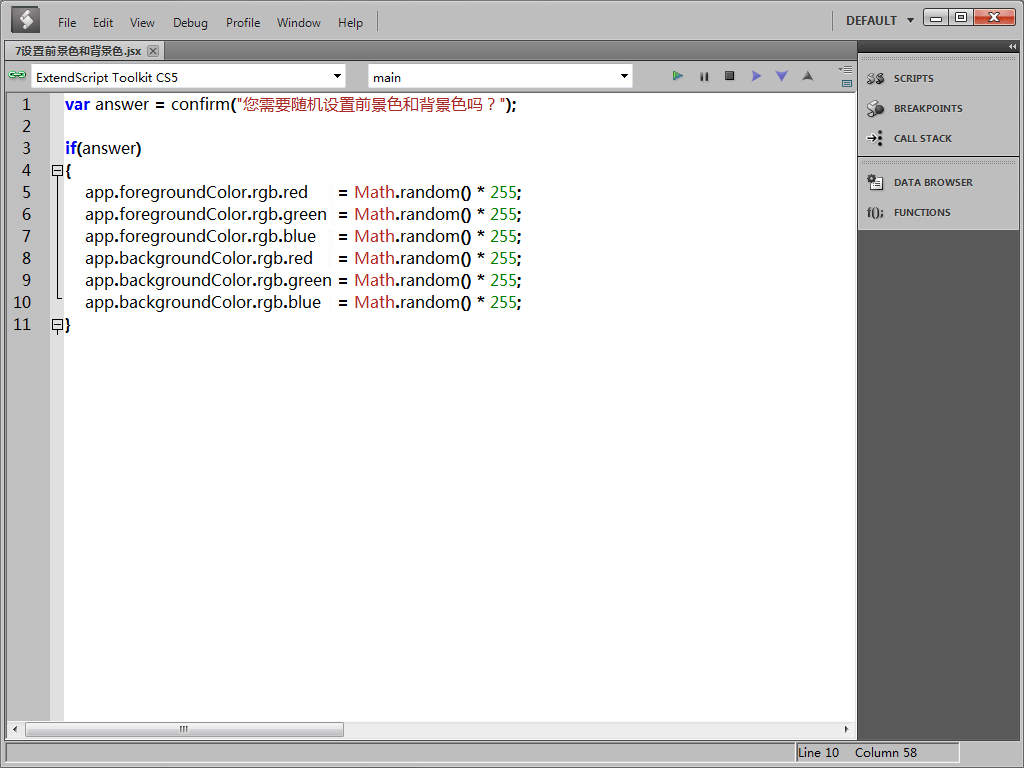
完整的腳本文件:
var answer = confirm("您需要隨機設置前景色和背景色嗎?");

if(answer)
{
    app.foregroundColor.rgb.red   = Math.random() * 255;
    app.foregroundColor.rgb.green = Math.random() * 255;
    app.foregroundColor.rgb.blue  = Math.random() * 255;
    app.backgroundColor.rgb.red   = Math.random() * 255;
    app.backgroundColor.rgb.green = Math.random() * 255;
    app.backgroundColor.rgb.blue  = Math.random() * 255;
}
我們的腳本已經編寫完成,現在把它保存下來。
然後切換到Photoshop,然後依次點擊[文件] > [腳本] > [瀏覽],打開剛剛保存的腳本文件。Photoshop將直接調用並執行該腳本。
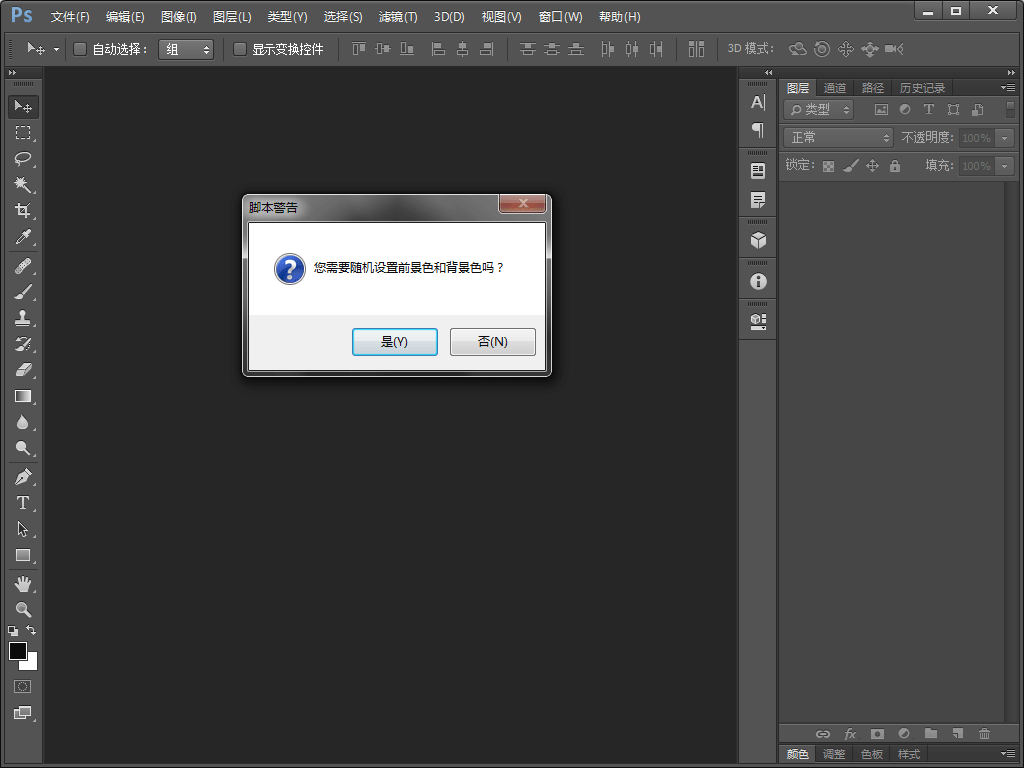
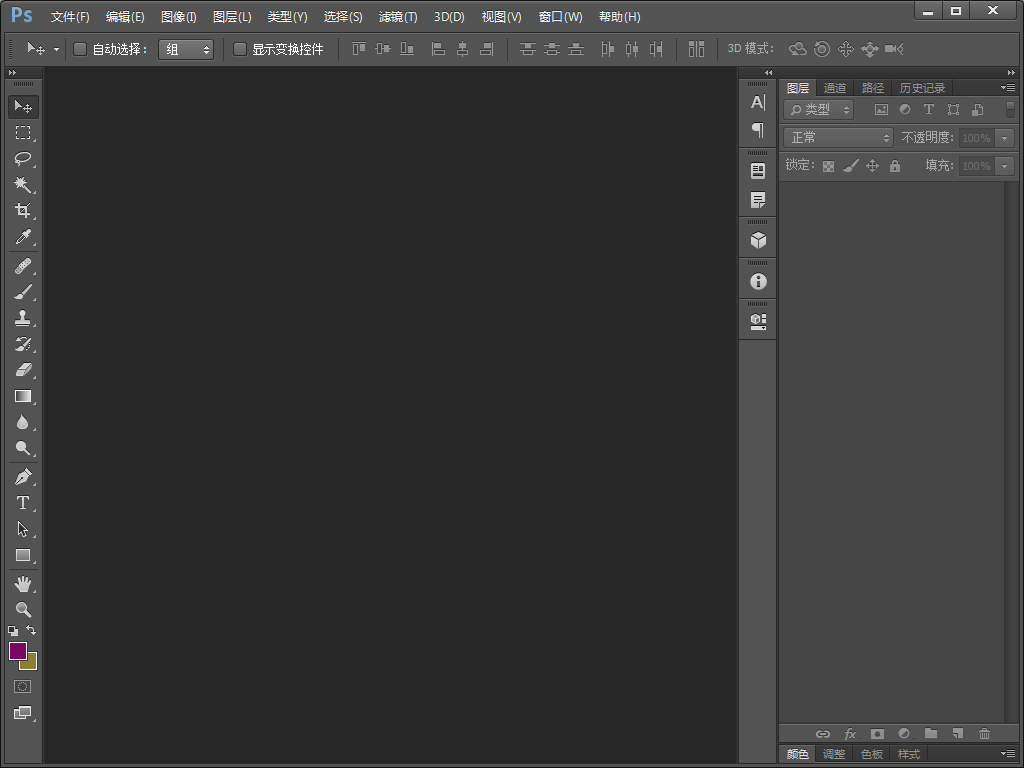
在彈出的[腳本警告]彈出框窗口,點擊[是]按鈕,開始設置前景色和背景色,請留意工具條下方前景色和背景色的變化。


本文出自 “酷課堂 - 互動教程” 博客,請務必保留此出處http://coolketang.blog.51cto.com/1743309/1929902
Photoshop腳本 > 設置前景色和背景色