
CentOS 8.2使用pgAdmin安裝PostgreSQL
PostgreSQL是最高階的RDBMS,而pgAdmin是Postgres的Web UI。在這裡,您將看到如何在CentOS 8上使用pgAdmin安裝PostgreSQL。
目錄
什麼是PostgreSQL?
(也稱為Postgres)是一個免費的開源關係資料庫管理系統(RDBMS),強調可擴充套件性和SQL遵從性。PostgreSQL最初被命名為POSTGRES,指的是Ingres資料庫的後繼者。在1996年,該專案被更名為PostgreSQL,以反映其對SQL的支援。
PostgreSQL的事務具有原子性,一致性,隔離性,耐久性(ACID)屬性,自動可更新檢視,例項化檢視,觸發器,外來鍵和儲存過程。它旨在處理各種工作負載,從單臺機器到具有多個併發使用者的資料倉庫或Web服務。它是macOS
PostgreSQL是一個免費軟體,並根據PostgreSQL許可證發行(免費和開放原始碼,允許)。
什麼是pgAdmin?
是用於Postgres資料庫伺服器的免費開放原始碼圖形使用者介面(GUI)管理工具。
pgAdmin在桌面和Web介面中可用。pgAdmin是PostgreSQL的其他管理工具中功能豐富且最受歡迎的功能。
就像PostgreSQL一樣,pgAdmin也是一個免費軟體。它也根據PostgreSQL許可證分發。
環境規格:
- CPU :3.4 GHz(2核)
- 記憶體:2 GB
- 儲存空間:20 GB
- 作業系統:CentOS 8.2
- 主機名:postgres.lianglab.cn
- IP地址:192.168.6.160/24
更新Linux伺服器軟體包
使用SSH客戶端並登入到postgres.lianglab.cn作為根使用者。
使用dnf命令更新Linux伺服器軟體包。
[root@postgres ~]# hostnamectl set-hostname postgres.lianglab.cn
[root@postgres ~]#dnf update -y
Dependencies resolved.
Nothing to do.
Complete!
我們的Linux作業系統已經是最新的。
檢查Linux作業系統和核心版本。
[root@postgres ~]# uname -r
4.18.0-193.28.1.el8_2.x86_64
[root@postgres ~]# cat /etc/redhat-release
CentOS Linux release 8.2.2004 (Core)
安裝Postgres官方Yum儲存庫
儘管Linux yum儲存庫中提供了Postgres資料庫伺服器,但是要安裝最新版本,我們必須在Linux伺服器中新增PostgreSQL官方yum儲存庫。
[root@postgres ~]# dnf install -y https://download.postgresql.org/pub/repos/yum/reporpms/EL-8-x86_64/pgdg-redhat-repo-latest.noarch.rpm
Last metadata expiration check: 1:47:55 ago on Sat 19 Dec 2020 07:50:22 PM CST.
pgdg-redhat-repo-latest.noarch.rpm                           15 kB/s |  11 kB     00:00
Dependencies resolved.
============================================================================================
 Package                    Architecture     Version           Repository              Size
============================================================================================
Installing:
 pgdg-redhat-repo           noarch           42.0-14           @commandline            11 k

Transaction Summary
============================================================================================
Install  1 Package

Total size: 11 k
Installed size: 11 k
Downloading Packages:
Running transaction check
Transaction check succeeded.
Running transaction test
Transaction test succeeded.
Running transaction
  Preparing        :                                                                    1/1
  Installing       : pgdg-redhat-repo-42.0-14.noarch                                    1/1
  Verifying        : pgdg-redhat-repo-42.0-14.noarch                                    1/1
Installed products updated.

Installed:
  pgdg-redhat-repo-42.0-14.noarch

Complete!
通過執行以下命令,在標準yum儲存庫中禁用PostgreSQL模組。
[root@postgres ~]# dnf list postgresql
PostgreSQL common RPMs for RHEL/CentOS 8 - x86_64           191 kB/s | 511 kB     00:02
PostgreSQL 13 for RHEL/CentOS 8 - x86_64                    9.2 kB/s | 196 kB     00:21
PostgreSQL 12 for RHEL/CentOS 8 - x86_64                    8.0 kB/s | 418 kB     00:52
PostgreSQL 11 for RHEL/CentOS 8 - x86_64                     18 kB/s | 608 kB     00:34
PostgreSQL 10 for RHEL/CentOS 8 - x86_64                    135 kB/s | 411 kB     00:03
PostgreSQL 9.6 for RHEL/CentOS 8 - x86_64                   3.1 kB/s | 400 kB     02:09
PostgreSQL 9.5 for RHEL/CentOS 8 - x86_64                   4.4 kB/s | 356 kB     01:20
Available Packages
postgresql.x86_64               10.14-1.module_el8.2.0+487+53cc39ce                AppStream
[root@postgres ~]#
[root@postgres ~]# dnf -qy module disable postgresql
[root@postgres ~]# dnf list postgresql
Last metadata expiration check: 0:10:17 ago on Sat 19 Dec 2020 09:45:13 PM CST.
Error: No matching Packages to list
在CentOS 8上安裝Postgres資料庫伺服器:
【1】使用dnf命令在Linux伺服器上安裝Postgres資料庫伺服器13(在撰寫本文時為最新)。
[root@postgres ~]# dnf install -y postgresql13-server
Last metadata expiration check: 0:11:15 ago on Sat 19 Dec 2020 09:45:13 PM CST.
Dependencies resolved.
============================================================================================
 Package                     Architecture   Version                    Repository      Size
============================================================================================
Installing:
 postgresql13-server         x86_64         13.1-1PGDG.rhel8           pgdg13         5.6 M
Installing dependencies:
 postgresql13                x86_64         13.1-1PGDG.rhel8           pgdg13         1.4 M
 postgresql13-libs           x86_64         13.1-1PGDG.rhel8           pgdg13         410 k

Transaction Summary
============================================================================================
Install  3 Packages

Total download size: 7.4 M
Installed size: 31 M
Downloading Packages:
(1/3): postgresql13-libs-13.1-1PGDG.rhel8.x86_64.rpm        9.1 kB/s | 410 kB     00:45
(2/3): postgresql13-13.1-1PGDG.rhel8.x86_64.rpm             9.6 kB/s | 1.4 MB     02:27
(3/3): postgresql13-server-13.1-1PGDG.rhel8.x86_64.rpm      5.3 kB/s | 5.6 MB     17:46
--------------------------------------------------------------------------------------------
Total                                                       7.1 kB/s | 7.4 MB     17:46
warning: /var/cache/dnf/pgdg13-e81daebfc8b779ec/packages/postgresql13-13.1-1PGDG.rhel8.x86_64.rpm: Header V4 DSA/SHA1 Signature, key ID 442df0f8: NOKEY
PostgreSQL 13 for RHEL/CentOS 8 - x86_64                    1.6 MB/s | 1.7 kB     00:00
Importing GPG key 0x442DF0F8:
 Userid     : "PostgreSQL RPM Building Project <[email protected]>"
 Fingerprint: 68C9 E2B9 1A37 D136 FE74 D176 1F16 D2E1 442D F0F8
 From       : /etc/pki/rpm-gpg/RPM-GPG-KEY-PGDG
Key imported successfully
Running transaction check
Transaction check succeeded.
Running transaction test
Transaction test succeeded.
Running transaction
  Preparing        :                                                                    1/1
  Installing       : postgresql13-libs-13.1-1PGDG.rhel8.x86_64                          1/3
  Running scriptlet: postgresql13-libs-13.1-1PGDG.rhel8.x86_64                          1/3
  Installing       : postgresql13-13.1-1PGDG.rhel8.x86_64                               2/3
  Running scriptlet: postgresql13-13.1-1PGDG.rhel8.x86_64                               2/3
  Running scriptlet: postgresql13-server-13.1-1PGDG.rhel8.x86_64                        3/3
  Installing       : postgresql13-server-13.1-1PGDG.rhel8.x86_64                        3/3
  Running scriptlet: postgresql13-server-13.1-1PGDG.rhel8.x86_64                        3/3
  Verifying        : postgresql13-13.1-1PGDG.rhel8.x86_64                               1/3
  Verifying        : postgresql13-libs-13.1-1PGDG.rhel8.x86_64                          2/3
  Verifying        : postgresql13-server-13.1-1PGDG.rhel8.x86_64                        3/3
Installed products updated.

Installed:
  postgresql13-13.1-1PGDG.rhel8.x86_64          postgresql13-libs-13.1-1PGDG.rhel8.x86_64
  postgresql13-server-13.1-1PGDG.rhel8.x86_64

Complete!
【2】執行一次以下命令來初始化Postgres資料庫。
[root@postgres ~]# /usr/pgsql-13/bin/postgresql-13-setup initdb
Initializing database ... OK
【3】啟用並啟動Postgres資料庫服務。
[root@postgres ~]# systemctl enable --now postgresql-13
Created symlink /etc/systemd/system/multi-user.target.wants/postgresql-13.service → /usr/lib/systemd/system/postgresql-13.service.
【4】檢查Postgres資料庫服務的狀態
[root@postgres ~]# systemctl status postgresql-13.service
● postgresql-13.service - PostgreSQL 13 database server
   Loaded: loaded (/usr/lib/systemd/system/postgresql-13.service; enabled; vendor preset: d>
   Active: active (running) since Sat 2020-12-19 22:18:10 CST; 3min 55s ago
     Docs: https://www.postgresql.org/docs/13/static/
  Process: 945378 ExecStartPre=/usr/pgsql-13/bin/postgresql-13-check-db-dir ${PGDATA} (code>
 Main PID: 945384 (postmaster)
    Tasks: 8 (limit: 23840)
   Memory: 17.4M
   CGroup: /system.slice/postgresql-13.service
           ├─945384 /usr/pgsql-13/bin/postmaster -D /var/lib/pgsql/13/data/
           ├─945385 postgres: logger
           ├─945387 postgres: checkpointer
           ├─945388 postgres: background writer
           ├─945389 postgres: walwriter
           ├─945390 postgres: autovacuum launcher
           ├─945391 postgres: stats collector
           └─945392 postgres: logical replication launcher

Dec 19 22:18:10 postgres.lianglab.cn systemd[1]: Starting PostgreSQL 13 database server...
Dec 19 22:18:10 postgres.lianglab.cn postmaster[945384]: 2020-12-19 22:18:10.802 CST [94538>
Dec 19 22:18:10 postgres.lianglab.cn postmaster[945384]: 2020-12-19 22:18:10.802 CST [94538>
Dec 19 22:18:10 postgres.lianglab.cn systemd[1]: Started PostgreSQL 13 database server.
【5】檢查Postgres資料庫服務埠監聽資訊
[root@postgres ~]# netstat -anptl| grep postmaster
tcp        0      0 127.0.0.1:5432          0.0.0.0:*               LISTEN      945384/postmaster
[root@postgres ~]# ss -anptl| grep postmaster
LISTEN    0         244              127.0.0.1:5432             0.0.0.0:*        users:(("postmaster",pid=945384,fd=6))
【6】檢查已安裝的PostgreSQL伺服器的版本。
[root@postgres ~]# psql -V
psql (PostgreSQL) 13.1
【7】切換到postgres使用者並連線到psql shell來設定管理員使用者密碼。
[root@postgres ~]# su - postgres
[postgres@postgres ~]$ psql
psql (13.1)
Type "help" for help.

postgres=# ALTER USER postgres WITH PASSWORD 'liang123';
ALTER ROLE
postgres=# \q
[postgres@postgres ~]$ exit
logout
配置Postgres資料庫服務以進行網路訪問:
PostgreSQL的預設服務埠是5432/tcp。執行以下命令以驗證PostgreSQL服務正在偵聽此埠。
[root@postgres ~]# ss -tulpn | grep 5432
tcp     LISTEN   0        244            127.0.0.1:5432           0.0.0.0:*      users:(("postmaster",pid=945384,fd=6))
您可能會注意到PostgreSQL服務最初僅在localhost介面上執行。但是,要使我們的Postgres資料庫可用於網路客戶端,必須將PostgreSQL配置為在所有(或某些特定)介面上執行。
為此,您必須在vim文字編輯器中編輯PostgreSQL配置檔案。
[root@postgres-01 ~]# vi /var/lib/pgsql/13/data/postgresql.conf
在其中搜索以下指令。
# listen_addresses = 'localhost'
並用以下指令替換它。
listen_addresses = '*'
現在,您的Postgres資料庫服務已配置為在所有網路介面上進行偵聽。
允許網路客戶端訪問pg_hba.conf檔案中的PostgreSQL服務。
[root@postgres-01 ~]# echo "host all all 192.168.116.0/24 md5" >> /var/lib/pgsql/13/data/pg_hba.conf
重新啟動Postgres資料庫服務以應用更改。
[root@postgres-01 ~]# systemctl restart postgresql-13.service
再次使用ss命令檢查網路服務。
[root@postgres-01 ~]# ss -tulpn | grep 5432
tcp     LISTEN   0        128              0.0.0.0:5432          0.0.0.0:*       users:(("postmaster",pid=1781,fd=6))
tcp     LISTEN   0        128                 [::]:5432             [::]:*       users:(("postmaster",pid=1781,fd=7))
Postgres Service現在在所有網路介面上執行。
為Postgres資料庫服務配置Linux防火牆:
在CentOS 8中,我們已經為PostgreSQL提供了防火牆服務,因此我們可以通過使用firewall-cmd命令來允許它。但是,如果將PostgreSQL伺服器配置為偵聽非預設埠,則可以自己。
[root@postgres-01 ~]# firewall-cmd --permanent --add-service=postgresql
success
[root@postgres-01 ~]# firewall-cmd --reload
success
Postgres資料庫伺服器已安裝在Linux伺服器上。
在CentOS 8上安裝pgAdmin Yum儲存庫:
pgAdmin是一個流行的Web介面,用於PostgreSQL資料庫的資料庫管理。
儘管在PostgreSQL官方yum儲存庫中也提供了pgAdmin。但這在我們的CentOS 8伺服器上不起作用。
因此,我們正在從pgAdmin官方yum儲存庫中安裝pgAdmin的最新穩定版本。
為此,首先需要從Linux伺服器上刪除PostgreSQL yum儲存庫。
[root@postgres-01 ~]# dnf remove -y pgdg-redhat-repo
Dependencies resolved.
================================================================================
 Package                Architecture Version          Repository           Size
================================================================================
Removing:
 pgdg-redhat-repo       noarch       42.0-14          @@commandline        11 k

Transaction Summary
================================================================================
Remove  1 Package

Freed space: 11 k
Running transaction check
Transaction check succeeded.
Running transaction test
Transaction test succeeded.
Running transaction
  Preparing        :                                                        1/1
  Erasing          : pgdg-redhat-repo-42.0-14.noarch                        1/1
  Verifying        : pgdg-redhat-repo-42.0-14.noarch                        1/1

Removed:
  pgdg-redhat-repo-42.0-14.noarch

Complete!
現在,在您的Linux作業系統中新增pgAdmin官方yum儲存庫。
[root@postgres-01 ~]# dnf install -y https://ftp.postgresql.org/pub/pgadmin/pgadmin4/yum/pgadmin4-redhat-repo-1-1.noarch.rpm
Last metadata expiration check: 1 day, 1:30:15 ago on Sun 22 Nov 2020 08:26:21 PM PKT.
pgadmin4-redhat-repo-1-1.noarch.rpm             1.2 kB/s | 6.6 kB     00:05
Dependencies resolved.
================================================================================
 Package                     Architecture  Version    Repository           Size
================================================================================
Installing:
 pgadmin4-redhat-repo        noarch        1-1        @commandline        6.6 k

Transaction Summary
================================================================================
Install  1 Package

Total size: 6.6 k
Installed size: 4.0 k
Downloading Packages:
Running transaction check
Transaction check succeeded.
Running transaction test
Transaction test succeeded.
Running transaction
  Preparing        :                                                        1/1
  Installing       : pgadmin4-redhat-repo-1-1.noarch                        1/1
  Verifying        : pgadmin4-redhat-repo-1-1.noarch                        1/1

Installed:
  pgadmin4-redhat-repo-1-1.noarch

Complete!
您還需要安裝EPEL(Enterprise Linux的額外軟體包) yum儲存庫,因為pgAdmin需要一些標準yum儲存庫中不可用的軟體包。
使用dnf命令並安裝EPEL yum儲存庫。
[root@postgres-01 ~]# dnf install -y epel-release
Last metadata expiration check: 0:01:00 ago on Mon 23 Nov 2020 09:57:16 PM PKT.
Dependencies resolved.
================================================================================
 Package               Architecture    Version            Repository       Size
================================================================================
Installing:
 epel-release          noarch          8-8.el8            extras           23 k

Transaction Summary
================================================================================
Install  1 Package

Total download size: 23 k
Installed size: 32 k
Downloading Packages:
epel-release-8-8.el8.noarch.rpm                  31 kB/s |  23 kB     00:00
--------------------------------------------------------------------------------
Total                                            13 kB/s |  23 kB     00:01
Running transaction check
Transaction check succeeded.
Running transaction test
Transaction test succeeded.
Running transaction
  Preparing        :                                                        1/1
  Installing       : epel-release-8-8.el8.noarch                            1/1
  Running scriptlet: epel-release-8-8.el8.noarch                            1/1
  Verifying        : epel-release-8-8.el8.noarch                            1/1

Installed:
  epel-release-8-8.el8.noarch

Complete!
為新安裝的yum儲存庫構建快取。
[root@postgres-01 ~]# dnf makecache
CentOS-8 - AppStream                            2.1 kB/s | 4.3 kB     00:02
CentOS-8 - Base                                 3.7 kB/s | 3.9 kB     00:01
CentOS-8 - Extras                               768  B/s | 1.5 kB     00:02
Extra Packages for Enterprise Linux Modular 8 -  24 kB/s |  98 kB     00:04
Extra Packages for Enterprise Linux 8 - x86_64   92 kB/s | 8.3 MB     01:32
pgadmin4                                        1.1 kB/s | 2.9 kB     00:02
Metadata cache created.
在CentOS 8上安裝pgAdmin Web UI:
已新增所有儲存庫。現在,您可以使用dnf命令安裝pgAdmin 。
[root@postgres-01 ~]# dnf install -y pgadmin4
...
Installed:
  apr-1.6.3-9.el8.x86_64
  apr-util-1.6.1-6.el8.x86_64
  apr-util-bdb-1.6.1-6.el8.x86_64
  apr-util-openssl-1.6.1-6.el8.x86_64
  avahi-libs-0.7-19.el8.x86_64
  centos-logos-httpd-80.5-2.el8.noarch
  cups-libs-1:2.2.6-33.el8.x86_64
  dejavu-fonts-common-2.35-6.el8.noarch
  dejavu-sans-fonts-2.35-6.el8.noarch
  fontconfig-2.13.1-3.el8.x86_64
  fontpackages-filesystem-1.44-22.el8.noarch
  glx-utils-8.4.0-4.20181118git1830dcb.el8.x86_64
  graphite2-1.3.10-10.el8.x86_64
  harfbuzz-1.7.5-3.el8.x86_64
  httpd-2.4.37-21.module_el8.2.0+494+1df74eae.x86_64
  httpd-filesystem-2.4.37-21.module_el8.2.0+494+1df74eae.noarch
  httpd-tools-2.4.37-21.module_el8.2.0+494+1df74eae.x86_64
  libICE-1.0.9-15.el8.x86_64
  libSM-1.2.3-1.el8.x86_64
  libX11-1.6.8-3.el8.x86_64
  libX11-common-1.6.8-3.el8.noarch
  libX11-xcb-1.6.8-3.el8.x86_64
  libXau-1.0.8-13.el8.x86_64
  libXdamage-1.1.4-14.el8.x86_64
  libXext-1.3.3-9.el8.x86_64
  libXfixes-5.0.3-7.el8.x86_64
  libXrender-0.9.10-7.el8.x86_64
  libXxf86vm-1.1.4-9.el8.x86_64
  libglvnd-1:1.2.0-6.el8.x86_64
  libglvnd-egl-1:1.2.0-6.el8.x86_64
  libglvnd-glx-1:1.2.0-6.el8.x86_64
  libjpeg-turbo-1.5.3-10.el8.x86_64
  libwayland-client-1.17.0-1.el8.x86_64
  libwayland-server-1.17.0-1.el8.x86_64
  libxcb-1.13.1-1.el8.x86_64
  libxshmfence-1.3-2.el8.x86_64
  mailcap-2.1.48-3.el8.noarch
  mesa-libEGL-19.3.4-2.el8.x86_64
  mesa-libGL-19.3.4-2.el8.x86_64
  mesa-libgbm-19.3.4-2.el8.x86_64
  mesa-libglapi-19.3.4-2.el8.x86_64
  mod_http2-1.11.3-3.module_el8.2.0+486+c01050f0.1.x86_64
  pcre2-utf16-10.32-1.el8.x86_64
  pgadmin4-4.28-1.el8.noarch
  pgadmin4-desktop-4.28-1.el8.x86_64
  pgadmin4-server-4.28-1.el8.x86_64
  pgadmin4-web-4.28-1.el8.noarch
  python3-mod_wsgi-4.6.4-4.el8.x86_64
  python3-pip-9.0.3-16.el8.noarch
  python3-setuptools-39.2.0-5.el8.noarch
  python36-3.6.8-2.module_el8.1.0+245+c39af44f.x86_64
  qt5-qtbase-5.12.5-4.el8.x86_64
  qt5-qtbase-common-5.12.5-4.el8.noarch
  qt5-qtbase-gui-5.12.5-4.el8.x86_64
  xcb-util-0.4.0-10.el8.x86_64
  xcb-util-image-0.4.0-9.el8.x86_64
  xcb-util-keysyms-0.4.0-7.el8.x86_64
  xcb-util-renderutil-0.3.9-10.el8.x86_64
  xcb-util-wm-0.4.1-12.el8.x86_64

Complete!
要配置SELinux策略,pgAdmin設定指令碼需要semanage命令,該命令在policycoreutils-python-utils軟體包中提供。因此,您應該在執行pgAdmin安裝指令碼之前安裝它。
[root@postgres-01 ~]# dnf install -y policycoreutils-python-utils
Last metadata expiration check: 0:12:43 ago on Mon 23 Nov 2020 10:12:00 PM PKT.
Dependencies resolved.
================================================================================
 Package                    Arch   Version                         Repo    Size
================================================================================
Installing:
 policycoreutils-python-utils
                            noarch 2.9-9.el8                       BaseOS 251 k
Installing dependencies:
 checkpolicy                x86_64 2.9-1.el8                       BaseOS 348 k
 python3-audit              x86_64 3.0-0.17.20191104git1c2f876.el8 BaseOS  86 k
 python3-libsemanage        x86_64 2.9-2.el8                       BaseOS 127 k
 python3-policycoreutils    noarch 2.9-9.el8                       BaseOS 2.2 M
 python3-setools            x86_64 4.2.2-2.el8                     BaseOS 601 k

Transaction Summary
================================================================================
Install  6 Packages

Total download size: 3.6 M
Installed size: 11 M
Downloading Packages:
(1/6): python3-audit-3.0-0.17.20191104git1c2f87  27 kB/s |  86 kB     00:03
(2/6): policycoreutils-python-utils-2.9-9.el8.n  44 kB/s | 251 kB     00:05
(3/6): python3-libsemanage-2.9-2.el8.x86_64.rpm  46 kB/s | 127 kB     00:02
(4/6): checkpolicy-2.9-1.el8.x86_64.rpm          40 kB/s | 348 kB     00:08
(5/6): python3-setools-4.2.2-2.el8.x86_64.rpm    85 kB/s | 601 kB     00:07
(6/6): python3-policycoreutils-2.9-9.el8.noarch 125 kB/s | 2.2 MB     00:18
--------------------------------------------------------------------------------
Total                                           147 kB/s | 3.6 MB     00:25
Running transaction check
Transaction check succeeded.
Running transaction test
Transaction test succeeded.
Running transaction
  Preparing        :                                                        1/1
  Installing       : python3-setools-4.2.2-2.el8.x86_64                     1/6
  Installing       : python3-libsemanage-2.9-2.el8.x86_64                   2/6
  Installing       : python3-audit-3.0-0.17.20191104git1c2f876.el8.x86_64   3/6
  Installing       : checkpolicy-2.9-1.el8.x86_64                           4/6
  Installing       : python3-policycoreutils-2.9-9.el8.noarch               5/6
  Installing       : policycoreutils-python-utils-2.9-9.el8.noarch          6/6
  Running scriptlet: policycoreutils-python-utils-2.9-9.el8.noarch          6/6
  Verifying        : checkpolicy-2.9-1.el8.x86_64                           1/6
  Verifying        : policycoreutils-python-utils-2.9-9.el8.noarch          2/6
  Verifying        : python3-audit-3.0-0.17.20191104git1c2f876.el8.x86_64   3/6
  Verifying        : python3-libsemanage-2.9-2.el8.x86_64                   4/6
  Verifying        : python3-policycoreutils-2.9-9.el8.noarch               5/6
  Verifying        : python3-setools-4.2.2-2.el8.x86_64                     6/6

Installed:
  checkpolicy-2.9-1.el8.x86_64
  policycoreutils-python-utils-2.9-9.el8.noarch
  python3-audit-3.0-0.17.20191104git1c2f876.el8.x86_64
  python3-libsemanage-2.9-2.el8.x86_64
  python3-policycoreutils-2.9-9.el8.noarch
  python3-setools-4.2.2-2.el8.x86_64

Complete!
pgAdmin軟體帶有編寫良好的配置指令碼,用於配置pgAdmin Web服務。執行它以建立管理員使用者,配置SELinux策略和Apache Web伺服器以部署pgAdmin Web服務。
[root@postgres-01 ~]# /usr/pgadmin4/bin/setup-web.sh
Setting up pgAdmin 4 in web mode on a Redhat platform...
Creating configuration database...
NOTE: Configuring authentication for SERVER mode.

Enter the email address and password to use for the initial pgAdmin user account:

Email address: [email protected]
Password:
Retype password:
pgAdmin 4 - Application Initialisation
======================================

Creating storage and log directories...
Configuring SELinux...
The Apache web server is not running. We can enable and start the web server for you to finish pgAdmin 4 installation. Continue (y/n)? y
Created symlink /etc/systemd/system/multi-user.target.wants/httpd.service â /usr/lib/systemd/system/httpd.service.
Apache successfully enabled.
Apache successfully started.
You can now start using pgAdmin 4 in web mode at http://127.0.0.1/pgadmin4
上面的指令碼安裝了一個配置檔案(/etc/httpd/conf.d/pgadmin4.conf),以將pgAdmin部署在Apache Web伺服器上。
此檔案中不需要自定義。您僅需要啟用和啟動httpd服務。
[root@postgres-01 ~]# systemctl enable --now httpd.service
Created symlink /etc/systemd/system/multi-user.target.wants/httpd.service â /usr/lib/systemd/system/httpd.service.
配置Linux防火牆,以允許傳入流量到Apache Web伺服器。
[root@postgres-01 ~]# firewall-cmd --permanent --add-service=http
success
[root@postgres-01 ~]# firewall-cmd --reload
success
在網路瀏覽器中開啟URL 。
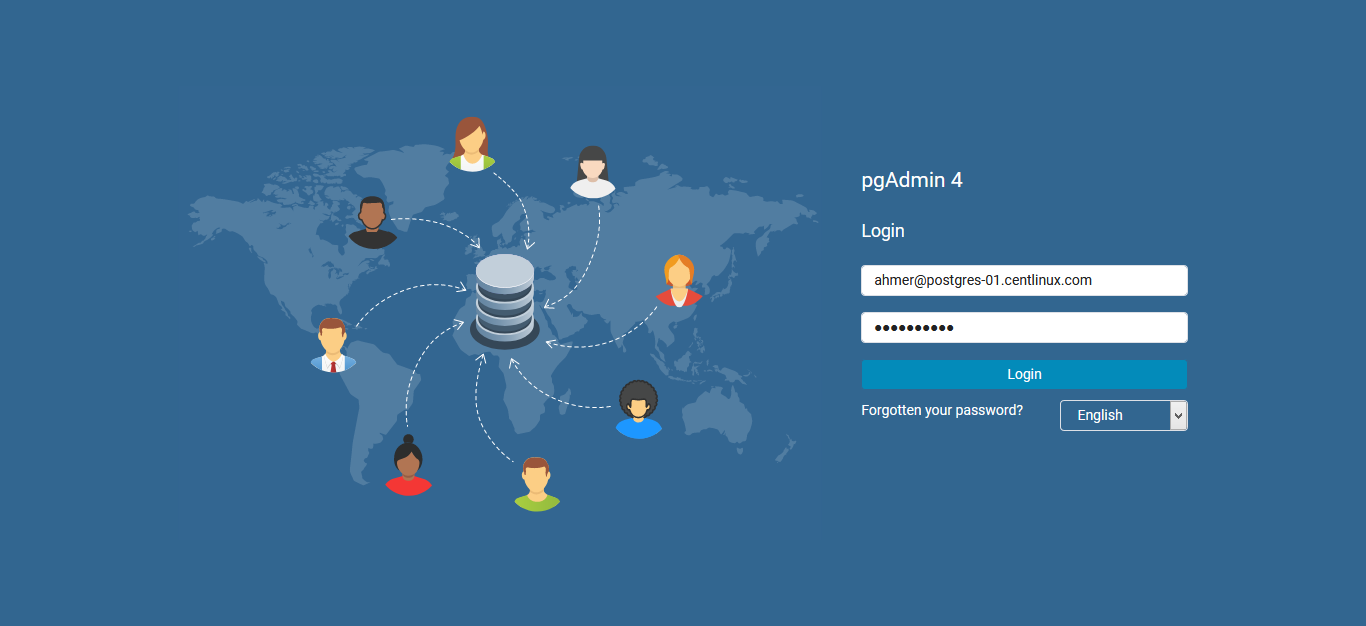
以setup-web.sh指令碼建立的管理員使用者身份登入pgAdmin 。

成功登入後,您可以訪問pgAdmin儀表板。
要將您的PostgreSQL資料庫伺服器新增到pgAdmin清單中,請單擊“新增新伺服器”。
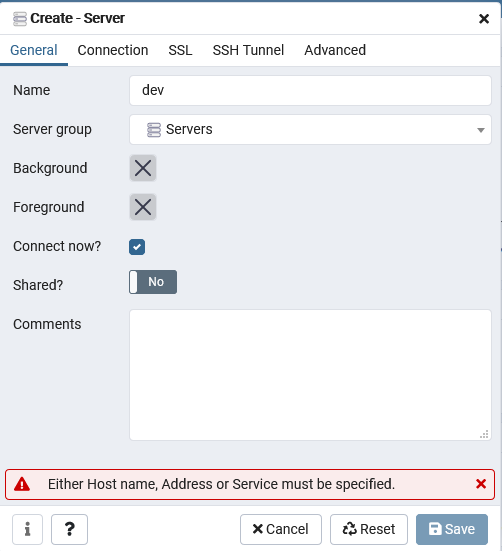
提供伺服器名稱,然後單擊“連線”選項卡。

像上面的螢幕快照一樣,在此對話方塊中提供資料庫連線資訊。
點選“儲存”。

我們的Postgres資料庫伺服器已新增到pgAdmin中。您可以在左側面板中看到資料庫伺服器的樹。
結論:
在此安裝指南中,您學習瞭如何在CentOS 8伺服器上使用pgAdmin安裝PostgreSQL。為了學習更多關於Postgres的資料庫。